Archive | Vegetables RSS feed for this section

Kyoto Comfort: Miso Soup

18 Sep

The morning that Joe and I arrived in Kyoto last year was rainy and cool. Actually most of our trip was spent under umbrellas and wrapped in raincoats (save for a literally perfect, amazingly clear day at Mt. Fuji), but it didn’t slow us down much.

At the Fushimi Inari shrine in Kyoto

That morning in Kyoto we were tired and hungry after the long trip from Tokyo, so after we dropped off our suitcase at the hotel, we wandered back through the train station in search of something warm to eat. We stumbled upon Suika KYK, a restaurant specializing in tonkatsu, which is deep-fried breaded pork cutlet. And yes, the tonkatsu was delicious, savory, and crispy.

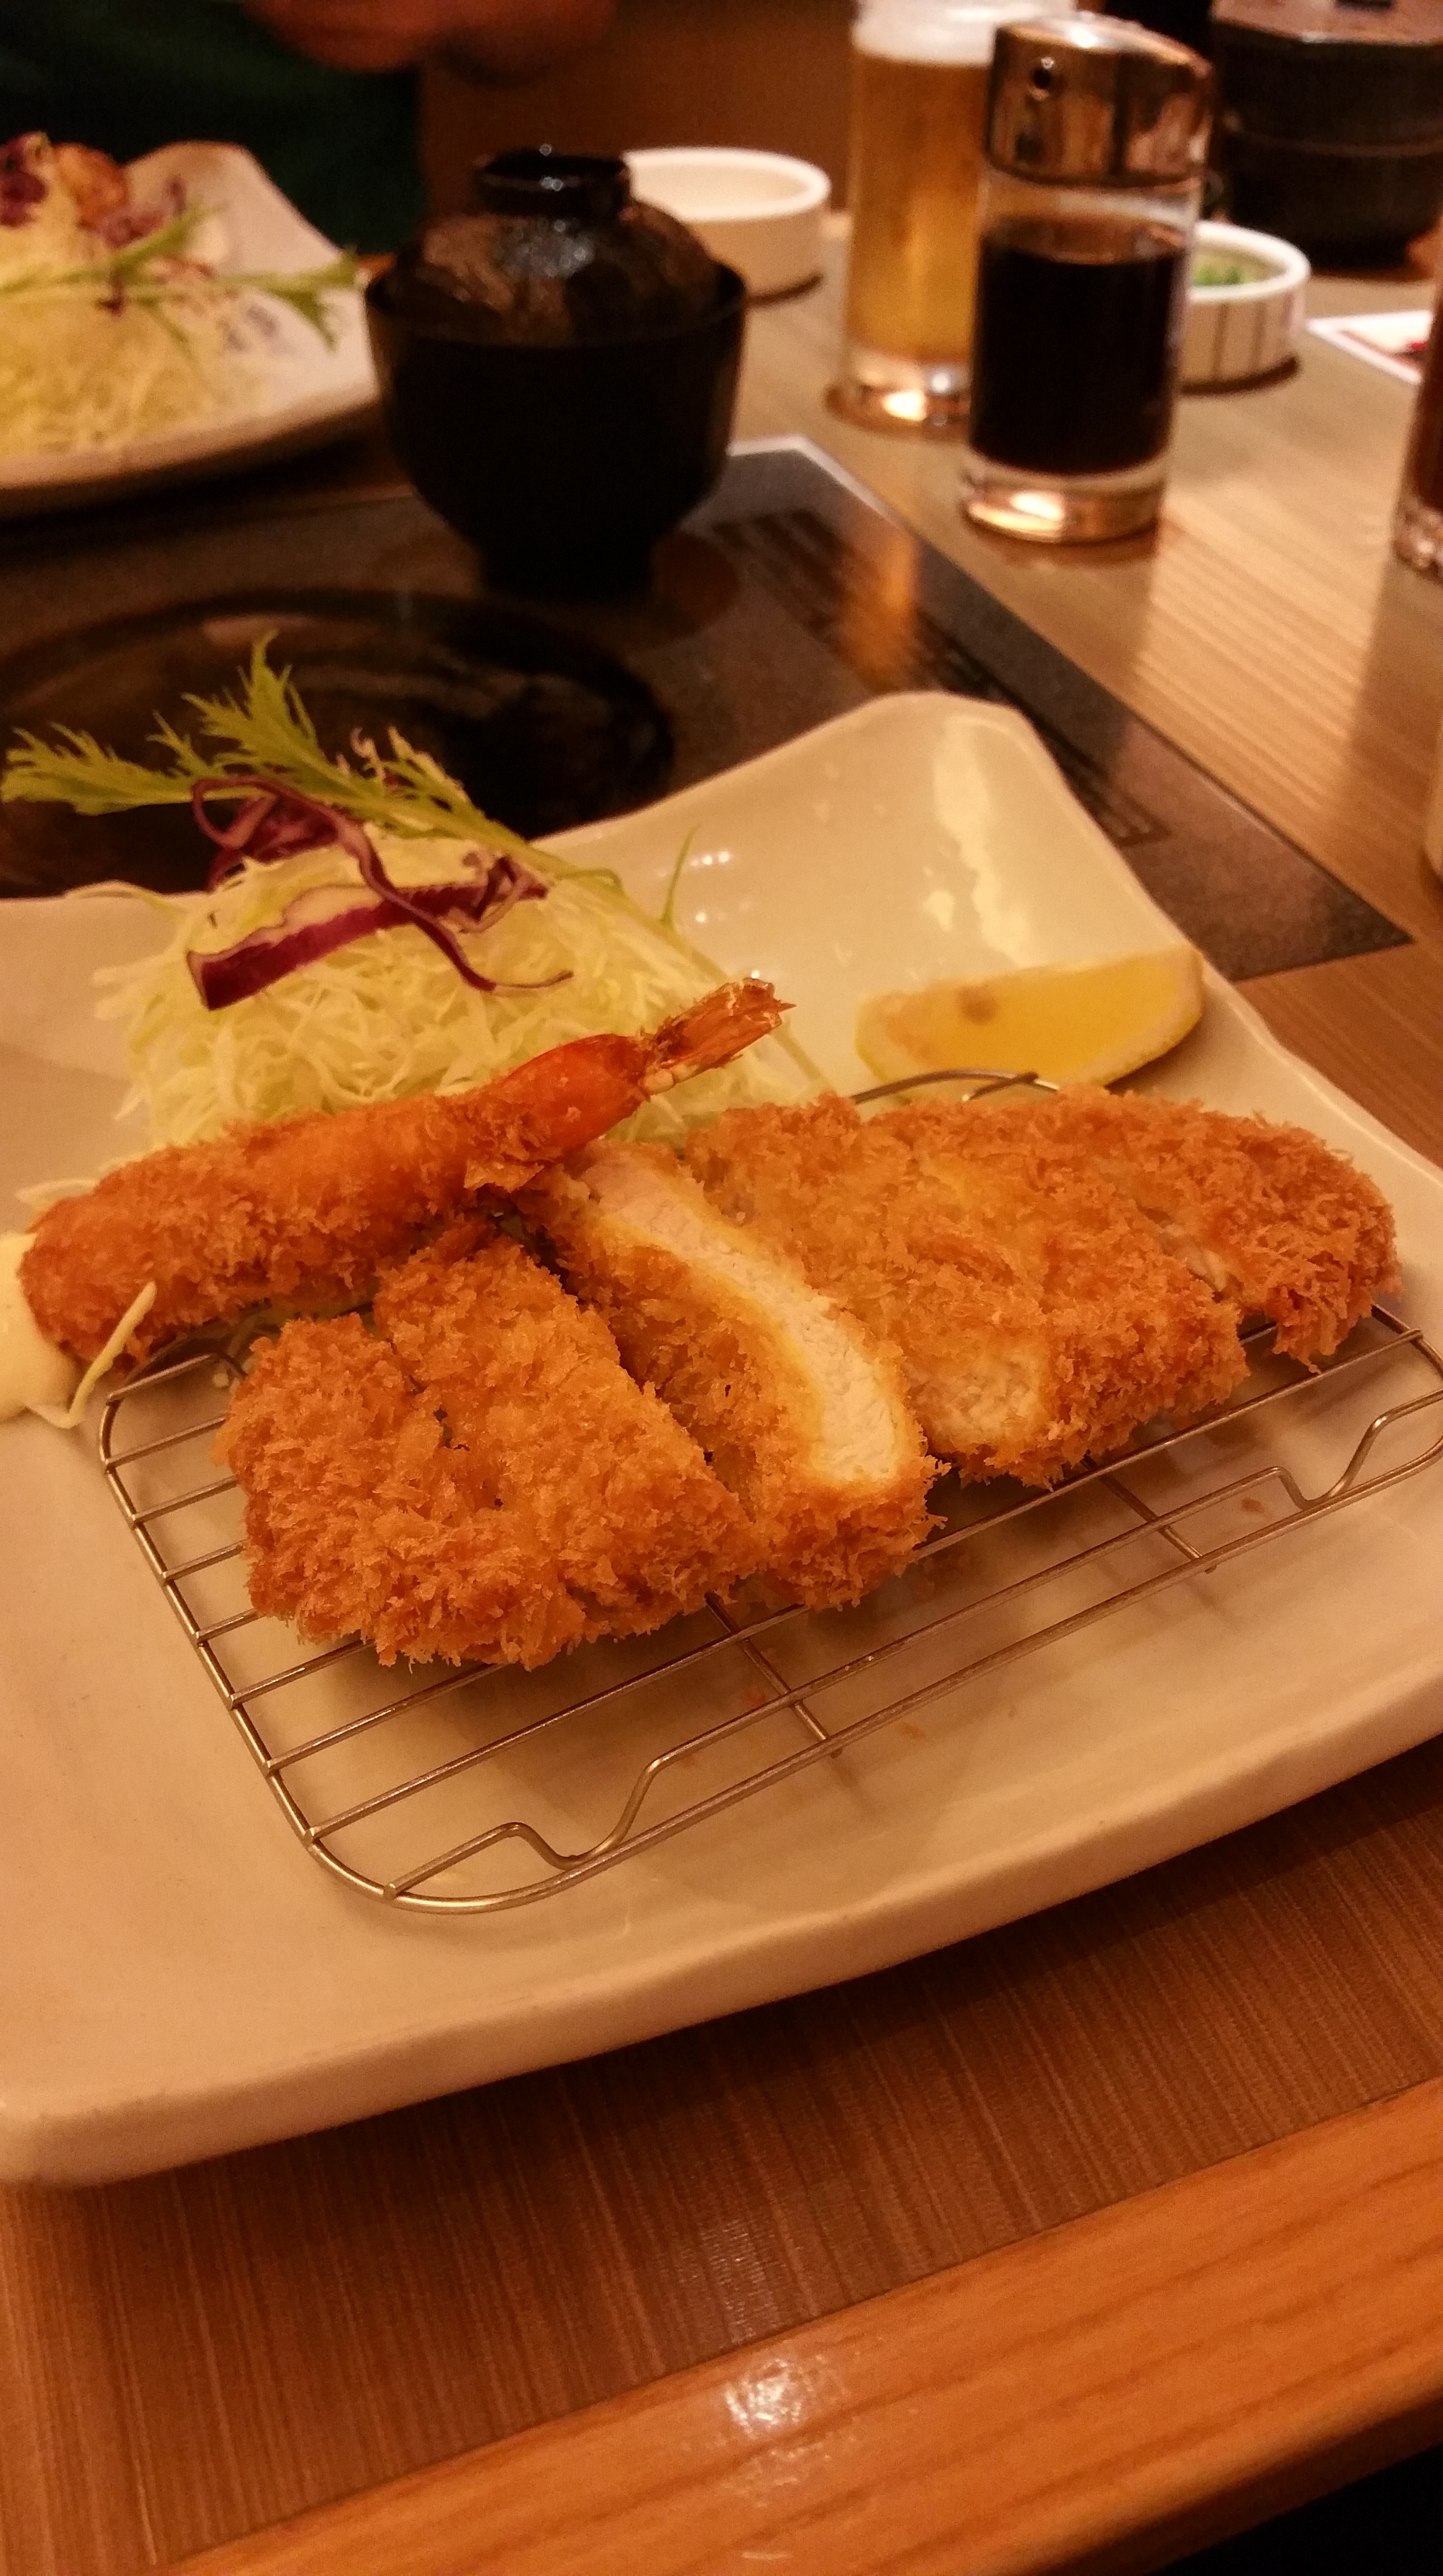
But I was equally enchanted by the deep, umami flavor of the miso soup served alongside it. Later, back in Tokyo, we ducked out of a storm into a Japanese steakhouse and were again greeted with a warm atmosphere and steaming hot bowls of miso soup.

With the recent residual storms from Hurricane Florence keeping the skies grey and the ground wet, I found my mind wandering back to those steamy bowls of soup that warmed and comforted my body. So one cool, gloomy morning I decided to allow myself a brief moment to embrace a memory that soothed me, and recreate a few cups of deeply treasured moments.

Miso soup is simple to make from scratch. Built right, we’ll end up with a rich, deep broth and a soup that’s both deeply satisfying and pretty healthy, too.

Miso Soup

Dashi:

  • 6 cups water
  • 1 – 12 in. piece kombu
  • 1 oz. bonito flakes / katsuobushi (dried, fermented, and smoked skipjack tuna)

Soup:

  • 1 recipe dashi
  • 2 tbsp. white miso paste
  • 2 tbsp. brown miso paste
  • 6 oz. firm tofu, well-drained and cut into 1/2 in. cubes
  • 2 green onions, bias cut into small pieces, white and green parts divided
  • 2 ½ oz. dried mushrooms (I used oyster and porcini)
  • 3 small heads baby bok choy, stems chopped into ½ in. pieces, leaves sliced
  • 1 in. piece fresh ginger, peeled and finely chopped
  • 1 clove garlic, minced

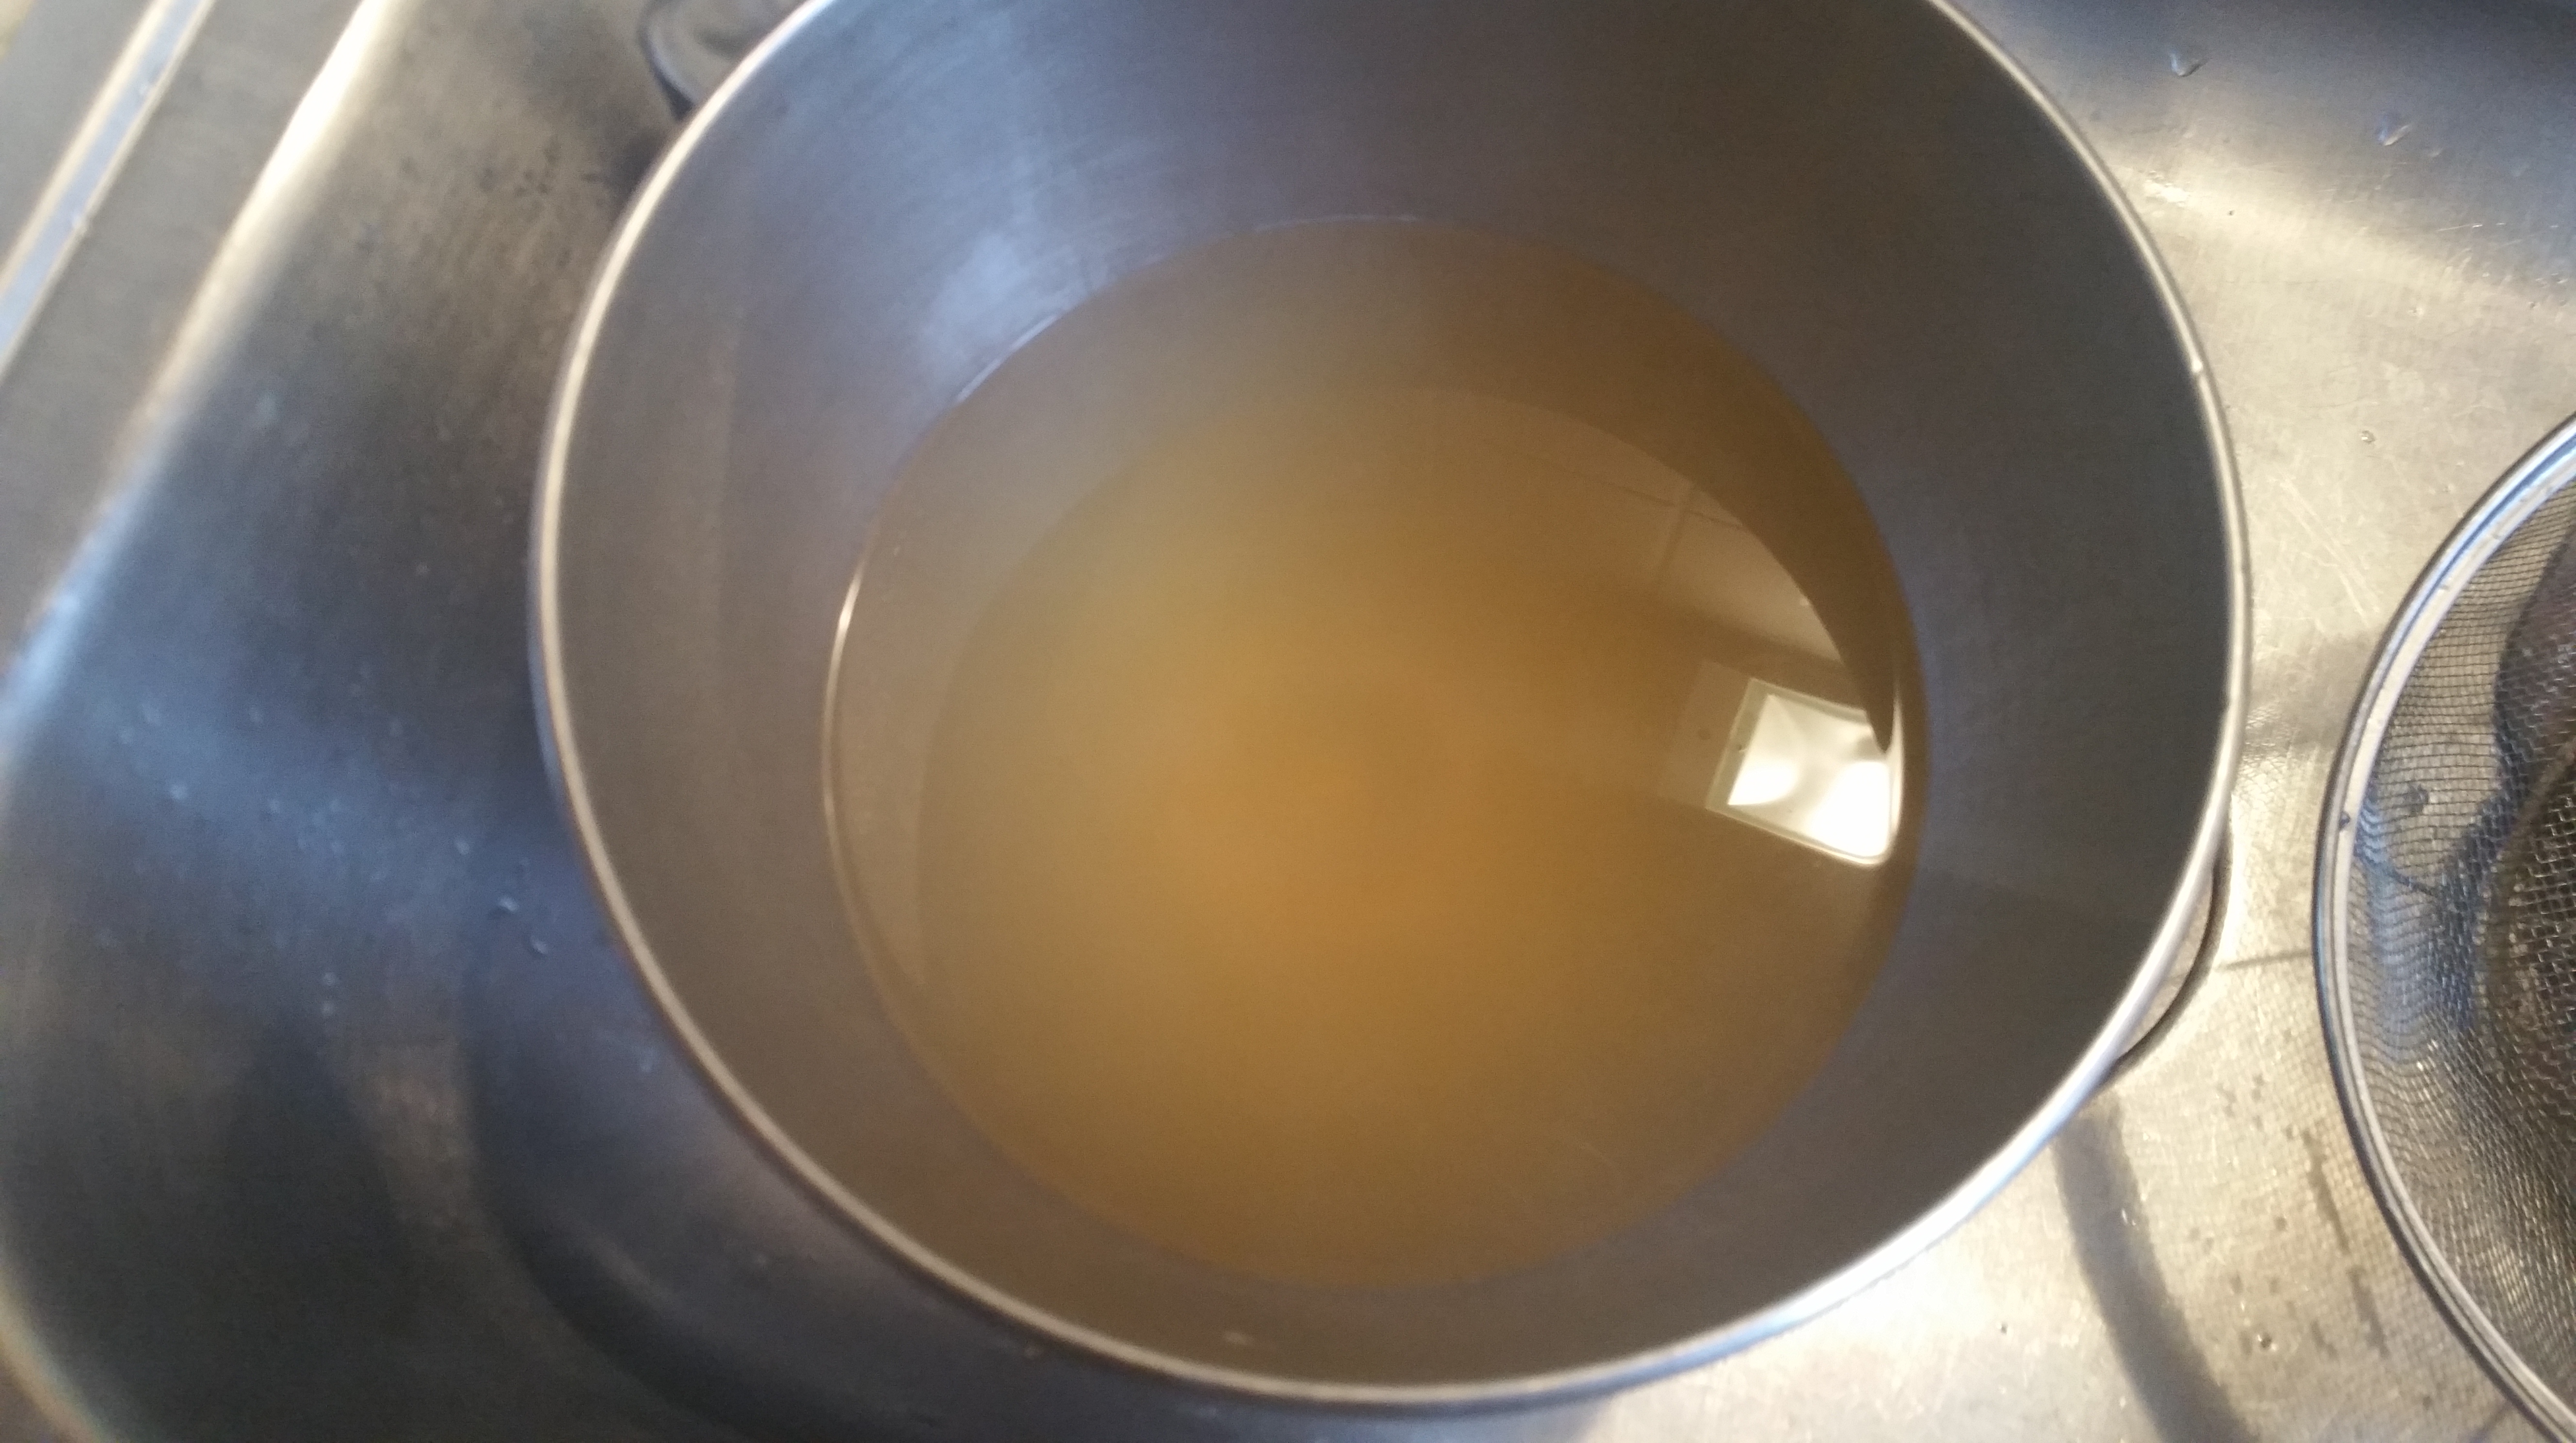
To make the dashi, combine the water and kombu and bring to a boil.

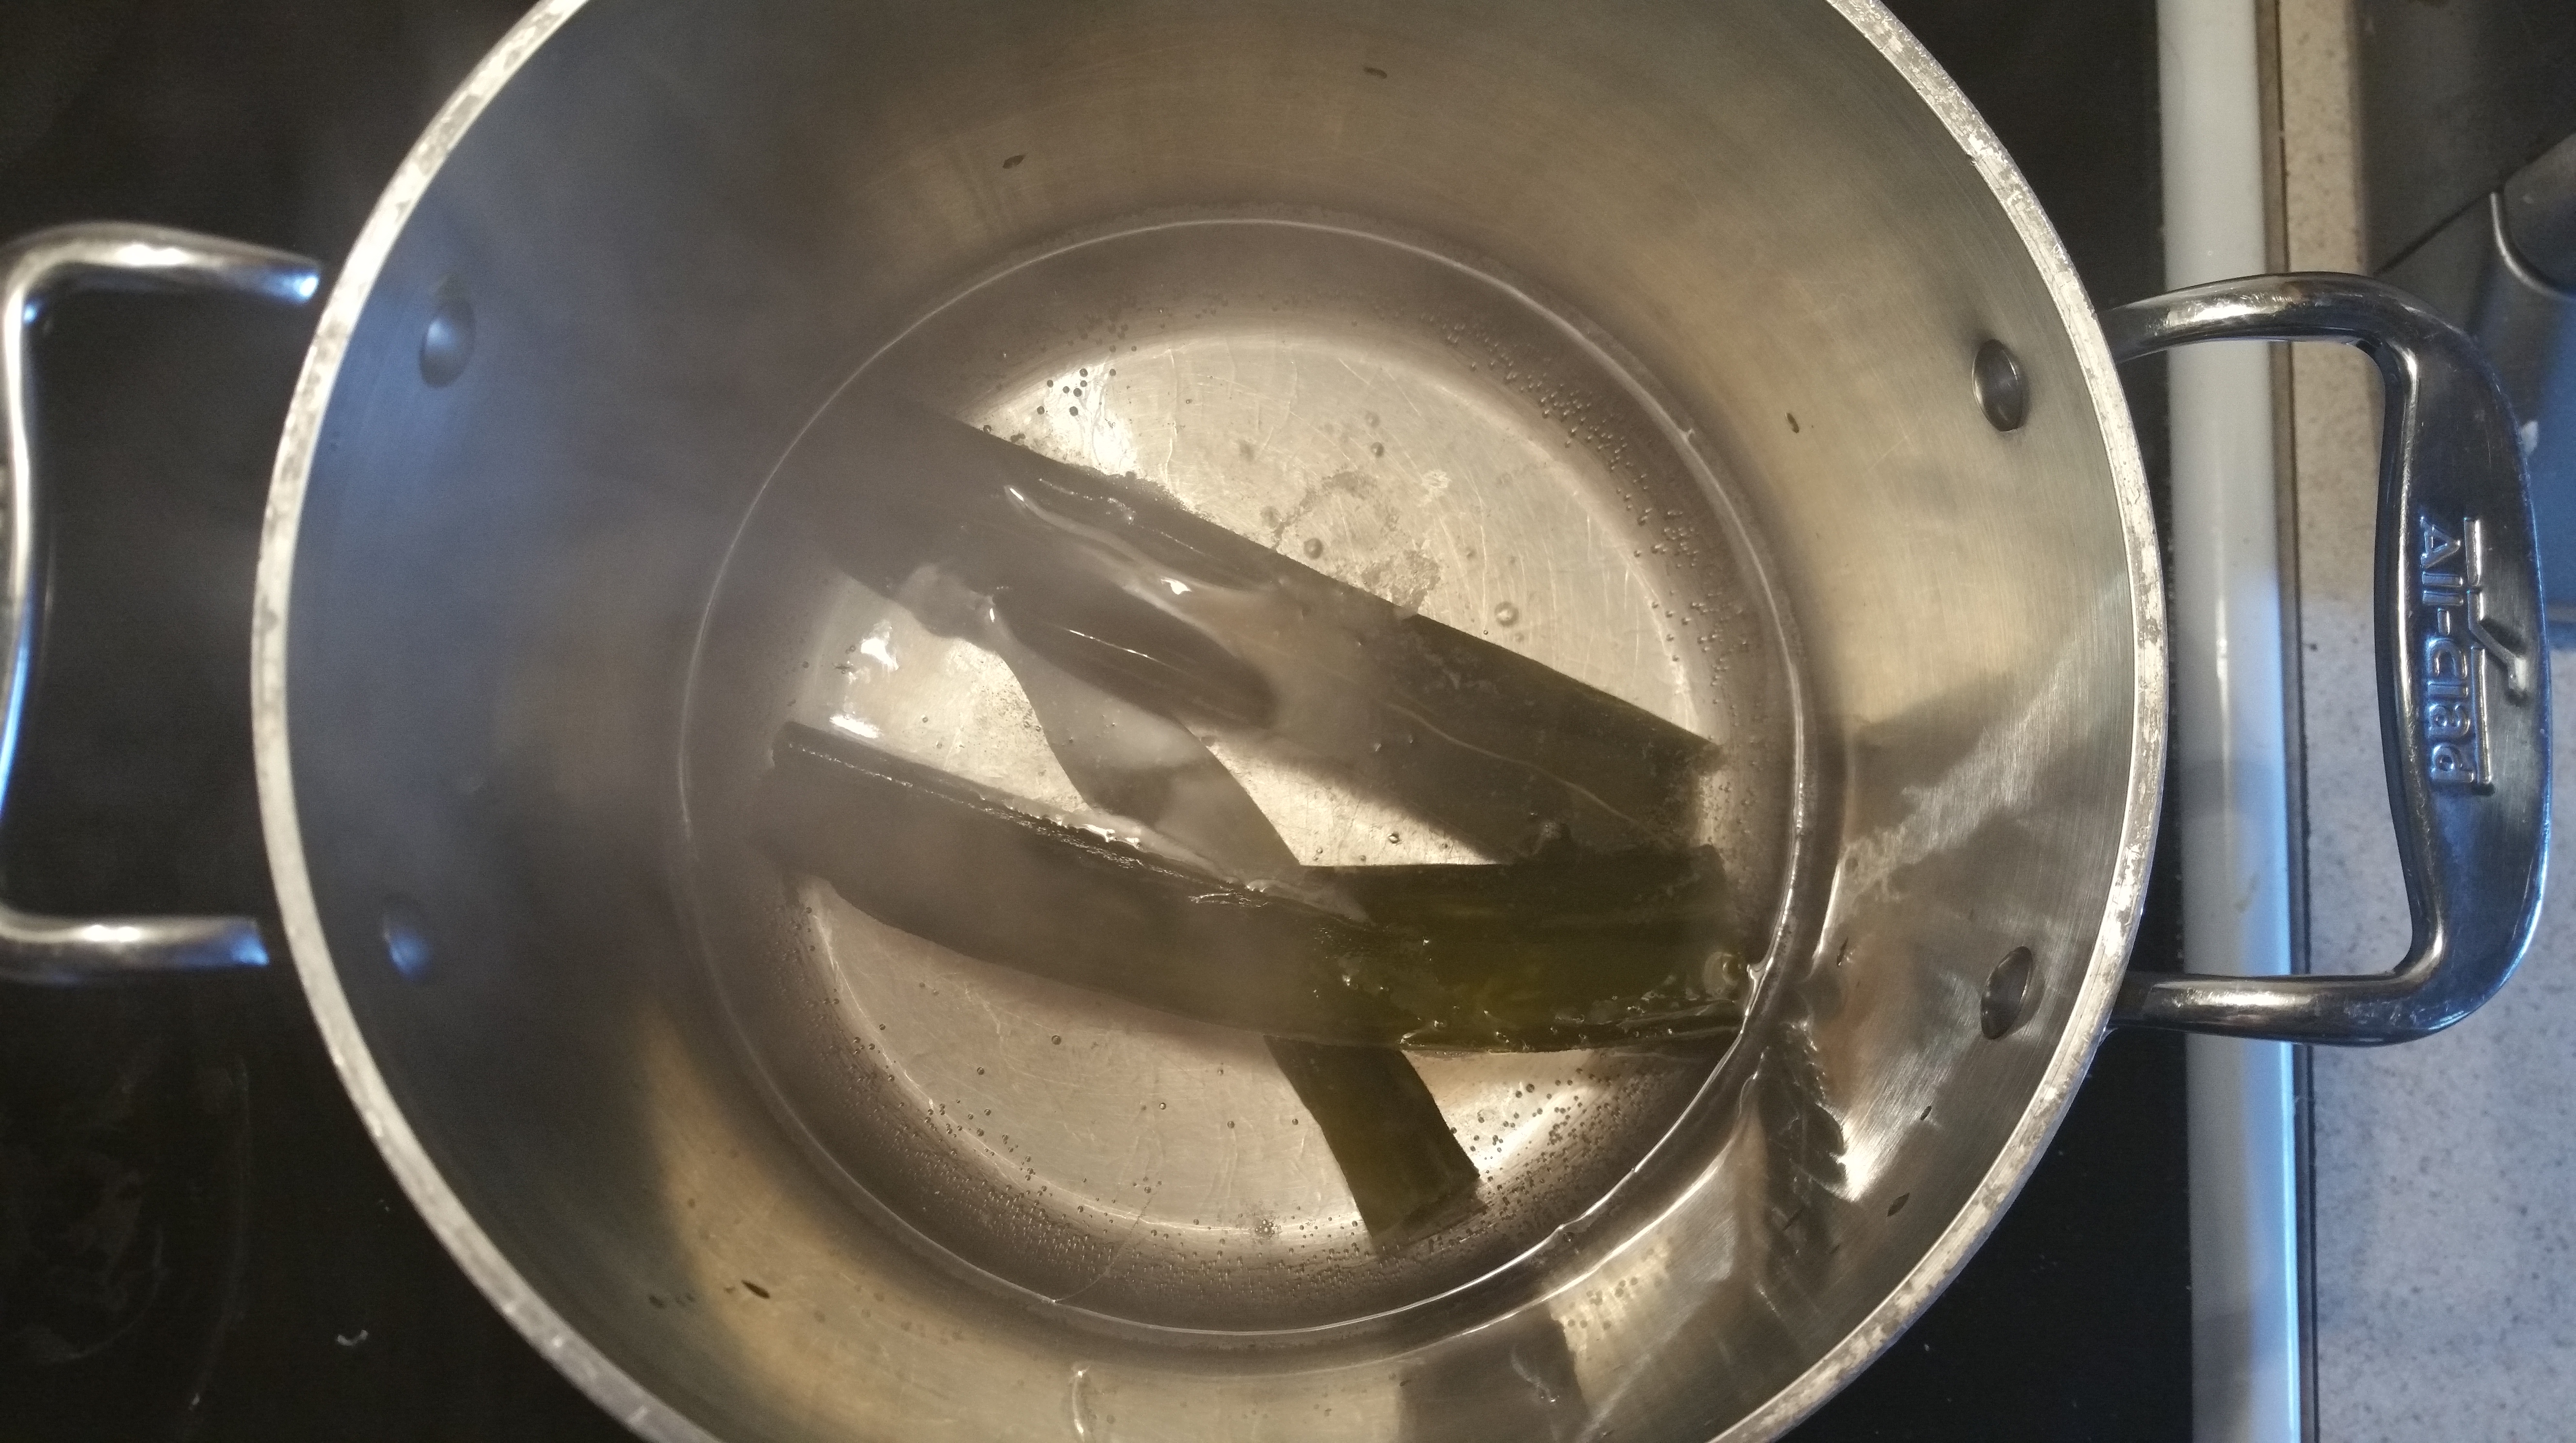
As soon as the water boils, remove the kombu. Add the bonito flakes and stir to mix.

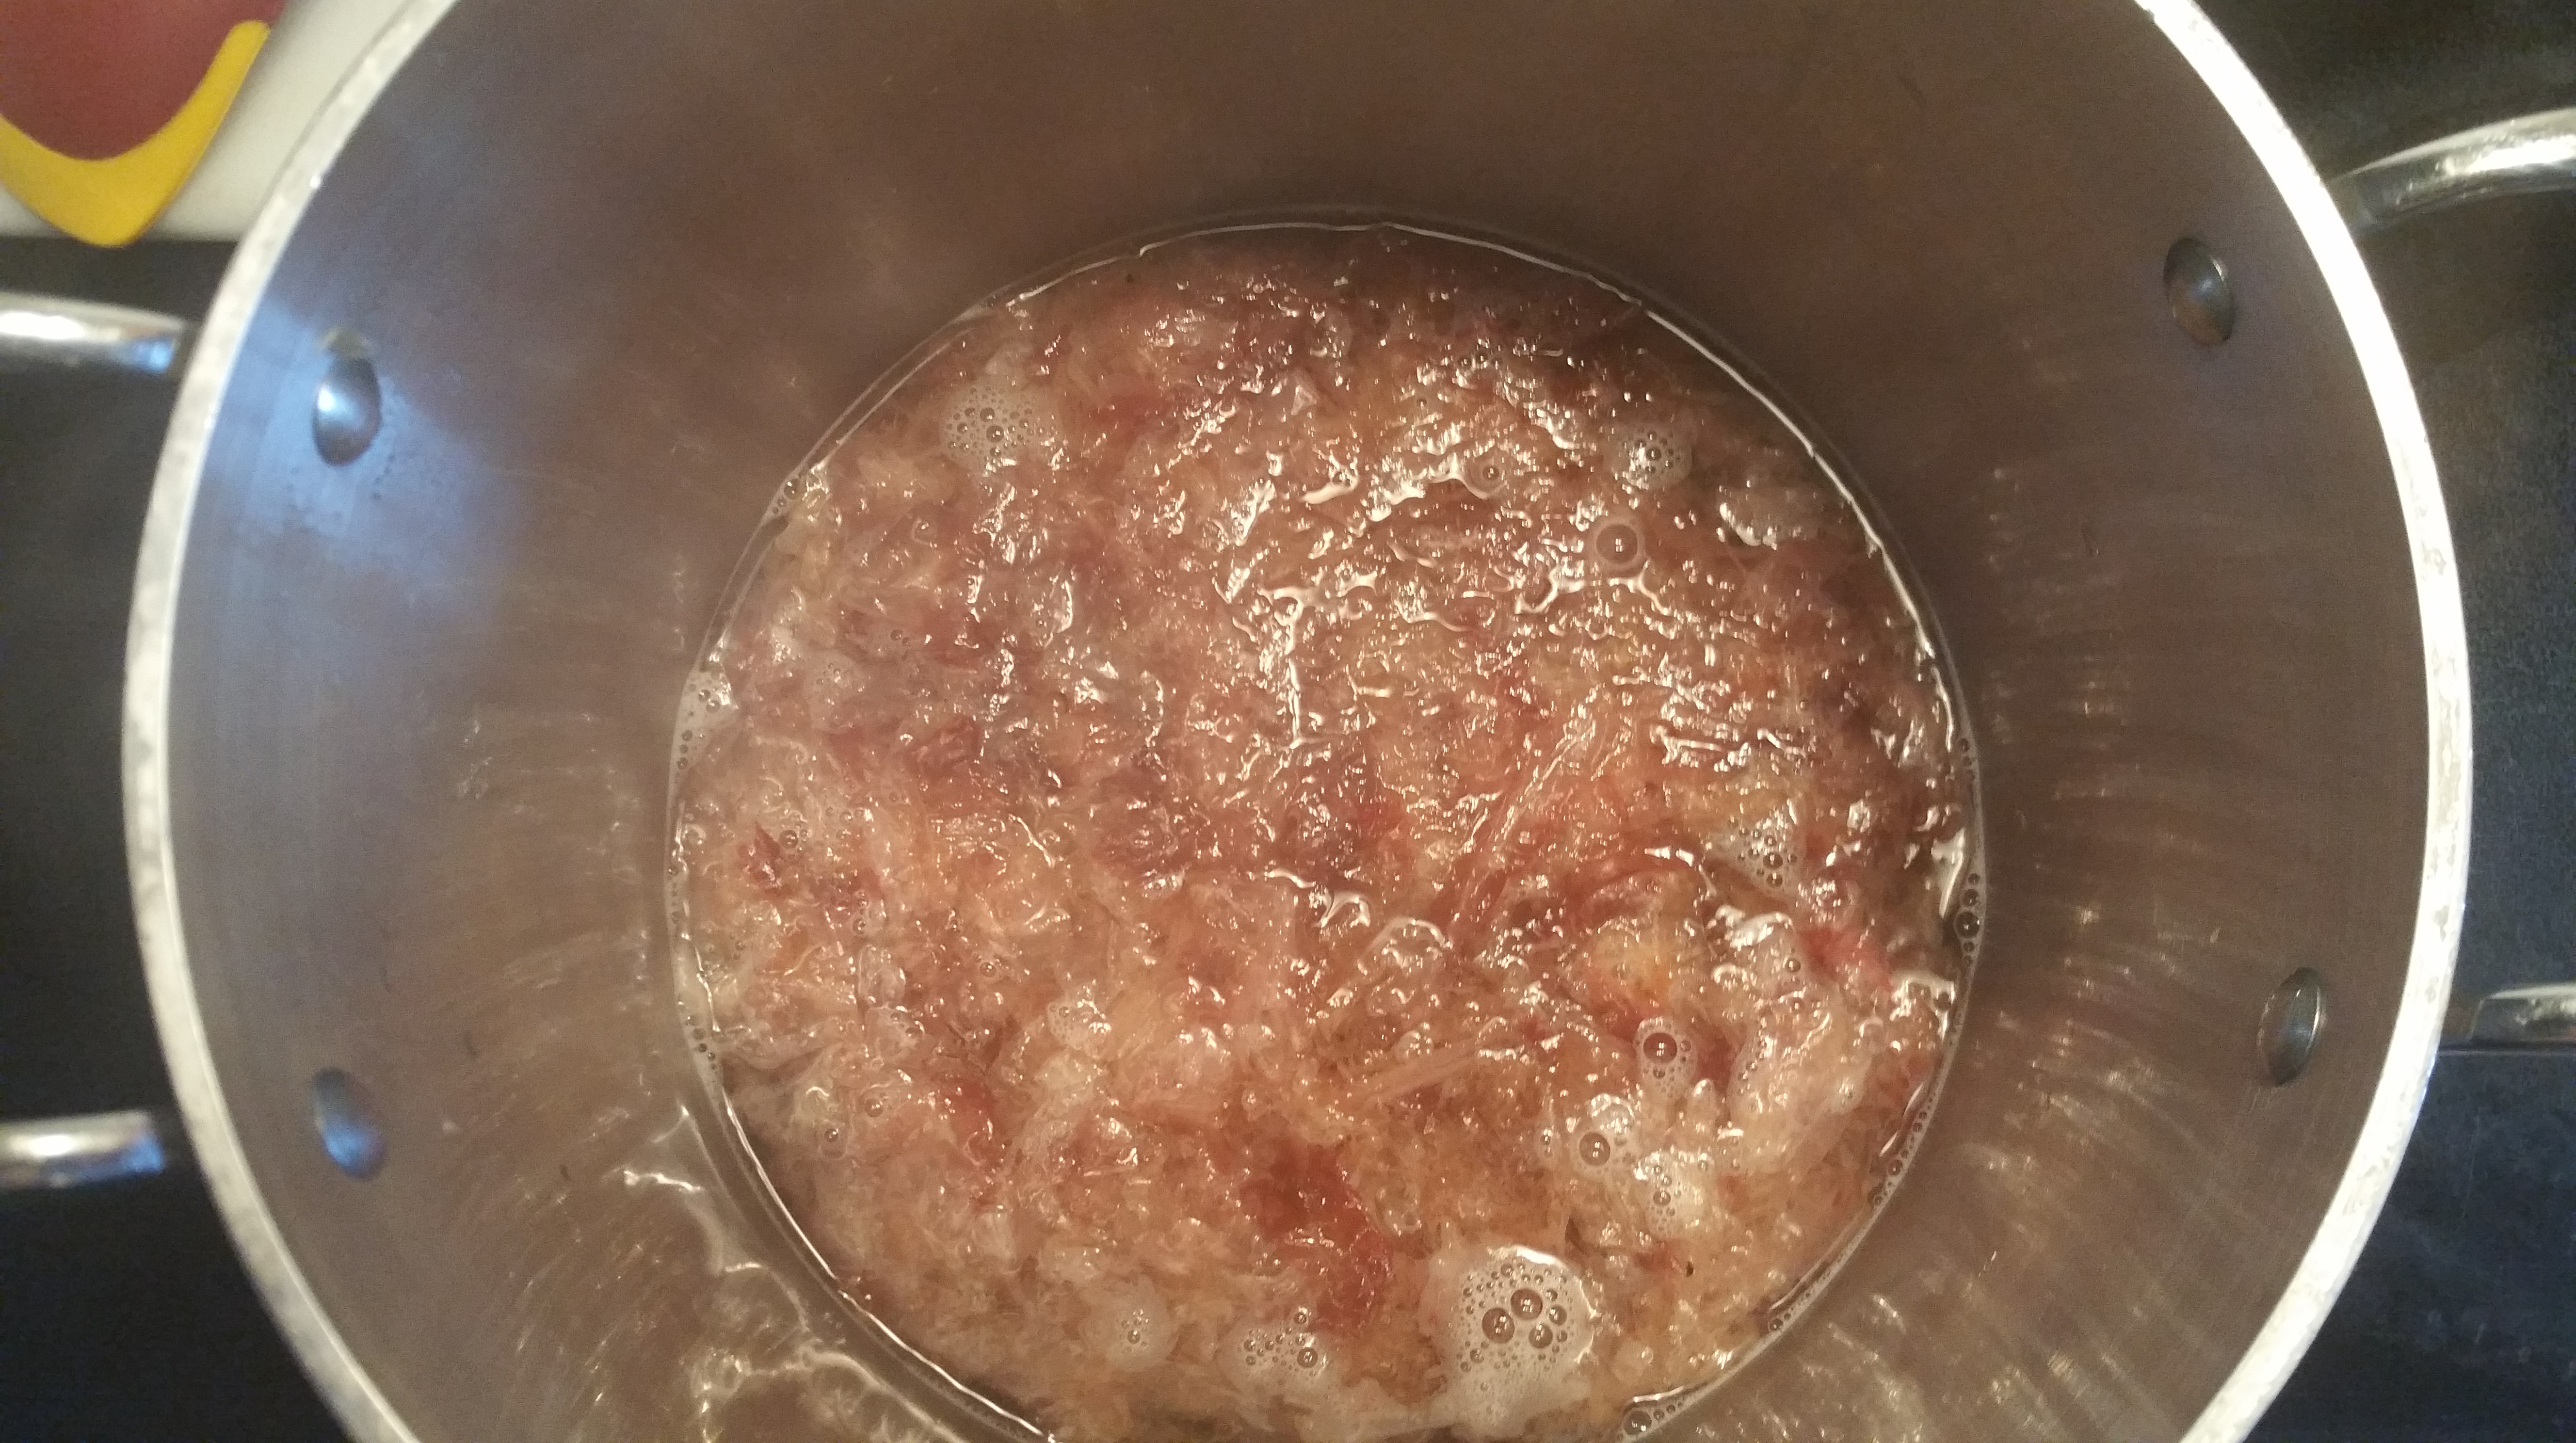
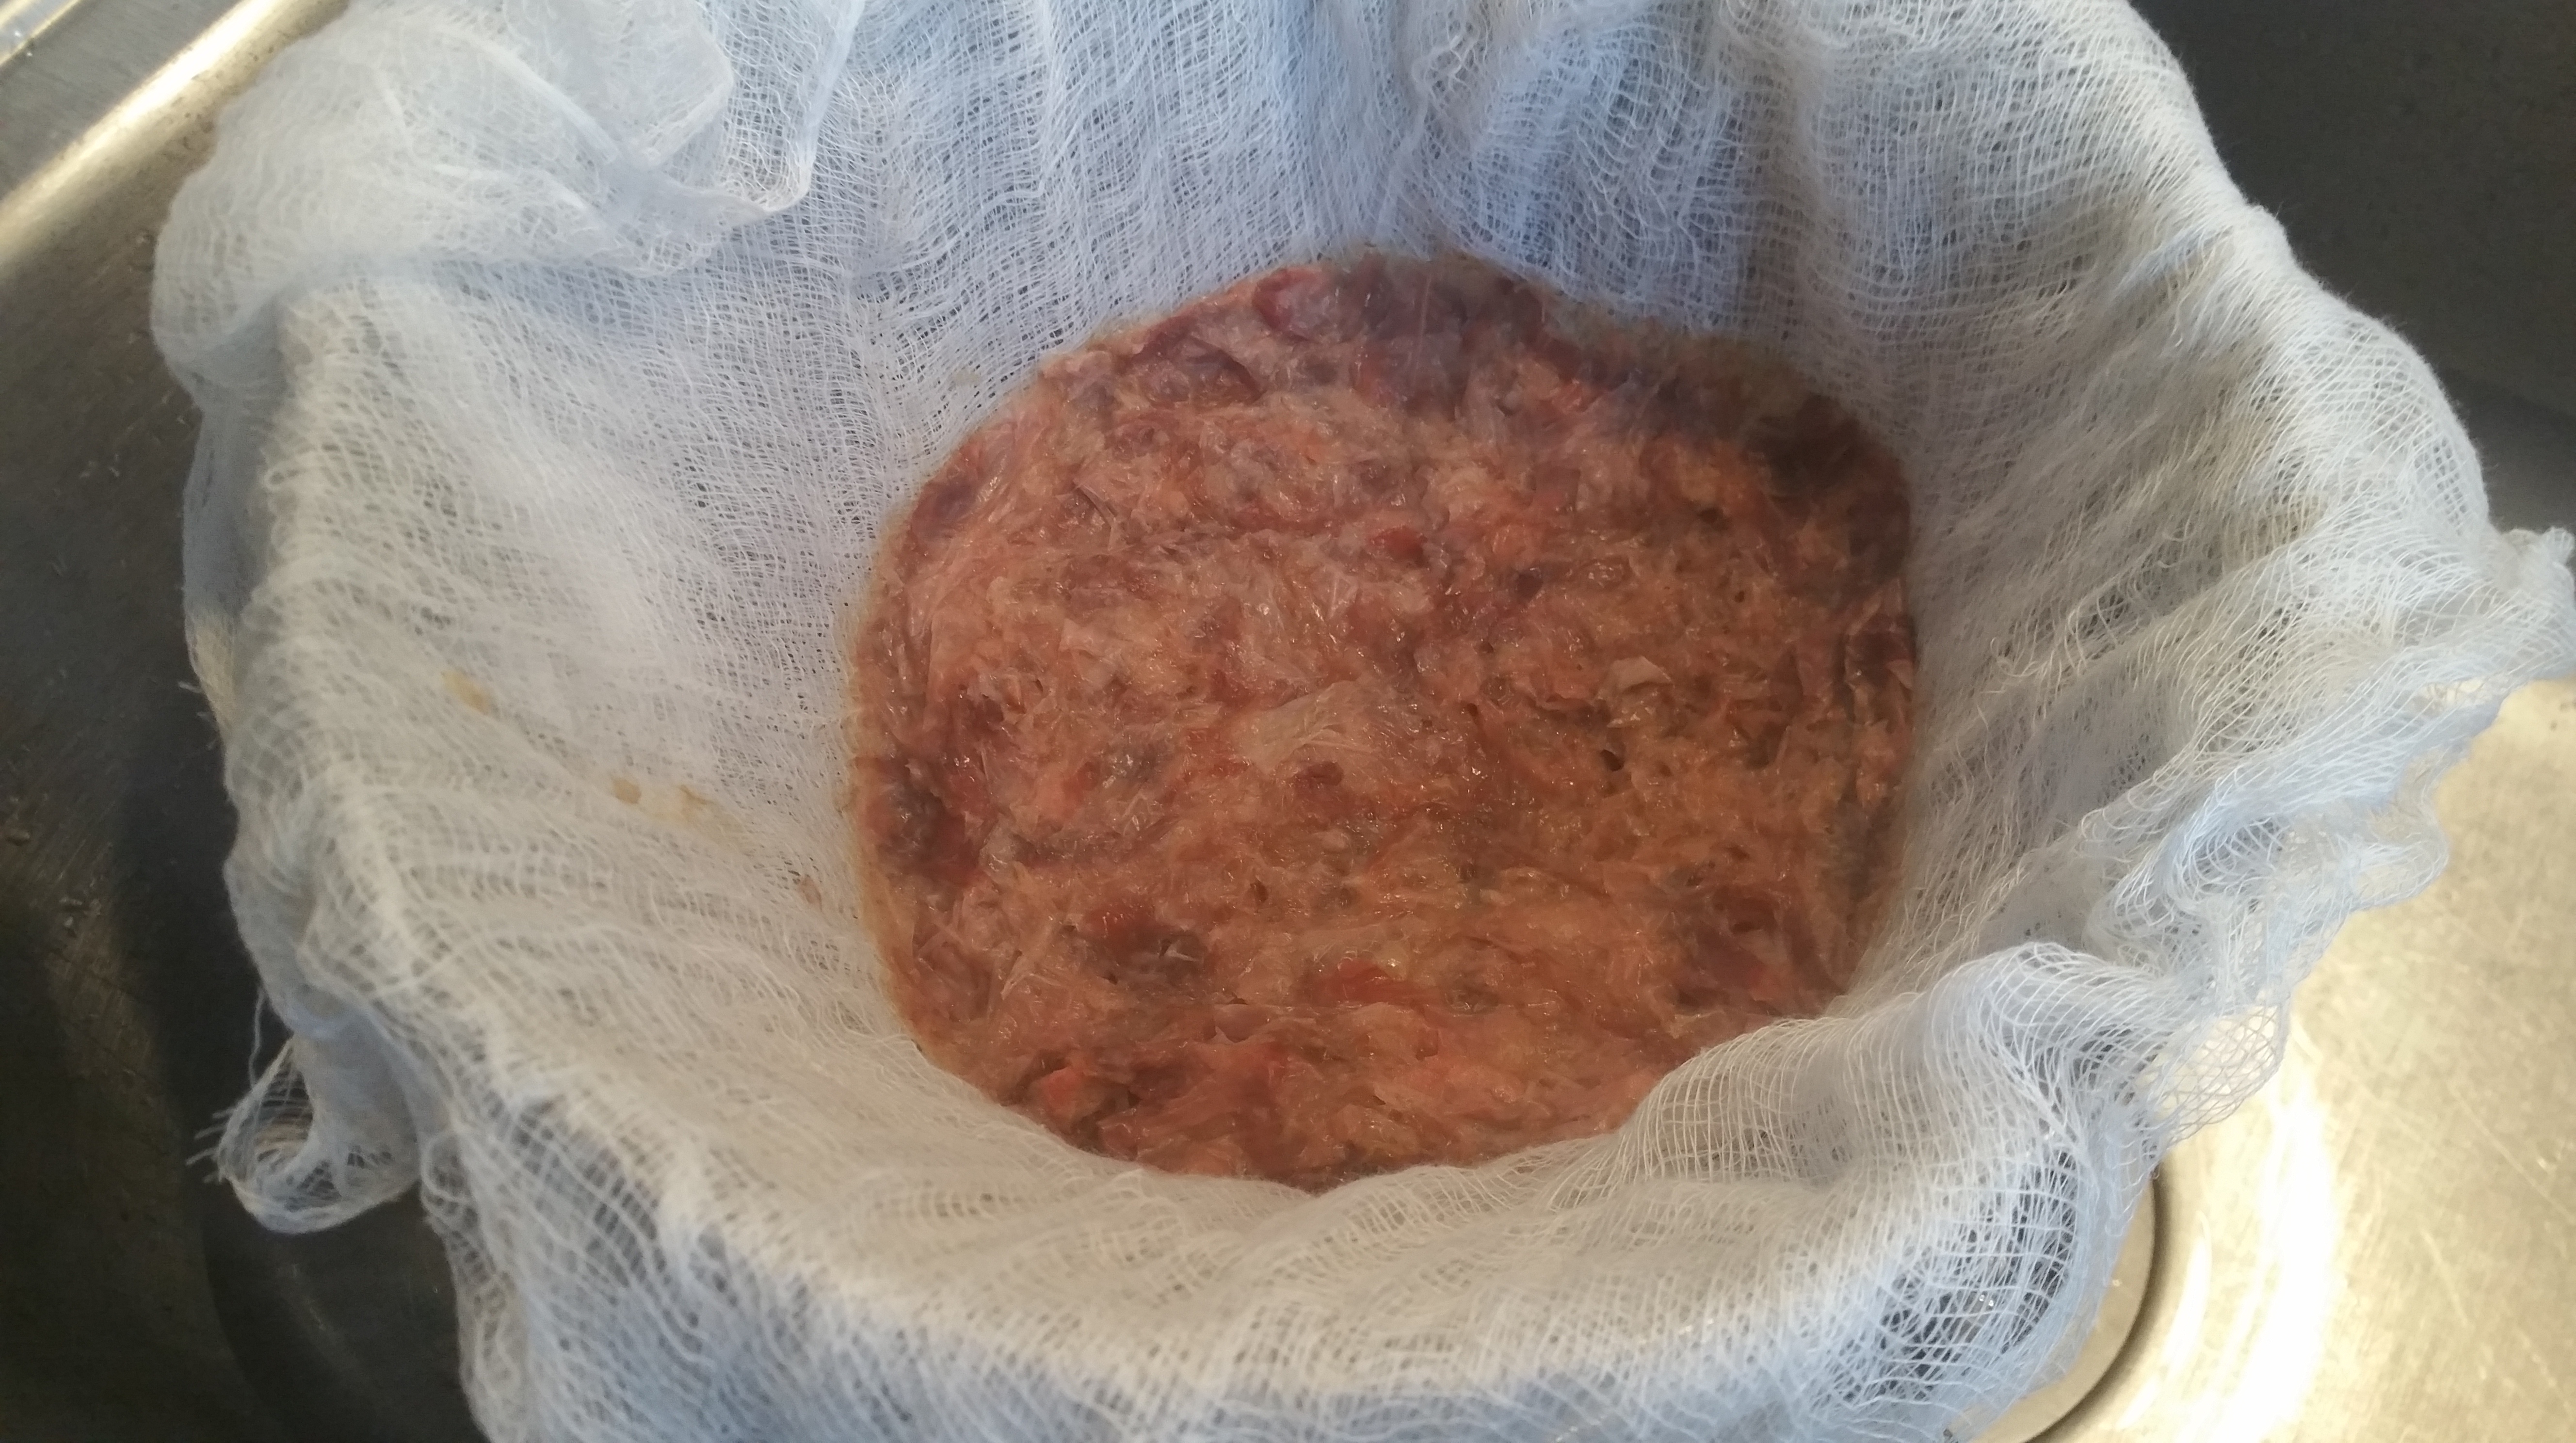
Remove the pot from the heat and allow the bonito flakes to steep for 5 minutes. Strain the dashi through a cheesecloth-lined sieve.

In a large pot, heat a tbsp. of neutral oil over medium-low heat and add the white parts of the onions, ginger, and garlic to the pot. Cook until softened and fragrant, about 5 minutes.

Add the dashi and bring to a simmer.

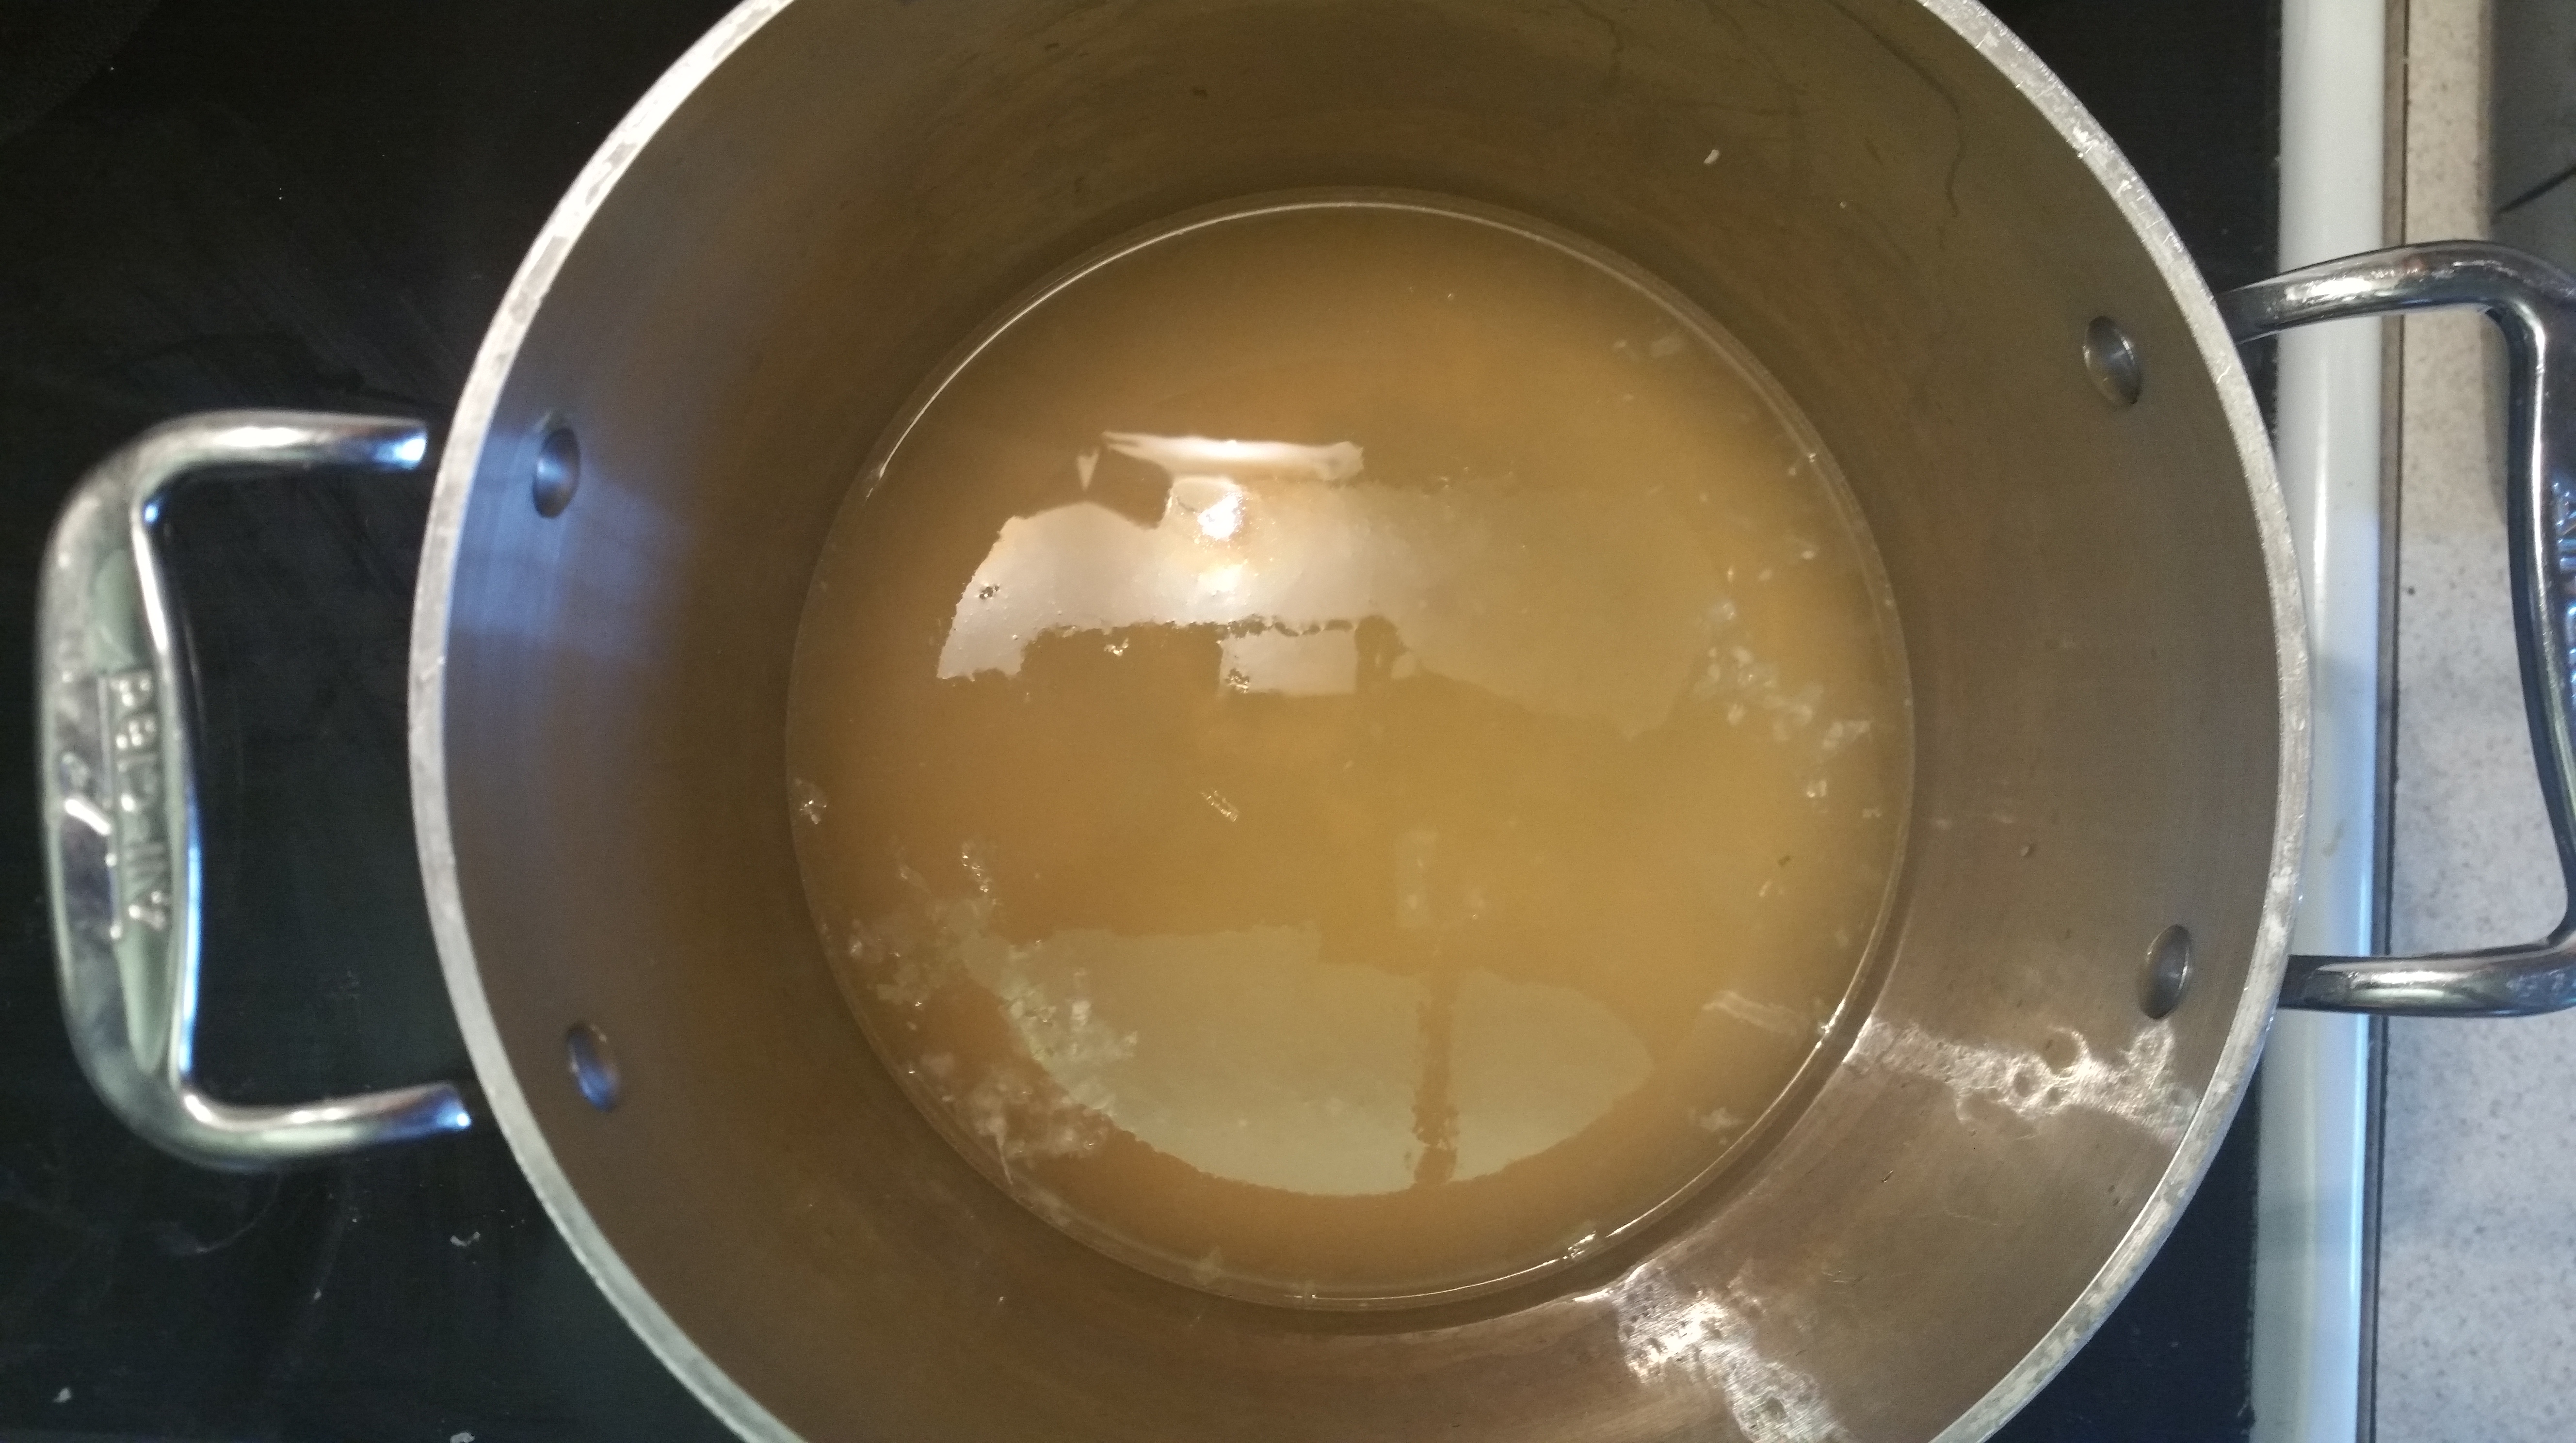
Add the miso pastes and mushrooms and cook 10 minutes, or until the mushrooms are tender.

Add the bok choy stems and simmer another 10 minutes.

Finally, add the tofu, bok choy leaves, and green onions, and simmer 5 minutes.

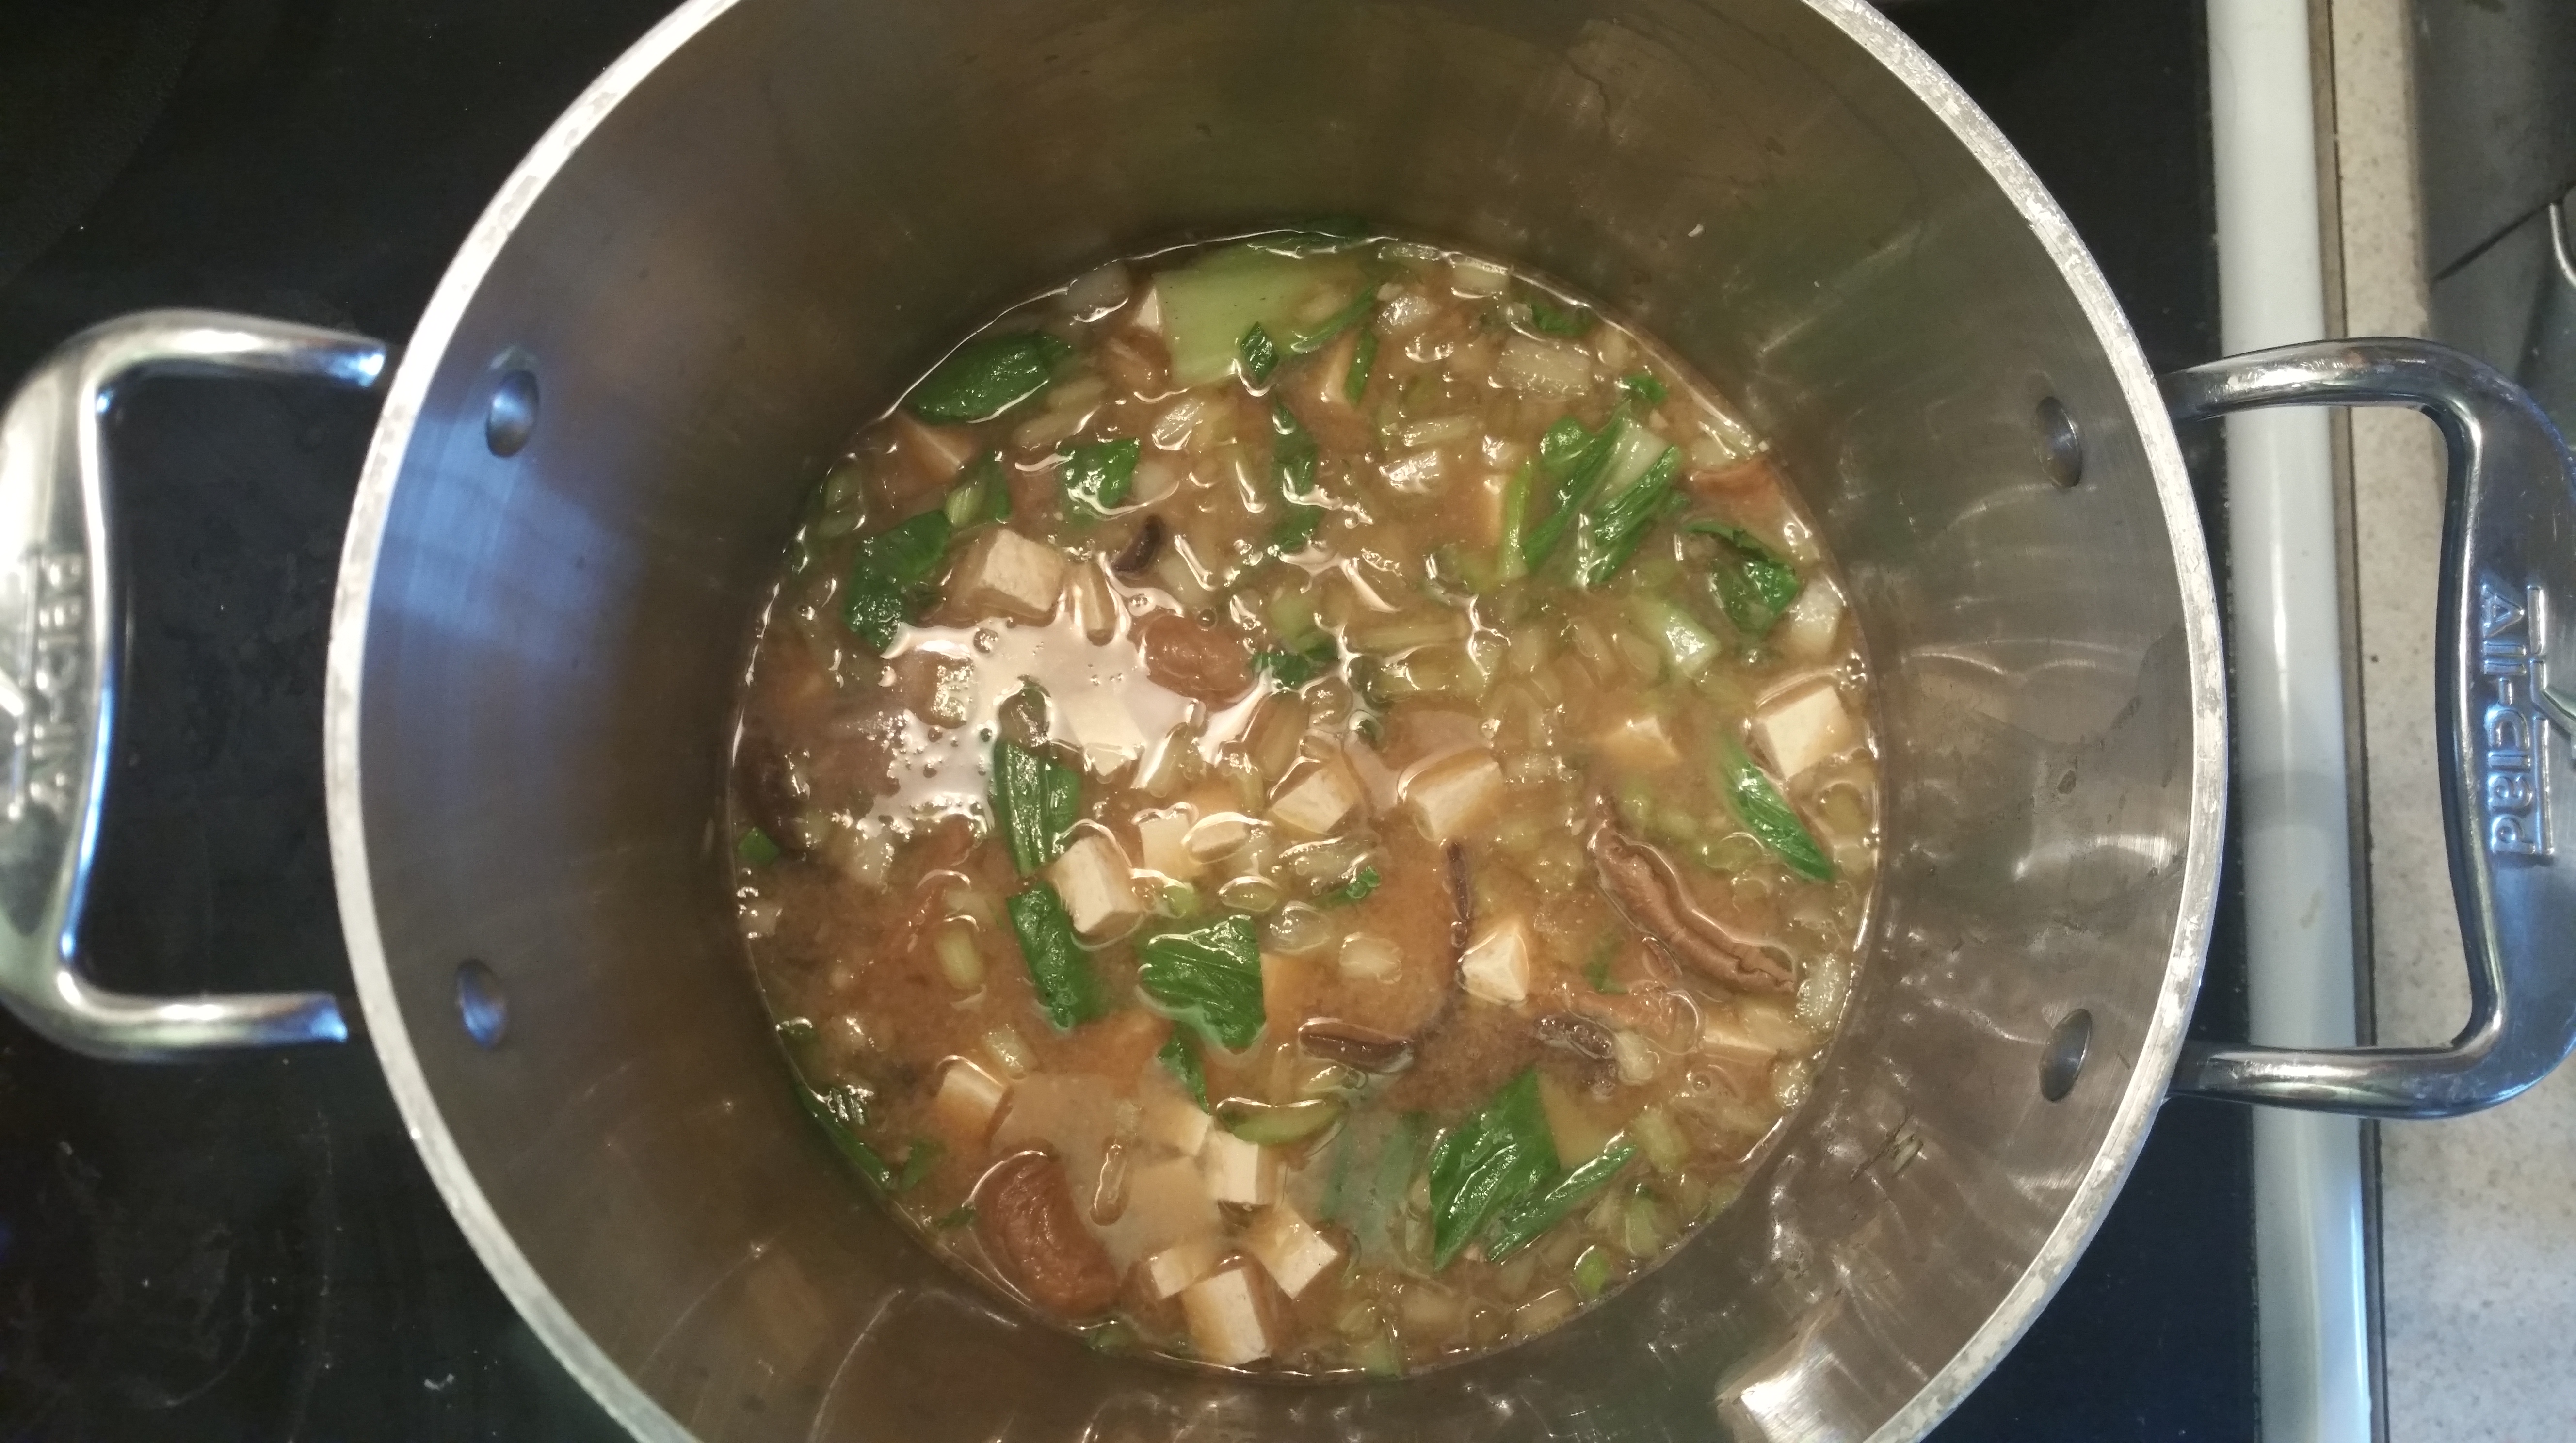
Serve, and let your heart and whole self feel warm.

While it’s a pretty light soup in a caloric sense, the tofu, mushrooms, and bok choy give it texture and heartiness that make it perfectly suitable for a meal. You could certainly add some noodles to it for something more substantial, though I think it makes a wonderful breakfast just as-is.

My life has been flipped upside-down in the last six months, but I am so grateful for the power of food and cooking to continue to not only bring me physical and mental comfort, but to bring joyful memories and thoughts to the forefront of my mind when I’m shaken. I sip this soup and I am back half-way across the world with my best friend. It is self-care in the truest and sweetest sense.

Ciao for now,

Neen


Birthday Bakes: Carrot Cake

2 Sep

I love carrots. They’re like the candy of the vegetable world, really. There’s always a bag of them in my refrigerator and I eat them with such consistency that Joe doesn’t even ask me to put them on the shopping list anymore. Much like coffee, he just assumes I’m running low and buys more.

If I’m waiting for something to bake or cook in the kitchen, I’m usually also leaning against the counter dipping carrot pieces in hummus or peanut butter. So it’s kind of weird (now that I think of it) that I’ve never once blogged about carrot cake. Probably because I’m the only one in this household that likes it and I just can’t eat a whole cake by myself.

So when I got the opportunity to make one for a friend’s son’s birthday recently, I HAD to jump at the chance. The natural sweetness of carrots blended into and a soft, tender cake full of warm spices is absolutely a treat. Wrap that up in some rich, decadent cream cheese frosting and we are definitely talking celebration-worthy. And plus, no one can say you didn’t eat your vegetables, right? Let’s make some cake!

T’s Carrot Cake

  • 2 cups all-purpose flour
  • 2 tsp. baking soda
  • 1 tsp. kosher salt
  • 2 tsp. ground cinnamon
  • 1 tsp. ground ginger
  • 1/2 tsp. fresh ground nutmeg
  • 2 cups granulated sugar
  • 1 1/4 cups canola oil
  • 4 large eggs, room temperature
  • 3 cups peeled and grated carrots

Cream Cheese Frosting

  • 16 oz. cream cheese, softened
  • 4 oz. butter, room temperature
  • 2 cups powdered sugar
  • 1 tsp. vanilla extract
  • 1 tsp. finely grated lemon zest
  • Pinch of salt

Candy Decorations

  • 6 oz. green candy melts
  • 6 oz. orange candy melts
  • Orange and green sprinkles


Preheat the oven to 350 degrees F.

Butter, flour, and parchment-line two 9 in. round cake pans and set aside.

Whisk together the flour, baking soda, salt, cinnamon, nutmeg, and ginger in medium bowl.

Whisk the sugar and oil in large bowl until well blended, and then add the eggs one at a time, beating between additions.

Add the flour mixture to the wet ingredients and stir until well-blended.

Stir in the grated carrots.

Divide the batter evenly between the prepared pans. I prefer to do this by weight rather than volume because it results in more even layers.

Bake the cake layers for about 40 minutes each, or until a tester inserted into center comes out clean. Allow them to cool in the pans for 15 minutes and then invert onto wire racks, peel away the parchment paper, re-invert and allow them to cool completely. The re-inverting is important because the tops of the cakes will be a little bit sticky, so you want the bottom-side on the cooling rack.

To make the frosting, beat the cream cheese and butter together on low speed until smooth. Gradually add the powdered sugar and beat on medium speed until fully incorporated and creamy.

Add the vanilla extract and lemon zest and beat until combined.

Taste the frosting and then decide whether or not to add the pinch of salt. Cream cheese brands can really vary salt content-wise, so you may or may not need it depending on your preference.

Now onto the fun stuff! I always think it’s easier to trim and frost a chilled cake, so I usually wrap and refrigerate layers for a few hours or overnight. Carrot cake has enough oil in it plus added moisture from the grated carrots that it won’t dry out at all as long as you wrap it up well.

Take a look at your cake layers. If they’re even and flat, leave them alone. If you have any doming, it’s a good idea to trim them with a serrated knife.

Put one layer on a cake board. If you have one, set that on a turntable. Place a layer of frosting on top of the cake layer (about ¾-1 cup of frosting) and then stack the second layer on top.

Then place a large dollop of frosting on top and frost the top and sides of the cake using a spatula or offset palette knife.

I have these cake scrapers to smooth the sides, but you can just as easily use the flat side of a knife, bowl scraper, bench scraper, or a plain old flat spatula.

Once you have a nice even coat, put the rest of the frosting into a piping bag for decoration. You can also use a gallon sized plastic freezer bag with the corner cut off for this.

Don’t be intimidated! Keep it simple with small swirls of frosting around the top and bottom or go nuts with patterns. At this point, it’s going to be delicious no matter what. Play around a little. You can always scrape a decoration off and throw that frosting back in the piping bag. If your hands are warm and the frosting gets a little soft, refrigerate the piping bag briefly and return to work when it has cooled.

You can also decorate in a way that allows you to practice as much as you want by using some candy melts, which are just colored vanilla candy you can buy at most craft stores and also online. I melted about 6 oz. of green and 6 oz. orange melts and drew these little carrots on some parchment paper, then sprinkled them with colored sugar.

They set up quickly and stick easily to frosting, so it’s a relaxed way to do more intricate decorations. I also used candy for the lettering on this cake by pouring the melted candy into letter-shaped silicone molds.

Once you’ve decorated your cake, put it in the refrigerator to let all of the frosting and decorations firm up. You can leave it uncovered if you are serving it that day, or box it up if you need to store overnight.


This cake is warm, spicy, and sweet. The smooth, luxurious cream cheese frosting compliments the spices, especially the ginger (in my opinion) without being overwhelmingly heavy. The little candy decorations give a nice vanilla crunch that adds a lovely bit of texture to the whole dessert.

To see the smile on Tobias’ face as his mom opened the cake box was the ultimate reward. There is nothing better than helping to make someone’s special day even sweeter.

Happy cake baking!

Ciao for now,

Neen

Leftover Treasures: Arancini

12 Aug

There are a lot of clever ways to revive leftovers, but one of my favorites makes a new dish that can be even better than the original. I am talking of course, about arancini, Sicily’s perfect little fried rice balls.

The name translates from Italian and Sicilian to mean “little oranges” for the shape and color of the finished product. They’re said to have originated in 10th century Sicily, and later gained popularity as a food eaten on the feast of Santa Lucia. “Arancini are a traditional food for the feast of Santa Lucia on 13 December when bread and pasta are not eaten. This commemorates arrival of a grain supply ship on Santa Lucia’s day in 1646, relieving a severe famine” [1]. Today, arancini are so popular that most food outlets in Sicily sell them year-round.

Though meat in tomato sauce (ragù) and mozzarella are a traditional filling, variants are sold all over Sicily. Like any good leftover application, they are malleable enough to accommodate what you have on hand. These deep-fried delights are the answer to “I made a full recipe of risotto and only needed to feed 1 or 2 people. What now?”

Risotto already has such a wonderful depth of flavor that we don’t need to do much at all to make it something special again. Arancini are simple to make, freeze well, and fry up in less than five minutes. Sound good? Let’s go for it.

Mushroom and Cheese Arancini

Ingredients

  • Well chilled leftovers from 1 recipe Mushroom and Romano Risotto (about 3 cups for me). You can certainly use other varieties of leftover risotto, just make sure you chill it well so that it’s firm.
  • 3 eggs (2 beaten in one bowl, 1 beaten in another)
  • 2 oz. mozzarella cheese (or other melting cheese), cut into ½ in. cubes
  • 1 cup all-purpose flour
  • 2 cups panko bread crumbs
  • Neutral oil such as peanut or canola for frying (enough to measure at least 2 in. deep in a saucepan)

Put the flour, 2 beaten eggs, and bread crumbs into separate bowls and arrange on the counter in that order. Line a baking sheet with parchment paper.

Beat one egg and mix it into the chilled risotto.

Take 2 tbsp. of the risotto and flatten it gently into your palm. Place a cube of mozzarella in the center and then gently close your hand to surround the mozzarella with risotto. I also roll the ball between my hands a few times to get a nice compact shape.

Dip the ball into the flour, shaking off excess.

Next, dip it into the beaten egg, letting the excess drip off.

Finally, roll the ball in the panko breadcrumbs and place on the parchment-lined baking sheet. I got 18 from 3 cups of risotto. (Yes, yes, there are only 17 in the picture. One was not-so-elegantly dropped.)

At this moment, I realized that I am one human with a somewhat small appetite and what on earth was I going to do with a dozen and a half arancini? Thankfully, these freeze well. If you need to do so, freeze them on a baking sheet until firm, and then move to a freezer bag. From frozen, fry 3-4 minutes and then put in a 350 degree F oven for 5-7 minutes to get the center piping hot. Win!

If not freezing, chill the arancini in the refrigerator for at least an hour before frying. They will hold their shape much better.

Prepare to fry by filling a saucepan with at least 2 in. of neutral oil. Clip a thermometer to the side of the pot and make sure the probe is at least ½ in. into the oil. This is important because greasy fried food is not what we’re after. Use an accurate thermometer, fry at the correct temperature, and the food will only absorb a very small amount of the oil. I’ve measured on a few occasions, and it’s usually only a few tablespoons total.

Bring the oil to 350 degrees F over moderate heat. You may be tempted to use high heat to get it there, but don’t. It will be harder to control the temperature later.

Fry the arancini 2-3 at a time to keep the oil temperature from dipping. They will cook in 2-4 minutes, depending on size. Remove when they are a deep golden brown. Bring the oil back to 350 degrees between batches.

Now you get a second course of your delicious risotto with added crunchy crust and gooey mozzarella center.

I mean, just check out that cheesiness:

They’re a great appetizer or lunch alongside a simple tomato salad. Now no delicious risotto leftovers need ever go to waste. And that feels pretty great.

Ciao for now,

Neen

1. Giuseppina Siotto, Vegetaliana, note di cucina italiana vegetale: La cucina vegetariana e vegana, 2014, ISBN8868101858, chapter 14

Cure for a Cold Snap: Curried Butternut Squash and Apple Soup

13 May

Howdy readers, I’m back. It’s been an interesting few months to say the very least, but needless to say I wasn’t doing as much cooking as I do normally. And when I was cooking, I was feeling stuck in a little bit of a rut. Not as if there aren’t endless sources of inspiration in books and online, I just wasn’t in that head space. It was hard to be out of the groove, but as I’ve started feeling more like myself, getting back into the kitchen and just experimenting has made me really happy again.

I’ve been on a soup and stew kick this week. That might seem like a little bit of a head-scratcher for this time of year, but if you were in Arlington this week, it’s been in the 50s, overcast, and rainy. So my local friends might understand why I’ve wanted nothing but warming foods.

This soup is spicy-sweet, creamy, and really delicious. It can also be made vegan if you swap out the chicken stock for vegetable stock or even water with a stick of kombu in it. Let’s have at it!

Curried Butternut Squash and Apple Soup

Ingredients

  • 1 lb butternut squash, cubed
  • 1 apple, cored and cubed
  • 1 red onion, diced
  • 3-4 cups unsalted chicken stock or broth
  • ½ cup whole or light coconut milk
  • 2 tbsp. olive oil
  • 1 tbsp. curry powder
  • 1 tsp. salt (less or more to taste)
  • ½ tsp. cayenne pepper (less or more to taste)
  • ½ tsp. toasted ground coriander
  • Optional: Toasted, salted pistachios

Method

Heat the olive oil in a deep, straight-sided saute pan over medium heat. Add the onions and cook until soft and a bit sweet.

Add the chopped apple, squash, and spices to the pan and cook everything over medium heat for 5-7 minutes or until the squash and apples begin to cook down and release liquid.

Add enough broth to the pan to cover the vegetables and fruit, then turn the heat to high and bring to a boil. Then reduce the heat back to medium and allow the soup to simmer, uncovered, until the squash is tender. The liquid will also start to reduce.

Using a traditional or immersion blender, puree the soup. If using a countertop blender, you may need to do so in batches to keep the hot liquid in check. Once the soup is pureed, add the coconut milk and blend it in. Check the seasoning, add salt and pepper as needed, and then blend again.

Serve hot with the toasted pistachio garnish and enjoy!

Hopefully I’ll be back a little more quickly this time. There’s a lot I know I’ll want to make once the farm markets are back in full swing for the summer, so keep your eyes peeled for new recipes. Until then…

Ciao for now,

Neen

Quick Re-Heats: Potato Crusted Mini Quiche

23 Apr

One of the most in-my-face changes since becoming a self-employed person with odd “office hours,” has been figuring out when and what to eat. Sometimes there are evenings where I teach from 6 until 9:30. I personally don’t like to eat less than 2 hours before I teach a hot class, and sometimes afterward my brain kicks into “I just want to relax” mode before I have time to consider dinner. The problem is that thinking leads to grabbing something easy or fast on my way home. And while Alexandria has a decent variety of quick, healthy food options, let’s be honest that buying a $10-15 salad/pizza/sandwich that I could make at home for a fraction of the cost is not the best idea.

So I’ve been leaning on foods that are easily re-heated and those that can be made for the sole purpose of using up odds and ends at the end of the week. Soup, lasagna, chili, and pot roast are all pretty good examples. Still, for simplicity, nothing beats quiche. And this version negates the need to make pastry, which is a good bonus. I make these on Sunday and refrigerate them in individual containers. The key here is to not think too hard about specific ingredients. Use what you have. In this instance, I made this right after Easter, so I had leftover ham, potatoes, a lone tomato, a half package of mushrooms, and some half-wilted salad greens. I also only had 5 eggs, and I assure you it was not the end of the world.

Potato Crusted Mini Quiche

  • 1 russet potato, sliced thin on a mandoline
  • 6 eggs, well beaten
  • 2/3 cup milk
  • 1/2-3/4 cup of shredded or diced cheese (I used a cheddar-jack blend)
  • 1 roma tomato, diced
  • A few handfuls of greens (I used kale/spinach/chard salad blend)
  • 5-6 oz. of ham, diced
  • 1 clove garlic, minced
  • 6-8 oz. white or cremini mushrooms, diced
  • 1/4 tsp. grated nutmeg
  • Salt and pepper to taste

Prep the potato crust first. Preheat the oven to 450 degrees F and lightly grease a baking sheet. Lay the sliced potatoes out—they can overlap a bit.

20150330_114239
Bake for 9-10 minutes or until just lightly golden. This isn’t to cook the potatoes through, but to make them pliable.

Grease a muffin tin. Let the potatoes cool slightly and then lay slices in each cup, pressing them against the bottom and sides. Make sure they overlap slightly. Five slices usually does the trick if you’re working with a large potato.

20150330_120911
Set the pan aside while you prepare the filling.

20150330_120150

Lower the oven temperature to 375 degrees F.

Place a skillet over medium heat and add some olive oil or butter to the pan. Gently saute the mushrooms until they start to give up some liquid, and then add the ham and garlic. Cook one minute more, and finally add the tomato and greens to the pan. Cook until the greens wilt slightly, and then remove the pan from the heat. Season the filling with salt and pepper to taste.

20150330_120443 20150330_120607

Beat the eggs with the milk, nutmeg, and some salt and pepper.

To assemble the quiches, place a generous amount of the vegetable/ham filling into each crust, top each with shredded cheese, and then very slowly add egg custard to each one until ¾ full.

20150330_121236 20150330_121408 20150330_121406 20150330_121729

Carefully move the muffin tin to the oven and bake the quiches for 12-15 minutes. They will puff up and be golden brown on top when ready. Let them sit in the pan for 5-10 minutes, then run a knife around the edge of each, and lift the quiche out with a wide spoon or small spatula.

20150330_132210

I like to have quiche with some greens in spicy vinaigrette to offset the rich custard. Yum.

To reheat from cold, just pop into a toaster oven or conventional oven set to 350 degrees F and cook for 5-8 minutes. Nearly instant breakfast, lunch, or dinner! This recipe usually makes about 8-10 quiches depending on how large the potato is and how many odds and ends you’re throwing into the custard.

Ciao for now,

Neen

Satisfy My Soul: Sweet Potato, Chickpea, and Collard Greens Stew

14 Jan

Long-time readers of this blog will no doubt remember the “Mystery Food” series. For a couple of summers, I participated in Community Supported Agriculture programs in the NoVA area. Basically, it’s like buying stock…only more delicious. You pay a lump sum to a local farm at the beginning of the growing season, and once a week receive a box full of whatever has been harvested that week.

What I miss the most about it is that it forced me out of my comfort zone. I had to plan meals around whatever appeared in that box—and during some times of the year that meant figuring out what to do with massive quantities of squash, apples, or greens. Kale must grow really well around here, because boy-howdy did I eat a lot of kale those summers.

So when my friend Heather tipped me off to a special deal on Relay Foods, a grocery delivery service that sources from local stores, restaurants, and farms, I was excited to find they had their own version of this CSA-type share called a Bounty Box. Cha-ching! Time for vegetable roulette. I ordered one and anxiously anticipated what might appear on the porch.

There were some glorious pink lady apples, a jug of fresh apple cider, a nice fat little tomato, some white potatoes, watercress, curly kale, an enormous pile of collard greens, and several very hefty sweet potatoes. I was definitely pleased with the haul, but a little thrown for a loop. Confession time: I never buy sweet potatoes or collards. I have nothing against them, but I just never buy them or cook with them.

20140106_170432

Nothing like a mystery box to let your mouth know what it’s been missing! Seasonal food is awesome, because it’s exactly what the earth has to offer at that moment—and wherever you are, it’s probably exactly what your body is asking for too. Think about it: Collards packed with vitamin c, k, and soluble fiber (not to mention factors that regulate immune function) and sweet potatoes full of fiber, beta carotene, vitamin c, vitamin b-6, and potassium. Yep, mother earth definitely knows you need some protection against flu season. And nothing says yummy winter food like a stew…

Sweet Potato, Chickpea, and Collard Greens Stew

  • 1 tbsp. olive oil
  • 1 onion, diced
  • 2 cloves garlic, minced
  • 1 tsp. smoked paprika
  • ½ tsp. coriander seeds
  • ½ tsp. cayenne pepper
  • ½ tsp. cumin
  • 3-4 cups collard greens, large ribs removed, roughly chopped
  • 1 15.4 oz. can of no salted added chickpeas, drained, or 2 cups of dried chickpeas soaked overnight
  • 2 large sweet potatoes (approximately 1 lb.), peeled and diced
  • 2-3 cups vegetable or chicken stock
  • Salt and pepper to taste

Begin by heating the olive oil, paprika, cumin, cayenne pepper, and coriander seeds  in a large pot over medium heat. Heat for about one minute, and then add the chickpeas and stir to combine. Cook the chickpeas until lightly browned, about 5-7 minutes. Remove, and set aside.
20140109_171922Add the onions to the pot and cook until soft and somewhat translucent, about 5-7 minutes. Add the garlic and cook one minute more, stirring frequently so that the spices don’t burn.

Add the diced sweet potatoes to the pot and cook for 10 minutes.
20140109_173252Once the sweet potatoes have softened slightly, add enough vegetable or chicken stock to the pot to just cover them. Bring the mixture to a boil, then reduce and simmer for 15 minutes or until the sweet potatoes are very tender.
20140109_174255
Remove the pot from the heat and blend or mash the soup until you like the consistency. I like to leave some chunks of sweet potato, rather than making this smooth like bisque.
20140109_180547
Return the pot to the stove over medium heat and add the collard greens and chickpeas. Simmer the soup for 10-15 minutes or until the greens are tender.
20140109_191507Serve hot, garnished with some roasted chickpeas, pumpkin seeds, or sunflower seeds for some crunch.
20140109_191523
Nothing like a bowl of something hearty to warm your body and soul on a cold January evening. And a reminder that sometimes being thrown out of your regular routine leads to a whole new experience of comfort, ease, and culinary satisfaction.

Ciao for now,

Neen