Archive | Beginner RSS feed for this section

One Pan Wonder: Roasted Chicken with Sweet Potatoes and Dates

29 Jun

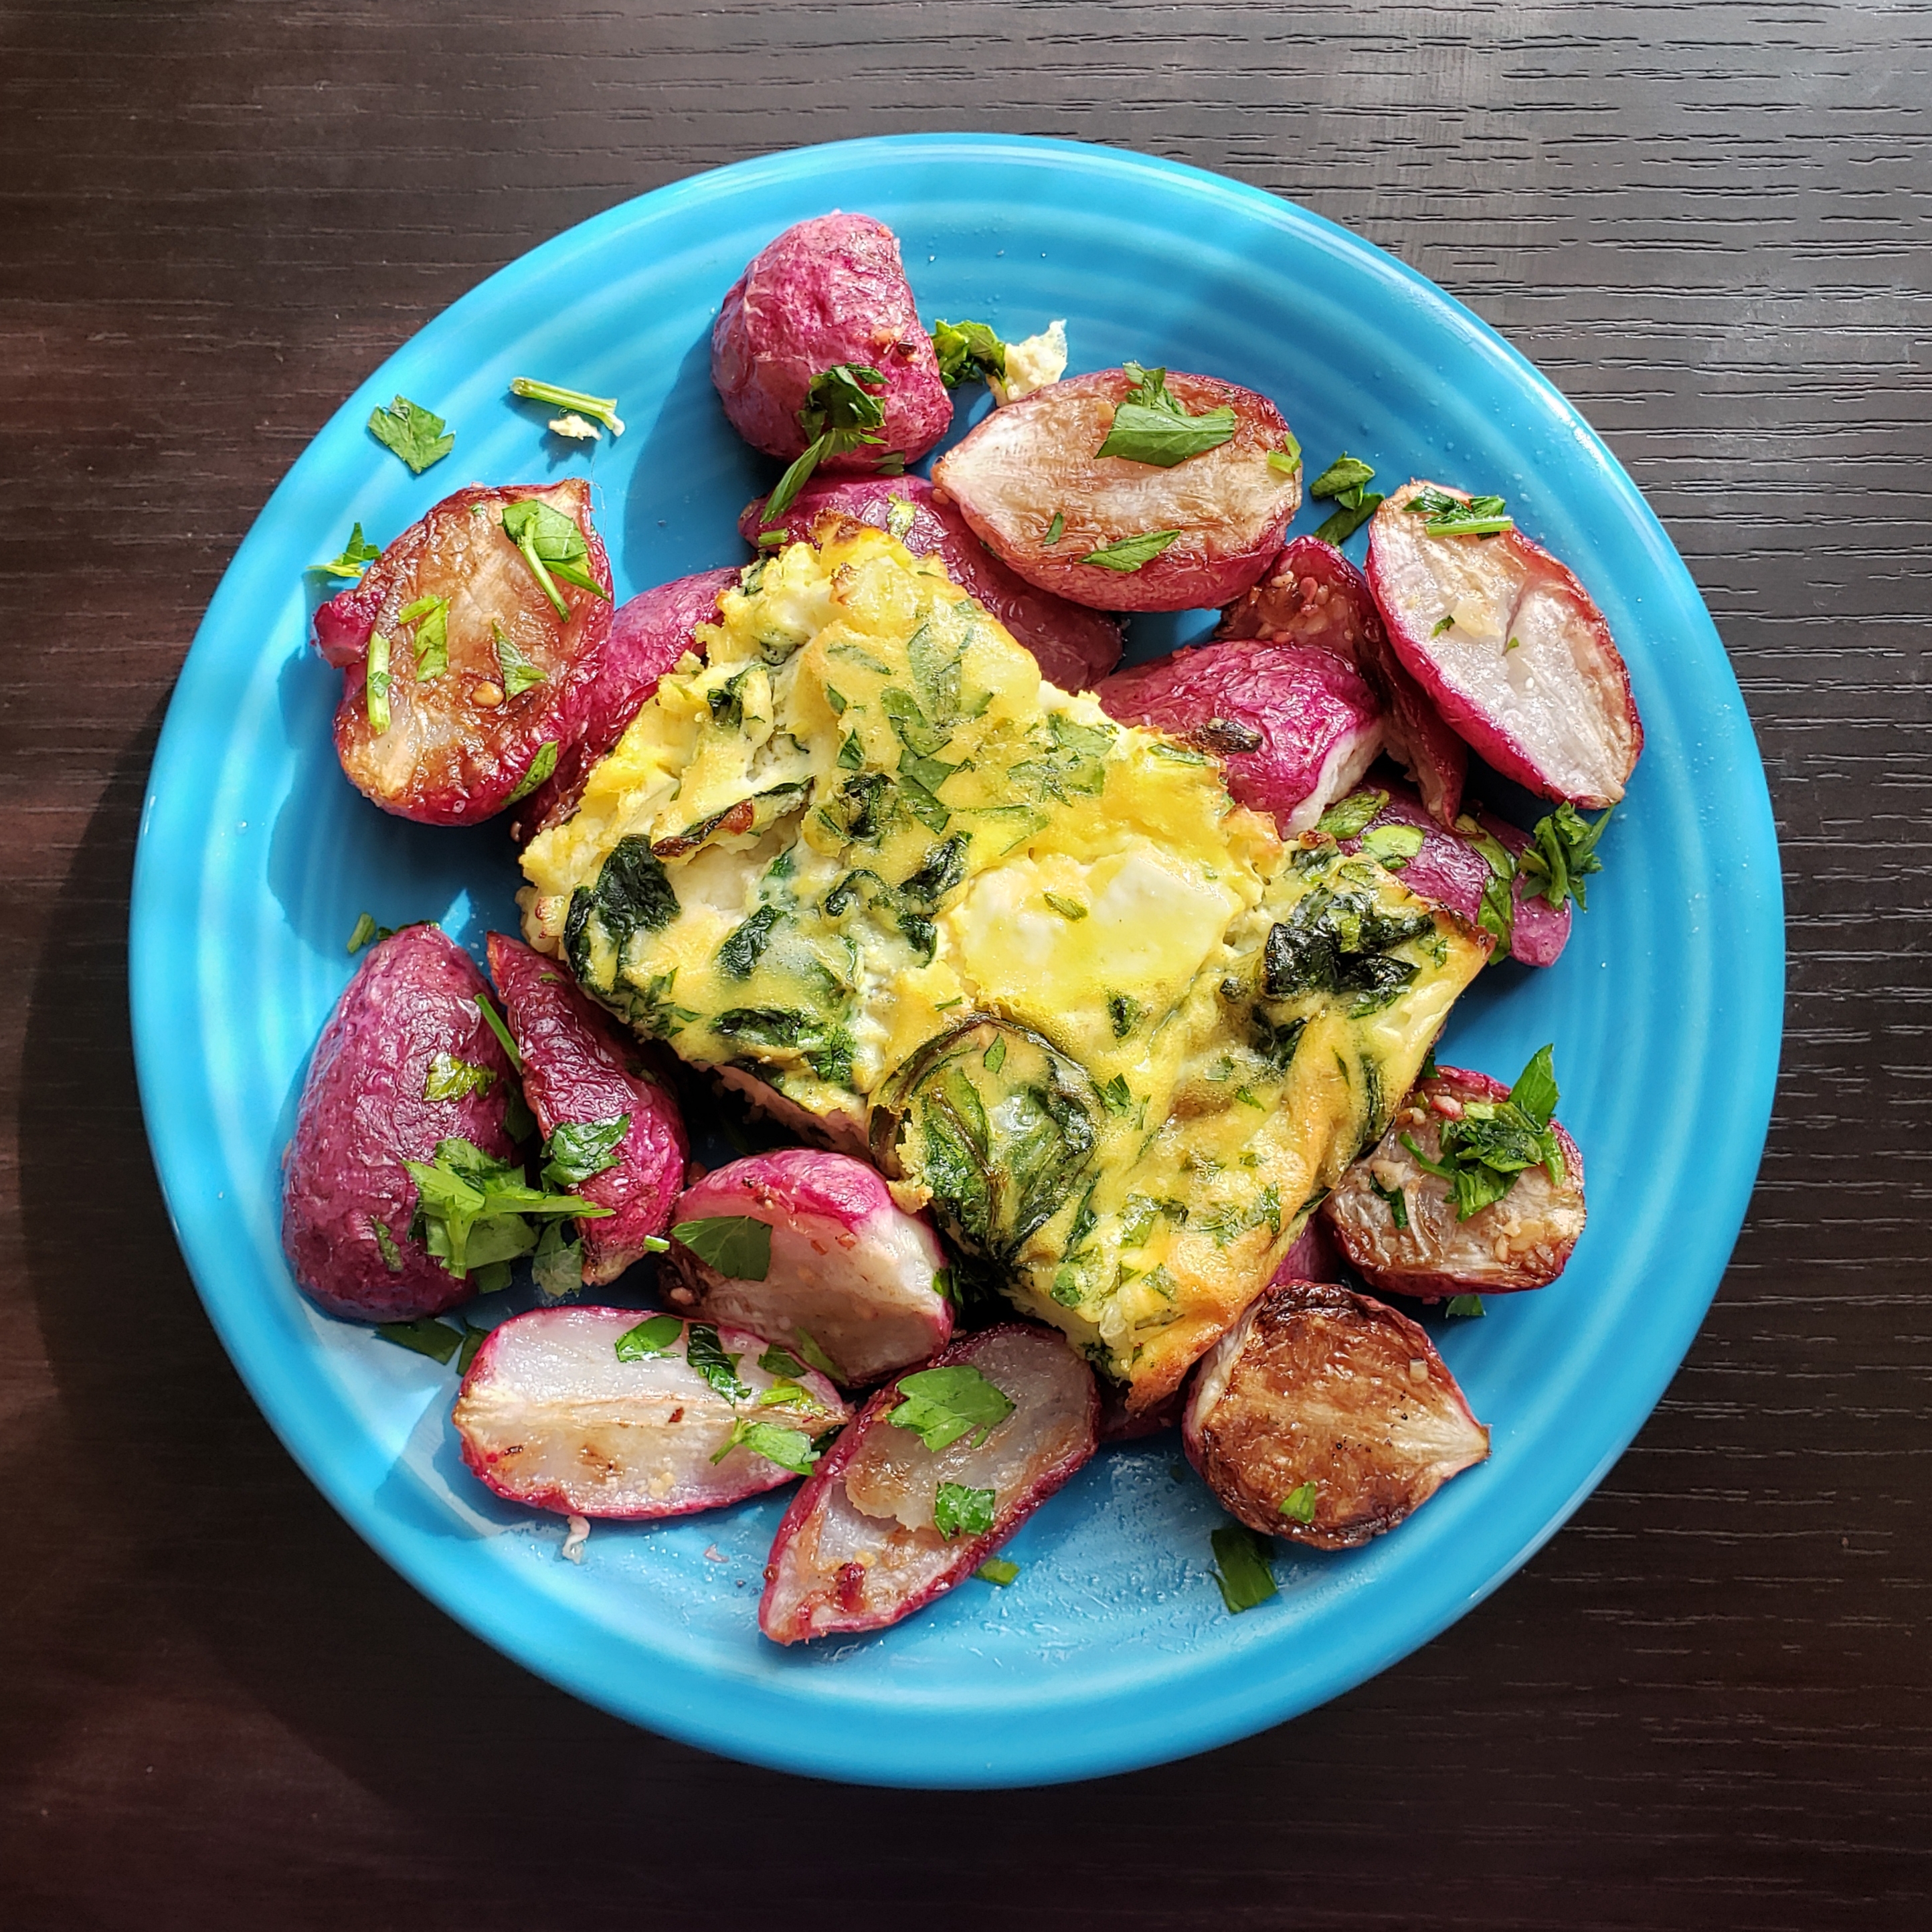
It’s always a delight to find a dish that wanders along the border of savory and sweet in a way so perfect that it’s completely satisfying. Recently I started getting a bi-weekly Imperfect Produce box, and in my most recent order I was gifted a couple of large sweet potatoes.  As soon as I got them, I was thinking of ways to roast and bring out their flavor, and what better way to balance that than with a well-seasoned chicken roasting over top of them?

I used to love the combination of sweet potatoes with brown sugar, but I’ve been off of refined sugar for a couple of months to cut down on inflammation, so I decided to bring that same flavor to the party with the addition of some soft, caramel-y, rich dates. But in order to keep things from getting cloying, we’d need just the right amount of tangy and umami flavors to bring it all together. And let me tell you, this dish plays like a well-tuned orchestra. Plus, it only takes one pan and is perfect for a weeknight meal.

Roasted Chicken with Sweet Potatoes and Dates

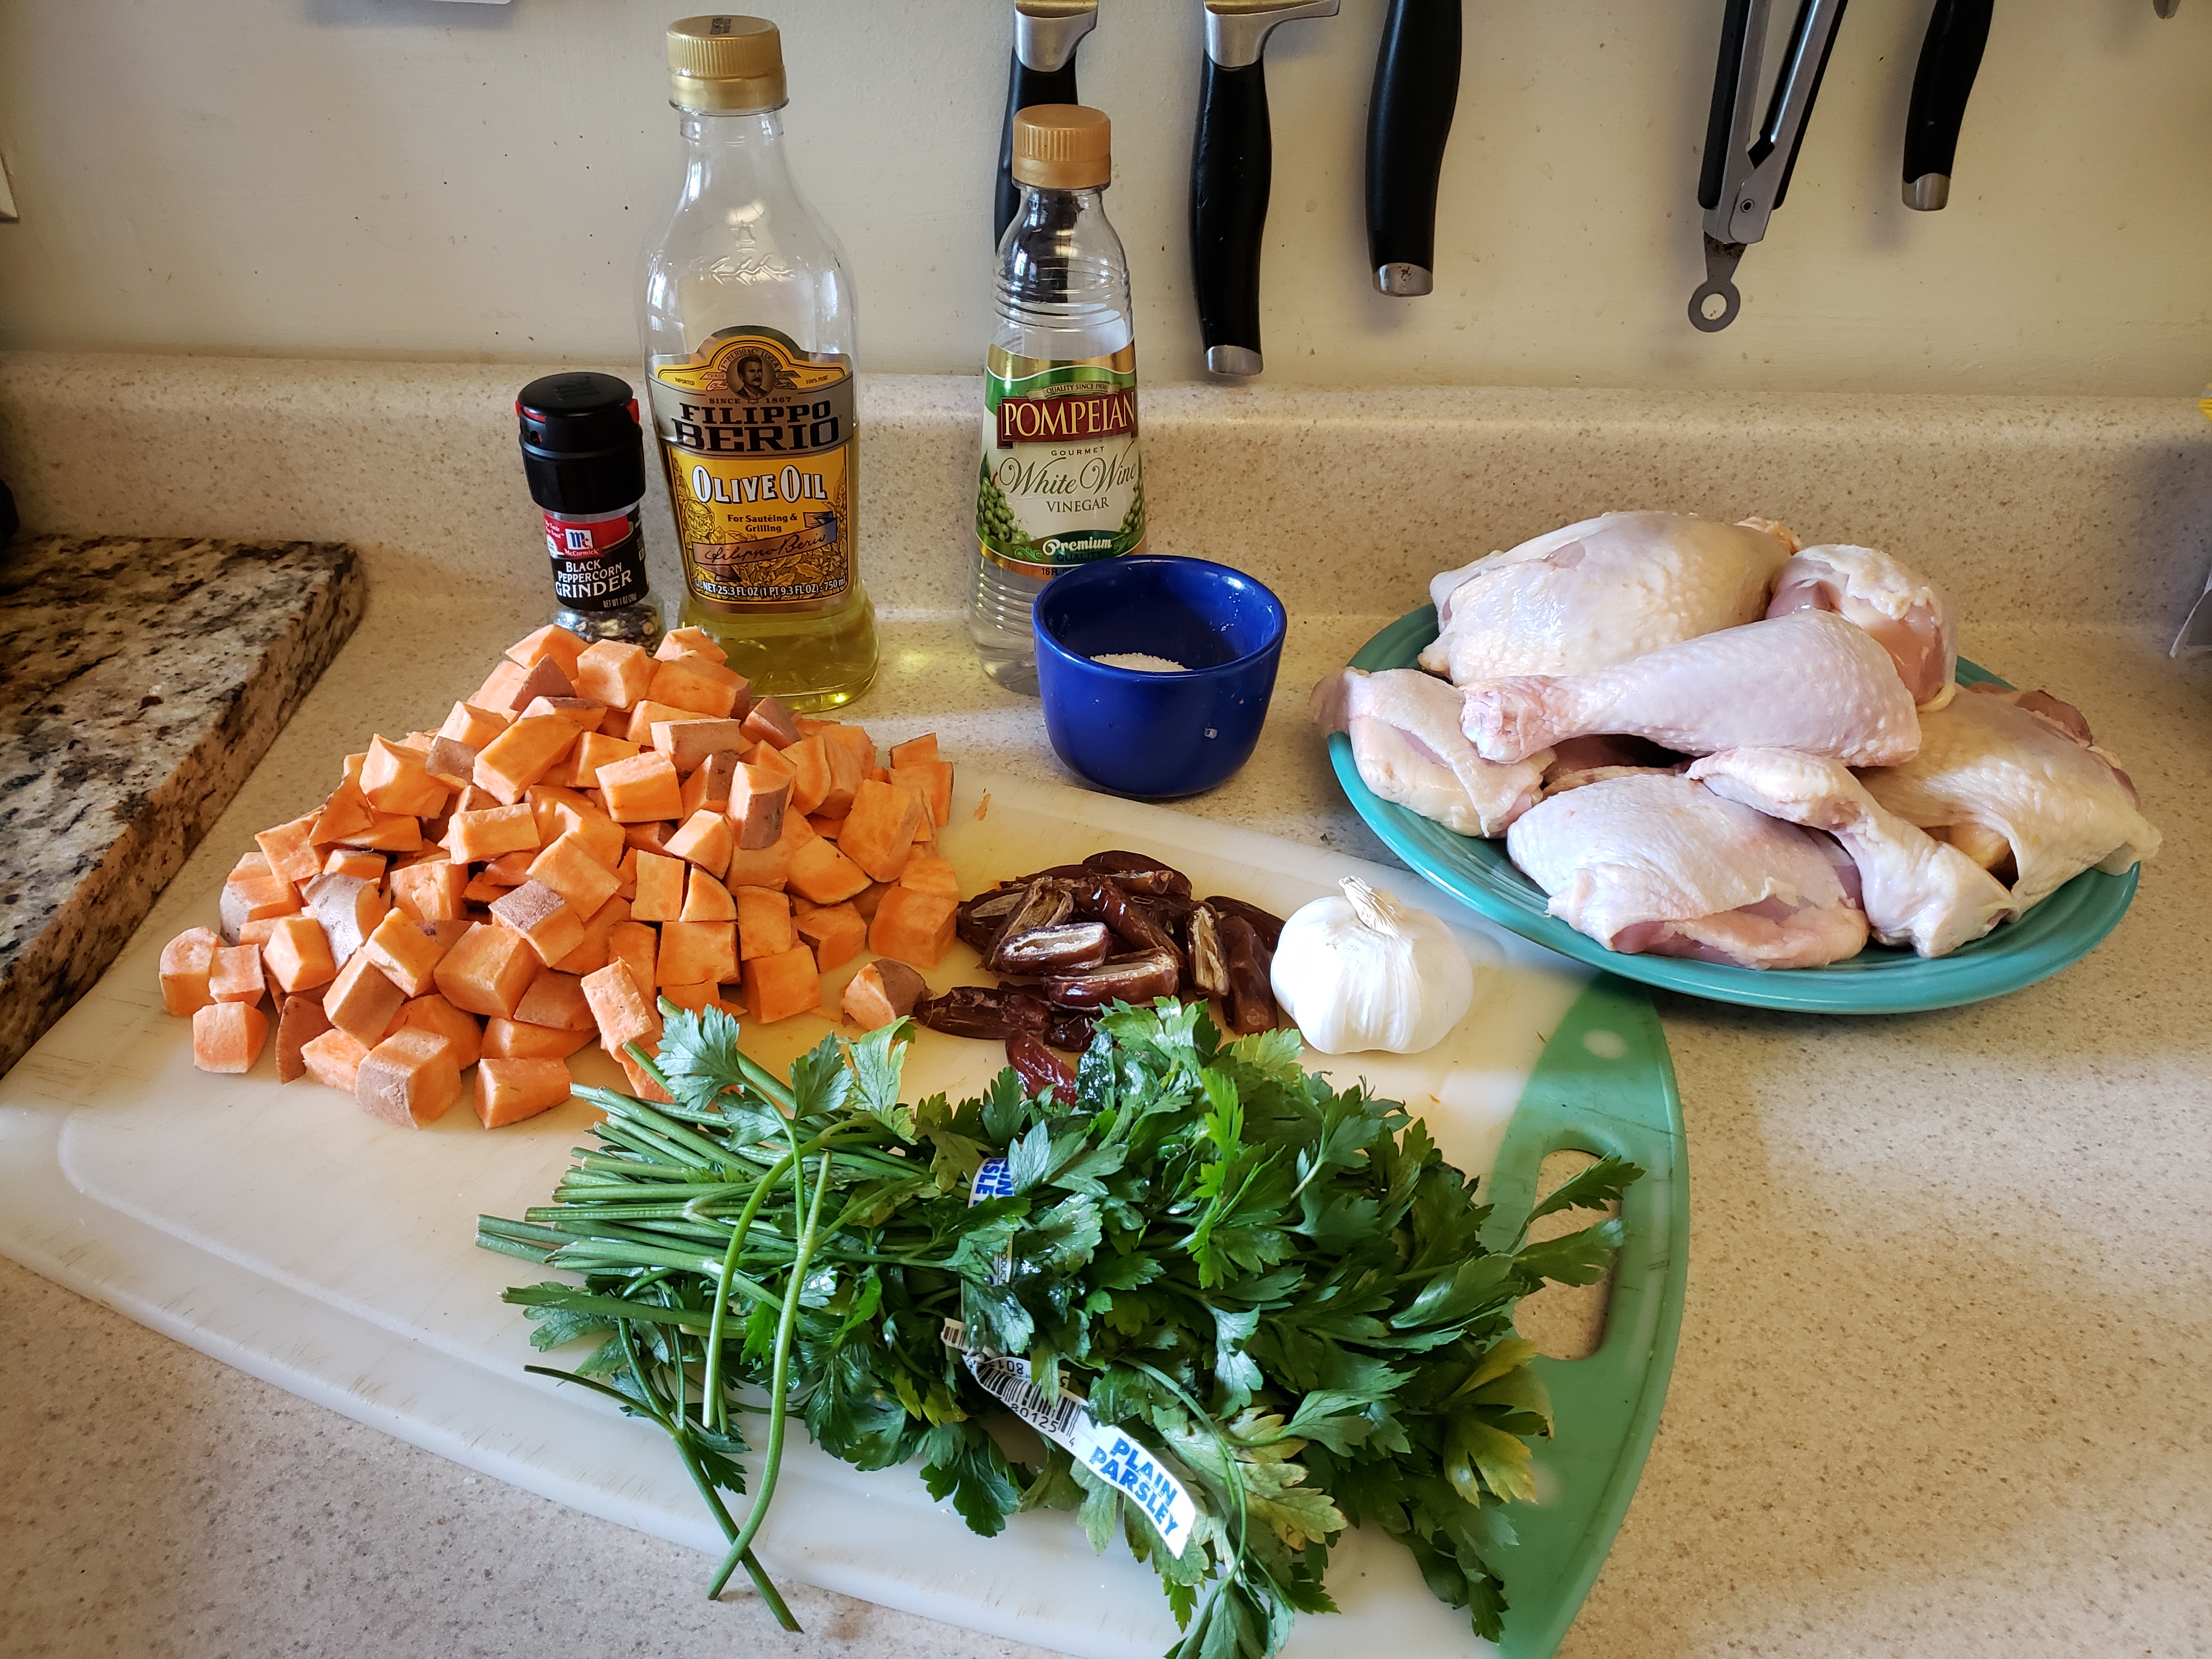
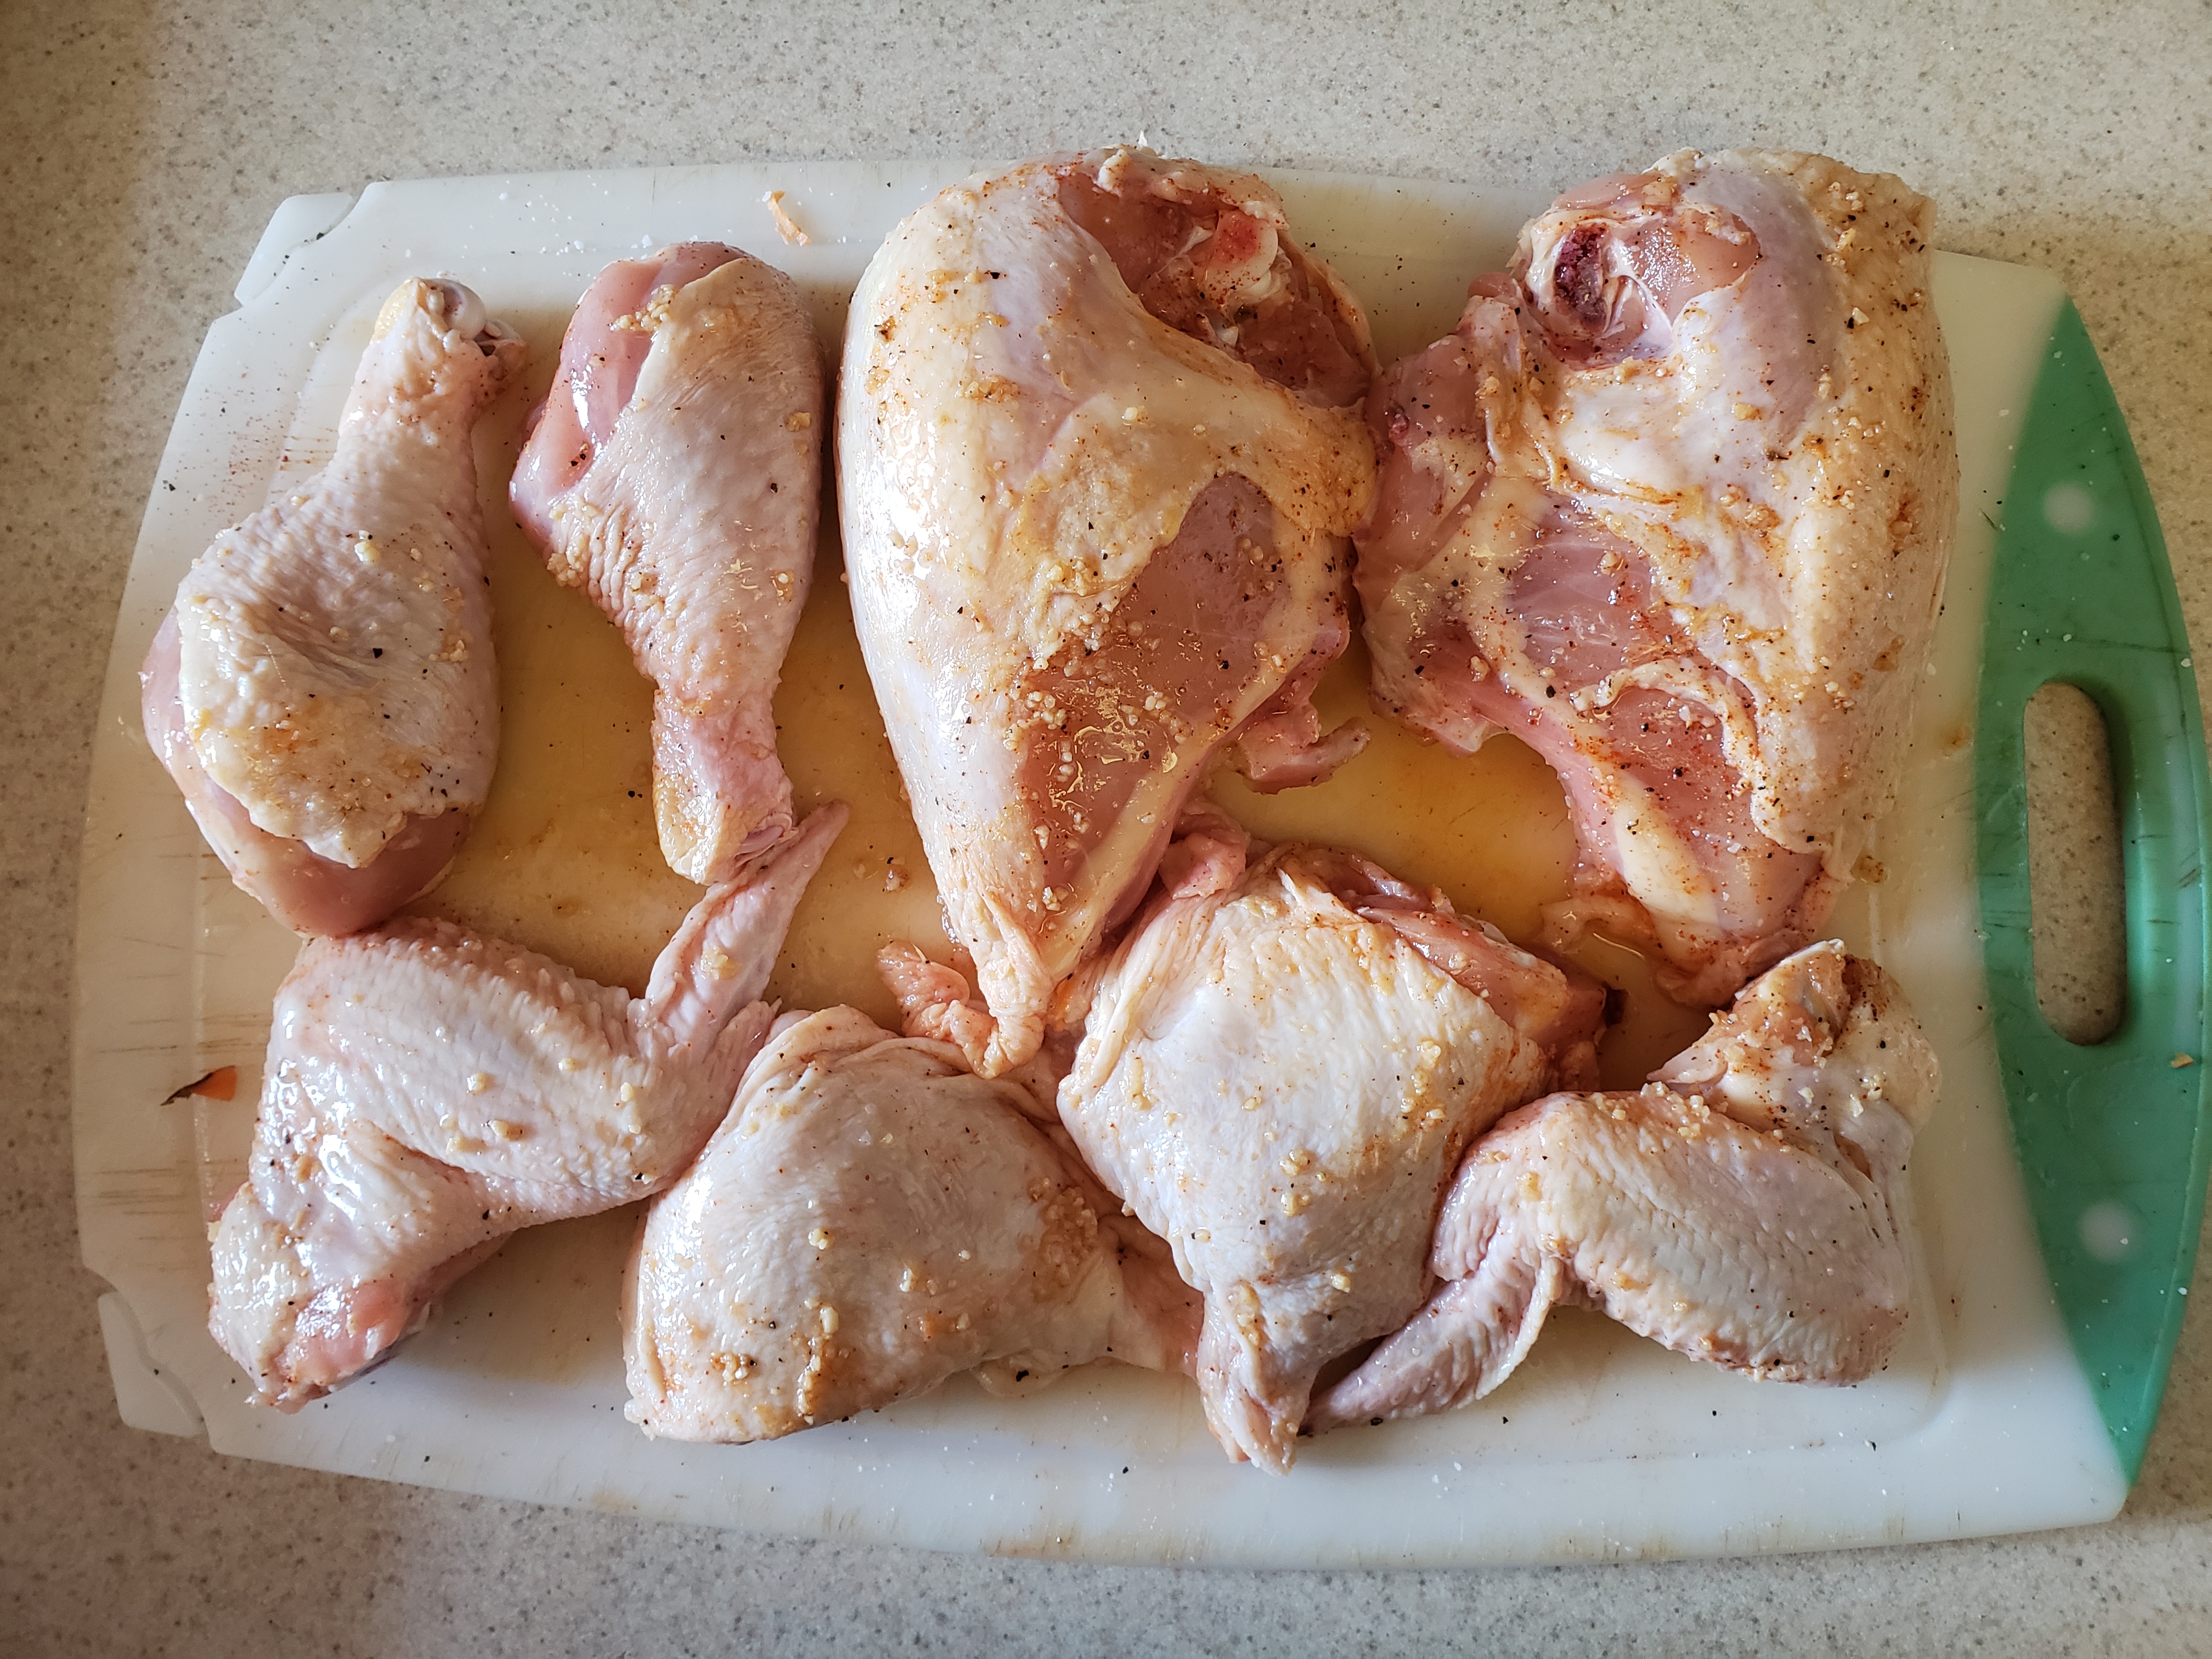
  • 1 4-6 lb. chicken, cut into 8 pieces (two breasts, two wings, two thighs, two legs. Reserve backbone for making stock.)
  • 2 large sweet potatoes, unpeeled and cut into bite size pieces
  • 15 dates, pitted and halved
  • 4 cloves of garlic, minced
  • ¼ cup white wine vinegar
  • 1/3 cup water or unsalted chicken stock
  • 2-4 tbsp. olive oil
  • Salt, pepper, and paprika
  • Fresh parsley to garnish

Preheat an oven to 425 degrees F.

Place the sweet potatoes and dates in a roasting pan, season with salt and pepper, and toss with the vinegar, chicken stock, 2 tbsp. of olive oil, and 2 cloves of minced garlic.

Rub the chicken pieces with the remaining olive oil, and then season on all sides with salt, pepper, paprika, and the remaining garlic.

Place the chicken pieces in one layer on top of the sweet potato mixture.

Roast the chicken for 1 hour, until the skin is well-browned, the pieces are firm, and the juices run clear. An instant-read thermometer should read at least 165 degrees when inserted in the thickest part of a breast or thigh.

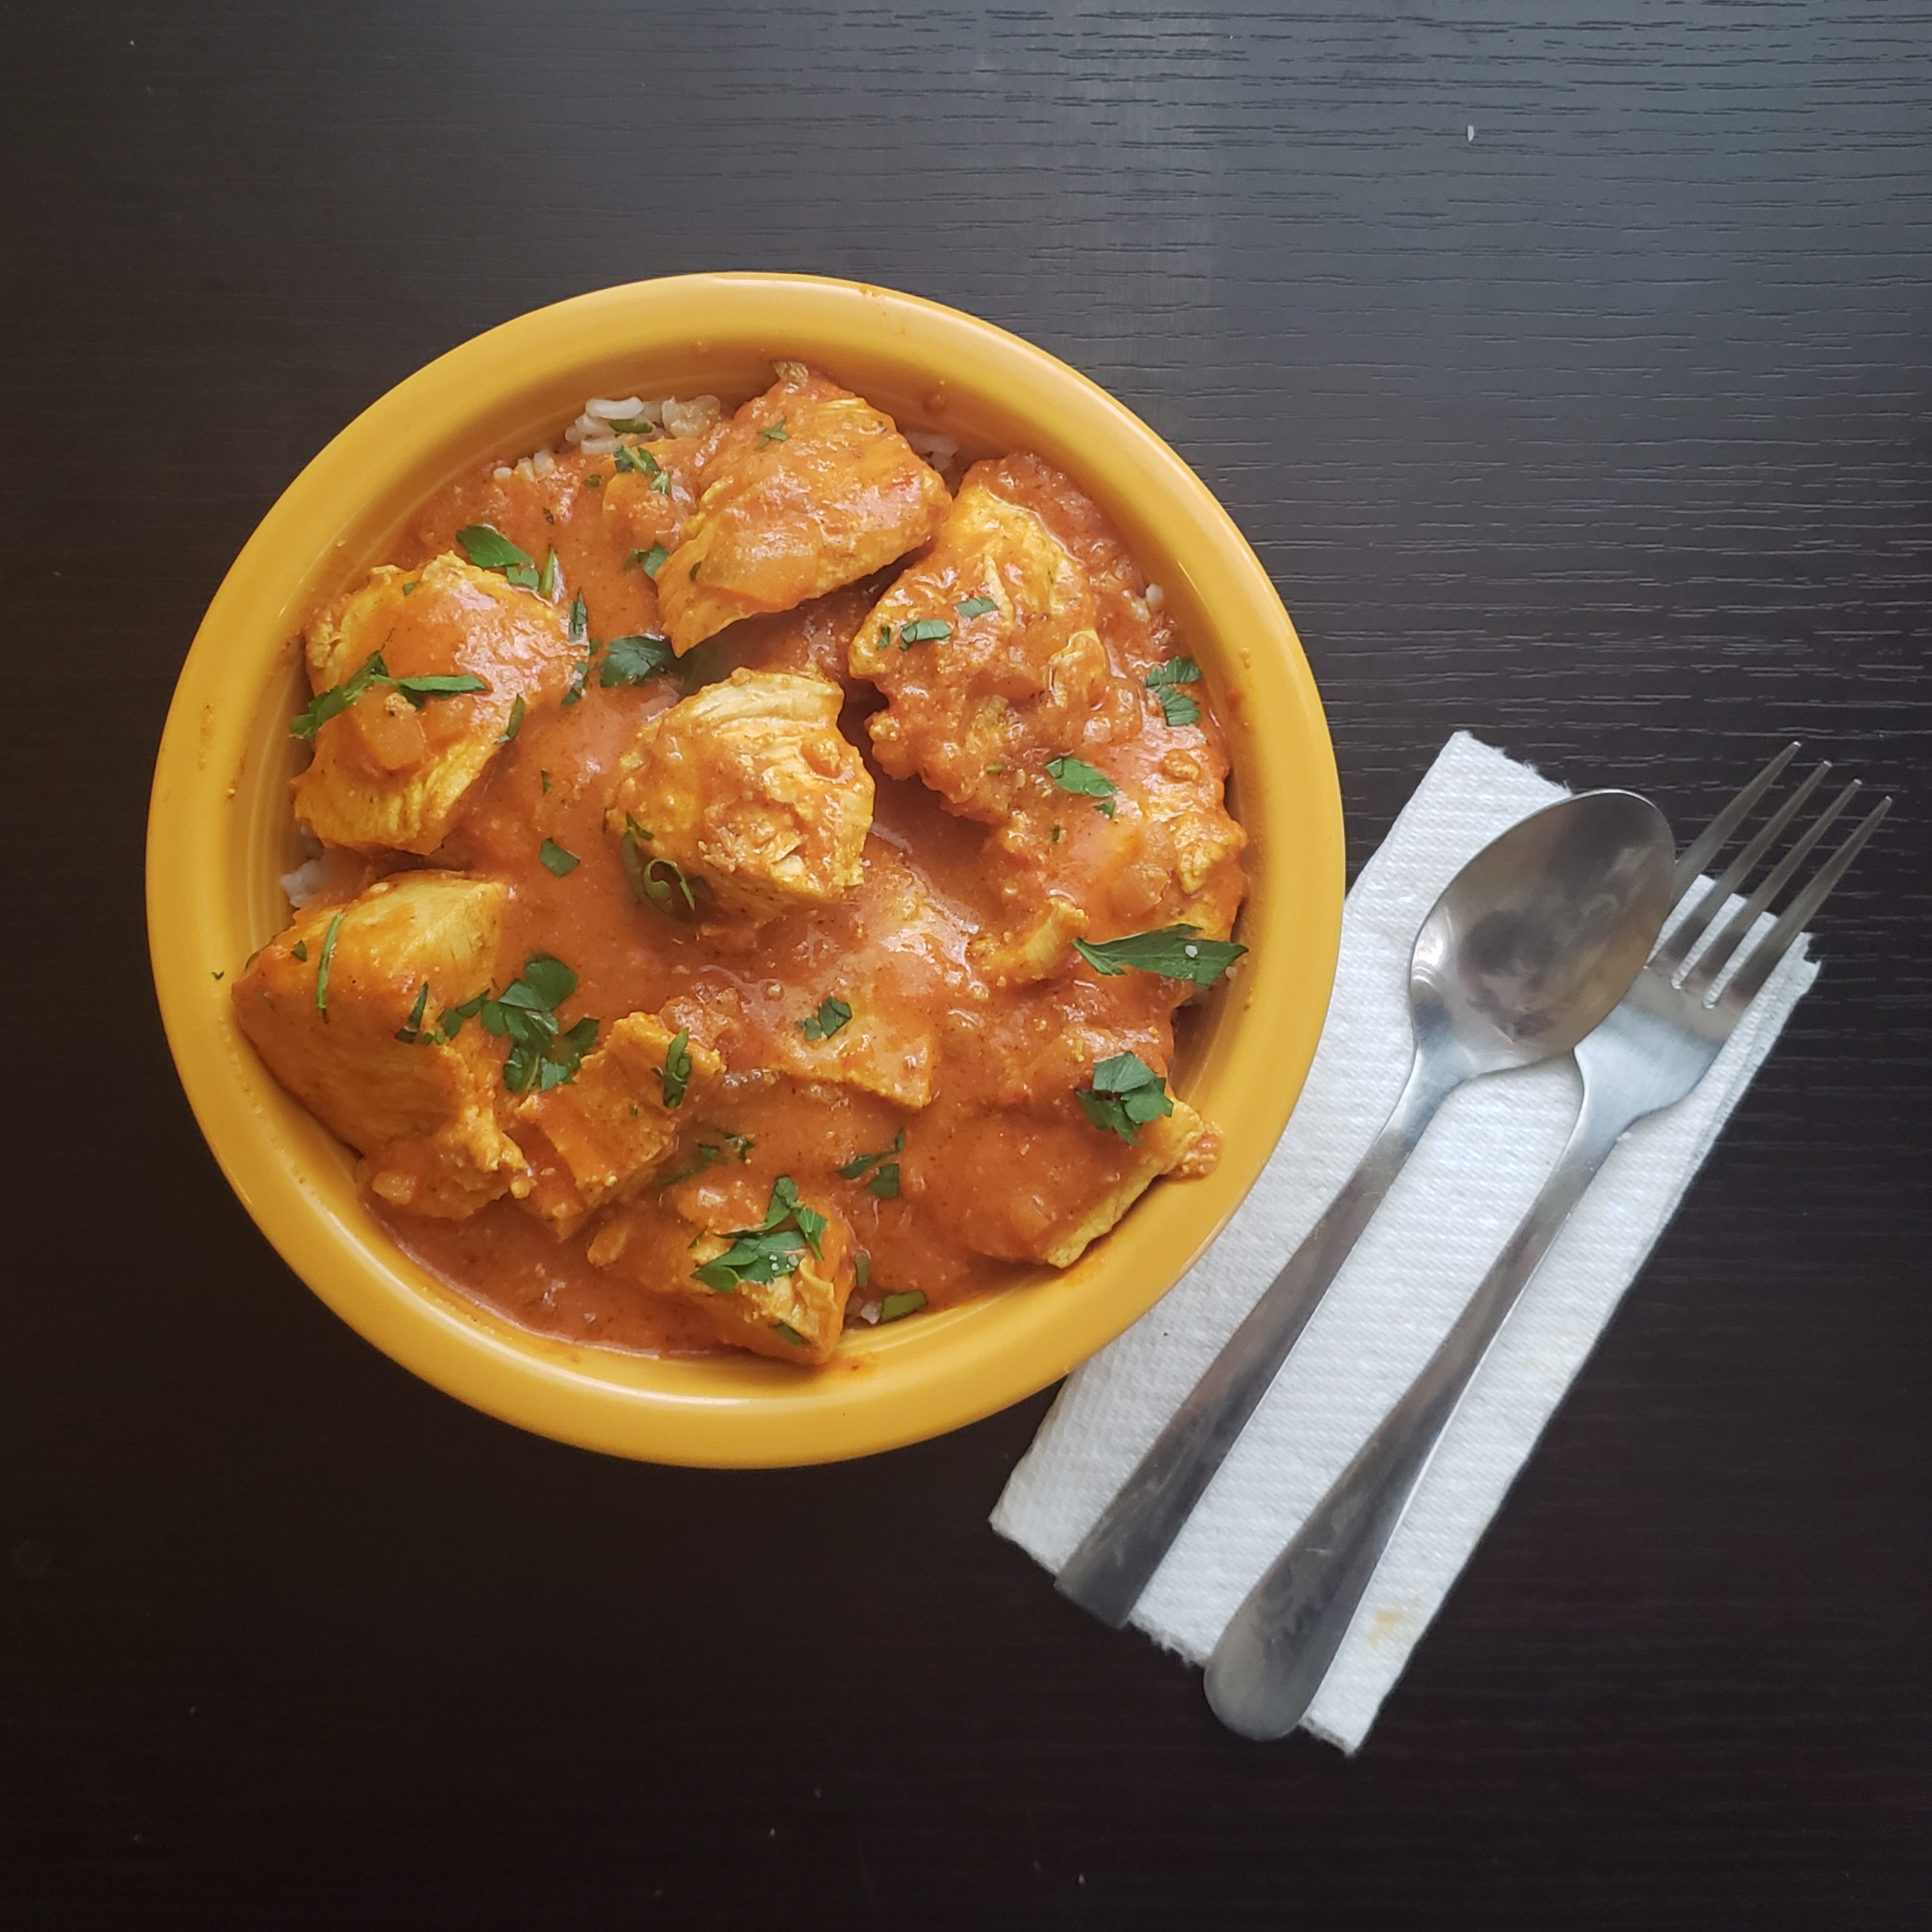
Let the chicken rest for 15 minutes and then move the chicken and potato mixture to a platter. Spoon the sauce over top, garnish with fresh parsley, and enjoy!

The chicken is rich and juicy, the potatoes are soft (but not mushy), and the dates are perfectly caramelized. The pan sauce is velvety and savory. The best part? The whole dish is better even hours (or days) later when the flavors have all had time to meld together. This makes a delicious meal all on its own, but would also go great with a cool, crunchy, refreshing salad alongside it.

Hope you get a chance to get this merry band of ingredients together soon. This recipe is definitely going to be a part of my regular rotation. I’m really looking forward to playing around with more surprises from my produce box and can’t wait to share the results with you!

Ciao for now,

Neen

A Surprising Start: Roasted Cauliflower Steaks with Braised Chard, Beans, and Kalamata Olives

2 Jun

I often eat what some might call non-traditional breakfasts. The fact is, I usually work 11-7 or 1-9 shifts at the pharmacy, so mornings are when I have the most time to cook. So I like to experiment with different foods, and as long as it is healthy, filling, and delicious, who really cares if it’s not “breakfast food”? Since I’ve been encouraged to eat more vegetables in the morning, I’ve been browsing the farmers market a lot for what’s fresh and in-season to maximize the flavor in what I’m cooking.

This week I found some beautiful rainbow chard, sweet onions, and cauliflower. I think the best way to get the most out of cauliflower is to roast it, so I decided on some roasted cauliflower steaks and braised greens for a relaxed weekend breakfast. Not only did it make for an excellent start to the day, the leftovers were even more delicious later on.

Roasted Cauliflower with Tomato-Braised Chard, Beans, and Kalamata Olives

  • 1 head cauliflower
  • 3 cloves garlic, minced
  • 1 medium yellow onion, diced
  • One 15 oz. can of cannellini beans, drained
  • 1 cup canned diced tomatoes with juice
  • 2 bunches (about 20-24 oz.) rainbow chard, stems diced and leaves chopped into 2 in. pieces
  • 2 tbsp. balsamic vinegar, divided
  • ¼ cup Kalamata olives, pitted and sliced
  • ¼ cup low-sodium or no salt added chicken broth
  • ½ tsp. dried oregano
  • Olive oil
  • Salt and freshly ground black pepper

Preheat the oven to 450 degrees F and line a baking sheet with parchment paper. Place one rack in the upper third oven the oven and one in the lower third.

Slice the core of the cauliflower so the head will sit flat. Then cut two 1 in. slices from the center and reserve the remaining florets for another recipe.

Lay the cauliflower on the prepared baking sheet. Brush the cauliflower steaks with olive oil and season each with a clove of minced garlic, salt, and pepper on both sides.

Roast on the upper rack for 15 minutes and then turn and roast on the bottom rack for 5 minutes more.

While the cauliflower is roasting, heat about a tbsp. of olive oil in a large saute pan over medium heat. Saute the onion for 2-3 minutes or until slightly softened.

Add the rainbow chard stems and cook2-3 minutes or until crisp-tender.

Add the broth, tomatoes, beans, Kalamata olives, chard leaves, oregano, and 1 tbsp. balsamic vinegar to the pan and saute for 4-5 minutes or until the chard is wilted. Taste and season with salt and pepper as needed.

To serve, place a generous portion of the braised vegetables in a bowl or on a plate. Place a cauliflower steak on top and drizzle with the remaining balsamic vinegar.

The roasted cauliflower retains a slightly firm texture and has wonderful caramelization from its quick roast. The greens are well balanced with sweet tomatoes, briny olives, and a little pop of acid from the balsamic vinegar. It’s a dish that wakes up the palette with a variety of textures and flavors. It’s also packed with everything you need to start your day with a filling, energizing, but not heavy meal.

Of course this is a great lunch or light dinner too, but don’t be afraid to step out of your breakfast comfort zone. Make your morning meal a little exciting—something to look forward to! Ask yourself what you’re really hungry for and you’ll find a new world of inspiration waiting.

Ciao for now,

Neen

Making a Memory: Chicken Tikka Masala

27 May

The summer I lived in England 13 years ago was uncharacteristically hot. Most days were in the 90s and sunny, but near the end of my trip were a few of the cloudy, rainy days I was told to expect. Because of the weather, we’d been consuming a lot of pretty light food, but one cooler night a group of us went out to eat and I found myself wanting something heartier.

One dish that appeared nearly everywhere was chicken tikka masala, a curry described by former British Foreign Secretary Robin Cook in 2001 as “a true British national dish, not only because it is the most popular, but because it is a perfect illustration of the way Britain absorbs and adapts external influences. Chicken tikka is an Indian dish. The masala sauce was added to satisfy the desire of British people to have their meat served in gravy.”

At the time, I was pretty unfamiliar with Indian food (or dishes of Indian origin) and wasn’t sure what to expect from the spices of that region. My tomato sauces at home were full of garlic, basil, and oregano, sometimes with the additions of sausage or meatballs. This was a different kind of tomato sauce altogether, with a palette full of aromatics and spices to flavor the juicy chicken simmering therein.

I was hooked by the smell first, like breathing in a warm, spicy hug. And I mean spicy in an aromatic sense, not heat. There were so many different smells to catch and yet somehow they came together in harmony. The curry sauce was flavorful, rich, and creamy, and the chicken breast juicy and succulent. It was a perfect stew for a cool night, perfect alongside soft and warm naan bread to sop up every drop of the sauce.

Chicken Tikka Masala

  • 2 lbs. boneless skinless chicken breasts or thighs, cut into 2 in. pieces
  • 2 tsp. kosher salt
  • 2 tsp. garam masala
  • 2 tsp. cumin
  • 1 tsp. turmeric
  • 1 tsp. coriander
  • 1 tsp. paprika
  • ½ tsp. black pepper
  • ¼ tsp. cayenne pepper
  • 1/8 tsp. cardamom
  • 1 cup plain yogurt (I used nonfat, but any fat content works)
  • 2 tbsp. olive oil
  • 1 onion, chopped
  • ¼ cup tomato paste
  • 4 cloves garlic, minced
  • 1 tbsp. fresh ginger, grated
  • 1 cup crushed tomatoes
  • ½ cup chicken stock or broth
  • 1 14 oz. can light coconut milk
  • Salt and pepper to taste

In a small bowl, combine the yogurt and spices and mix well.

Place the chicken in a nonreactive container or zip-top plastic bag, pour on the yogurt, and mix well. Let the chicken marinate in the spiced yogurt for 2-4 hours in the refrigerator.

Heat the olive oil in a large saute pan over medium-high heat and brown the chicken 2-3 minutes per side.

Remove the chicken to a plate, deglaze the pan with a splash of chicken stock, scrape the brown bits off the bottom of the pan, and pour that onto the chicken. Return the pan to the stove and reduce the heat to medium-low.

Pour in a little bit more olive oil, add the onion and saute 3-4 minutes, or until soft.

Add the tomato paste and cook for another 2-3 minutes.

Stir in garlic and ginger.

Deglaze the pan with the crushed tomatoes. Add the coconut milk and broth, and bring the curry to a gentle simmer.

Add the chicken and simmer for 15-20 minutes or until thickened to your desired consistency.

Serve over rice or with warm naan to soak up all of the wonderful sauce.

Over the years this has remained one of my favorite curries to make. For me it’s not just seeking to recreate a dish, but a feeling and a moment in time. When I taste this I am instantly transported to that sweet summer night surrounded by laughter and good company, and feel the comfort that comes from that. And it helps that it tastes absolutely delicious.

Ciao for now,

Neen

Restaurant Riff: Roasted Eggplant with Crispy Chickpeas and Garlic-Yogurt Sauce

26 May

Often, when my parents come to visit me we go to this great Lebanese restaurant in Arlington that serves small plates meant for sharing. It’s an awesome way to enjoy a meal because we get to taste lots of different things and try new dishes every time.

But there are definitely some items that are regular favorites. One is a variation of a dish called fatteh; roasted eggplant with a garlic-yogurt sauce and crispy chickpeas. It’s sooo good we order it twice in the same meal sometimes. I was craving it this week and decided to see if I could create a variation at home.

This recipe requires only a few simple ingredients, but it turns into something magical as the roasted components in combination with the creamy sauce create a range of different flavors and textures.

Roasted Eggplant with Crispy Chickpeas and Garlic-Yogurt Sauce

Crispy Chickpeas

  • 2 cans chickpeas, drained and patted dry
  • Olive oil
  • 1 tsp. salt
  • ½ tsp. paprika
  • ½ tsp. cumin
  • ½ tsp. curry powder
  • ½ tsp. coriander
  • Pinch cayenne pepper (or more if you like spicier food)

Roasted Eggplant

  • 2 small eggplant (I used graffiti eggplant, but Chinese eggplant would work well)
  • 3 cloves garlic, minced
  • Olive oil
  • Fresh parsley or sumac

Garlic-Yogurt Sauce

  • ¾ cup plain yogurt (any fat content works)
  • 2 cloves garlic, minced
  • ½ tsp. salt

Preheat the oven to 400 degrees F.

Spread the drained chickpeas on a sheet pan lined with aluminum foil and dry-roast for 30 minutes.

Remove from the oven and toss with a small amount of olive oil (maybe a tsp. or two), then add the cumin, coriander, curry powder, paprika, cayenne pepper, and salt and stir to coat the chickpeas.

Return the chickpeas to the aluminum foil-lined sheet pan and roast for 30 more minutes, shaking the pan every 10 minutes to prevent burning.

Remove from the oven and set aside to cool.

Now onto the eggplant! Cut the eggplants in half length-wise and then score with a diamond pattern, taking care not to cut through the skin.

Drizzle the eggplant with the olive oil, then rub on the minced garlic, and sprinkle with salt.

Roast for 30 minutes or until the flesh is soft.

While the eggplant is roasting, combine the yogurt, garlic, and salt in a large bowl and stir well to combine.

To assemble the dish, place the eggplant, cut side up on a serving plate. Drizzle on the yogurt sauce and then top with the crispy chickpeas and chopped parsley or sumac. Finish with a sprinkle of kosher salt. Serve warm or at room temperature.

The roasted eggplant is sweet and soft, the yogurt creamy and tangy, and the chickpeas add a perfect salty crunch. It’s a dish that hits all the notes for sure.

As an added bonus, the crispy chickpeas in this recipe make a great snack. I keep them in a jar behind the counter at the pharmacy and grab some every few hours as a quick pick-me-up.

I love being inspired by other chefs and am excited to have created my own riff on something I enjoy so much. (Now I can have it anytime, woohoo!) Hope you try this one out—maybe even see how it tastes with different spices on the chickpeas. Take my spin, make it your own, and enjoy it soon.

Ciao for now,

Neen

Crisper Clean-Out: Vegetable and Feta Frittata

25 May

Can you tell I’m on an egg kick? The nutritionist I’m working with has really emphasized the importance of eating vegetables and protein at breakfast. During the week, I usually have leftovers from dinner, but on the weekends I like to cook something fun. Today I took the opportunity to clear out some small quantities of vegetables I had in my refrigerator from making other dishes and put together a truly tasty vegetable frittata. You can mix and match your own combinations of vegetables, leftover meats, and cheeses, but this is my favorite variation.

Most frittata recipes I find call for a dozen eggs, which is kind of excessive when you are only one person who doesn’t want to put all of her eggs into one dish. This is a smaller, but super filling frittata that will comfortably serve a generous slice for 4 people or a side-dish style slice for 6. This stovetop-and-oven method provides a nice, crispy bottom that makes this easy to slice and serve.

Vegetable and Feta Frittata

  • 6 large eggs
  • 1-2 tbsp. light cream
  • 2 cups rainbow chard, chopped, leaves and stems separated
  • 2 cups broccolini, chopped
  • 8 oz. mushrooms, sliced
  • 1 leek, chopped
  • 2 oz. feta cheese, crumbled
  • 1 tbsp. olive oil
  • ½ tsp. dried oregano
  • Salt and fresh ground black pepper to taste
  • Fresh parsley to garnish

Preheat an oven to 425 degrees F.

Beat the eggs, oregano, and light cream together in a large bowl and season with salt and fresh ground black pepper.

Heat the oil in an 8 in. cast-iron or nonstick pan over medium heat. Add the leeks and saute for 2-3 minutes or until they begin to soften.

Add the mushrooms and cook another 2-3 minutes or until they give up their juices.

Add the broccolini and chard stems to the pan and saute 4-5 minutes or until they are bright and begin to get tender.

Finally, add the chard and cook just until wilted, about a minute or two.

Pour the egg mixture over the vegetables and stir briefly to combine. Top with the crumbled feta and cook for 1 minute.

Carefully place the pan in the oven and bake for 7-10 minutes or until set and golden brown around the edges. Sprinkle on fresh parsley.

Slice, serve, and enjoy!

The leeks are sweet and there is a wonderful variety of textures and flavors from the broccolini, mushrooms, and chard. The feta adds a salty, creamy kick that finishes the dish beautifully.

I hope you have a happy and relaxing Memorial Day weekend. It’s farmers market season so go get inspired by what you find and make your own special frittata creations!

Ciao for now,

Neen

A Perfect Start: Spanikopita Egg Casserole and Garlic Roasted Radishes

20 May

For the last few months, I’ve been fundraising for the Arthritis Foundation’s Walk to Cure Arthritis and this weekend the event finally took place! After a lot of rain here recently, we got an absolutely gorgeous day for the walk. My mom, dad, Joe, and my cousin Alyssa came to support me and hear me sing the National Anthem.

Of course, I had to make us a delicious breakfast before our morning exercise so we had oatmeal, yogurt and a protein and vegetable packed egg casserole that turned out really great. This morning I reheated a piece and enjoyed it along with some garlic-roasted radishes—too good to not share!

Spanikopita Egg Casserole

  • 8 large eggs
  • 5 oz. greens (I used a baby kale, chard, and baby spinach mix)
  • 1 tbsp. olive oil
  • 1 onion, diced
  • 2 cloves garlic, minced
  • ½ cup light cream or half and half
  • ½ cup ricotta cheese
  • ½ cup feta cheese, crumbled
  • ¼ cup fresh parsley, finely chopped
  • ½ tsp. kosher salt
  • A few grinds of black pepper

Garlic-Roasted Radishes

  • 8 oz. radishes, quartered (or halved if small)
  • 2 cloves garlic, minced
  • 1 tbsp. olive oil
  • Salt and pepper to taste
  • 2 tbsp. fresh parsley, finely chopped

Preheat an oven to 350 degrees F and lightly grease an 8×8 in. baking dish.

For the egg casserole, begin by sautéing the onion in the olive oil for 4-5 minutes or until slightly softened. Add the garlic and cook 1 minute more.

Add the greens and cook just until wilted, about 1-2 minutes.

Transfer the mixture to the baking pan, spreading it evenly along the bottom.

In a large bowl, whisk the eggs and light cream together.

Then add the ricotta, feta, and parsley and mix well.

Pour the egg mixture evenly over the spinach mixture and stir gently.


Bake the casserole for 40-45 minutes or until set and golden around the edges. You’ll get 6 generous slices from this recipe.

For the radishes, preheat the oven to 425 degrees F. Toss the radishes with the oil, salt, and pepper, and then spread evenly on a foil-lined baking pan.

Roast for 25 minutes, tossing once, until lightly caramelized. Stir in the garlic and roast for 2-3 minutes more. Remove from the oven and toss with the parsley.

This really makes for a filling breakfast. The egg casserole tastes rich and creamy, and the slightly sweet roasted radishes make for a perfect accompaniment.

We really had a great time at the walk this weekend. It was so inspiring to meet others battling the various types of arthritis and hear their stories. For all the challenges we face, the event was uplifting and overwhelmingly positive. Hope you enjoy these dishes and share them with your support team soon!

Ciao for now,

Neen