A New York State of Mind: Bagels

23 Jan

A lot comes to mind when I think of New York City. Growing up it was this mysterious place that people talked about as the center of the universe. It wasn’t until my seventeenth birthday that my first trip there was even planned. My parents, knowing my grand lifelong obsession with Billy Joel, decided to take me to New York during the opening weekend of the musical based on his songs called “Movin’ Out.” I was star struck from the minute we arrived: Times Square was a mob scene, impossible for tour buses to navigate due to the crowd’s determination to catch a glimpse of Eminem waving out the window at Total Request Live. When I sat down in the theatre to see “Movin’ Out,” I realized that James Gandolfini was directly in front of me. Less than 24 hours after that I was taking a picture with Billy Zane (who, aside from Hugh Jackman was the most gracious, kind celebrity I have ever met).

Inevitably at some point in my blogging career I was going to use Billy Joel’s most famous song as a post title. One does not see him in concert 6 times in three different cities without having that song permanently embedded into a part of the brain. Trips to New York always remind me of going to his concerts because he sings so much about NYC and the surrounding areas.

There are a lot of iconic things about New York: The Empire State Building, The Statue of Liberty, vast amounts of museums, enormous flagship stores, the Yankees, Broadway, and probably the best people-watching around. And the food scene? Pretty much everything imaginable. The little neighborhoods throughout all seem to have little clumps of ethnic groups that have brought their dishes to the States throughout the country’s history. And if I learned one thing in New York it is that they are serious about bagels. Polish-Jew immigrants brought the bagel to America, and sadly by the 1960s their delicious, handmade creations had been industrialized by Harry Lender, who engineered the automatic production and…pre-slicing of them (face, meet desk). I mourn for these bagels.

But New York has a host of bakeries that still make them from scratch. Even if you feel most sure of it, do NOT insist to a New Yorker that you can buy a decent bagel anywhere but there. This is an argument that you will not win. The theory is that it’s all about the water (much like the lime content of Kentucky water giving bourbon its distinctive characteristics).

Oh, but I am defiant and stubborn. And skeptical of anyone who tells me that I can’t do something. Maybe I didn’t ask my brother to ship me some of his water, nor did I bring a bucket on Amtrak during my recent trip to NYC, but I did my research. I wanted to know what makes bagel baking different from other bread baking and how I could achieve the closest possible analog to the breakfast king of the Big Apple.

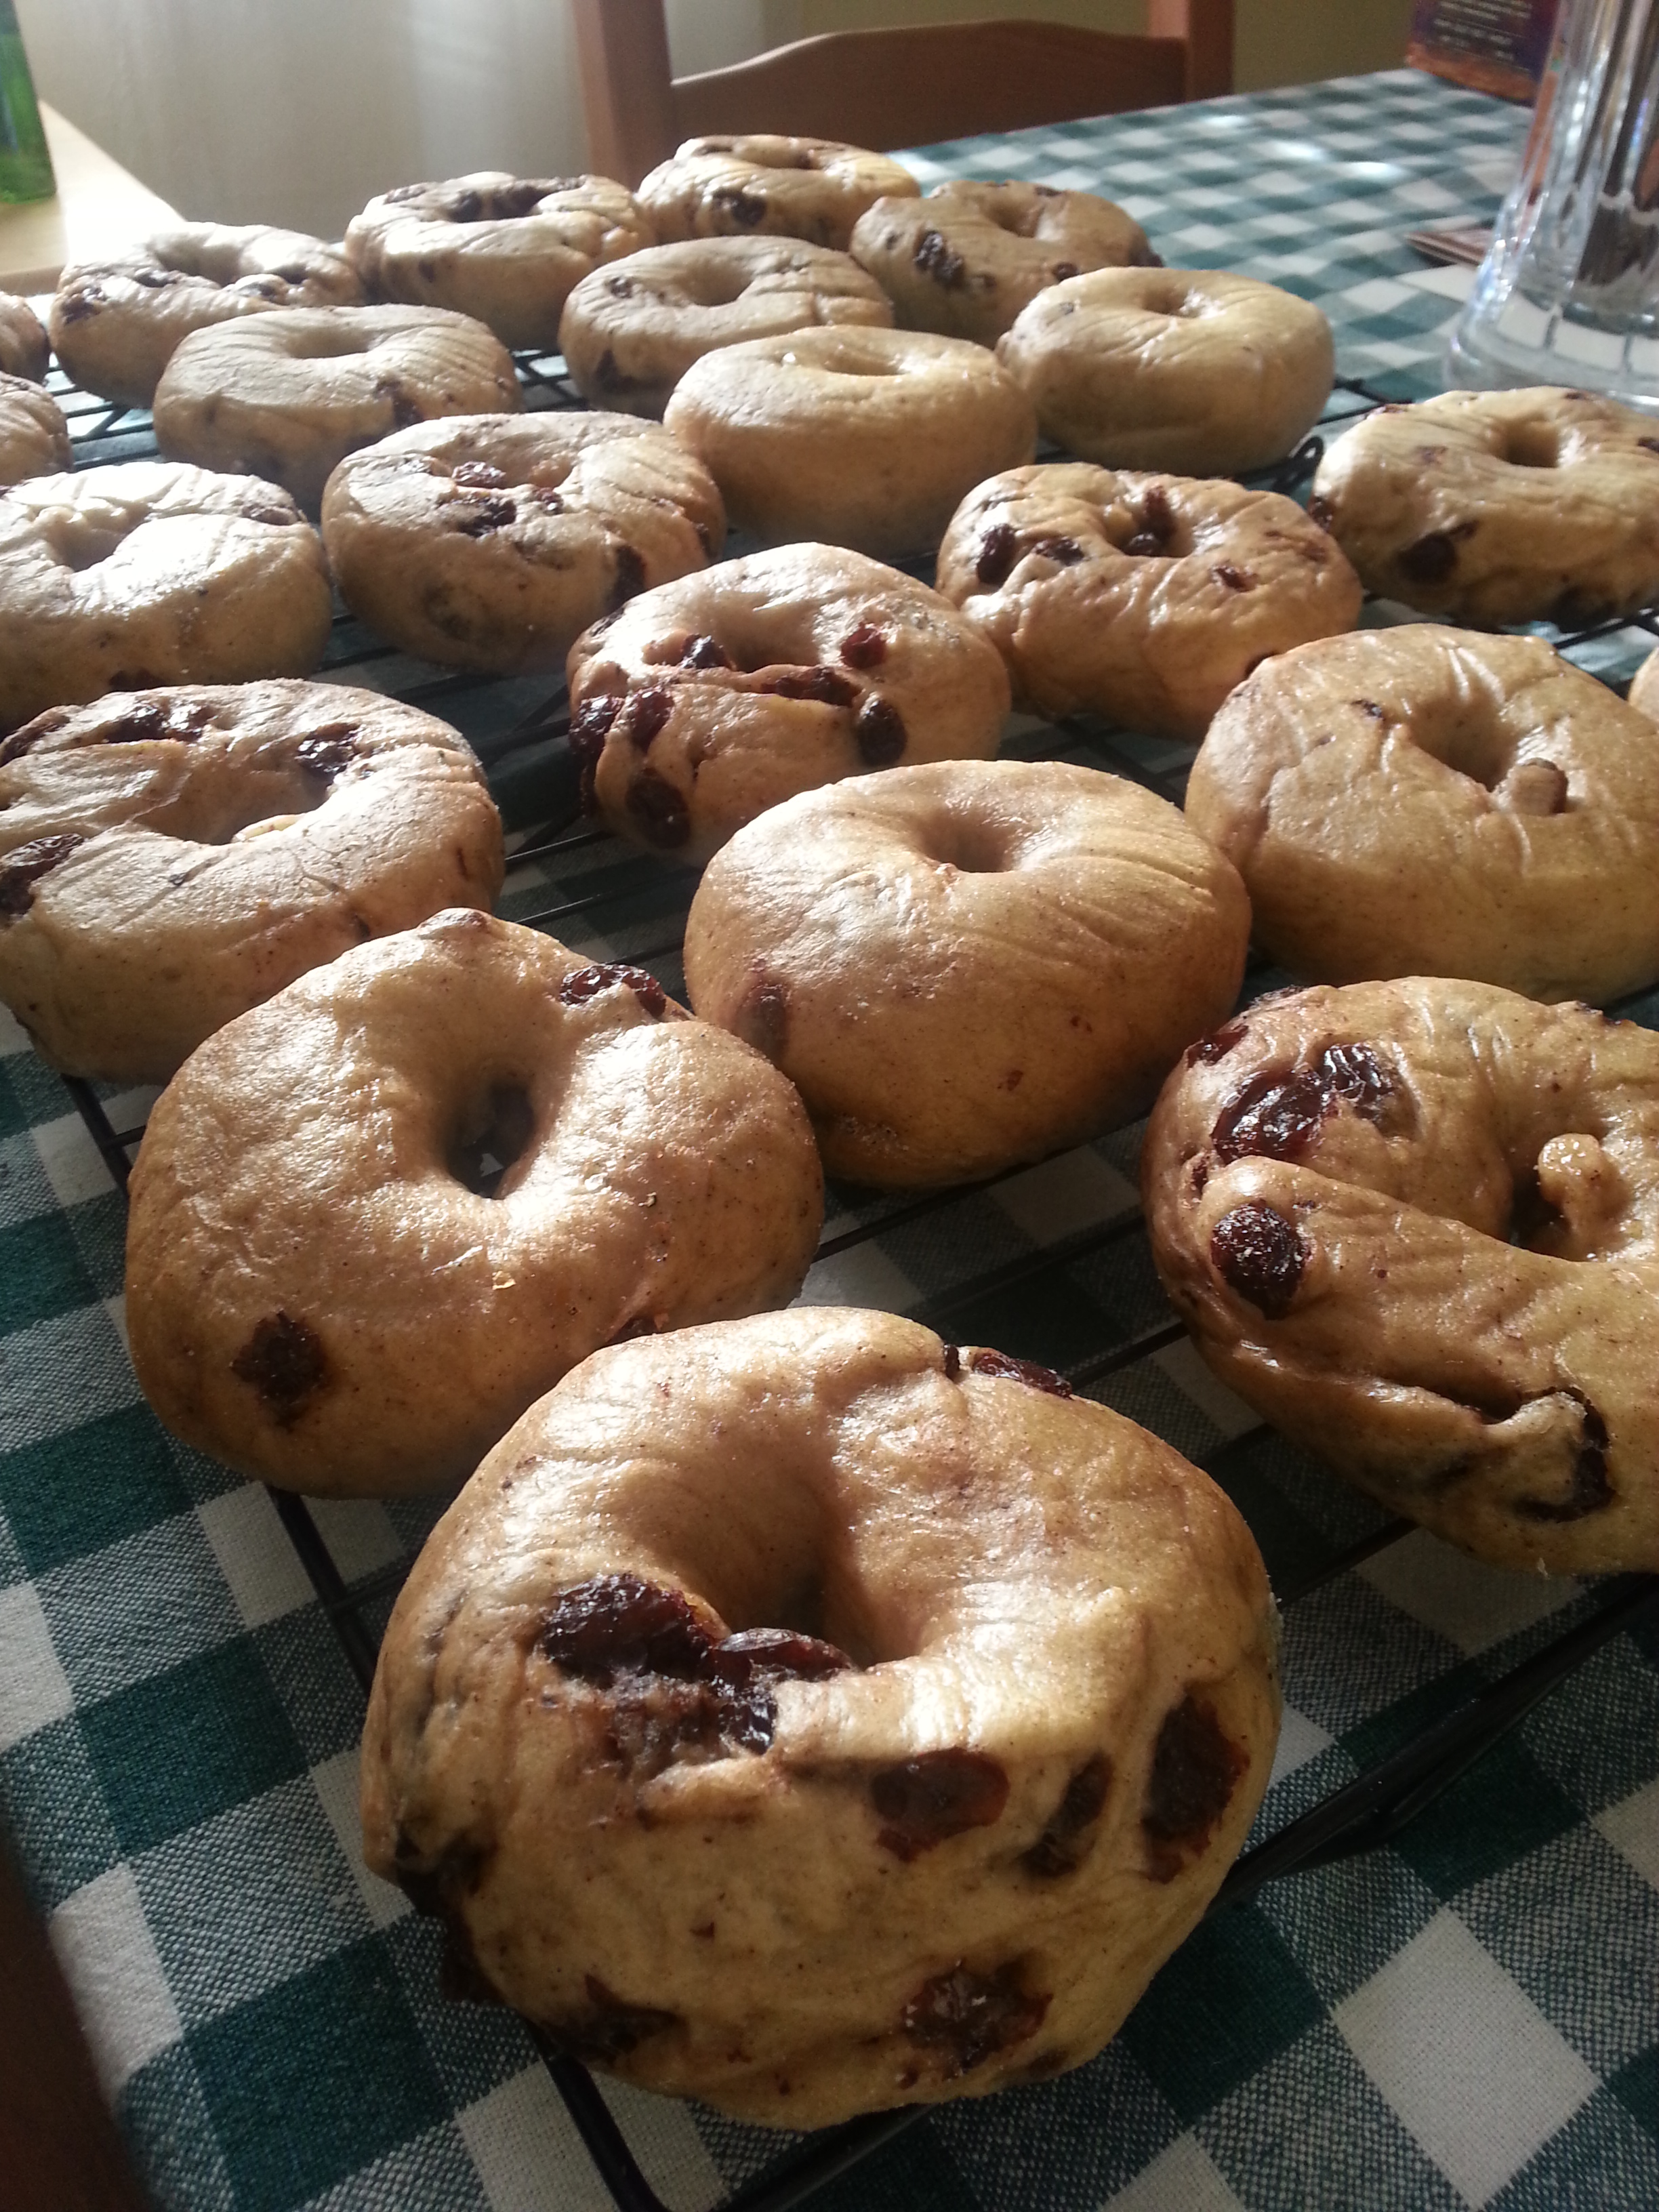
New Yorkers, I believe that I have done you proud. Perhaps they are not made with the “right” water, but I guarantee you that they are dense, slightly spongy, and chewy. They are not “doughnut bagels” or bread shaped like a bagel. They are truly, wholeheartedly bagels.

These ones are of the cinnamon-raisin variety, but they aren’t sweet. I really wanted to shy away from making these resemble pastry or sweet bread in any way. The process takes two days, so make sure you give yourself adequate time before beginning.

Cinnamon Raisin Bagels

adapted from Peter Reinhardt, recipes from Jewish friends, and the great city of New York.

Sponge

  • 4 cups bread flour (or high-gluten flour)
  • 2 1/2 cups room temperature water
  • 1 tsp. rapid-rise yeast

Dough

  • 3 ½ cups bread flour (or high-gluten flour)
  • 4 tbsp. sugar
  • 1 tbsp. cinnamon
  • 1 tbsp. malt syrup or honey
  • 1 tbsp. salt
  • 1 tsp. rapid-rise yeast
  • 2 cups raisins, rinsed under warm water and patted dry
  • 1 tbsp. baking soda for water bath
  • Cornmeal for baking pans

To make the sponge, mix the flour and yeast together and then stir in the water until you have a thick batter. Cover the bowl with plastic wrap and leave it in a non-drafty, warm place for 2-3 hours or until it has doubled in size and is very foamy on top. It should deflate slightly when the bowl is tapped on a hard surface.

1 - sponge

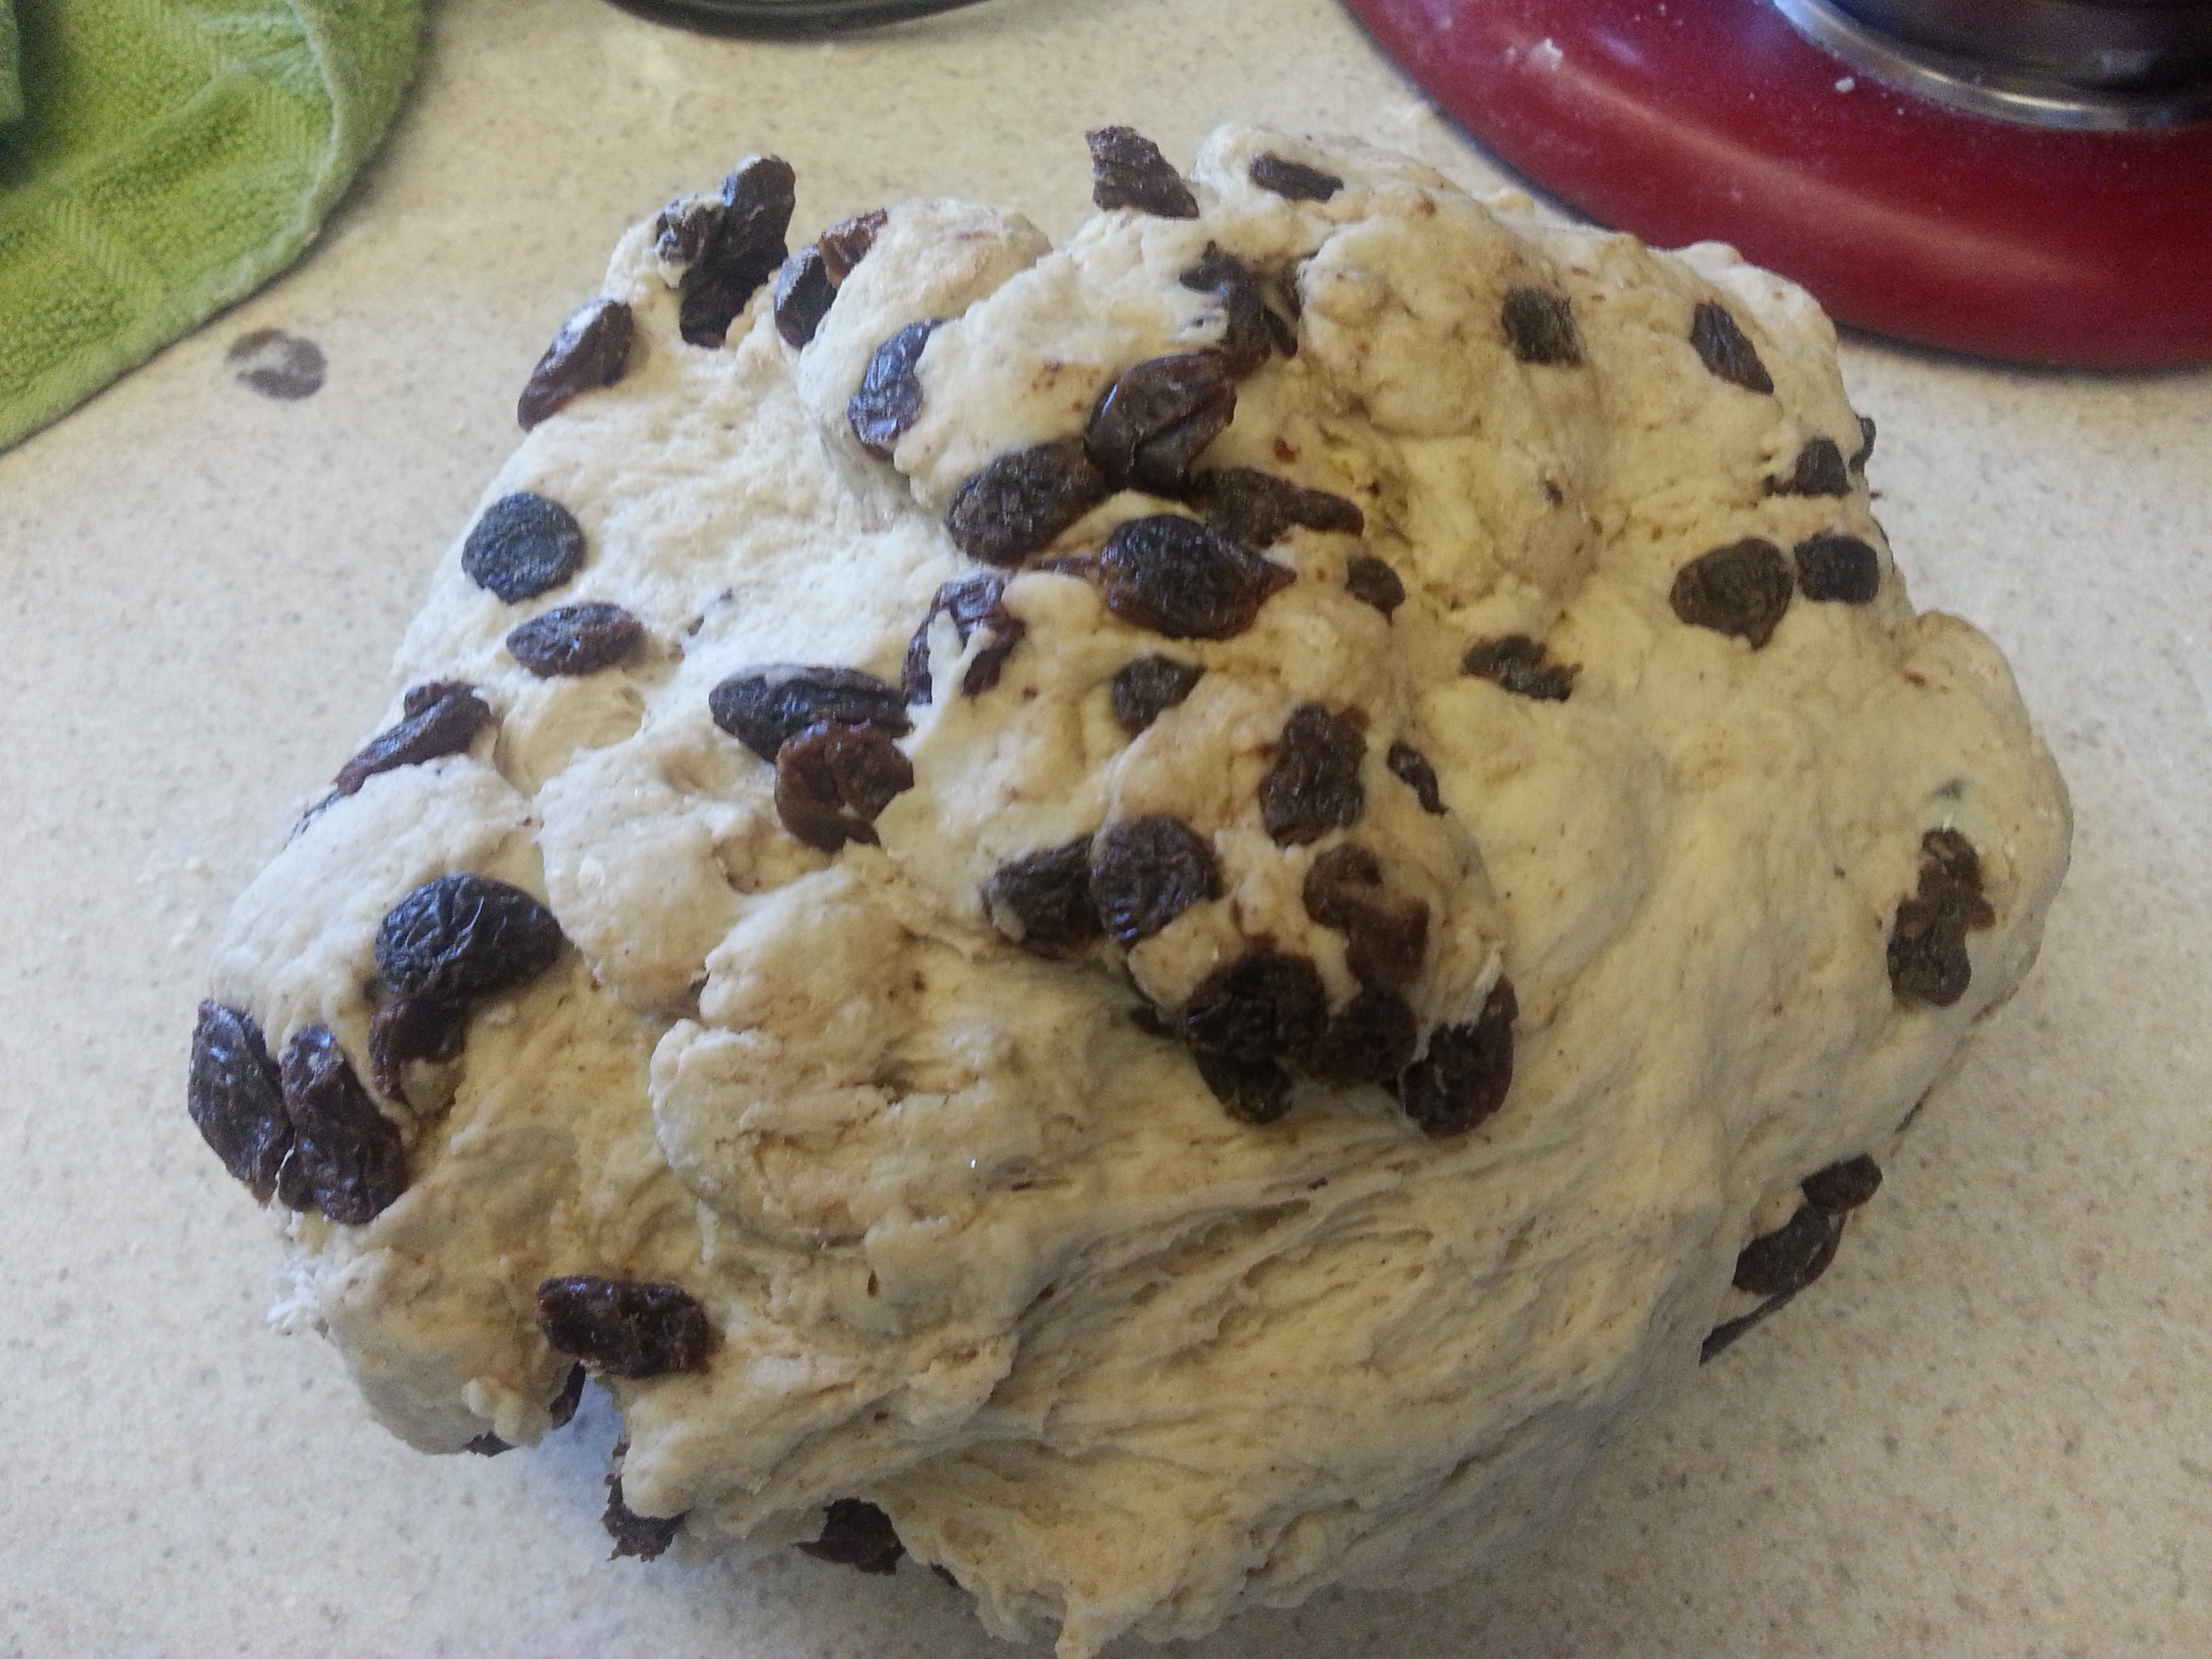
Add the second teaspoon of yeast and mix it thoroughly into the sponge. Mix in 3 cups of the flour, sugar, cinnamon, malt syrup, and salt. Add the remaining flour only as needed to form a stiff bread dough. Mix in the raisins.

2 - sponge with yeast and flour

3 - adding the dry ingredients

4 - mixing

5 - raisins added
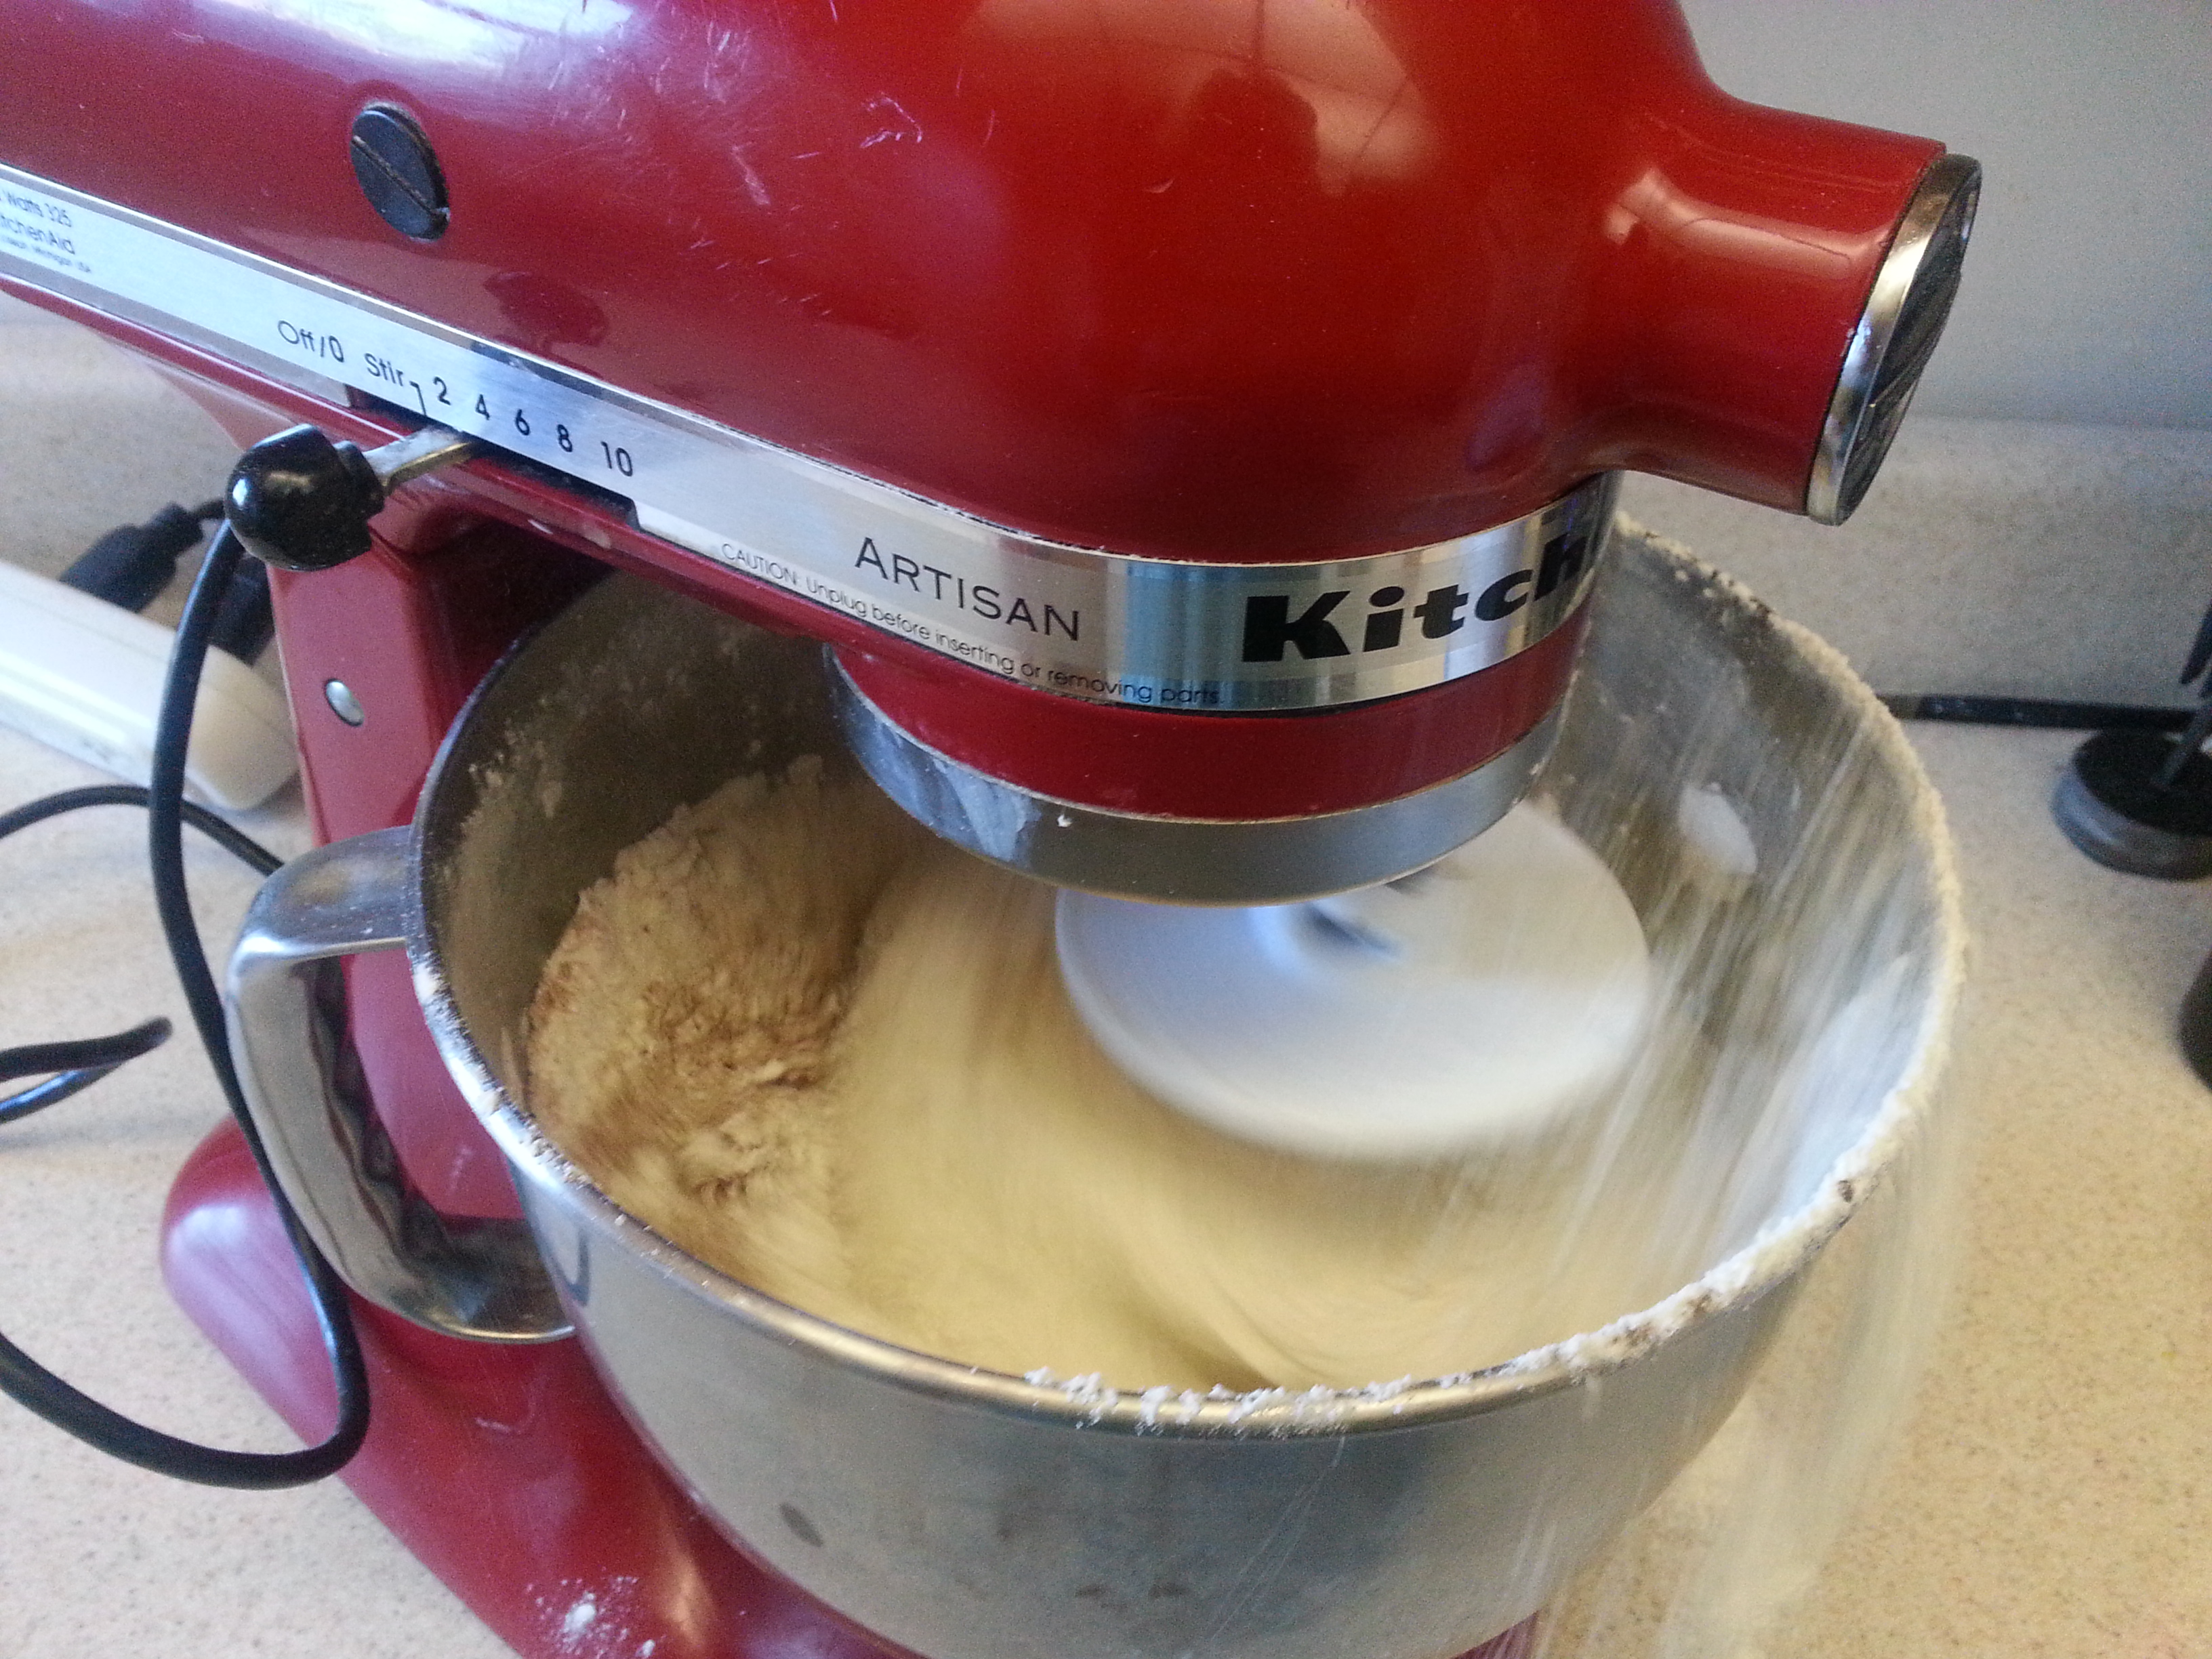
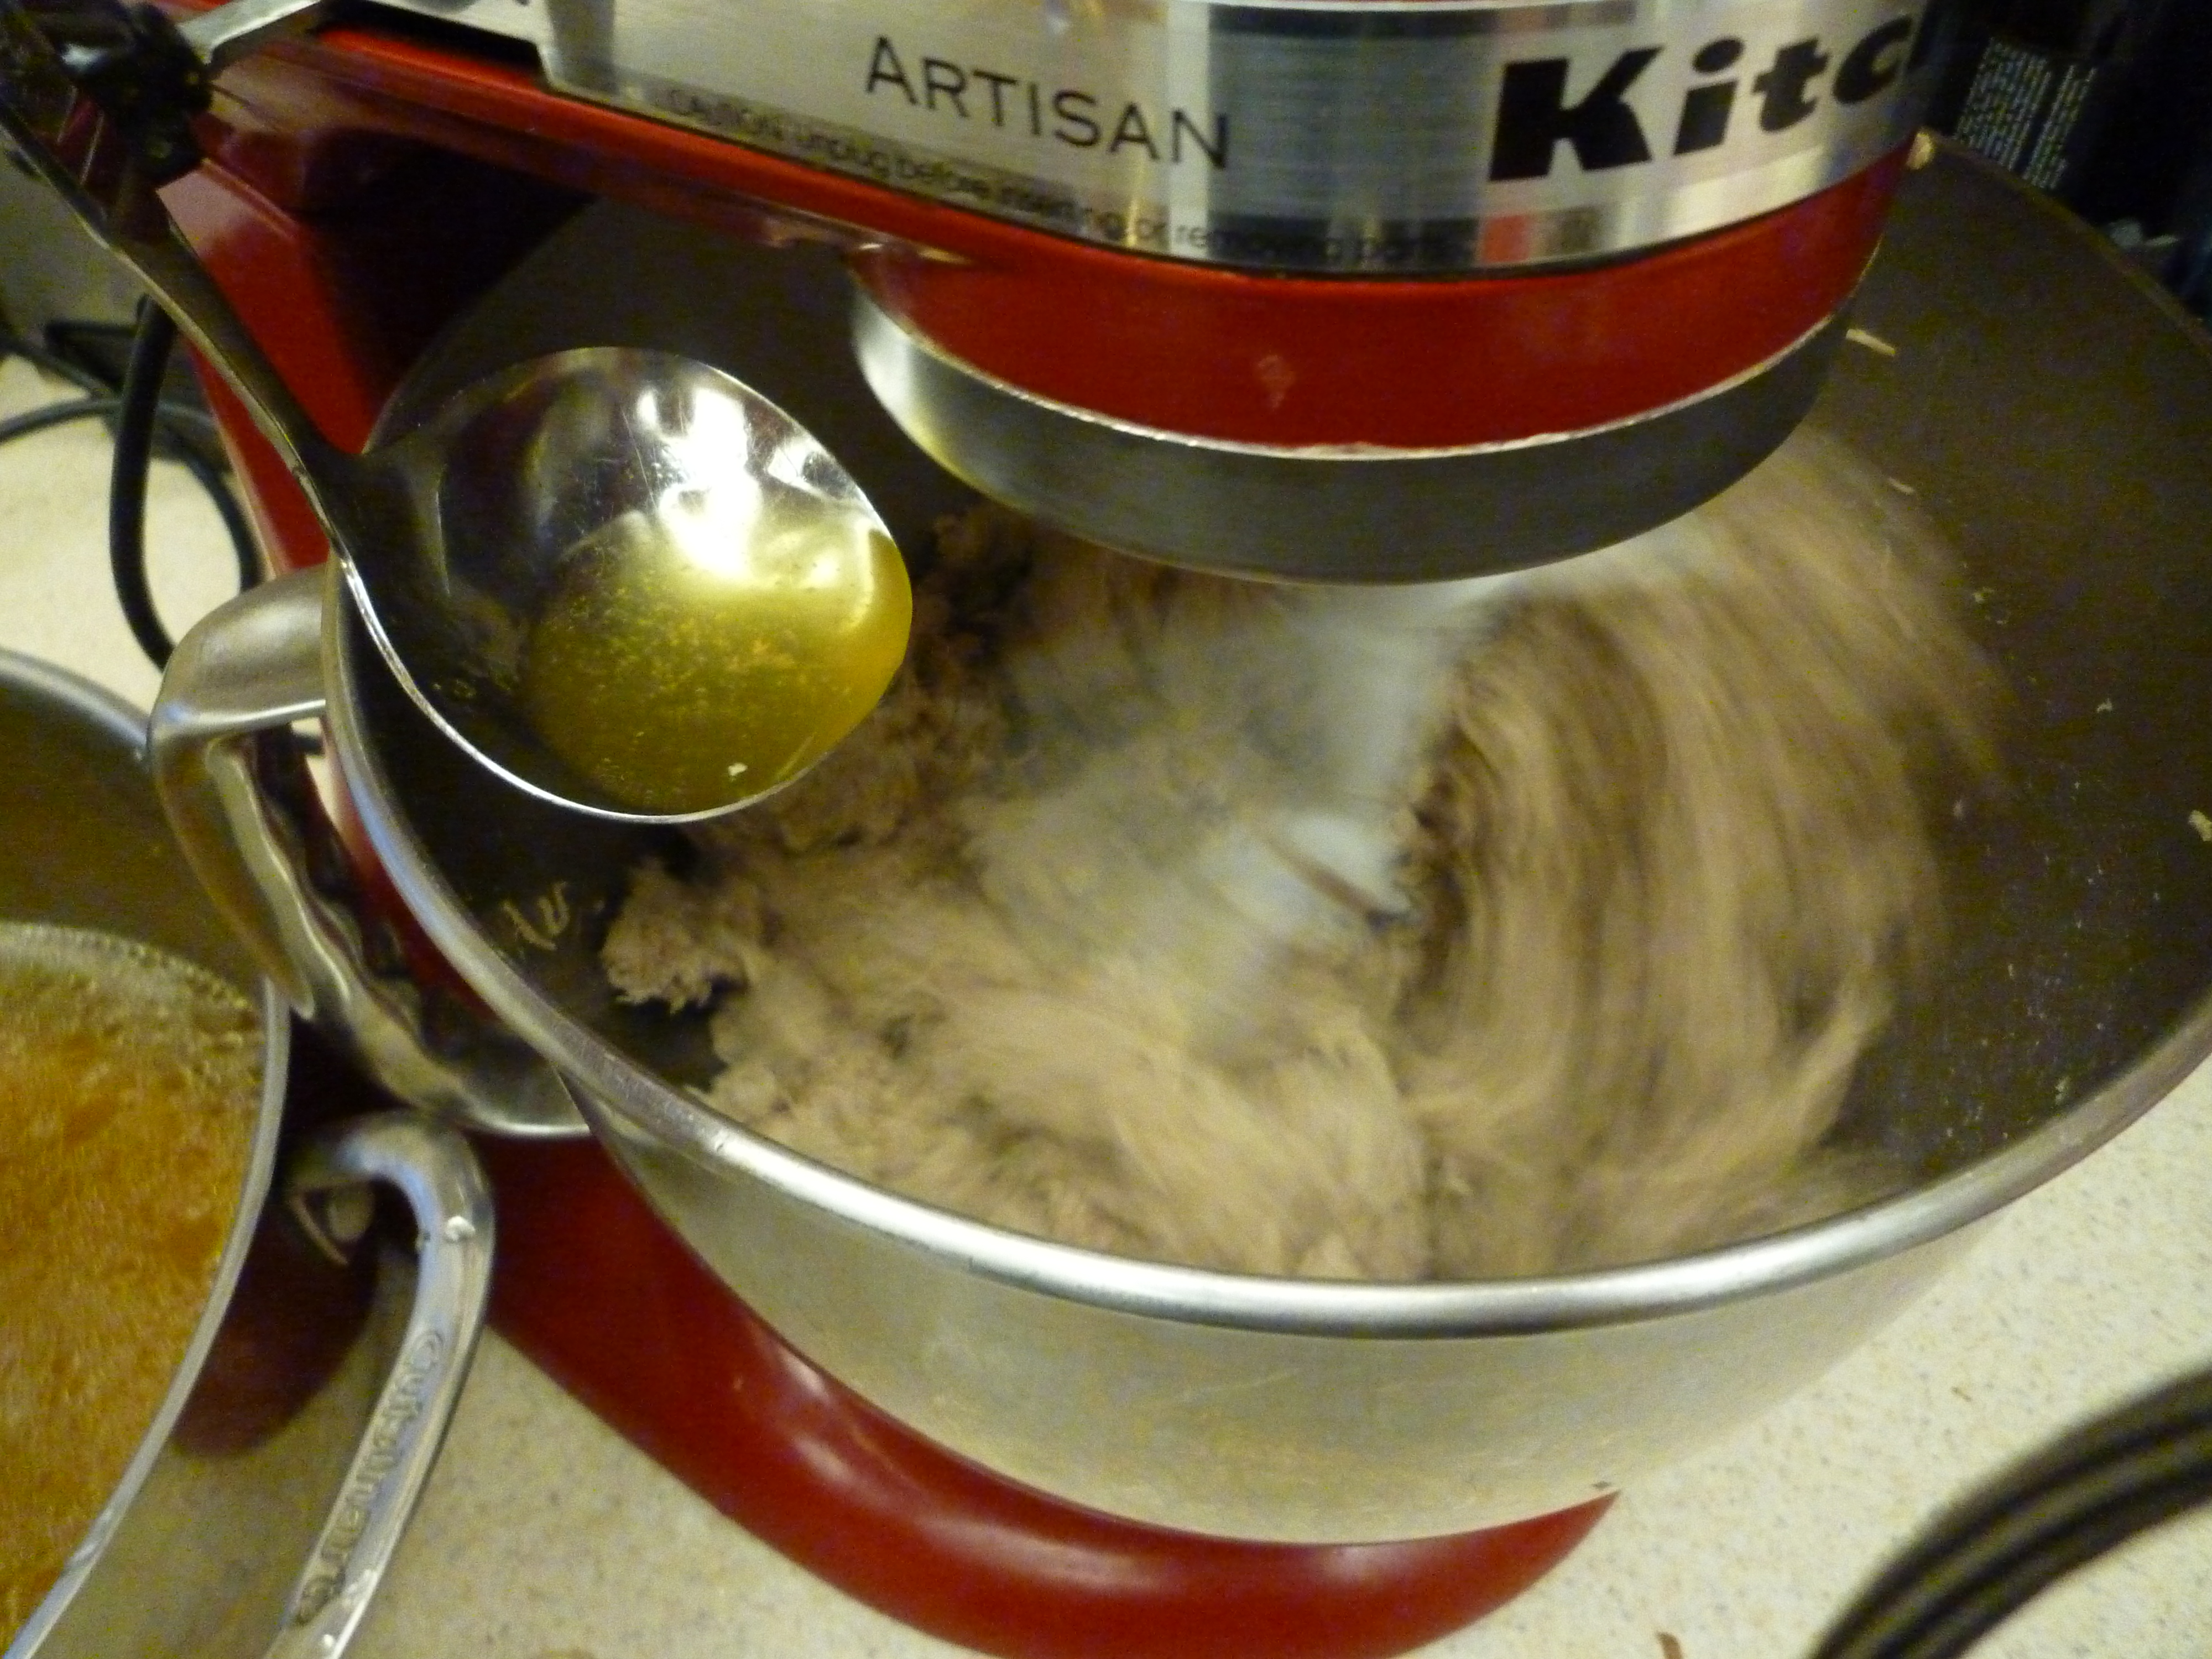
Transfer the dough to a counter and knead for ten minutes or until it is smooth and pliable. The dough should not be tacky, but should be hydrated enough that it does not rip while being kneaded. At this point, check the temperature with an instant read thermometer. It should be somewhere in the mid 70s F.

6 - kneaded dough

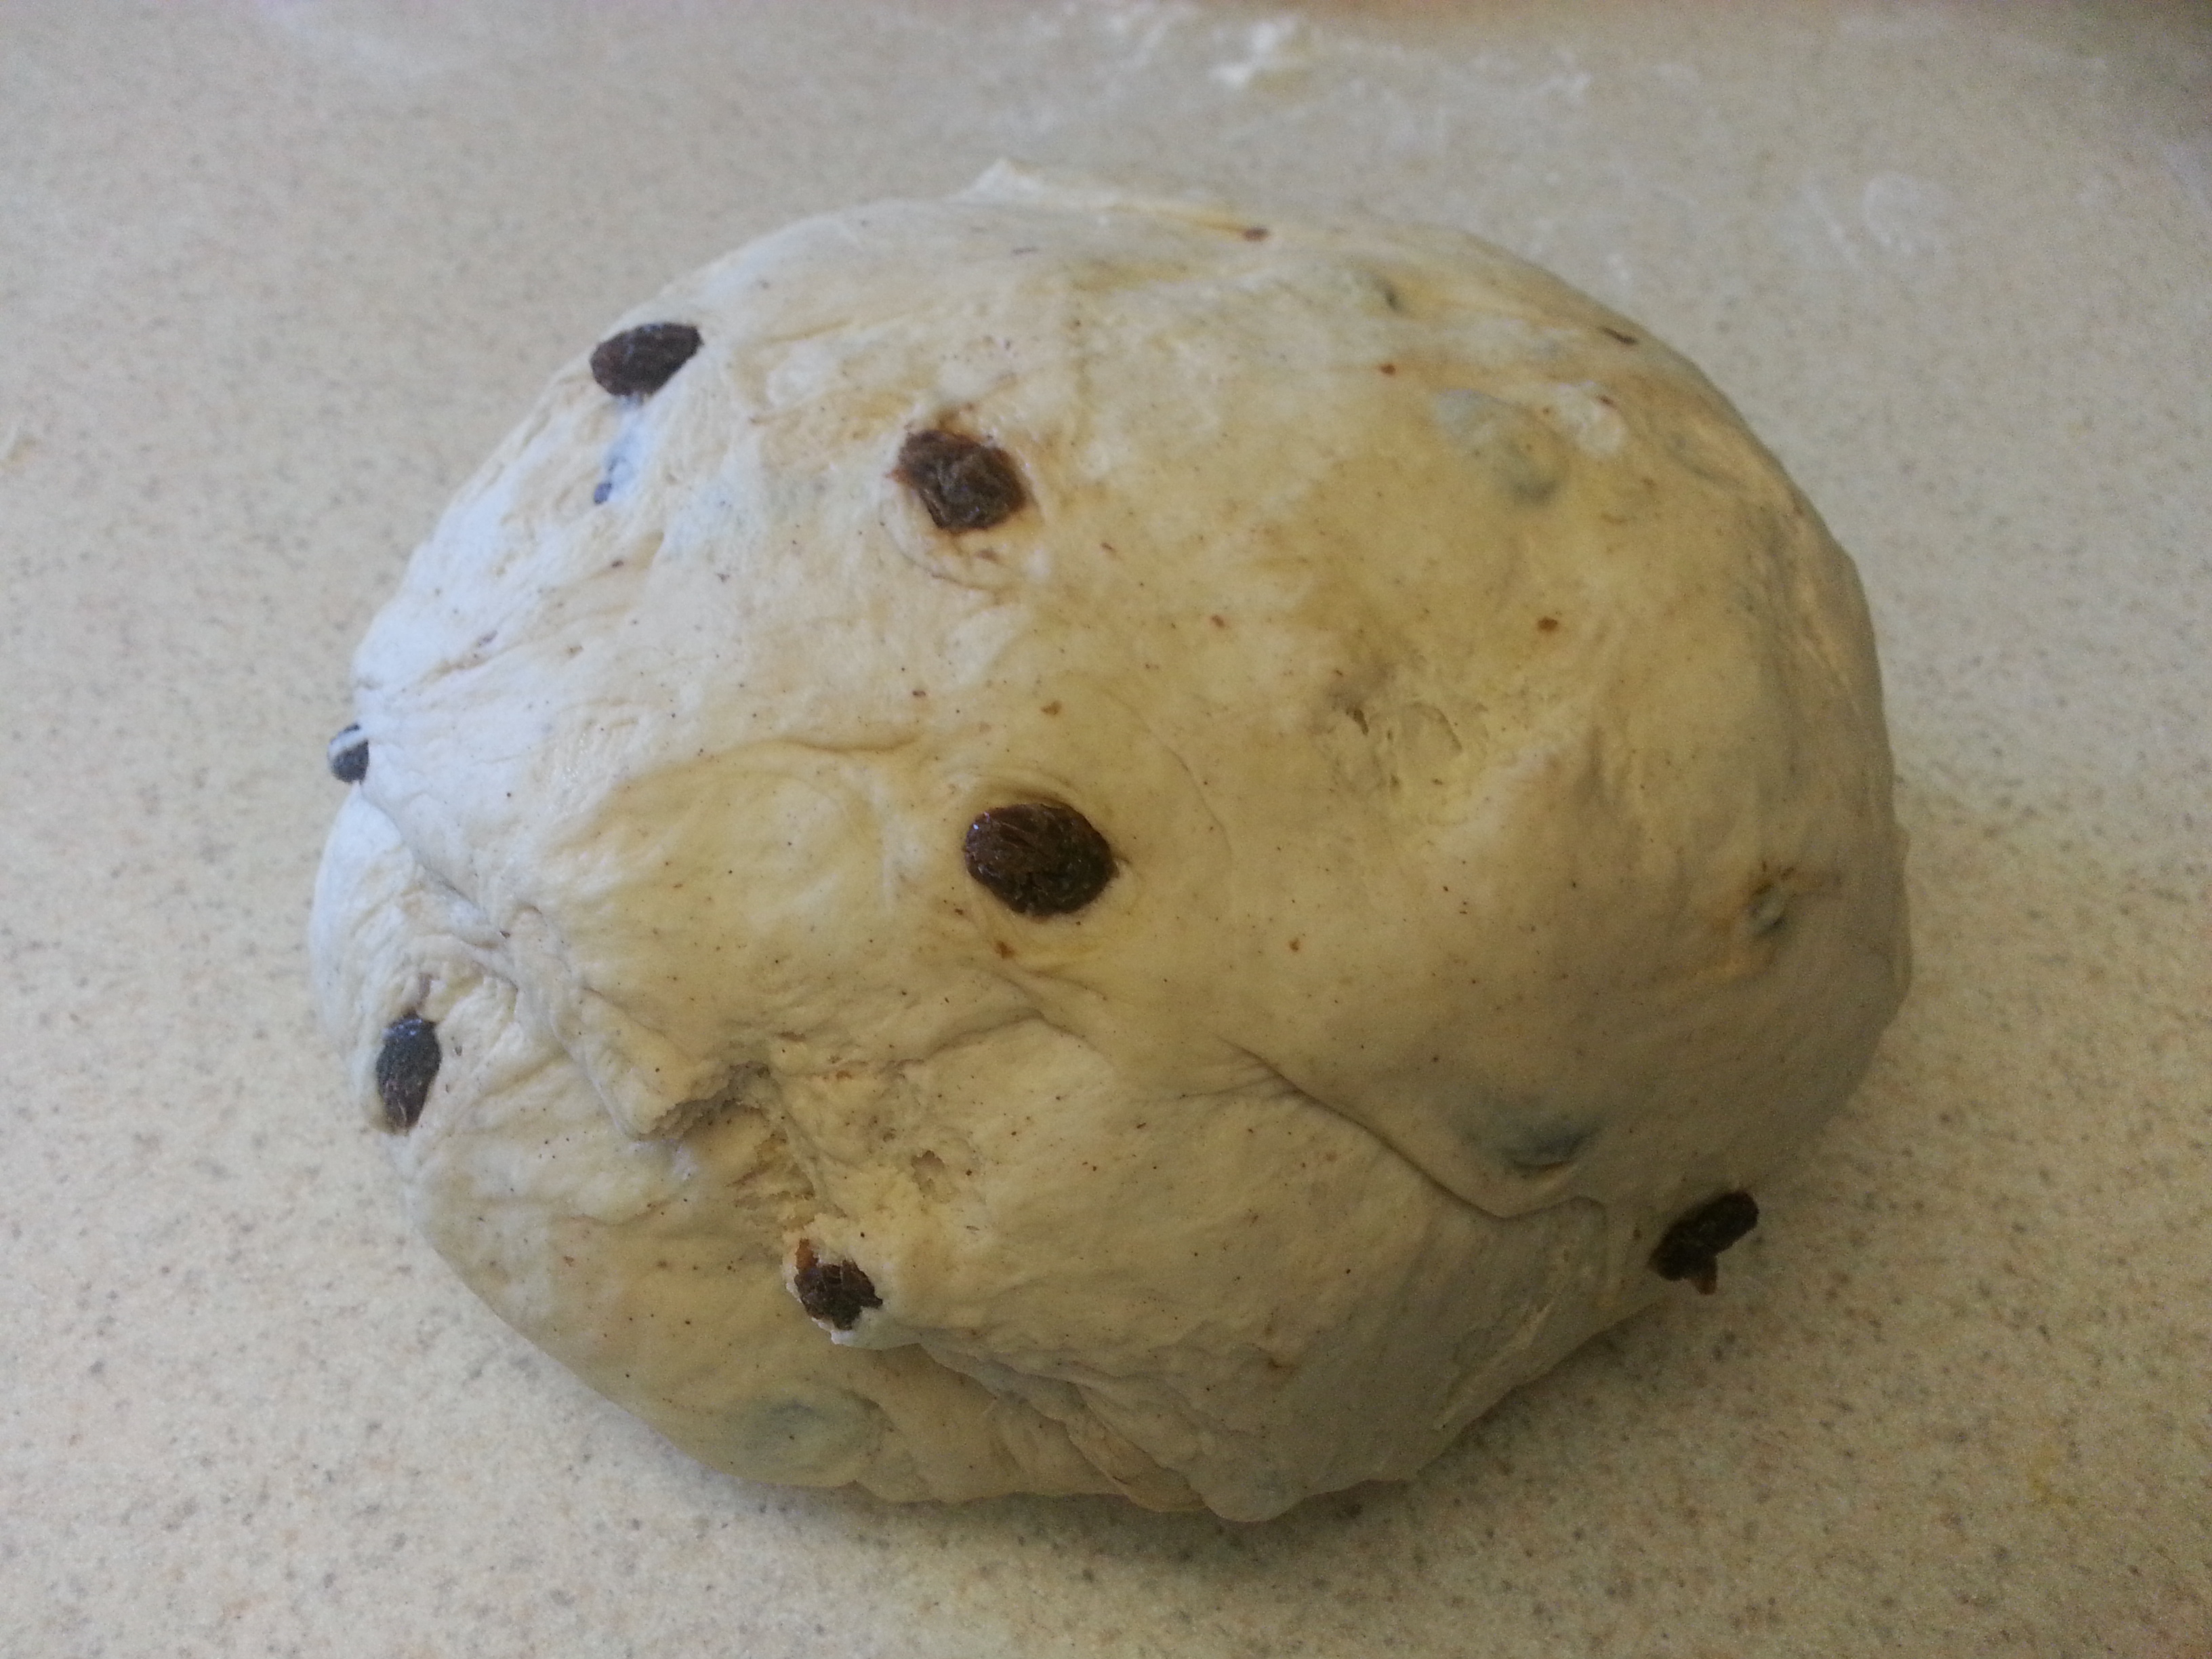
Immediately divide the dough into 24 equal pieces and shape into rolls. These were 3 oz. each. Cover loosely with plastic wrap and allow them to rest for a half hour.

7 - formed rolls

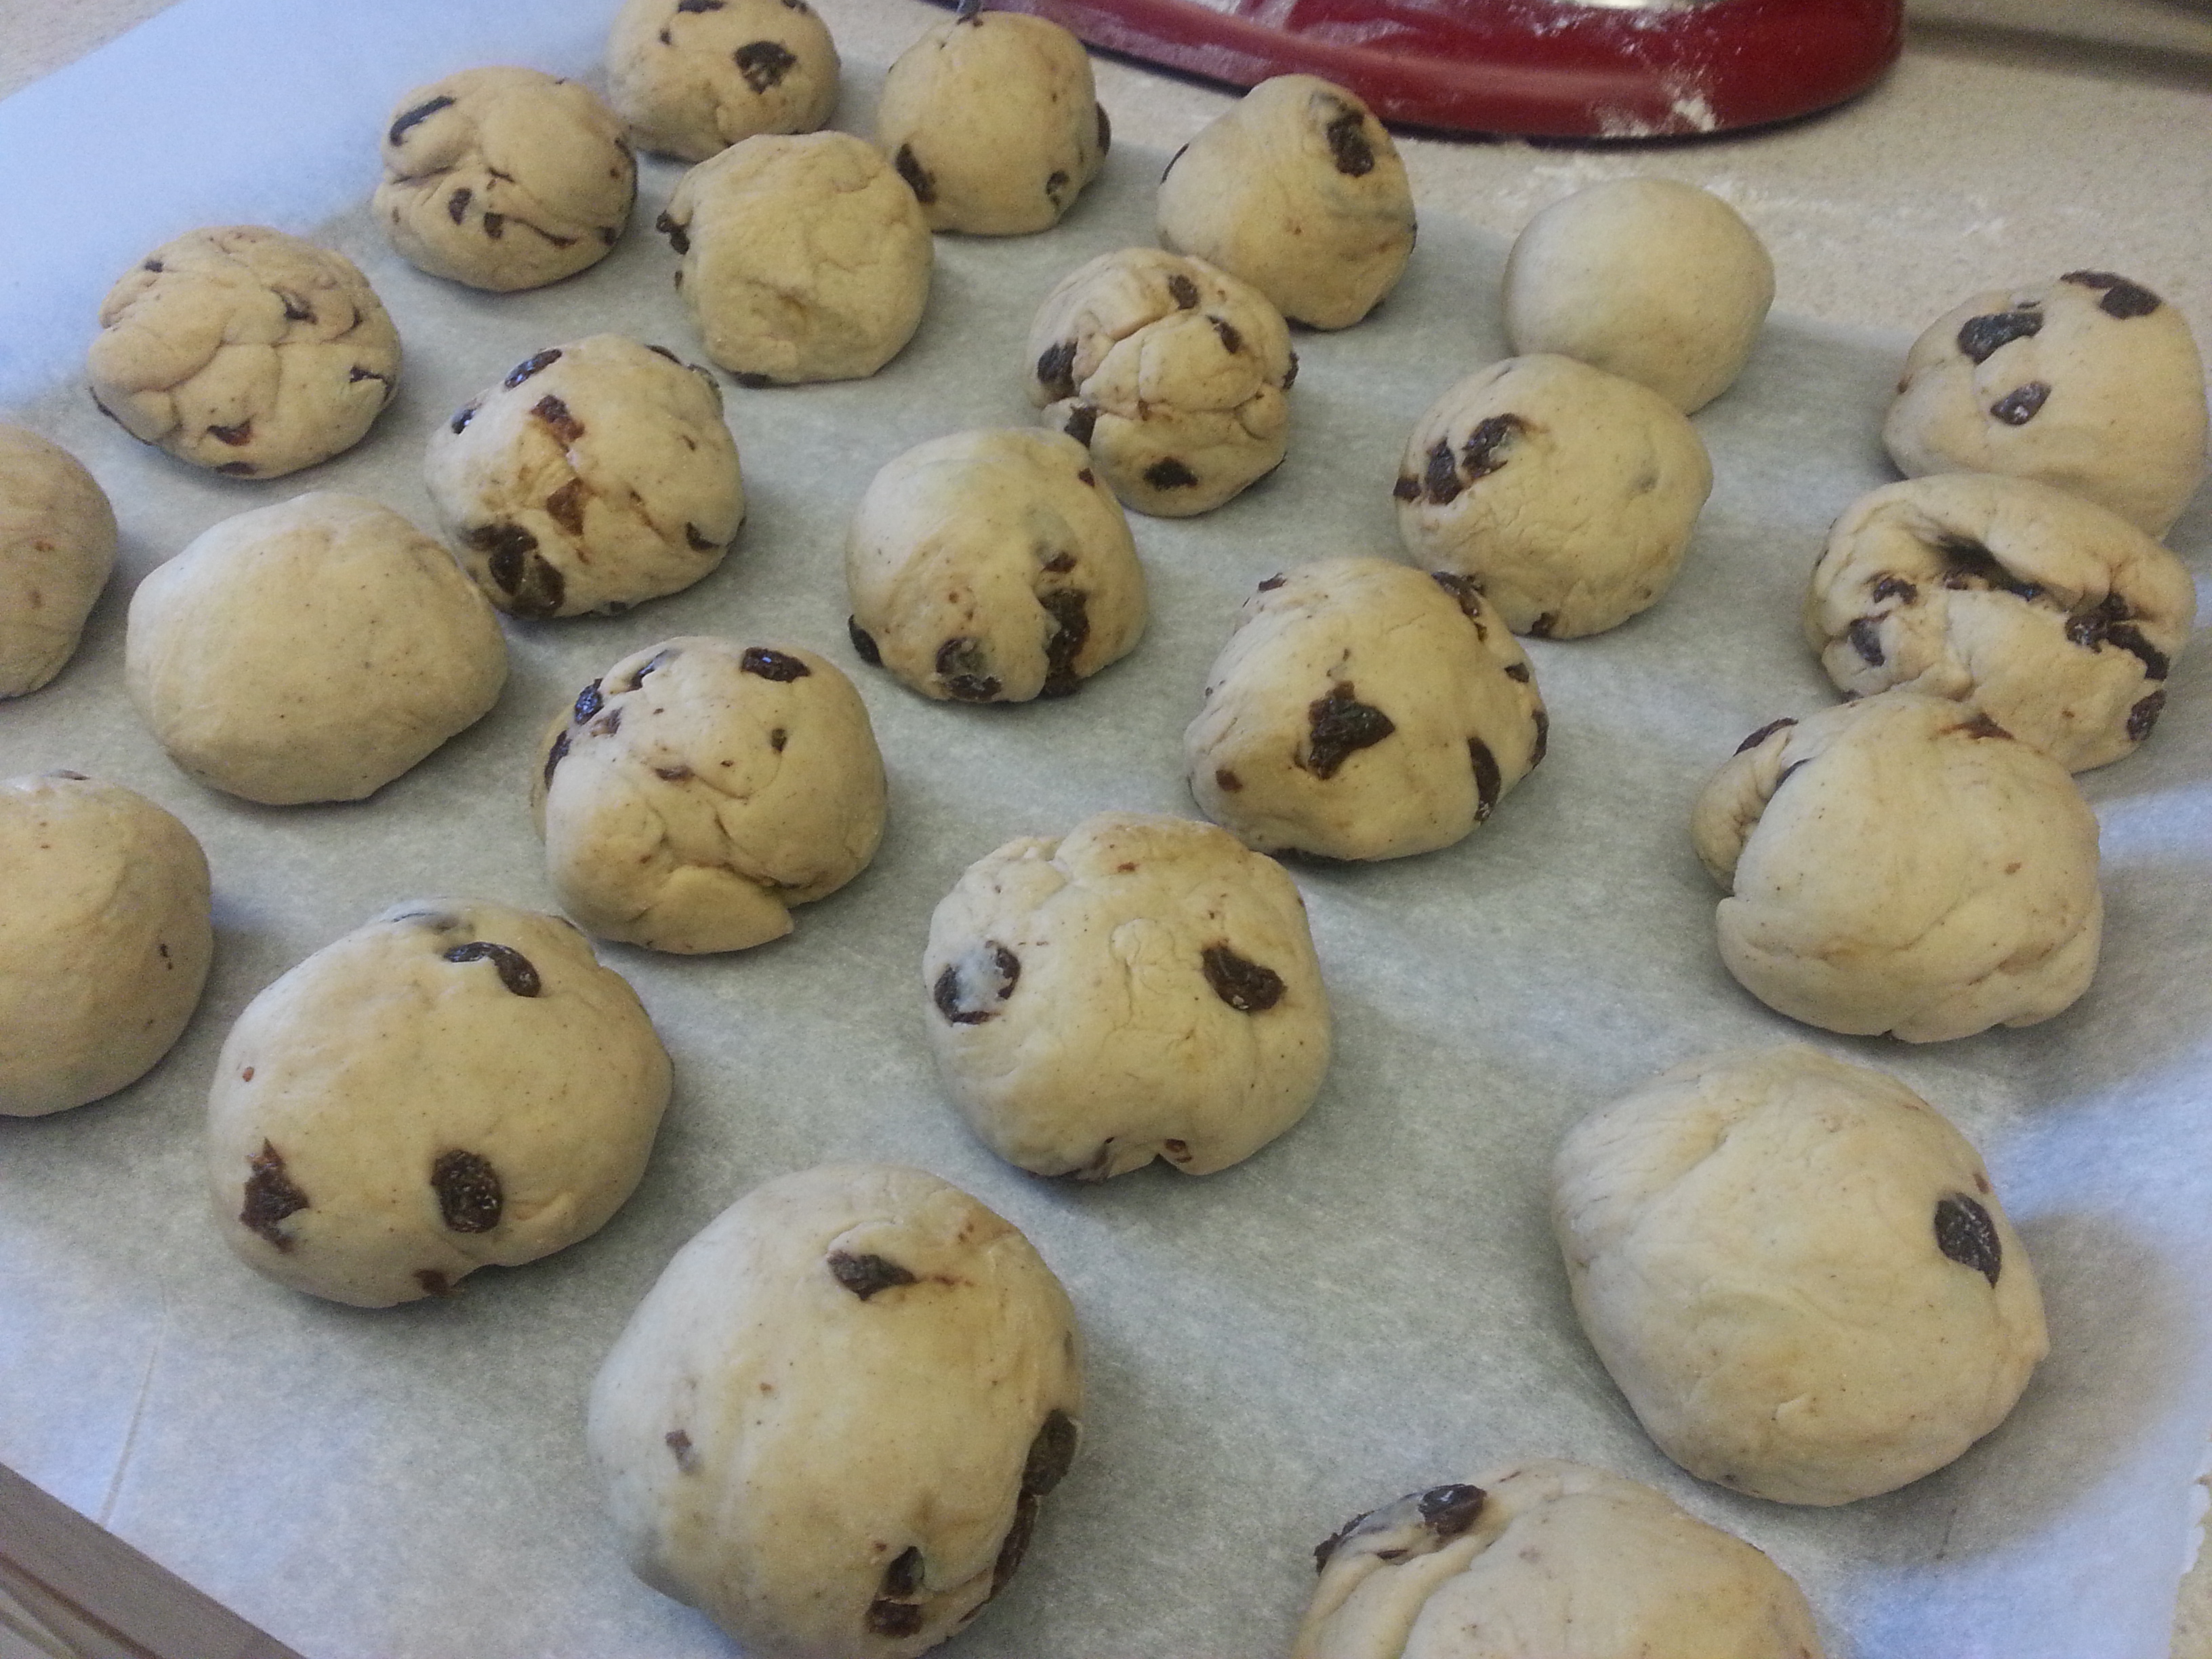
Line two sheet pans with parchment paper and form the bagels. The easiest way to do this by hand is to poke the hole in the center using your thumb and then rotate the bagel around it until the hole is about one inch in diameter. Make them as even as possible to avoid timing problems during the baking process. Place the bagels on the prepared sheet pans and cover loosely with plastic wrap and let them rest at room temperature for 20 minutes. This room temperature rest is crucial before moving them to the refrigerator for final retarding as it provides some time for the gasses to build up that will make the bagels float during the pre-bake boil.

8 - shaped bagels

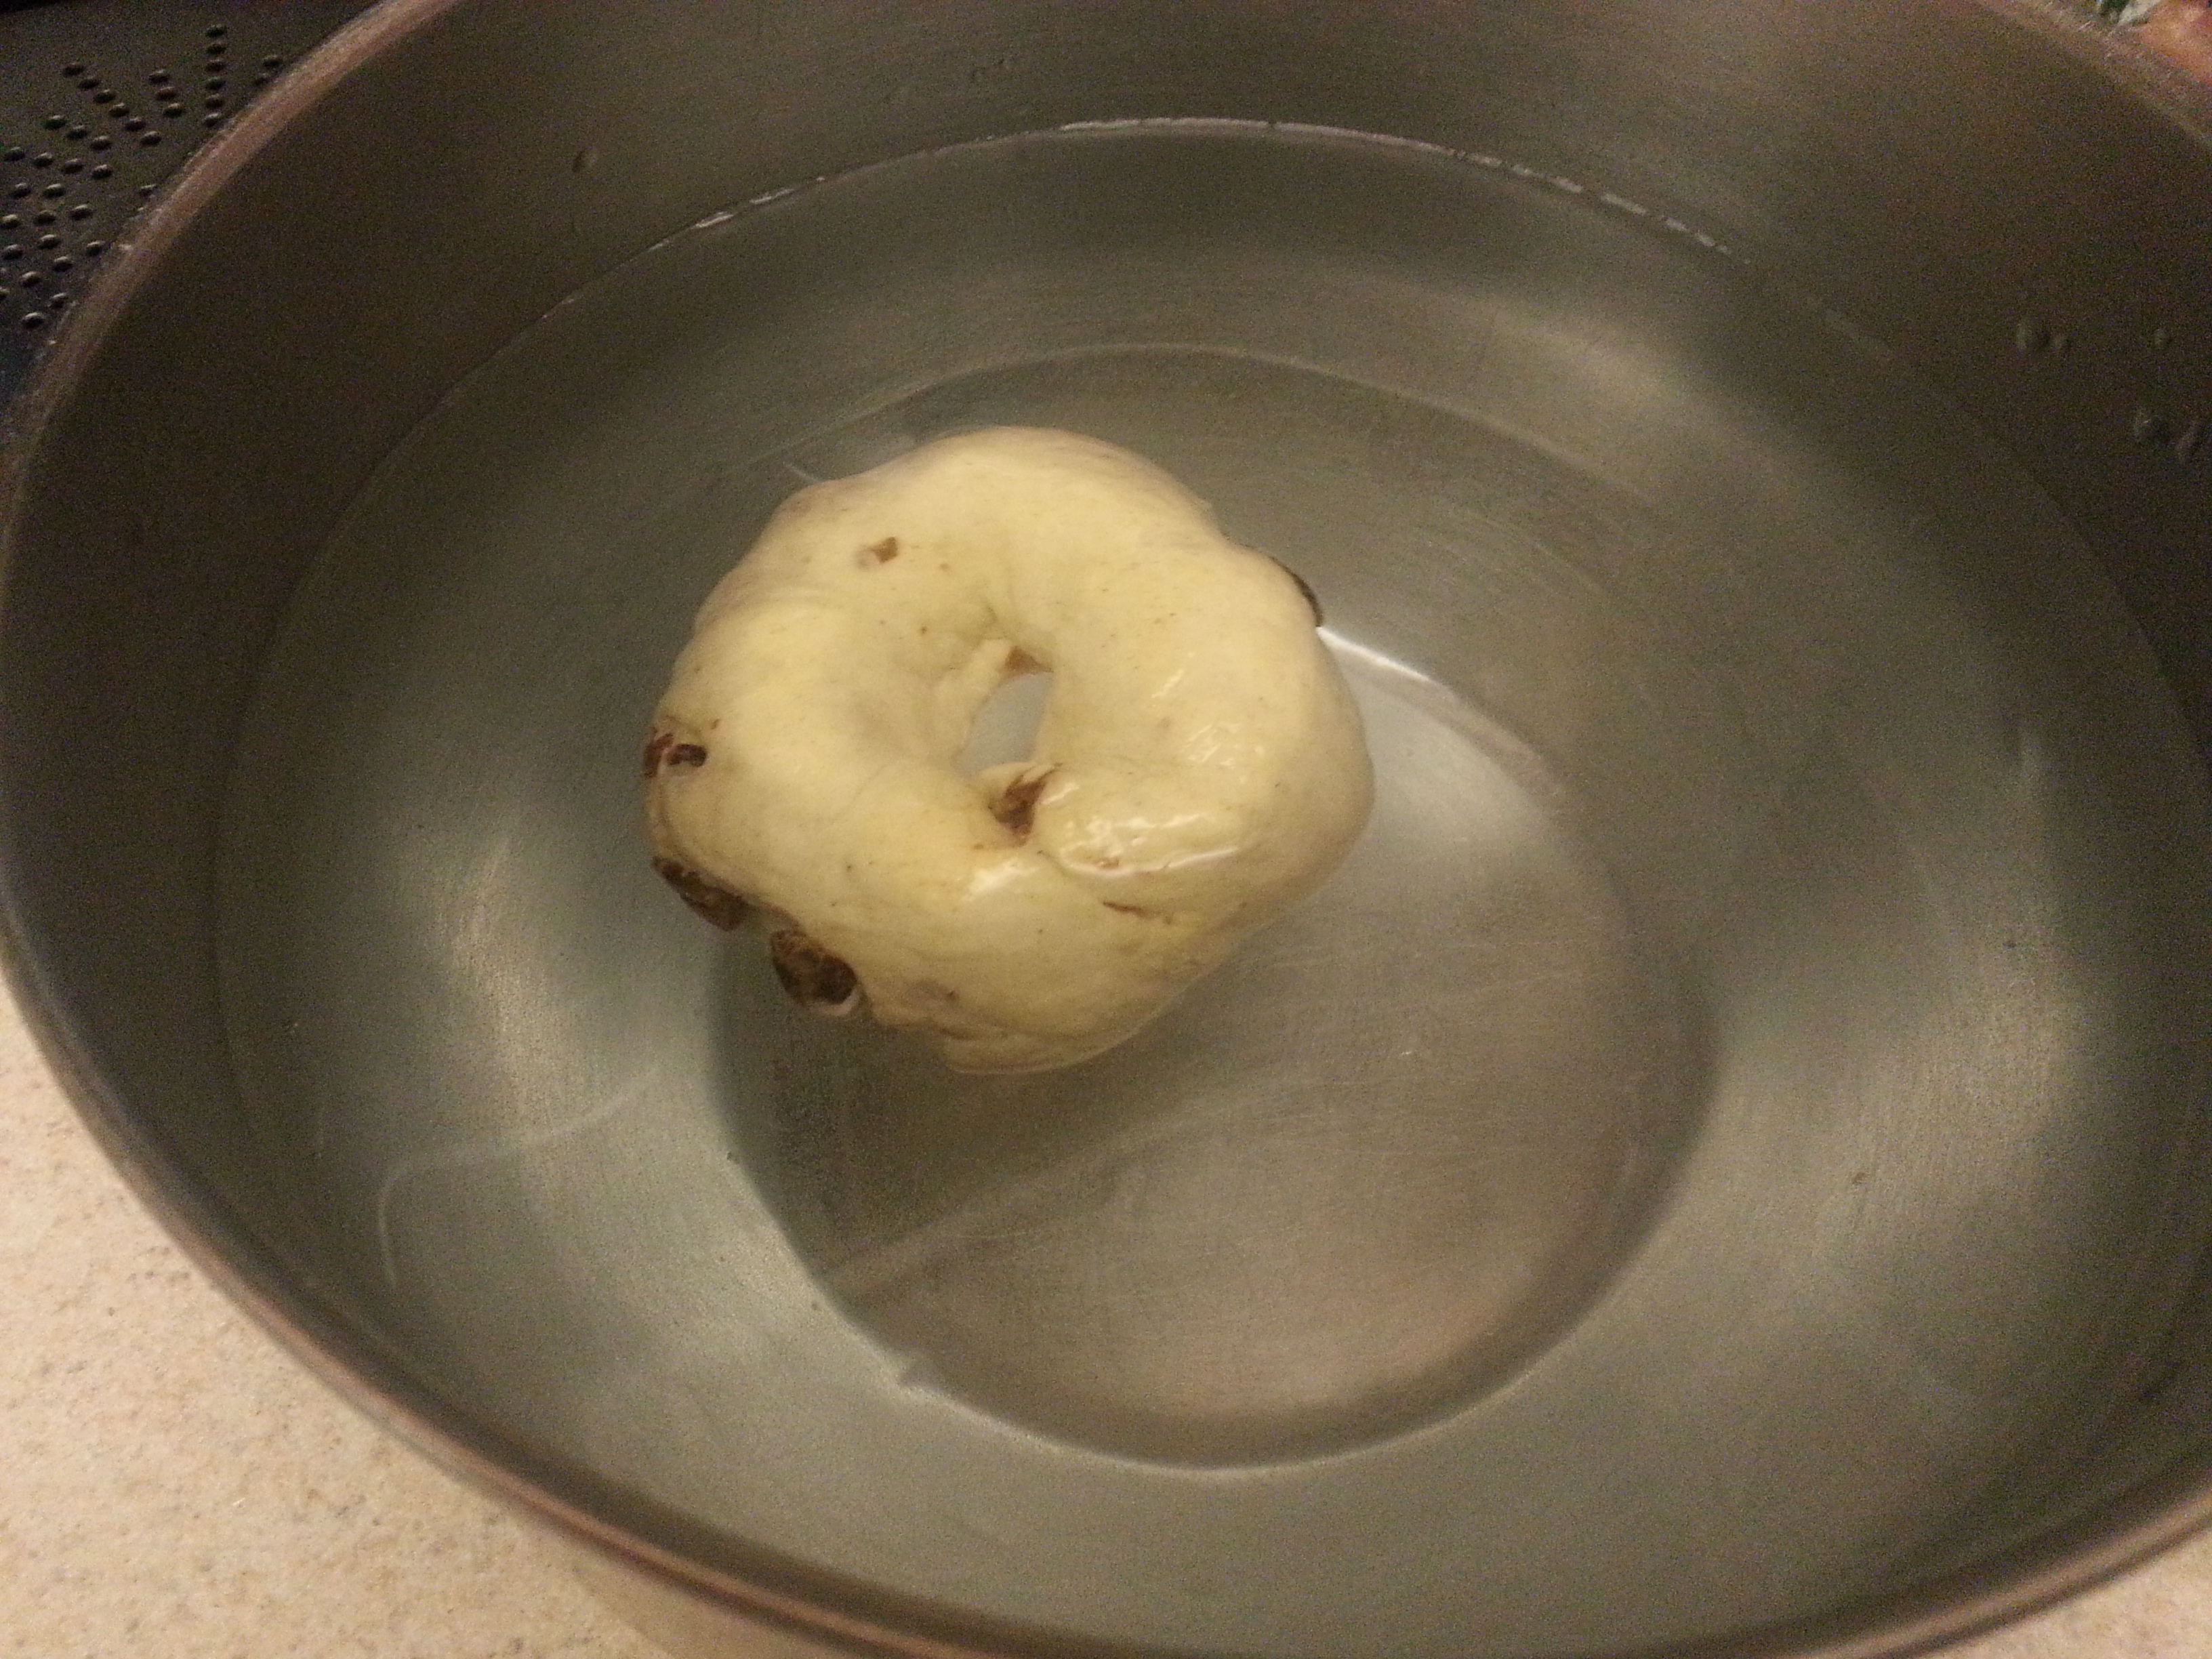
After the 20 minute rest do a test by dropping a bagel into a bowl of room temperature water. If it floats within 10 seconds, the bagels are ready for final retarding. Pat the test bagel dry and return it to the sheet pan. If the tester doesn’t float, leave the pans at room temperature and re-test every 10 minutes until it floats. Once this is achieved, move the bagels to the refrigerator and allow them to retard for 12 hours. They can stay like this for up to 2 days.

9 - float test

The following day, preheat the oven to 500 degrees F.

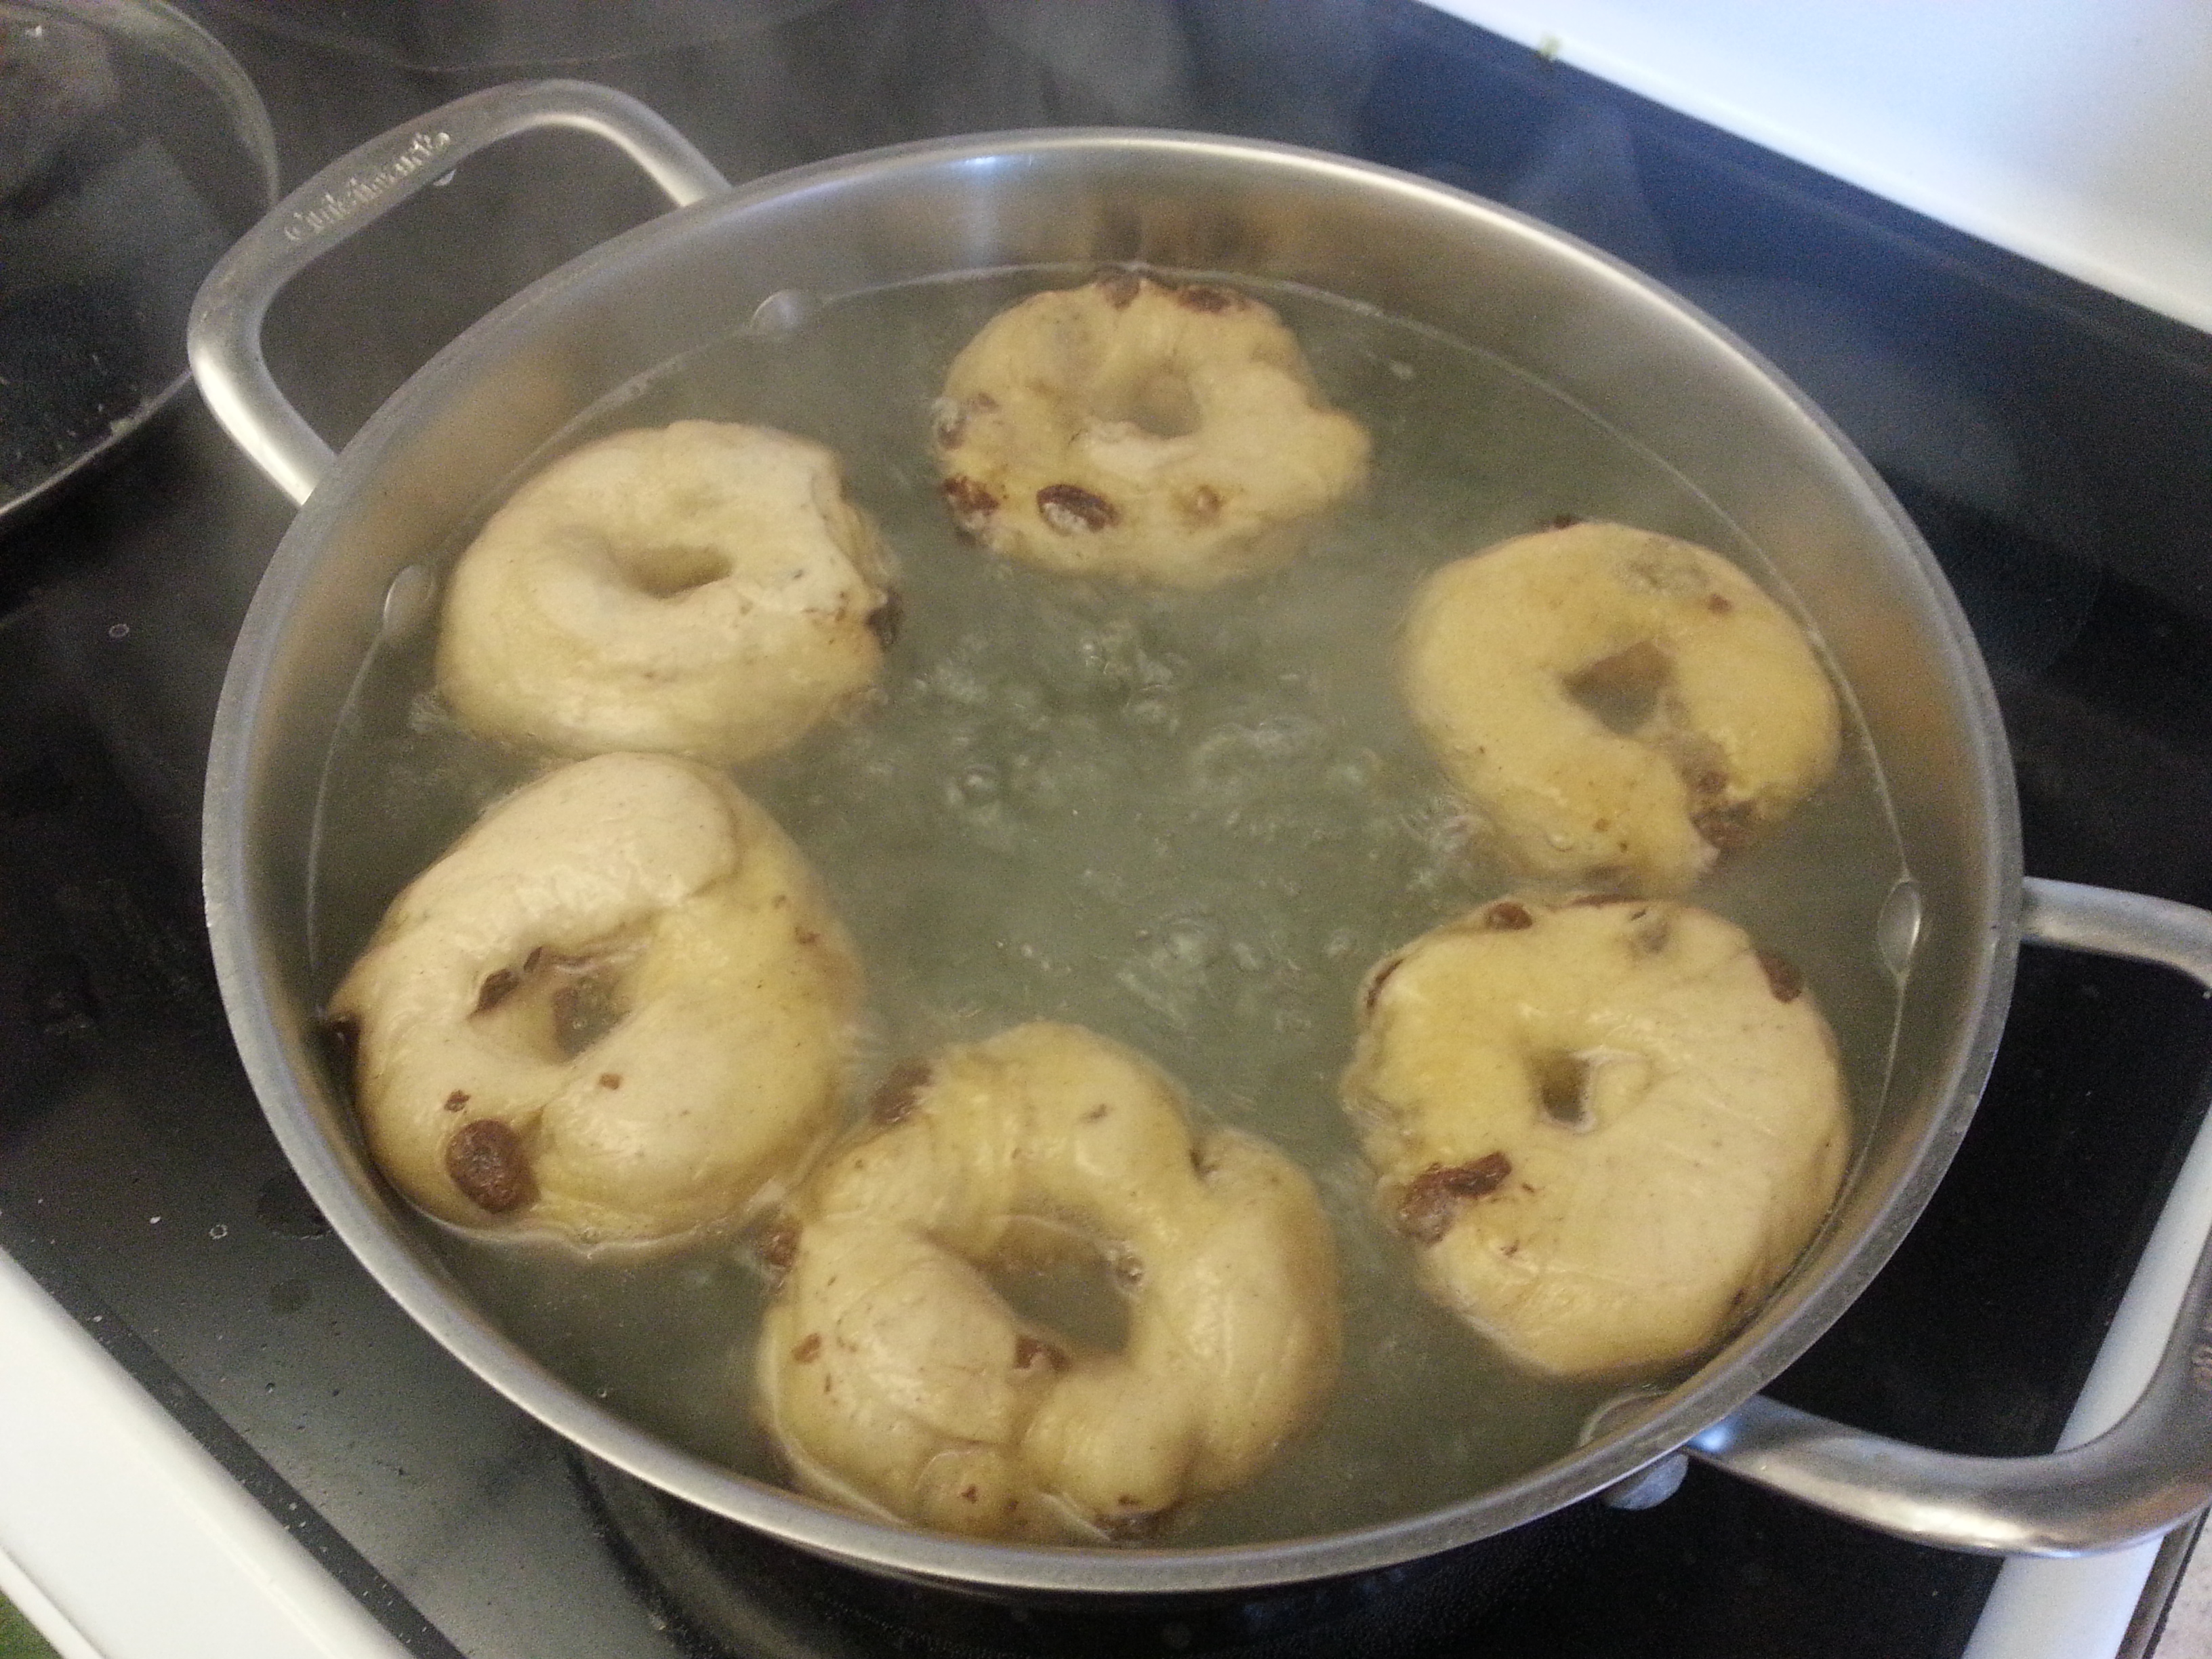
Bring a large pot of water to boil on the stove and then add the baking soda.

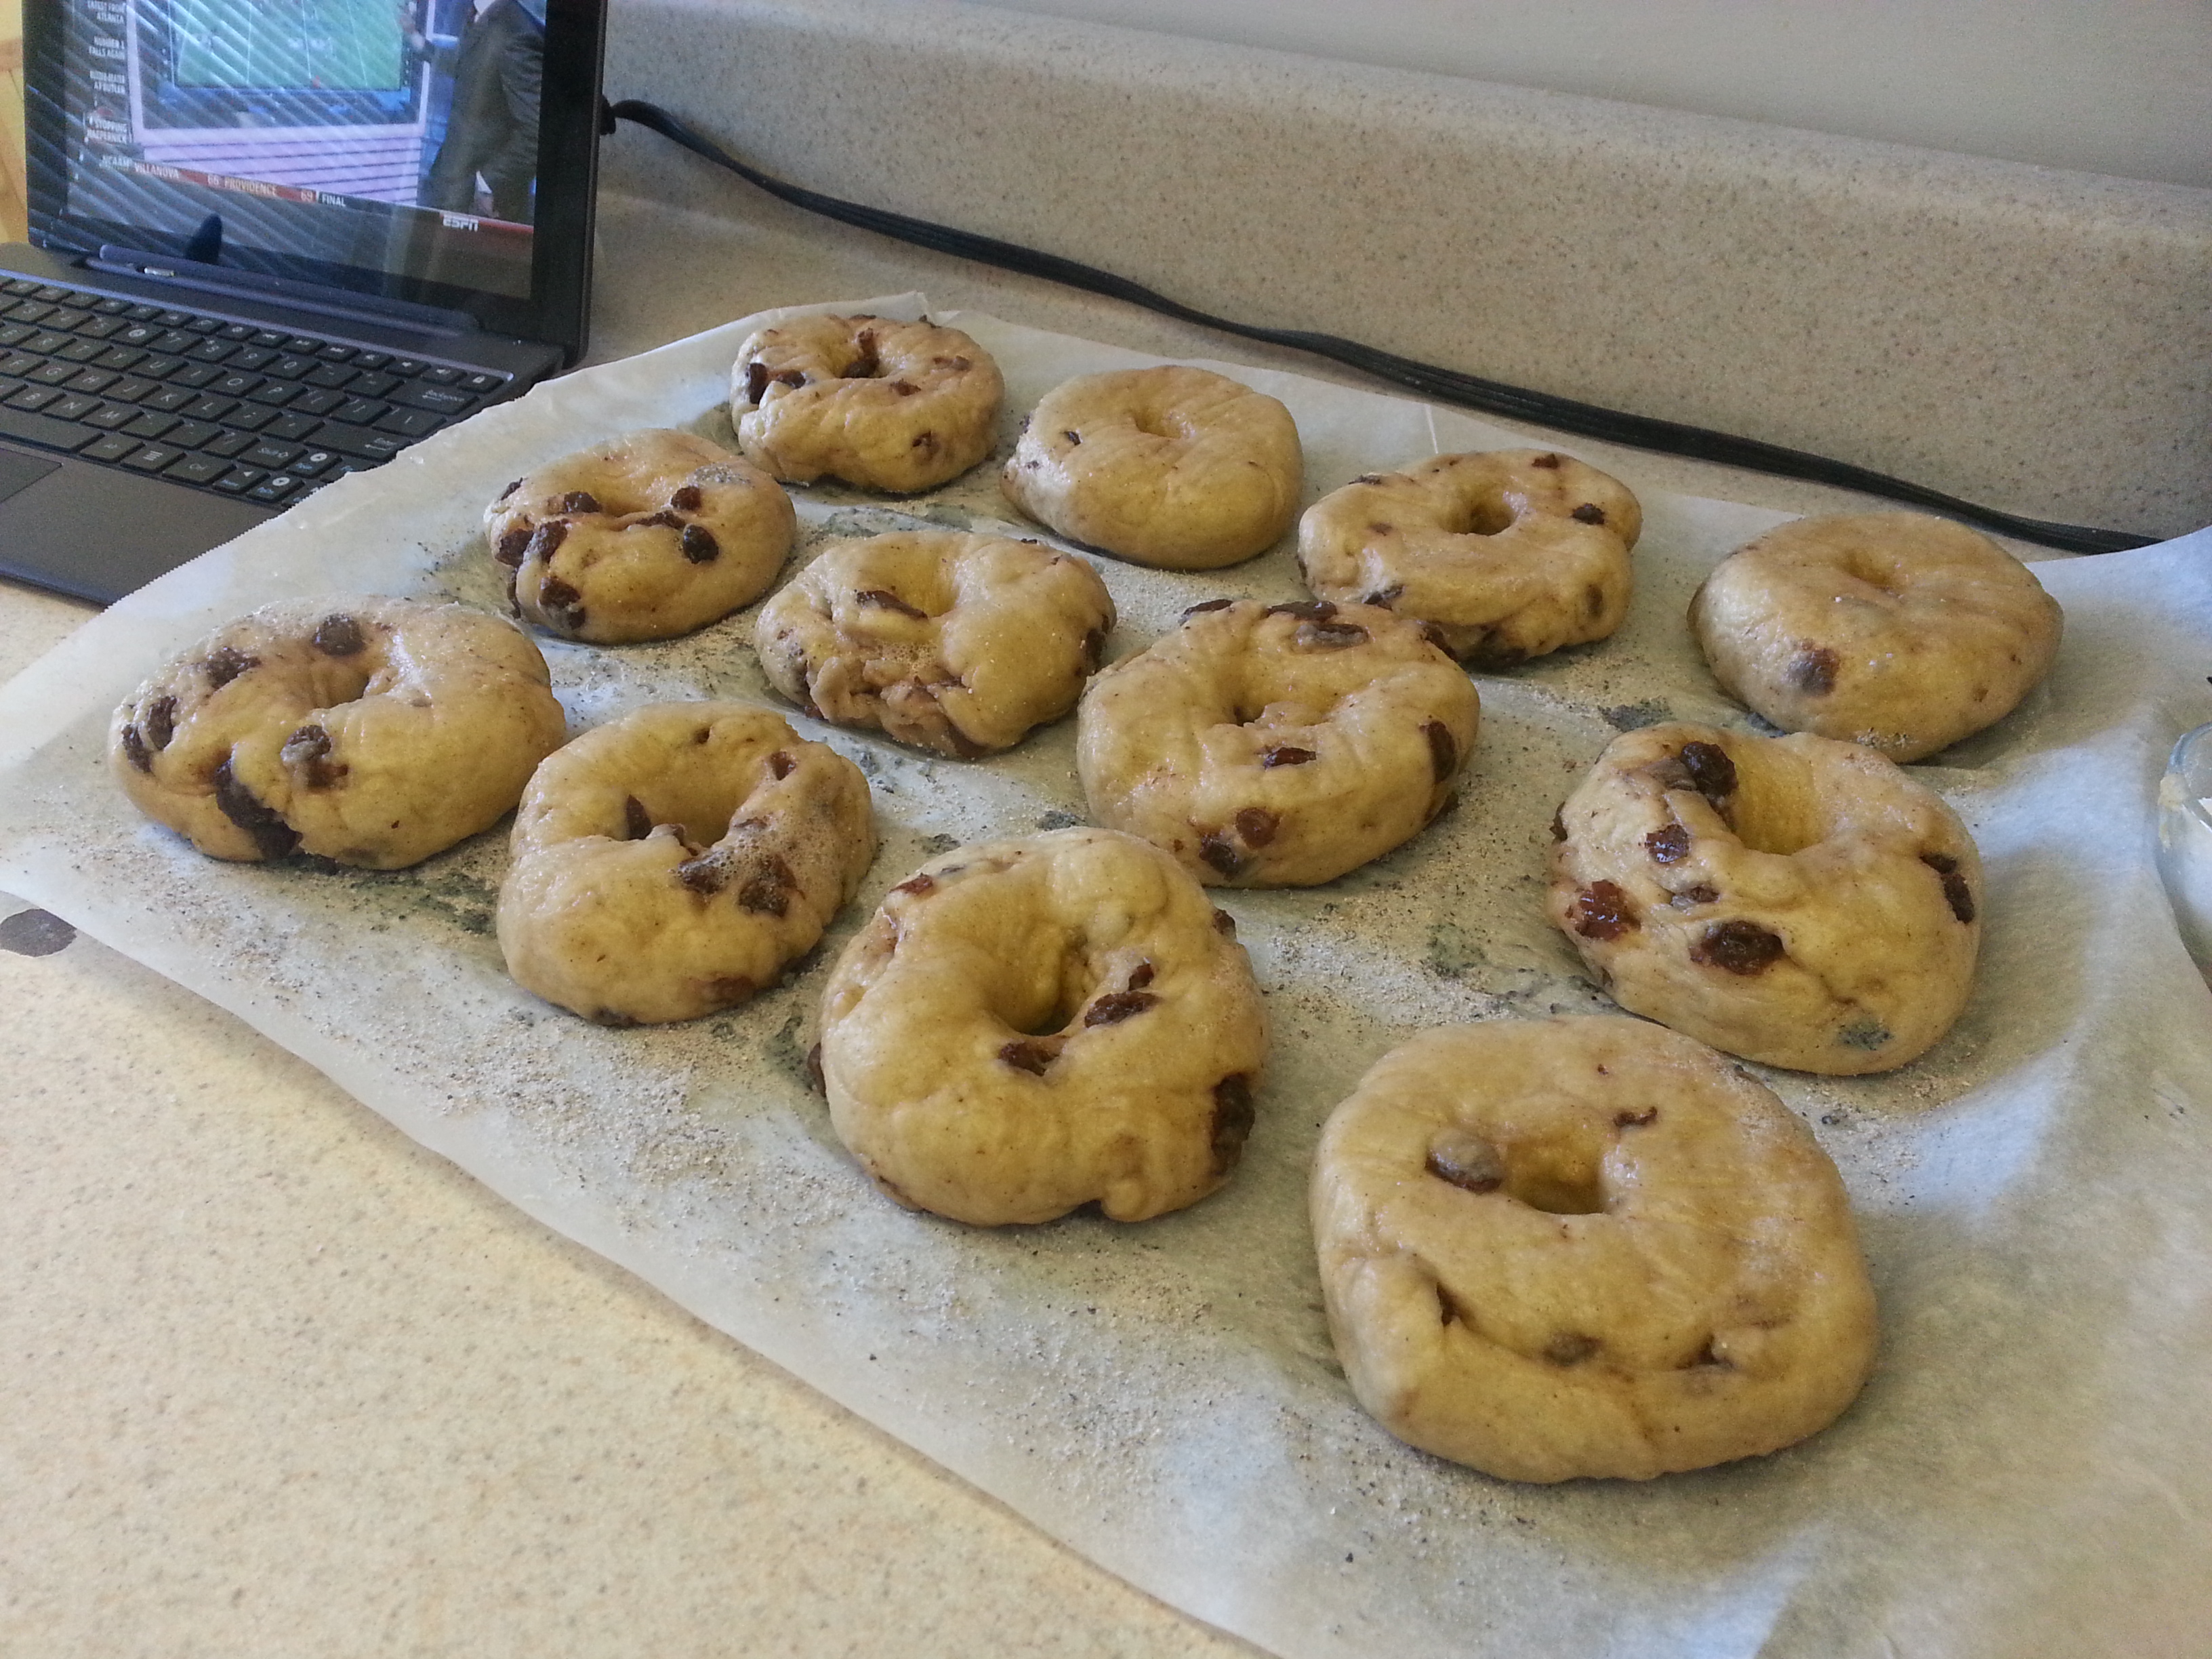
Line two sheet pans with parchment paper, lightly oil the paper, and sprinkle a layer of cornmeal on it.

Remove the bagels from the refrigerator and gently drop them into the boiling water a few at a time. They should float within 10 seconds. Boil for 1 minute, flip them over, and then boil for 1 more minute.

10 - boil bagels

Place the boiled bagels on the prepared sheet pan about 2 inches apart. Once you’ve finished boiling all of them, move the pans to the oven and bake for 5 minutes. Lower the oven temperature to 450 degrees, rotate the pans, and bake for 5 more minutes or until lightly golden brown. As with most bread, you can generally tell that they are cooked through once they reach an internal temperature of 190 degrees.

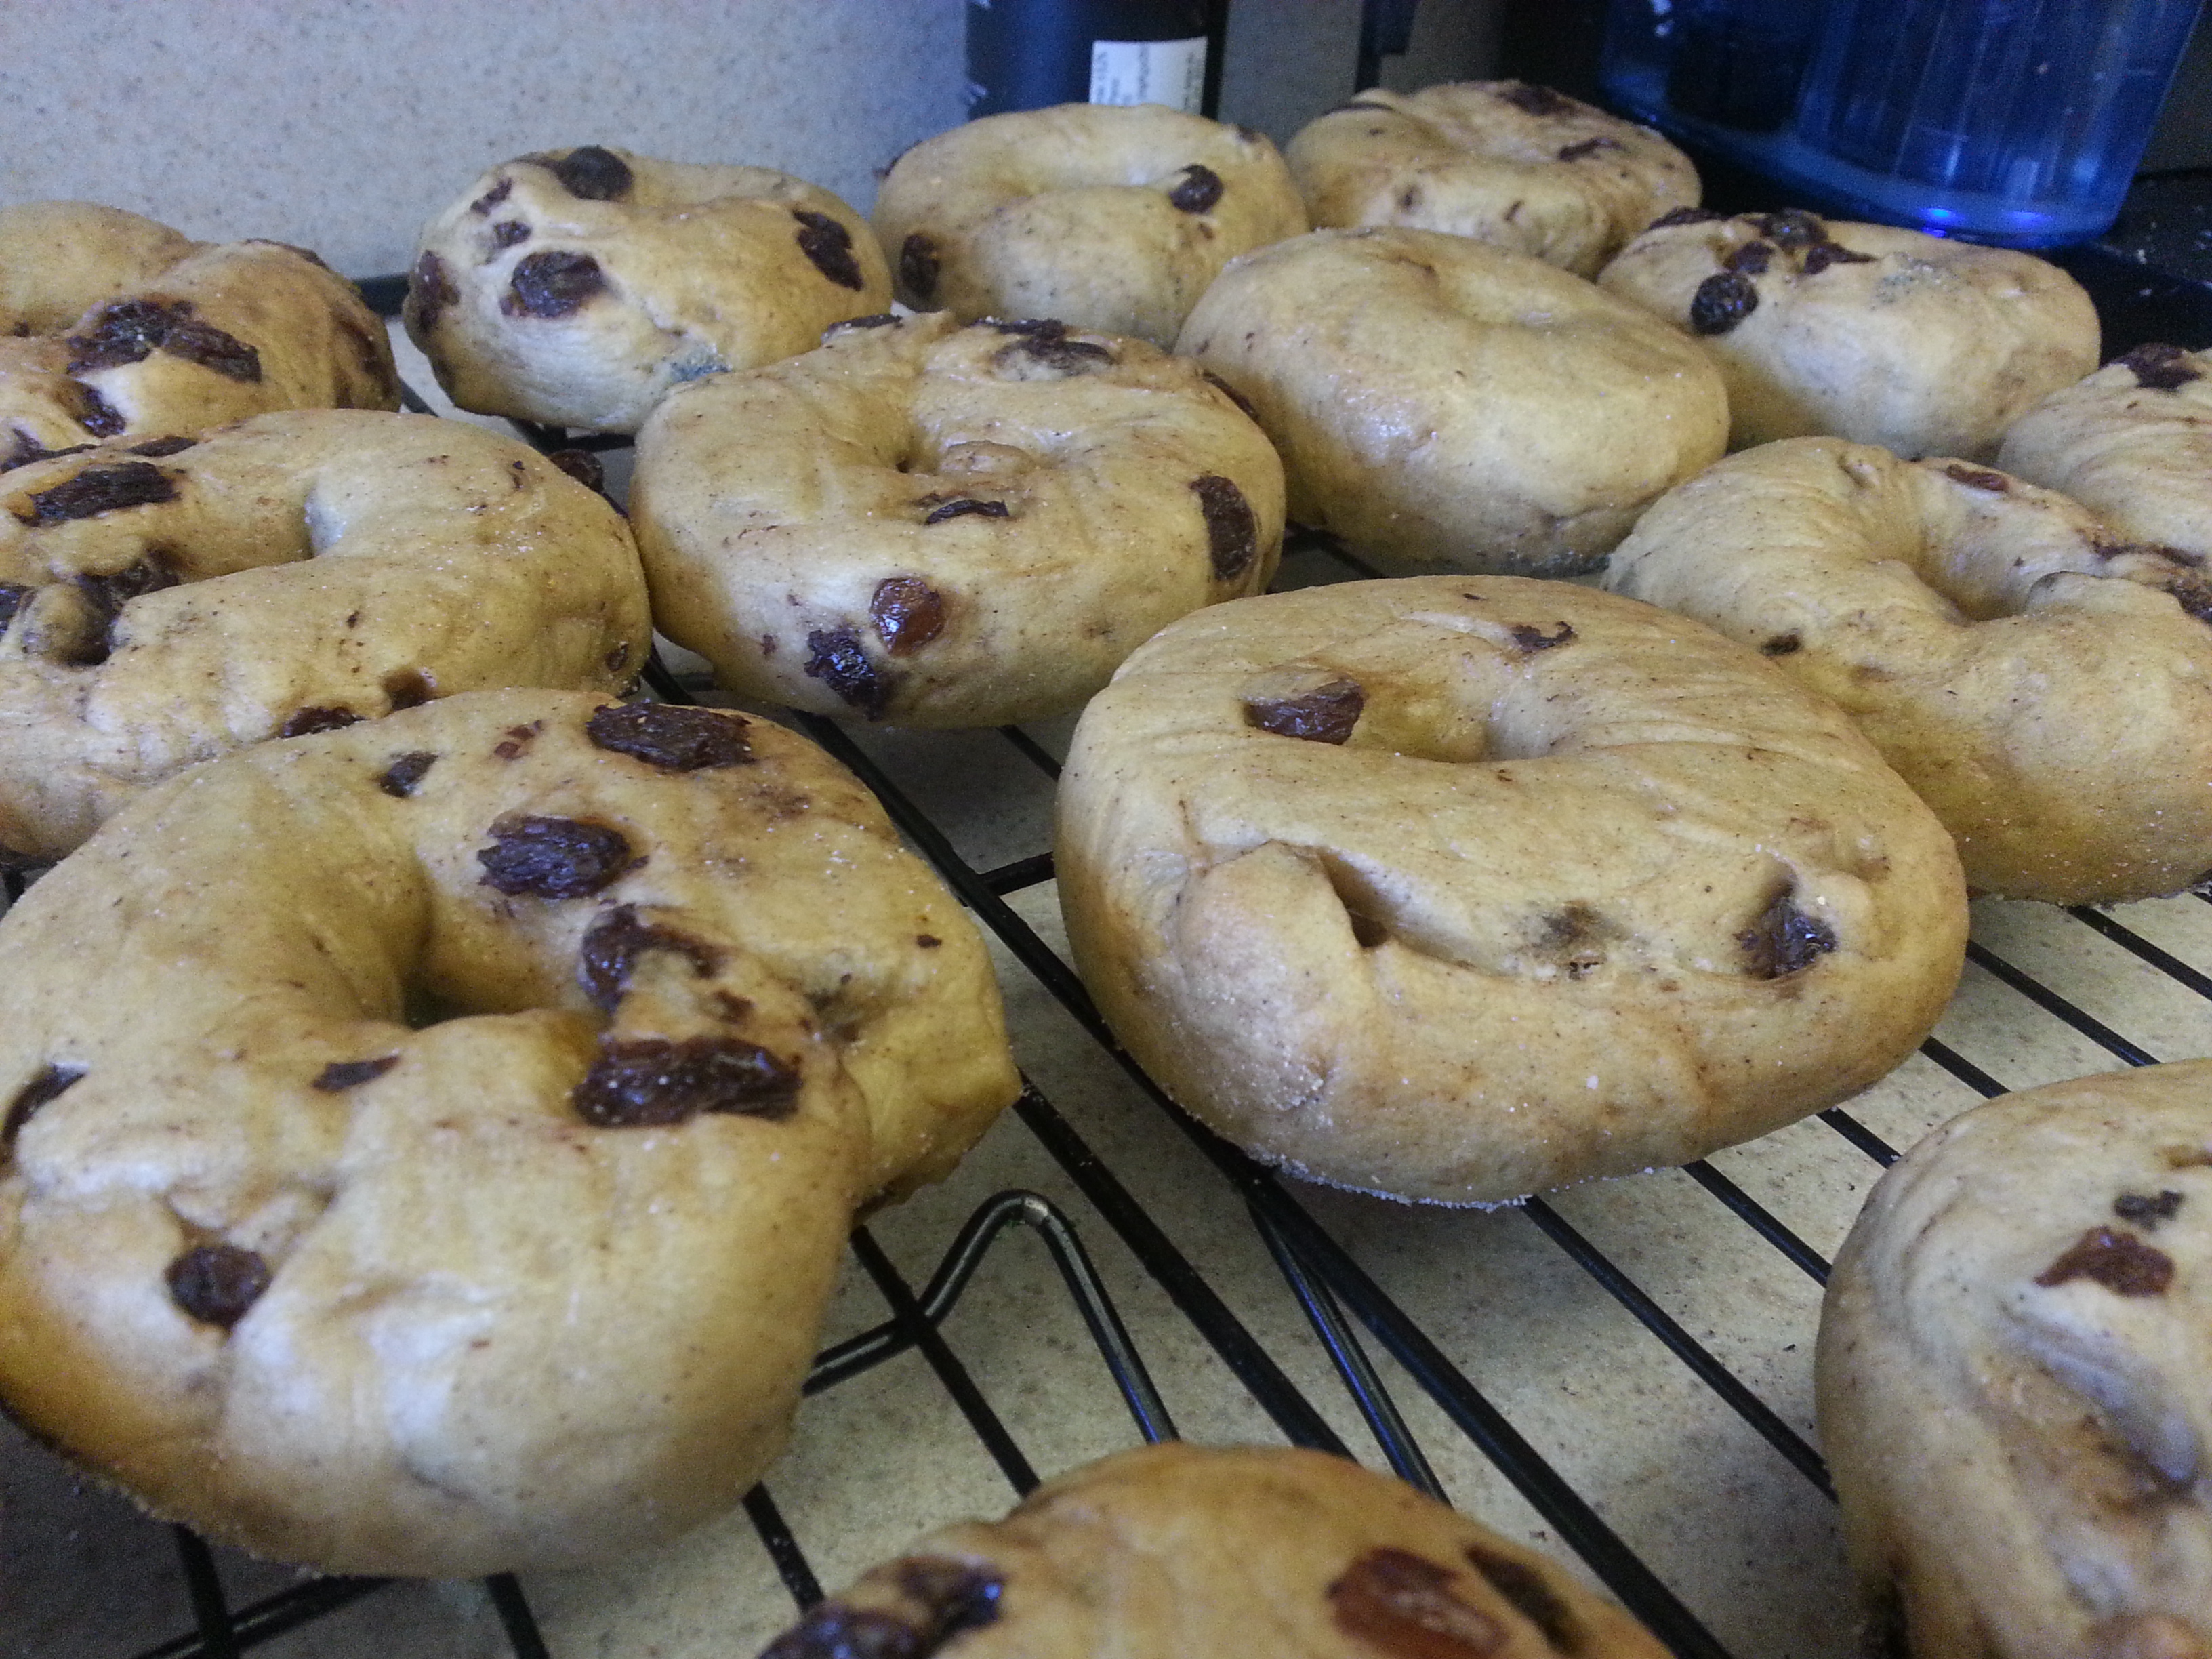
Cool the bagels on a wire rack for at least 20 minutes prior to cutting them. You wouldn’t want to smoosh all of the chewy goodness you worked to achieve, so be patient! I actually found that the texture improved greatly after several hours.

11 - boiled bagels12 - finished bagels 113 - finished bagels 2

But now you might be thinking “What do I do with two dozen bagels and only one stomach?” Well, I suppose you could share, but the good news is that these hold up well in the freezer as long as they’re tightly wrapped. Revive for a few minutes in a 350 degree oven or just toast them. Not as good as fresh, but infinitely better than store-bought.

Although I may never convince a New Yorker that these are the real deal, I have had many a bagel in my time and this is honestly the closest I’ve ever come to that distinct bagel-ness. Have fun, be patient, and enjoy. Other flavors? Omit the cinnamon and raisins and top your bagels with coarse salt, poppy seeds, or sesame seeds prior to baking. Purists might get mad at you, but dried blueberries are really tasty in place of the raisins. And besides, who cares what anyone thinks of you if you’re happy with them.

For now I think I’ll just enjoy my bagel and think about “taking a Greyhound on the Hudson River line…”

Ciao for now,

Neen

Warming up: Beer-Braised Short Ribs

21 Jan

Welcome to 2013! Neen’s Notes is grabbing the bull by the horns and ready for another year of kitchen experiments and fun:

20130118_184204

Our long national nightmare has ended and hockey is back! The Penguins had their opener against Philadelphia on Saturday and looked like they had things pretty well put together. I was impressed given that there was only a week of training camp due to the lockout.

It was conference championship week for the NFL, so a sports-filled weekend all around. What better way to enjoy the games than with something meaty and slow-cooked? That’s what was on my mind when I headed to the grocery store to get some things to make over the long weekend. You know it’s going to be a good day when you walk in and the butcher (with whom you have wisely made friends) gives you a big grin and says, “Check these out. These are what you want, trust me.”

Well who am I to argue? And let’s be honest…they were very pretty:

1 - short ribs

Short ribs have a lot of connective tissue to break down and cry out to be braised slowly in a very flavorful liquid. The key is to strike a balance between earthiness and acidity, and a mix of stock and something alcoholic is a good place to start. Wine braises are delicious, but for “tailgate” food I thought a good dark lager seemed more appropriate.

Beer Braised Short Ribs

  • 2 lbs. beef short ribs
  • 2 tsp. dried thyme
  • 3 tbsp. olive oil
  • 1 onion, diced
  • 3 cloves garlic, minced
  • 3-4 small carrots, diced
  • 2-3 sprigs flat leaf parsley
  • 4-5 sprigs thyme
  • 1 tbsp. fresh rosemary
  • 12 oz. dark lager
  • 2 1/2 cups veal stock
  • 2 tbsp. tomato paste
  • Salt and pepper

Remove the short ribs from the refrigerator one hour before cooking and season with the thyme, salt, and pepper.

2 - seasoned short ribs

Preheat the oven to 300 degrees F.

Heat a dutch oven over medium-high heat and add the olive oil. Once it is shimmering and fragrant, add the short ribs to the pan and brown on all sides. This will take about 10-15 minutes.

4 - browned ribs

Remove the ribs to a plate and set aside. Reduce the heat to medium-low and add the onions and garlic to the dutch oven. Cook for 2-3 minutes or until the onions are translucent.

5 - onions in pan

Add the carrots and tomato paste and stir thoroughly with a wooden spoon, scraping the bottom of the pan.

6 - vegetables and tomato paste

Add the ribs back to the dutch oven and tuck the herbs around them. Pour the beer over the meat and then add 1 ½ cups of the veal stock.

7 - herbs8 - add the beer

Cover the dutch oven and move it to the oven. Cook for 3 hours, adding small amounts of veal stock every hour until the remaining cup is used. Remove the lid during the last 20 minutes of cooking.

Move the ribs to a plate and remove sprigs of herbs from the dutch oven. Puree the remaining liquid and vegetables into a sauce with an immersion blender and reduce slightly until it coats the back of a spoon.

9 - cooked ribs10 - pureed sauce

Pour the sauce back over the whole ribs and serve as-is if you like. The meat is very tender though, so I shredded it and served it on whole wheat pasta with the sauce. The end result was a hearty, warm dish that fit perfectly into a lazy January weekend.

11 - short ribs over pasta

Hope you’re having a great start to 2013!

Ciao for now,

Neen

Recipe Megapost: FRACAS 2012

6 Dec

Each winter I go completely overboard and cook a bizarre amount of food in the span of 2-3 days for the Folger Recycled Arts and Crafts Annual Show (FRACAS). The Green Committee holds the event each December and displays creative art pieces made from recycled objects by Folger employees, family, and friends.

After I’m home from the first ingredient run, I have a brief “you are out of your mind” moment, get that five minute panic out of the way, and then move forward. Once prep lists are made and I’ve worked out what needs to be done when / how things should be stored, it’s go time.

I may not be a trained chef, but I’ve been cooking for groups since I was old enough to reach the counter. One of the benefits of being the location of choice for most family holidays was / is getting to spend days in the kitchen working on party food with my family. We put on music, everyone picks a task, and sometimes a bottle of wine even starts floating around. Sometimes grandmothers or aunts even appear, ready to help. We’ve been a pizzelle factory, ravioli assembly line, cookie shapers, manicotti fillers and just about everything in between.

It’s different to do it alone. Fortunately, I never feel alone, because when I’m in the kitchen my family is with me whether they’re physically there or not. There may be several less pairs of hands, but all of their experience sticks right with me. So when this once-a-year madness comes around I go at it with everything I’ve got.

This year, the FRACAS tasting plates were primarily influenced by dishes from France and the Mediterranean. I was inspired by the spirit of our Green Committee to think about being a responsible steward of the earth and used each ingredient in as many ways as possible. I also considered the sustainability and seasonality of what was planned and consulted with friends from the local Arlington County Farmer’s Market in order to prepare a thoughtful, respectful group of dishes. My most sincere thanks go to those purveyors for making available the many local herbs, meats, vegetables, and preserved foods (i.e. dried cherries and strawberry jam). Special thanks to the fine folks at Smith Meadows, Cibola Farms, Toigo Orchards, and Twin Springs.

We begin with the plate of tapenades, spreads, and rillettes…

Smoked Salmon Rillettes
adapted from David Lebovitz

  • 8 oz. wild salmon filet, bones removed.
  • 5 tbsp. unsalted butter
  • 1 tbsp. olive oil
  • Juice of half of one lemon
  • 2 tbsp. fresh chives, chopped.
  • 4 oz. of smoked salmon, cut into thin strips and then diced.
  • ¼ tsp. smoked paprika

Season the fresh salmon lightly with salt and steam for 8 minutes or until cooked through. Set aside to cool. In a medium-sized bowl, mash together the olive oil and butter until very smooth and then stir in the lemon juice, chives, and smoked salmon.

P1060895

Remove the skin and flake the cooked, fresh salmon over the top of the mixture then fold it in gently until well combined. Season with chili powder and salt if needed. My smoked salmon was quite salty and so I did not add any extra salt.

Cover and chill for at least two hours. Allow the rillettes to come to room temperature before serving them. They will stay fresh covered in the refrigerator for up to three days or tightly wrapped in the freezer for up to two months.
P1060899

Pork Rillettes
adapted from Michael Ruhlman

  • 3 lbs. fatty pork shoulder
  • 8 oz. rendered pork fat (lard)
  • 1 leek, thoroughly washed and split lengthwise, leaving one inch intact at the root end.
  • 1 celery stalk
  • 1 small bunch fresh thyme
  • 3 fresh bay leaves
  • 1 yellow onion
  • 5 cloves
  • 2 qt. water or veal stock

Preheat the oven to 300 degrees F.

Dice the pork into 1 in. cubes and place in a pot. Cover with water by 2 in., bring to a boil, and drain the pork. Return the pork to the clean pot.

P1060867

Stuff the thyme and bay leaves into the split leek. Take the celery stalk and put it alongside the leek, then tie everything together with a piece of cotton twine. This is called a bouquet garni.

Stud the onion with the cloves.

P1060873
Add 2 qts. of water or stock to the pot with the pork in it, add the bouquet garni and clove studded onion, then bring to a simmer over medium heat. Cover the pot and place it in the oven. Cook until the pork is very tender and falls apart when poked with a fork.

Remove the pork from the cooking pot and transfer it to a plate to cool. Strain the cooking liquid into a bowl and set aside.

P1060913

Once the pork has cooled to slightly above room temperature, put it in a mixing bowl and mix on low speed, adding reserved cooking liquid as needed until it is a smooth, spreadable consistency. Season with salt and black pepper to taste.

P1060919

Put the spread into individual containers and refrigerate until chilled.

P1060934

Melt the lard over low heat and then pour a 1/8 in. layer of it on top of each container of rillettes. This seals the containers and keeps the rillettes fresh. Put the rillettes back into the refrigerator and chill until the layer of fat has solidified. Remove from the refrigerator two hours before serving.

Covered, they will keep in the refrigerator for up to a week and in the freezer for up to a month.

Mediterranean Olive and Vegetable Rillettes
adapted from Michael Ruhlman

  • 1 zucchini, cut into ½ in. discs.
  • 1 yellow squash, cut into ½ in. discs.
  • 4 oz. mushrooms, quartered.
  • 2 medium sized tomatoes, quartered and seeded.
  • 1 yellow bell pepper
  • 1 red bell pepper
  • 1 cup kalamata olives, pits removed.
  • 1 onion, diced.
  • 2 garlic cloves, minced.
  • ½ cup olive oil
  • 2 tbsp. balsamic vinegar
  • ¼ cup basil, chiffonade cut.
  • Salt and black pepper

Broil or grill the red and yellow peppers until the skin is black all over. Put them in a bowl, cover with plastic wrap and allow them to cool.

P1060916
P1060917

Once cool enough to handle, remove the skin, core, and seeds and then ½ in. dice.

Preheat the oven to 400 degrees F. Toss the zucchini, yellow squash, mushrooms, and tomatoes with ¼ cup olive oil, spread on a baking sheet and roast for 20 minutes.

Saute the onion and garlic in 2tbsp. of the olive oil until soft, but not browned and then set aside to cool slightly.

Process the olives, garlic, and onions into a puree. Fold in the balsamic vinegar, roasted vegetables, peppers, and basil.

P1060928

Season to taste. Cover and refrigerate for up to a week.

Fig and Olive Tapenade
adapted from David Lebovitz

  • 1/2 cup dried black mission figs
  • 1 cup water
  • 1 cup nicoise or kalamata olives, rinsed and pitted.
  • Juice of half a lemon
  • 2 tsp. stone ground mustard
  • 1 small garlic clove, peeled and smashed.
  • 1/2 tablespoon capers, rinsed and patted dry.
  • 1 tsp. finely diced rosemary
  • 1/2 cup olive oil

Salt and black pepper

In a medium-sized pot, simmer the figs in the water until they are soft and the cooking liquid becomes syrupy. Remove the figs from the water with a slotted spoon and reserve the excess cooking liquid.

P1060876

In a food processor, pulse together the olives, mustard, lemon juice, garlic, figs, capers, rosemary until a chunky paste forms. Add the olive oil until the mixture is spreadable.

P1060891
P1060893

The reserved liquid from the figs can be used to thin the spread if needed. Season to taste. Refrigerate for at least one day prior to serving. Covered, it will keep in the refrigerator for up to a week.

Roasted Garlic with Marinated Dried Tomatoes

  • 1 cup dried tomatoes
  • ½ cup olive oil
  • 1 tbsp. fresh lemon juice
  • 2 heads garlic
  • 2-3 sprigs fresh thyme
  • Salt and black pepper

Combine the tomatoes and olive oil and set aside for at least 30 minutes or until the tomatoes have softened slightly. If you have trouble getting the tomatoes to soften, you can put the mixture over very low heat for 5 minutes.

Preheat the oven to 375 degrees.

Split the heads of garlic in half horizontally and drizzle olive oil on each half. Put the garlic back together and bundle tightly in aluminum foil. Roast the garlic for 40-45 minutes or until soft and lightly caramelized. Set aside to cool.

Squeeze the softened garlic out of the peel and mash in a bowl. Drain and roughly chop the tomatoes, then mix them into the garlic with the lemon juice and thyme. If you like a chunky texture, stop and season here. If you prefer more of a spreadable consistency, you can puree this in a food processor. Season to taste. Cover and store in the refrigerator for up to 2 weeks.

fracas2

…The second plate was full of cured pork tenderloin and parma ham accompanied by a few young cheeses and special condiments to brighten everything up. Everything here mixes and matches pretty well, but my favorite was a toast topped with the cured tenderloin and mustard fruit. Salty, sweet, and a little tangy, yum!

Sage and Thyme Cured Pork Tenderloin

  • 4 lb. pork tenderloin, trimmed of fat and sinew.
  • ½ gallon water
  • 1 cup salt
  • 5 tbsp. DQ Cure #1, also known as pink salt or Instacure
  • 1 cup sugar (you can use a mixture of brown and white)
  • 1 bunch fresh thyme
  • 1 bunch fresh sage

Combine the water, herbs, salt, curing salt and sugar in a pot and bring to a boil. Set aside and chill until cold in a container large enough to hold the tenderloin.

Add the pork to the container of brine and place a plate on top of it to keep it submerged. Allow this to sit in the refrigerator for 48 hours.

Remove the pork from the brine, rinse and pat dry. Set it on a wire rack over a baking sheet and refrigerate uncovered for 12 hours.

Preheat the oven to 375 degrees F.

Roast the pork until it reaches an internal temperature of 150 degrees, rest, and then wrap and chill. Slice thin on the bias to serve.

P1060906

Ancho Chile Spiced Ricotta

Follow the recipe found here for making homemade ricotta. Once the curds have drained, add 1 tsp. ancho chile powder and mix thoroughly. Store covered in the refrigerator for up to a week.

20121203_190308

Queso Blanco with Roasted Piquillo Peppers

Follow the recipe found here for making homemade queso blanco. Prior to pressing the cheese, fold in 1/3 cup diced roasted piquillo peppers. Store well wrapped in the refrigerator for up to 2 weeks.

P1060929

Mustard Fruit
adapted from Michael Symon

  • 1 cup dry red wine
  • 1/2 cup white sugar
  • 1/4 cup red wine vinegar
  • 1 tsp. salt
  • 1/3 cup stone ground mustard
  • 1/2 tsp. yellow mustard seeds
  • 1 pear, peeled, cored, and chopped into ½ in. cubes
  • 1 dried sour cherries

Place the dried cherries and chopped pears in a clean, quart-sized mason jar and set aside. Cover and shake to mix.

Combine the wine, sugar, vinegar and salt in a medium-sized saucepan and bring to a boil. Stir in the mustard until thoroughly blended and then mix in the mustard seeds.

Gently pour the hot liquid over the fruit in the jar, cover, and shake gently to distribute the liquid. It should generously cover the fruit. Store in the refrigerator for at least two days and up to one month. The longer it is stored, the more pronounced the flavors will become. The dried cherries will also plump up a little bit and they are delicious.

Giardiniera
adapted from Michael Symon

  • 1 pound celery, peeled and sliced thin.
  • 2 jalapeño peppers, cut into thin rings.
  • 2-3 cherry peppers, diced.
  • 2 cloves garlic, minced.
  • 1 red onion, quartered and sliced thin.
  • 1 tsp. ancho chile powder
  • 1 tsp. salt
  • 1 tsp. toasted, ground coriander
  • 1/4 cup flat leaf parsley, chopped.
  • ½ cup red wine vinegar
  • ½ cup olive oil

Combine all ingredients in a large mixing bowl and mix thoroughly. Pack into a 1 quart mason jar. Store in the refrigerator for up to a month, shaking gently every so often to redistribute the liquid.

P1060880

Strawberry Jam Tart with Walnut Crust

Follow the recipe found here for making a strawberry jam tart, but replace the cornmeal with ½ cup finely ground walnuts.

20121203_185332

Chocolate Hazelnut Tart
adapted from the Noble Pig

Tart shell:

  • 12 tbsp. unsalted butter
  • 2 cups flour
  • 1/2 cup sugar
  • 1 tsp. vanilla extract
  • 1/2 tsp. kosher salt
  • Zest of one large orange

Filling:

  • 2 tbsp. cornstarch
  • 2 cups heavy cream
  • 3/4 cup Nutella or other chocolate-hazelnut spread
  • 1/2 tsp. vanilla
  • 1/8 teaspoon salt
  • Chopped hazelnuts to garnish

Preheat the oven to 325o F.

Melt the 12 tbsp. of butter in a medium-sized pot over medium-high heat and brown just a touch. Remove the pot from the heat and stir in the sugar, vanilla, salt, and orange zest until the sugar is mostly dissolved.

P1060936

Put the flour in a large bowl and add the butter mixture. Mix until a soft dough forms.

P1060938

P1060939

To form the crust, roll the dough into a ball and then press it into an ungreased 10 in. tart pan with a removable bottom using the heel of your hand. Push the crust approximately ½ in. up the sides of the pan.

P1060940

Freeze the crust for 15 minutes and then bake it for 25 minutes or until the edges are just becoming golden. Set aside on a wire rack to cool slightly. Unlike many tart recipes, the crust does not have to be completely cool before the filling is added. It can be warm, but you should be able to touch the sides of the pan.

P1060945

Whisk the cornstarch with ¼ cup of the heavy cream. Make sure the cream is cold when you do this.

Combine the remaining 1 ¾ cups cream, chocolate-hazelnut spread, vanilla, and salt in a saucepan over medium heat. Add the cornstarch mixture and mix thoroughly.

P1060946

Whisking constantly, bring the filling to a boil and boil for one minute or until it thickens considerably.

P1060949
P1060950

Pour the filling into the tart shell.

P1060951

Top with chopped hazelnuts and refrigerate until set for at least two hours before serving. Chilling it overnight is ideal for the very easiest cutting serving. Covered, the tart will keep for 2-3 days in the refrigerator.

P1060953

Here’s the whole spread waiting to be enjoyed in our photography department. As you can see, I was not the only one contributing delicious goodies. We have a very talented staff, what can I say?

20121205_165419

And that doesn’t even include all of the truly special artwork that was created for the event. Tote bags, planters, wreaths, mobiles, frames, dioramas, models, origami…you name it, my colleagues thought of a creative way to make it. A personal favorite was a giant paper crane made out of a proposed engineering plan. He was pretty cool looking. For my own FRACAS piece I wanted to find a way to save all of the beautiful greeting cards Joe and I received at our wedding, so I made this wreath out of those, fabric scraps left over from making a skirt, a bow from the groomer which Dioji no longer cared to wear, and a broken embroidery ring:

20121205_170109

Well, I hope that this post will sustain you through December, since I’m fairly sure that I’ll go MIA during Christmas baking season. (Dare I try to break the record of 114 dozen treats?) All I’ll say is that a certain grandma gave me a pizzelle iron at my bridal shower and that it’s been calling to me from the cupboard ever since I deemed it acceptable to begin thinking about Christmas.

Warmest holiday wishes to all of you. Remember that what you always have is what you carry in your heart and head, so make it something fun!

Ciao for now,
Neen

“Tell yourself…”

29 Nov

“…how lucky you are.”

Ignore the fact that I’m quoting from Seussical the musical and meditate on that statement for a second. Now that Thanksgiving has passed us by and we’re rolling on toward December, most of the people I know have entered the frantic “oh-god-what-do-i-buy-people-where-did-this-year-go” phase. The thought hit me this time around, but it didn’t really stick. The emotional roller coaster that we’ve been on this year has made me feel significantly more appreciative of what is already in my life and admittedly a little bit selective about how I choose to spend my time. I’ve written here before about how thankful I feel to have my family, my ability to cook things that make people happy, and a safe, wonderful home. But I was pleasantly surprised to be reminded of a few other things during November…

I’ve put off writing any kind of long fiction for almost my entire life. The vast majority of the writing I do is journaling, essays or poetry. I love science fiction literature, but the idea of sitting down and writing a book always seemed so daunting. I’d try, then make it a third of the way through and get lost. It would languish for so long that by the time I went back it I wanted to scrap the entire thing. On a whim and looking for a distraction the week after my mother-in-law died, I decided to try my hand at National Novel Writing Month (NaNoWriMo). If you enjoy writing in any sense and haven’t given the challenge a shot, I highly encourage you to do so. It forced me to sit down and just write every day in November. It didn’t matter if what I put down was a complete wreck or created a massive plot hole, the challenge made me think creatively and problem solve every day until I hit that 50,000 word mark. I never thought I’d actually finish it and there’s a massive amount of editing to do to make it anything I’d want to share, but I wrote a manuscript for a novel in a month. It’s honest and it’s mine. Aside from the nice feeling of accomplishment, there was also something very cathartic about the experience. I’ve always seen writing as therapeutic, but I didn’t think that fiction would have quite the same feel to it. Interestingly enough, the idea that I could write anything or create a character as wonderful, horrific, or just plain crazy as I felt like was liberating. In a way it made me work through my own daily thoughts and feelings in a constructive way. I appreciate writing for the positive way it has enriched my life and made me a more creative thinker.

November also brought with it a strong compulsion to purge the house. I don’t know why, but I’m really glad it did. It made me get around to going through the old computer equipment, files, random junk, kitchen toys, clothes, and general nonsense that accumulates when you are too busy and tired to care about it. We were able to recycle or give away a lot of things and the process reminded me to be grateful to have so much and to see cleaning out the house not as a chore, but as a way to share. I appreciate cleaning for making me remember to be a mindful citizen of the planet socially and environmentally.

Along with said compulsion to act as a tornado around the house came finding all sorts of hidden treasures! Among the items I found was a single, lonely CD labeled only as “Back up 9/04.” Buried in a storage tub full of my old journals and some paper files, It was scratched to death and I was sure that there was no way my laptop would read it. When I put it in the drive, the loud buzzing as it began to spin was less than encouraging. But the Auto Play dialog box popped up and I clicked the button to open the files. Before me was my entire freshman year of college on one, sole disc. Between five moves and several computers I thought I’d lost those files (I have since become more diligent about having redundant back-up copies). There was a folder full of poetry, one of school work, and one of music compositions. But it was the last folder on the disc that caught my eye the most: It was just labeled “hub” and I knew exactly what was in it.

My freshman year of college was chock full of luck. I was a depressed mess of an individual when I left Pittsburgh and somehow ended up in a small dorm where we were practically a family and in a major where I don’t think there was anyone that didn’t like each other (even though we were almost always competing with one another for stage roles). Then there was The Hub. A few of the computer science majors ran a file sharing hub that was open to anyone with an on campus IP. It also had a chat room and that is where I started talking to a bunch of people in entirely different majors (I’d later marry one of them!) and “met” many of my very best friends. We’d spend a few hours, usually obscenely late at night, just typing to each other and making silly, sarcastic jokes.

It should have been the most awkward thing in the world when we all finally decided to meet in person, but it wasn’t, aside from the fact that none of us knew each others’ names at first. And after that one night meeting up and walking to the only open place we could knew of—a pizza joint called Little Steve’s—at 3 in the morning, we were a regular Island of Misfit Toys in the very best sense. So when I found that folder a few nights ago, full of pictures from our weekly dinners and chat logs from our funniest conversations, I was reminded of how much that group of people completely changed my perspective on what it meant to be a friend. There are only a few of them that I keep in touch with, but they will always be with me. They changed my entire life for the better. They brought me joy when I didn’t believe that I deserved it, and put me on their shoulders while I found self-confidence. Even at my saddest moments, I think of them and think “Bring joy.” If I can find at least one moment each day when I make someone smile or laugh, then that day is a success. I appreciate the whole hub (especially three Joes, two Ians, Kris, Johnna, Anthony, Evan, Talia, Brandon, Mike, Colin, Mark, Ed, and Kevin) for teaching me how to just let go and LAUGH.

These two pictures from that old, scratched up CD basically say everything. Always smiling. And in case you’re curious, it’s powdered sugar on the lens of my camera in the first one. It was a good night:

No, she didn’t maim him. She’s probably the one person in our dorm I trusted with a chef’s knife.

While this post might not contain delicious food (aside from that table full of Kris’ baking magic), it is one of the most satisfying things I’ve made recently. But just so you don’t feel neglected: Our office’s annual recycled arts and crafts show and reception is coming up and I am the chef de cuisine for the evening. Which means an incoming Recipe Megapost! Look out for it late next week. For now, I leave you with this: If the holiday shopping is already driving you toward the bourbon-laced eggnog and spiked mulled cider, remember that what you carry with you in the spiritual sense is the one thing that you’ll always have. So let it be joy.

Ciao for now,

Neen

Deep-Fried Delicious Memories

1 Nov

Two days after what was probably the most fun wedding party ever, my in-laws hosted brunch for our family at the Grand Concourse. My mother-in-law Lynn was glowing with pride in a beautiful floral print pink dress and matching cardigan as she welcomed everyone to another celebration as a big, new family.

The Grand Concourse lives up to its name in more ways than one. It’s a giant restaurant set in an old train station, and is famous for its vast brunch buffet complete with everything from roast beef to bananas foster. But what was it that tickled our family the most?

The doughnut machine.

Yes, the doughnut machine. A mold dropped perfectly shaped pieces of doughnut batter into oil just long enough for them to cook and then moved them  along to a conveyor belt where the grease drained off of them. Next to the machine were two bowls where the doughnut could be dipped in either powdered sugar or cinnamon sugar. Needless to say, we were all incredibly entertained by this. Especially Joe and Lynn.

For almost as long as I’ve known Joe, I’ve known exactly where he gets his eating habits. It’s certainly not my father-in-law, who like me, thinks vegetables really are a food group. Nope, it’s definitely his mom. Their shared love for burgers and fries, anything with blueberries in it, and fresh, hot doughnuts is unmatched. We arrived in Louisville late one night on a flight from DC and saw that the Krispy Kreme nearby had the “hot doughnuts” sign lit up. I blinked and we were at the drive-thru window. On another occasion when I’d had just about enough of grad school, I closed the books for a day and made yeast doughnuts with a honey glaze and sent half of them with Joe when he went to visit his parents. I was later asked why only a half-dozen had been delivered.

It was a long summer for Lynn as she fought valiantly to stay well amidst all of her treatments and enjoy the wedding festivities. By the time the brunch in Pittsburgh came around, she didn’t have much in the way of an appetite anymore. But when my brother returned to our table with two fresh mini-doughnuts for her (one of each kind, of course!), she took a bite of each. It was the first thing I’d seen her eat in a long time and one of the few foods she said still tasted good to her. Had I the time, I’d have been churning out doughnut recipes for all of August.

Things changed very quickly when we returned from Pittsburgh. A few posts ago in “Bake it All Away,” I mentioned that the reason I’d baked bread that particular day was because I was feeling sad and powerless. It was right around that time that Lynn’s condition started to deteriorate. All I could do was make frozen meals for my father-in-law, sit by Lynn’s bedside singing and trying to remember the words to songs from “Evita” (her favorite musical), and play Rachmaninoff recordings so at least she might dream about being at spectacular performances at the Kennedy Center.

On October 23rd, Lynn’s long battle with ovarian cancer ended. She passed away peacefully with Joe, Roger, myself, her sisters, and her nurse at her side. The loss has felt agonizingly painful at times and we’ve all spent the last week in kind of a fog. Life still doesn’t feel real, and I imagine that it will take a long time to get used to the “new normal.”

Then Hurricane Sandy hit and gave us Monday and Tuesday off of work this week. It was kind of a relief and gave me time to do something a little bit fun and lighthearted for a little bit of distraction.

I’ve been promising Joe for a month that I’d make cider doughnuts for him. But we spent most of our October days being where we truly needed to be, with our family. So when I suddenly had unexpected free time on Tuesday morning, I decided to spend it elbow deep in flour and all the spicy sweet smells of autumn.

Cider doughnuts are cake doughnuts, so there’s no rise time involved here. That said, the dough does require some chilling prior to cutting, so make sure you have a good chunk of time on hand before starting.

Apple Cider Doughnuts

  • 1 cup apple cider (fresh, unfiltered is best)
  • 2 small strips of orange peel
  • 1 shot bourbon
  • 3 ½ cups flour
  • 2/3 cup sugar
  • 1/3 cup brown sugar
  • 2 tsp. baking powder
  • 1 tsp. baking soda
  • 2 tsp. cinnamon
  • ½ tsp. fresh grated nutmeg
  • ½ tsp. salt
  • ½ cup buttermilk
  • 2 eggs, room temperature
  • 4 tbsp. unsalted butter, softened

Toppings

  • Sugar mixed with cinnamon
  • Powdered sugar mixed with just enough cider to achieve a glaze that ribbons off of a spoon.

Combine the apple cider, orange peel, and bourbon in a small pot over medium heat and simmer until it reduces to between a 1/3 and ¼ of a cup of liquid. Discard the orange peel and set the liquid aside to cool.

In a large bowl, mix together the flour, baking powder, baking soda, salt, cinnamon, and nutmeg.

In the bowl of a stand mixer, beat the sugar and butter together until smooth. With the speed turned to low, add the eggs one at a time, mixing in between additions, and then add the cider reduction and milk. Mix until well blended.

Add the flour mixture to the wet ingredients and mix just until everything comes together. You’ll have a sticky, loose dough.

Line a baking sheet with parchment paper and dust it with flour. Scrape the dough out of the bowl and onto the baking sheet and flatten it with your hands until it is ½ in. thick. Freeze for 20 minutes or until slightly firm.

Cut doughnuts into desired shapes and place them on a second baking sheet lined with floured parchment paper. I used a 2 in. biscuit cutter and got 3 dozen small doughnuts. A larger biscuit cutter can also be used, in which case you should also cut out the middles (a shot glass dipped in flour works well) and use them to make doughnut holes. If a 1 in. cutter is used to make only doughnut holes, the yield is about 10 dozen. These fry fairly quickly and it’s easier to avoid raw middles with smaller doughnuts.

Refrigerate the pan of doughnuts while you prepare the frying oil and toppings. Put each topping in a shallow bowl and set them next to a wire rack placed over a piece of aluminum foil. Fill a pot with at least three inches of peanut or corn oil. They both have high smoke points, but peanut oil is my favorite for frying. Heat the oil over a burner set to medium-high until it reaches 350-360 degrees. Keep the oil within that temperature range while you fry the doughnuts and you won’t end up with greasy pastries. If you filter your oil at the end to reuse it, you’ll notice that you lose very little when you pay attention to temperature control.

Fry batches of 5-6 doughnuts at a time for 30-60 seconds on each side or until brown. Two chopsticks or butter knives make it easy to flip them. One batch I made had a few that were a little doughy in the middle, so I’d lean toward the longer cooking time for larger doughnuts. Doughnut holes cook much faster, so watch them closely. Check the oil temperature between each batch and adjust the heat accordingly.

Drain the doughnuts on paper towels for a few seconds and then either dip in the glaze or roll in the sugar. Enjoy warm with a cup of very strong coffee for maximum joy.

As Joe and I ate them and relaxed on a much-needed surprise day off of work, I couldn’t help but smile and think of Lynn. She’d have been right there with Joe, probably play-fighting for the last one on the plate.

If you want to see some of Lynn’s favorites, check out other recipes I’ve made for her: There’s Easter Bread (she loved it for grilled cheese sandwiches), Flourless Chocolate Cake with Italian Meringue for the chocoholics, and last year’s special birthday treat, a Coconut Layer Cake for the true southerners out there.

I’ll always love this special lady for everything she was: A generous, loving, kind, intelligent and empowered woman with more wit in her little finger than I have in my entire body. I feel blessed to have known her, and even more special to be a part of her family forever.

Ciao for now,

Neen

Tribute to the Pie Queen

9 Oct

My best friend at Northeastern U. was an incredible baker. You’d walk into her dormitory suite and be enveloped in the warm scent of apples, cinnamon, and buttery pastry. She was undoubtedly one of the most generous people I have ever met in my life, and never once hesitated to take care of those around her. My freshman year of college, I would be her kitchen helper when she made dinner for our friends once a week. Every week was a different theme; from Italian and Southern favorites to a night of American classics that ended in an epic powdered sugar fight. Outside of my family, she is the one person who truly inspired me to see cooking in that light. She’s one of the reasons I almost never bake anything without intending to give some of it away.

Eight years ago today I solo-baked my first layer cake and it was for her. My decorating skills were even less, um, elegant than they are now and I used M&Ms to spell out her name on top of the icing. We watched a Red Sox v. Yankees playoff game, drank, ate, and laughed our heads off with the rest of our friends the entire evening. That night is more vivid in my mind than almost any other from that year living on Columbus Avenue. I adored those friends, especially the skinny guy with the sandy blonde curls and bright yellow “Firefighters for Kerry” shirt who asked me out four days later. Who knew I’d be calling him my husband someday?

Every year when that first autumn chill hits my bones, I think of my friend and the incredible apple pie she would make for us at a moment’s notice. That inaugural Fall day was most certainly yesterday. Saturday was warm with puffy clouds in the sky and then BAM: 50 degrees and overcast on Sunday.

I only had two apples in the refrigerator. Damn. Pie was not to be, but all was not lost. A lonely package of thawed phyllo dough called out to me and the next thing I knew I was making origami folds with the paper thin sheets slicked with butter. It might not be pie, but the little pockets of goodness were certainly easy to transport and share with colleagues.

I think she’d be proud of me.

Apple Turnovers with Hazelnuts and Almonds

Okay, take a deep breath. You are going to tear several sheets of phyllo dough. Don’t worry about it. Either patch it with a dab of butter or just grab a fresh sheet from the box. To keep your phyllo pliable while you work with it, keep what you aren’t currently working with and covered with a damp towel.

  • 2 large apples. I used Rome apples this time and enjoyed them a lot.
  • 1/3 cup sugar, plus extra for dusting finished pastry.
  • 3 tbsp. all-purpose flour
  • 1 tsp. ground cinnamon
  • 20 sheets phyllo dough (14 inches x 9 inches), thawed, unrolled and covered with a damp cloth.
  • 6 tablespoons butter, melted
  • ½ cup chopped toasted hazelnuts and almonds

Preheat an oven to 375 degrees F.

Core, peel, and chop the apples. This kitchen toy is pretty awesome. I keep it around for when I make apple rings to dry or preserve. A $10 investment that will save you a massive amount of time unless you are Hiroyuki Sakai: http://www.youtube.com/watch?v=c-xkL9DbwJc

Combine the apples, sugar, cinnamon, flour, and chopped nuts (if using) and set aside.

Now you are going to assemble and fold the dough exactly as you would do with the American flag. Here is a very clear video of the folding process. You don’t need to do the final fold at the edge and can finish with your original triangle pattern: http://www.youtube.com/watch?v=PcOWc5EJbVo

Place one sheet of phyllo dough on a clean work surface and brush one half with butter. Fold the sheet in half lengthwise and then repeat the process of buttering and folding. You’ll have a long strip of dough.

Take about one tablespoon of the apple filling and put it at one end of the phyllo strip. Then, fold the edge over the filling at a 90 degree angle to form a triangle shape. Continue folding into triangles the whole way down the strip of dough. Place the finished turnover seam side down on a baking sheet.

Repeat the process until you run out of either dough or filling. If you are being really neat and meticulous about it, you could probably get two dozen turnovers out of this recipe.

Brush the finished turnovers with melted butter, sprinkle on some extra cinnamon and sugar, and then bake for 15 minutes or until golden brown at the edges and on the bottom. Move them to a cooling rack. Unlike pie, you can eat them right away without the fear of oozing pie goo being left in the pan and not on your plate.

So, an autumn tribute to the Pie Queen, who taught me that generosity is the greatest gift in the world and always made me feel that no matter how cold the Boston winters were, there would always be a place to go to be warm all over. Thank you, my friend.

Ciao for now,

Neen