Archive | Pie and Pastry RSS feed for this section

Graham Crackers (and S’mores!)

23 Aug

Sometimes, you find your 31 year old self needing the comforts of childhood: Cartoons and s’mores. After a particularly long week recently, I asked a couple of friends to come over and watch Batman cartoons with me and wind down.

It’s hard not going into full-on hostess mode when people come over. But I really just wanted to hang out with my friends. Can’t hide in the kitchen the whole time, Neen. So I decided the local Thai place would make dinner and I’d only put myself on the hook for dessert.

I thought s’mores would be pretty fun for a summer evening, so I made a batch of marshmallows (recipe here), a batch of chocolate ganache, and some graham crackers.  I know the typical s’mores chocolate is a good old fashioned Hershey bar, but the ganache was definitely tastier and meltier.

Easy Chocolate Ganache

  • 8 oz. semi-sweet chocolate, chopped
  • 1 cup heavy whipping cream (or coconut milk for dairy-free)

Put the semi-sweet chocolate in a bowl. Bring the heavy cream just to a boil, and then pour it over the chocolate. Let stand for 2 minutes, and then whisk until smooth. It will be very liquid, but will set up and become spreadable as it cools down.

The last step was making the graham crackers, which is really more like making pastry dough than a cookie or biscuit. I’ve made graham crackers a lot of different ways, but this is my personal favorite recipe for ones that are crisp, and juuust sweet enough.

Graham Crackers

  • 2 1/2 cups unbleached all-purpose flour
  • 1 cup dark brown sugar (or 1 cup granulated sugar blended with 3 tbsp. molasses)
  • 1 tsp. baking soda
  • 1 tsp. kosher salt
  • 4 oz. unsalted butter, cubed and chilled
  • 1/3 cup honey or maple syrup. For this batch I used half and half!
  • 5 tbsp. cold milk
  • 1 tbsp. vanilla extract
  • granulated sugar for sprinkling

Combine the flour, brown sugar, baking soda, and salt in the bowl of a food processor.

20160806_142507

Add the butter a few cubes at a time and pulse until the mixture is sandy. You can also do this by hand with a pastry cutter or the tines of two forks.

20160806_142641

In a separate bowl, whisk together the honey/maple syrup, milk, and vanilla extract.

Slowly add the wet ingredients to dry and mix until a cohesive dough forms.

20160806_142913

Divide the dough into two equal pieces, flatten into discs, and chill in the refrigerator for an hour or until firm enough to roll.

20160806_143051

Preheat the oven to 350 degrees F and line two baking sheets with parchment paper or a baking mat.

Roll out one half of the dough until it is 1/8 in. thick and then cut out crackers. I used a 2-in. fluted round cutter for these.  Move the crackers to the prepared baking sheet, dock with a fork (this keeps them from puffing up) and sprinkle lightly with granulated sugar.

20160806_153433
20160806_153754

Bake the crackers for about 15-20 minutes or until the edges are golden brown. Then move to a wire rack to cool.

20160806_164756

We intended to use my little butane torch to toast the marshmallows (no campfire here, alas). It was out of fuel though, so Joe quickly improvised while at the grocery store and bought a sterno. We lit it and toasted our marshmallows using the chopsticks from dinner as skewers. Honestly, it was a pretty great way to spend an evening with friends. I’m glad to have people in my life who are content to laugh, eat a bunch of gooey marshmallows, and have a good time.

Snapchat-7145572736731819779
Snapchat-2672394220576813970

Quick Re-Heats: Potato Crusted Mini Quiche

23 Apr

One of the most in-my-face changes since becoming a self-employed person with odd “office hours,” has been figuring out when and what to eat. Sometimes there are evenings where I teach from 6 until 9:30. I personally don’t like to eat less than 2 hours before I teach a hot class, and sometimes afterward my brain kicks into “I just want to relax” mode before I have time to consider dinner. The problem is that thinking leads to grabbing something easy or fast on my way home. And while Alexandria has a decent variety of quick, healthy food options, let’s be honest that buying a $10-15 salad/pizza/sandwich that I could make at home for a fraction of the cost is not the best idea.

So I’ve been leaning on foods that are easily re-heated and those that can be made for the sole purpose of using up odds and ends at the end of the week. Soup, lasagna, chili, and pot roast are all pretty good examples. Still, for simplicity, nothing beats quiche. And this version negates the need to make pastry, which is a good bonus. I make these on Sunday and refrigerate them in individual containers. The key here is to not think too hard about specific ingredients. Use what you have. In this instance, I made this right after Easter, so I had leftover ham, potatoes, a lone tomato, a half package of mushrooms, and some half-wilted salad greens. I also only had 5 eggs, and I assure you it was not the end of the world.

Potato Crusted Mini Quiche

  • 1 russet potato, sliced thin on a mandoline
  • 6 eggs, well beaten
  • 2/3 cup milk
  • 1/2-3/4 cup of shredded or diced cheese (I used a cheddar-jack blend)
  • 1 roma tomato, diced
  • A few handfuls of greens (I used kale/spinach/chard salad blend)
  • 5-6 oz. of ham, diced
  • 1 clove garlic, minced
  • 6-8 oz. white or cremini mushrooms, diced
  • 1/4 tsp. grated nutmeg
  • Salt and pepper to taste

Prep the potato crust first. Preheat the oven to 450 degrees F and lightly grease a baking sheet. Lay the sliced potatoes out—they can overlap a bit.

20150330_114239
Bake for 9-10 minutes or until just lightly golden. This isn’t to cook the potatoes through, but to make them pliable.

Grease a muffin tin. Let the potatoes cool slightly and then lay slices in each cup, pressing them against the bottom and sides. Make sure they overlap slightly. Five slices usually does the trick if you’re working with a large potato.

20150330_120911
Set the pan aside while you prepare the filling.

20150330_120150

Lower the oven temperature to 375 degrees F.

Place a skillet over medium heat and add some olive oil or butter to the pan. Gently saute the mushrooms until they start to give up some liquid, and then add the ham and garlic. Cook one minute more, and finally add the tomato and greens to the pan. Cook until the greens wilt slightly, and then remove the pan from the heat. Season the filling with salt and pepper to taste.

20150330_120443 20150330_120607

Beat the eggs with the milk, nutmeg, and some salt and pepper.

To assemble the quiches, place a generous amount of the vegetable/ham filling into each crust, top each with shredded cheese, and then very slowly add egg custard to each one until ¾ full.

20150330_121236 20150330_121408 20150330_121406 20150330_121729

Carefully move the muffin tin to the oven and bake the quiches for 12-15 minutes. They will puff up and be golden brown on top when ready. Let them sit in the pan for 5-10 minutes, then run a knife around the edge of each, and lift the quiche out with a wide spoon or small spatula.

20150330_132210

I like to have quiche with some greens in spicy vinaigrette to offset the rich custard. Yum.

To reheat from cold, just pop into a toaster oven or conventional oven set to 350 degrees F and cook for 5-8 minutes. Nearly instant breakfast, lunch, or dinner! This recipe usually makes about 8-10 quiches depending on how large the potato is and how many odds and ends you’re throwing into the custard.

Ciao for now,

Neen

Lessons in Problem Solving: Chocolate-Caramel Tart revisited

20 Sep

I recently went gluten-free. Yes, I’ll still be baking with wheat to share recipes with you on the blog, but for my own purposes, eliminating gluten from my diet has done a world of good. The benefits have been pretty staggering, and I’ve finally stopped feeling like “I’m just doing this because it’s the trendy thing.” Even under the advice of a doctor, I thought, “This is stupid.” I don’t have a wheat allergy, I don’t have celiac, how could a mild intolerance be an actual problem?  My brother was once given a pair of shoes for an opera performance and they were far too small. The costumer’s response? “Suffer for art!!” And cooking is my art, after all.

But the hemo-doc thinks it could have an effect on my iron levels, so I decided to be a compliant patient.

I was initially annoyed, and then decided to see the situation as an opportunity. I would try new foods, post new recipes, and just…play in the kitchen. My only rule was to avoid the gluten-free baking mixes or specialty pre-packaged cookies. The last thing I wanted was to incorporate a lot of potato and cornstarch into my diet instead of using more whole grains in general. After a few days of perusing and one or two brief experiments…something magical happened.

What would you think if I told you that I could make the best candy bar in the world without a drop of flour, butter, or refined sweetener? Perhaps you might run screaming in the other direction, but then you wouldn’t get any and that would be very, very sad. Because it is literally one of the best tarts I have ever made. It may even trump the Nutella tart. This is basically my favorite candy bar turned into a pastry that will truly knock your socks off. Caramel, chocolate, and nuts…what’s not to like? I must be on to something, because it disappeared before my eyes when shared with friends.

Date-Almond Butter Caramel and Chocolate Tart

For the crust:

  • 1 ½ cups finely ground almonds
  • ½ cup toasted, shredded, unsweetened coconut
  • 2 tbsp. grade b maple syrup
  • 2 tbsp. coconut oil, melted
  • Pinch of salt

For the caramel filling:

  • 10 medjool dates, pitted and soaked in warm water for 30 minutes
  • 6 tbsp. almond butter
  • 6 tbsp. grade b maple syrup
  • 4 tbsp. coconut oil
  • 1 tsp. vanilla extract
  • Pinch of salt

For the chocolate ganache

  • 4 oz. unsweetened chocolate
  • 1/3 cup light or regular coconut milk
  • Grade b maple syrup to taste (I used a 4-5 tablespoons)

Preheat the oven to 350 degrees.

Combine the dry ingredients for the crust in a food processor and blend well.

20130919_171346[1]Mix together the coconut oil and maple syrup and then drizzle into the dry ingredients. Pulse this mixture until it begins to clump.

20130919_171358[1]20130919_171448[1]Press the crust into the bottom of a greased 9 or 10 in. tart pan with a removable bottom. Bake for 14 minutes or until golden brown and fragrant.

20130919_171729[1]20130919_173215[1]Cool the crust completely on a wire rack. I usually just refrigerate it for 20 minutes or so.

Prepare the caramel by combining the almond butter, maple syrup, coconut oil, vanilla and salt in a food processor and blend well.

20130919_172624[1]Add the drained, soaked dates and process until smooth. It may take a  few minutes.

20130919_174943[1]For the ganache, chop the chocolate and place it in a small bowl.

20130919_174301[1]Heat the coconut milk until it simmers, and then pour it over the chocolate. Allow it to sit for 5 minutes and then whisk until smooth.

20130919_175652[1]20130919_180016[1]Assemble the tart by spreading the caramel into the crust in an even layer.

20130919_174927[1]Refrigerate for a half hour or until the caramel begins to firm up. It will still be sticky, but it should be cool. Drizzle the chocolate ganache on top and voila! Scrumptious, candy-like tart.

20130920_052754[1]And there you have it, a delicious surprise that you can share with all of your gluten-free, vegan, or paleo friends. Nothing fake, no special ingredients, just good stuff that happens to be pretty good for you. Sort of. 😉

This whole experience has reminded me of the importance of creativity and ingenuity. I was so thankful once I began looking at the situation it through a different lens, and even though I know there’s nothing that will stop me from baking bread or craving pizza every so often, I can accept that by remembering that I can always cook, have a taste, and share with others. What an energizing lesson!

Ciao for now,

Neen

Recipe Megapost: My Old Kentucky Home

6 May

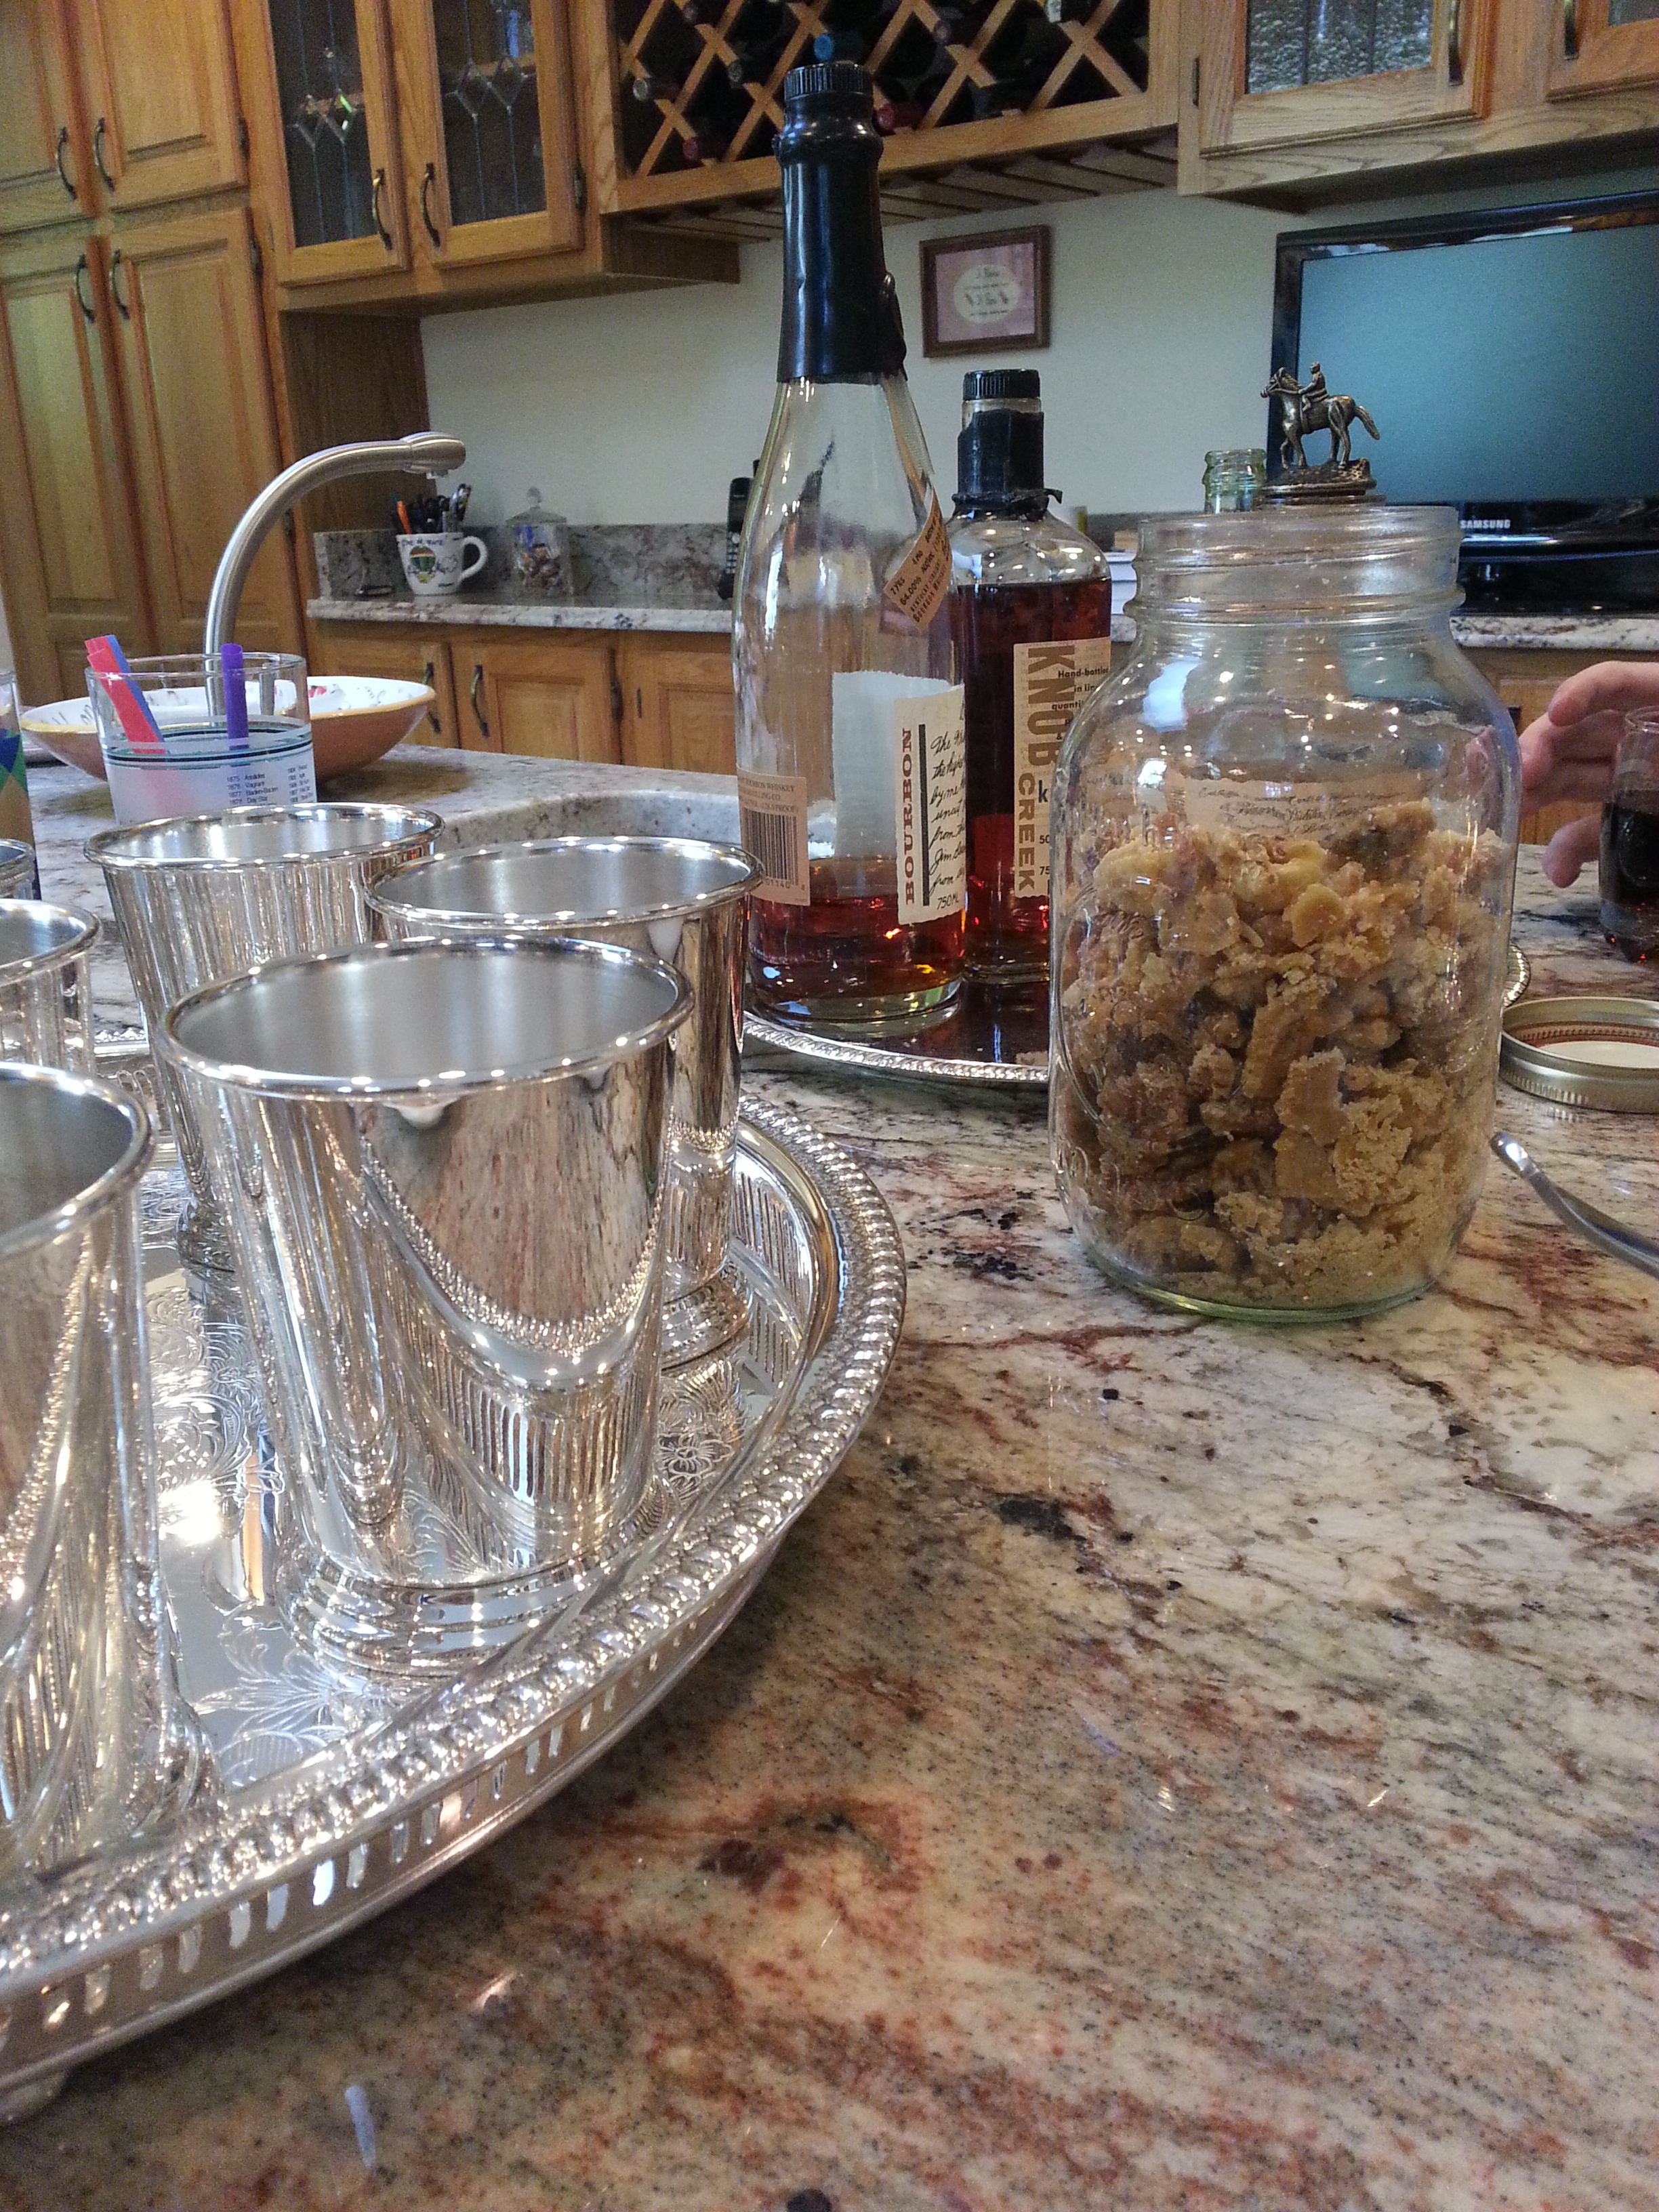
Roger, our native Kentuckian, invited Joe and I over for Derby Day this year. He and Lynn always loved celebrating the Kentucky Derby. I imagine that it was particularly special for her, having grown up so close to Churchill Downs.

While I pawned mint julep duty off on the men-folk, I took charge of the food. Roger’s only “must-have” request was derby pie, an amazing chocolate-nut pie that’s possibly sweeter than actually winning the race itself. Other than that, I was free to do as I pleased.

It got me thinking a lot about Lynn. She liked to get me cookbooks, especially Southern ones. Last summer she gave me an edition of Seasoned Cooking of Kentucky, and several years ago an edition of Charleston Receipts. But the foods that make me think of her are the ones that she talked about the way that I talk about food from Pittsburgh, and those that she eventually wrote down for me the on cards I received at the bridal shower last year.

20130503_142327
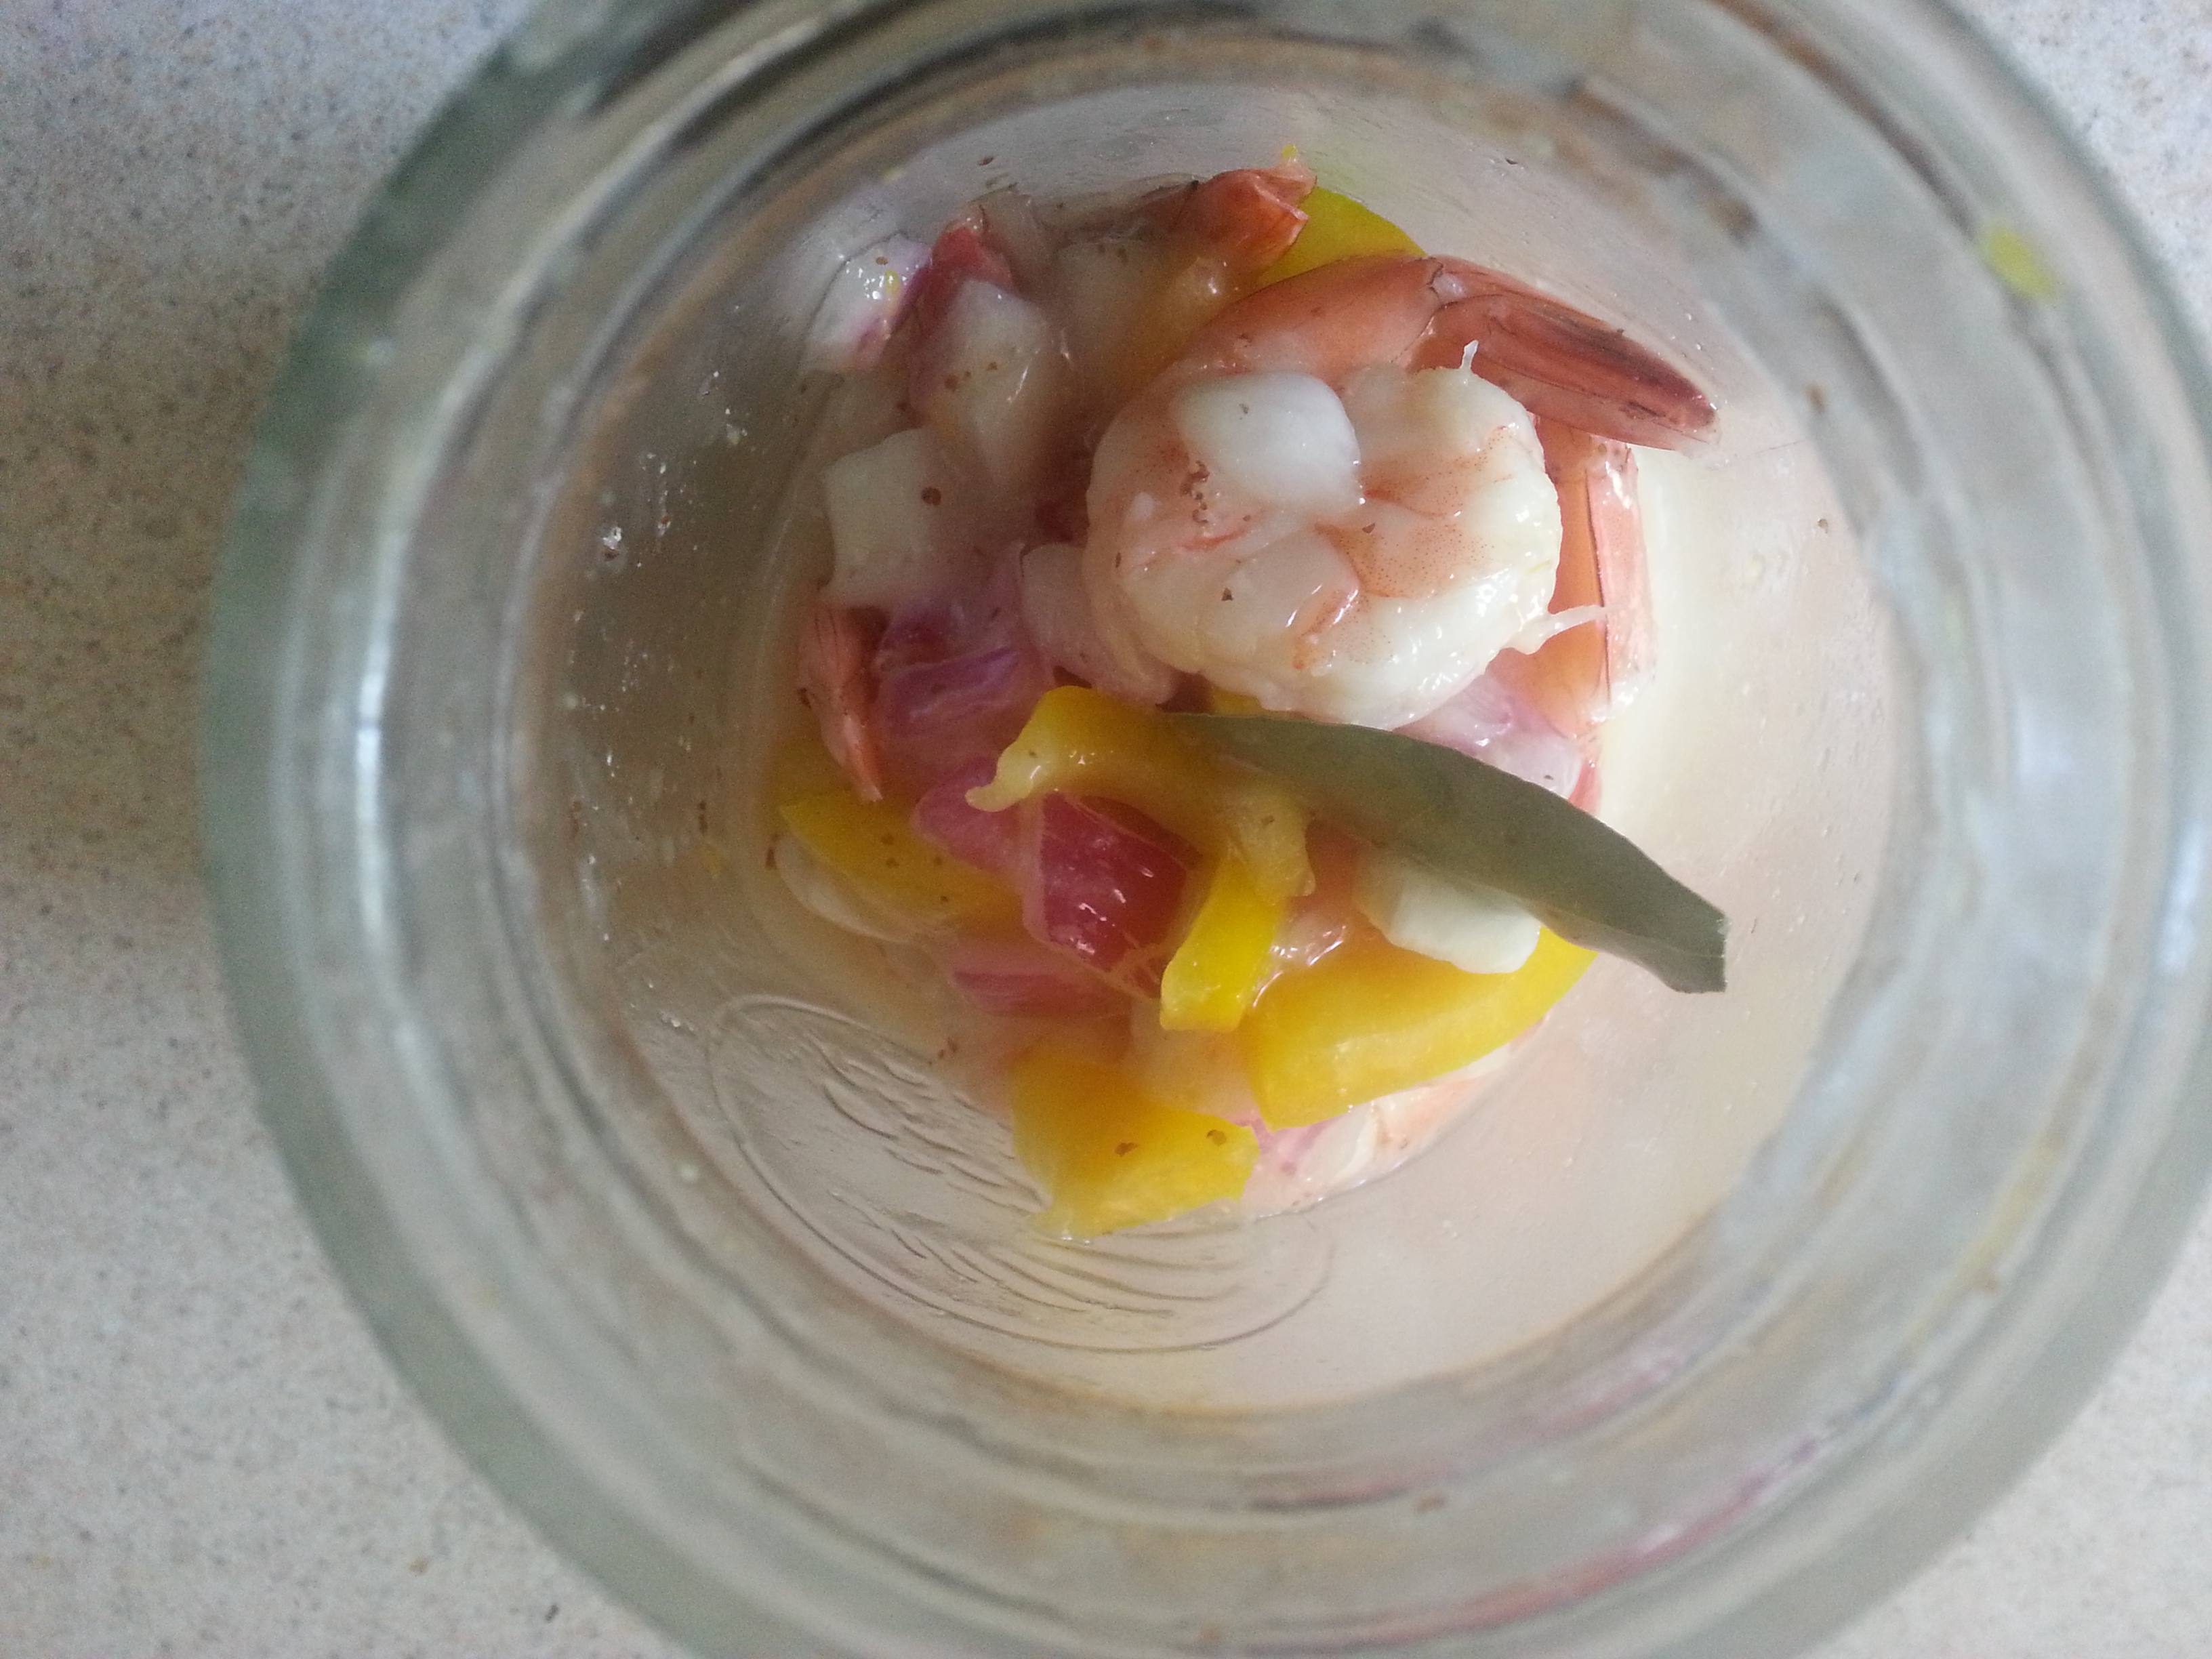
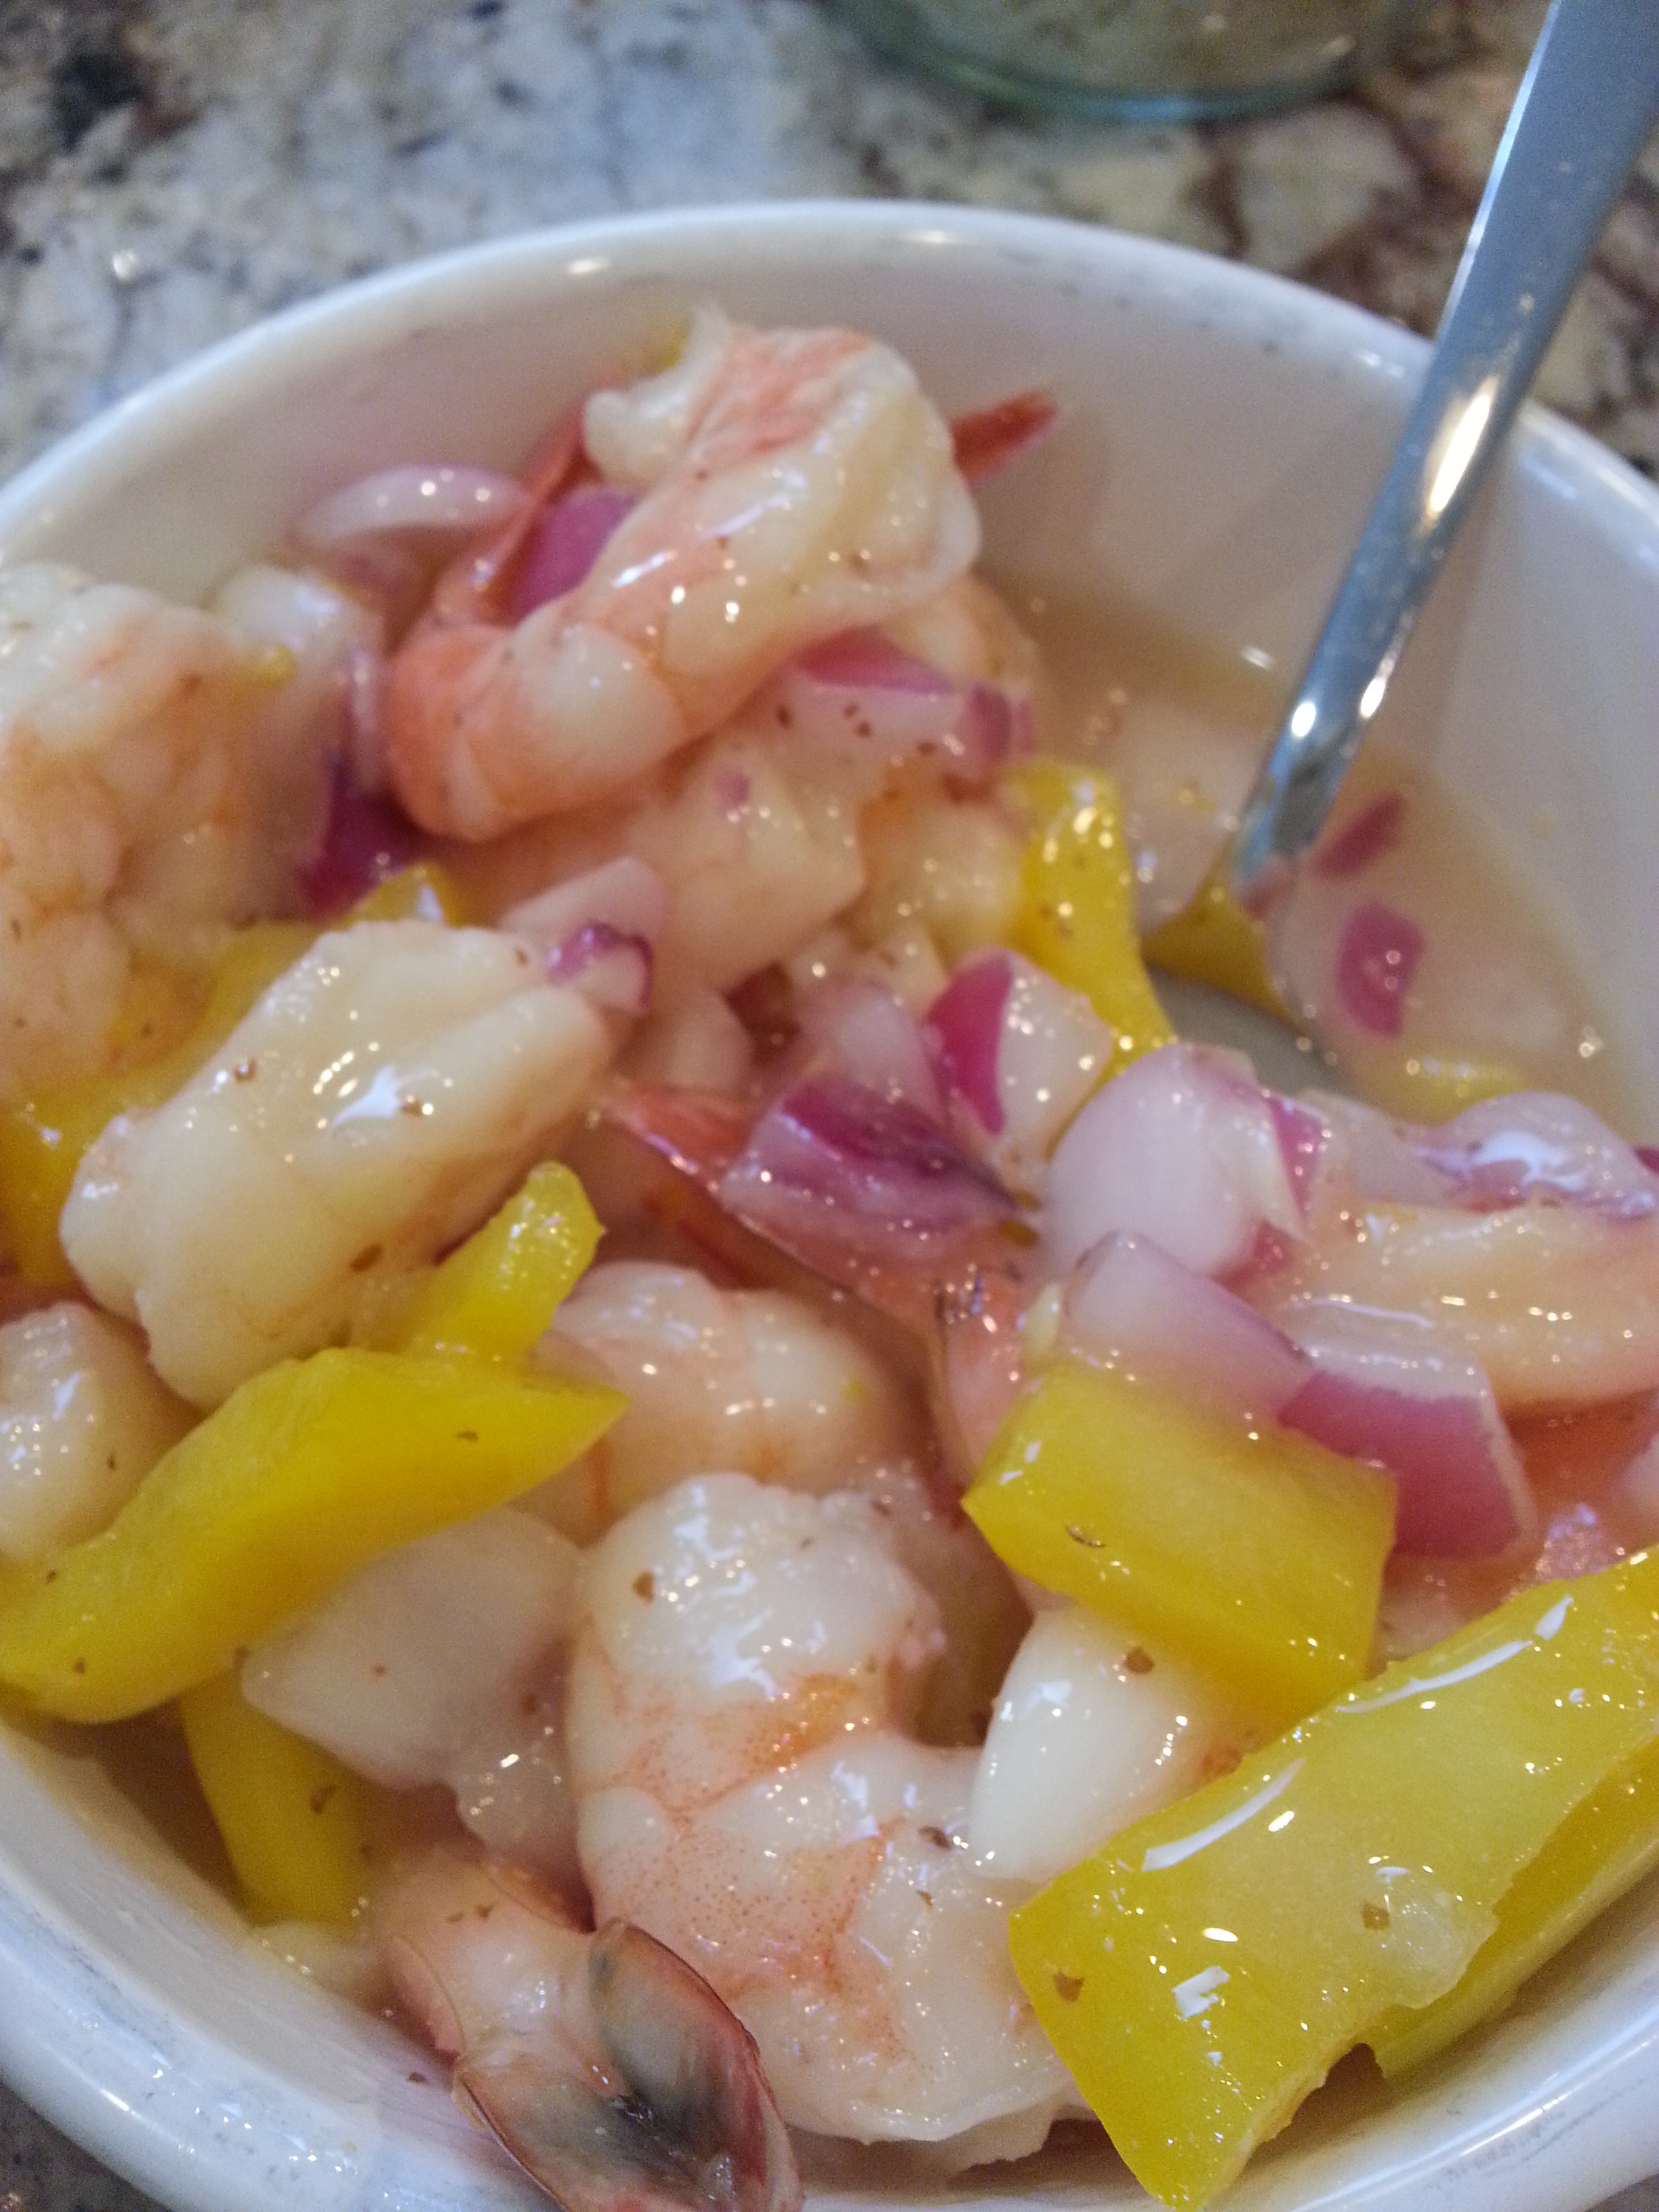
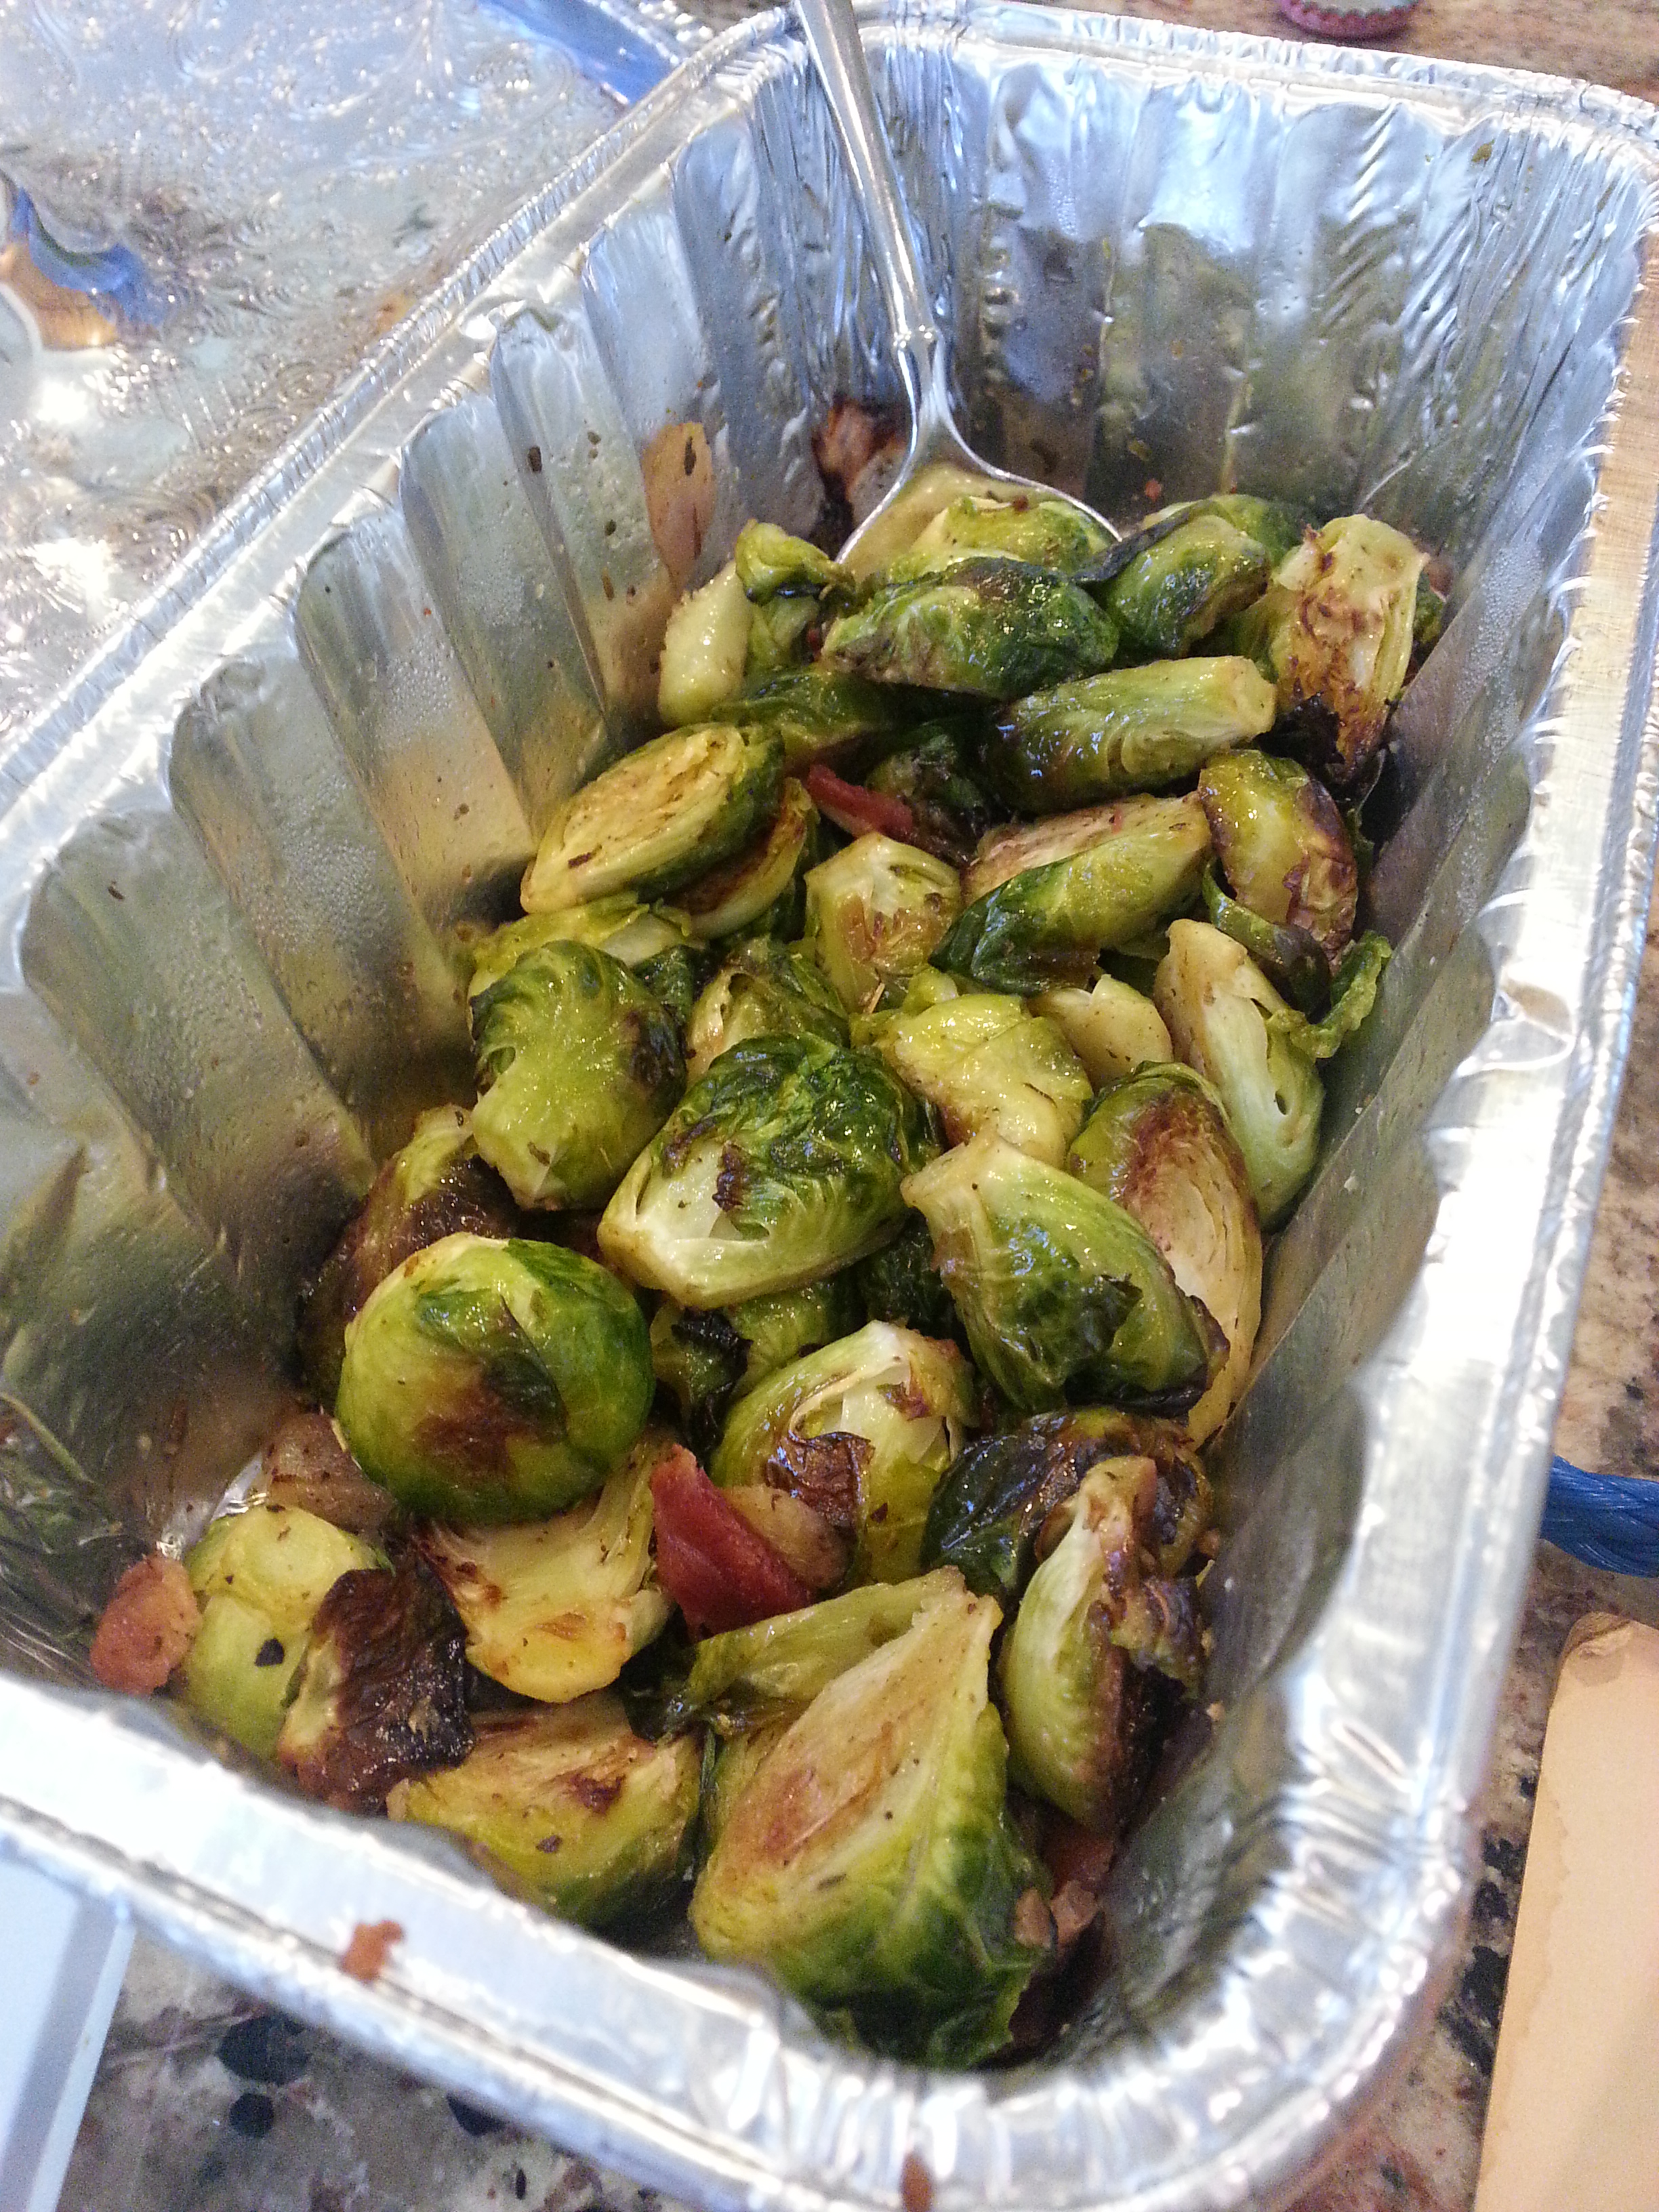
One of the things I remember her always loving was ham biscuits. Exactly what they sound like; cured, country ham (not the sweet, smoked style of Virginia), thin sliced and piled on top of fresh, fluffy biscuits. Roger mentioned in one of his recent emails to me that they were indeed her favorite, so I searched high and low—the wonderful butcher at Union Meat finally came through with beautiful, red slices of country ham, and I went on a search for a sturdy, slider-style biscuit recipe. The next item on the menu was from one of the books she’d given me.  Pickled shrimp are a popular picnic food in the summer that sounded just refreshing enough to cut some of the richness in the menu (oh believe me, we haven’t even started). Steamed, chilled shrimp, mixed with some vegetables, herbs, and a sweet/sour pickling liquid, all layered into a jar to marinate overnight. Along with the ham biscuits, and pickled shrimp, I figured a vegetable had to enter into the picture somewhere, so I roasted some beautiful spring Brussels sprouts with herbs de provence,  red onion, and bacon and served them at room temperature. They were an amazing contrast to the shrimp.

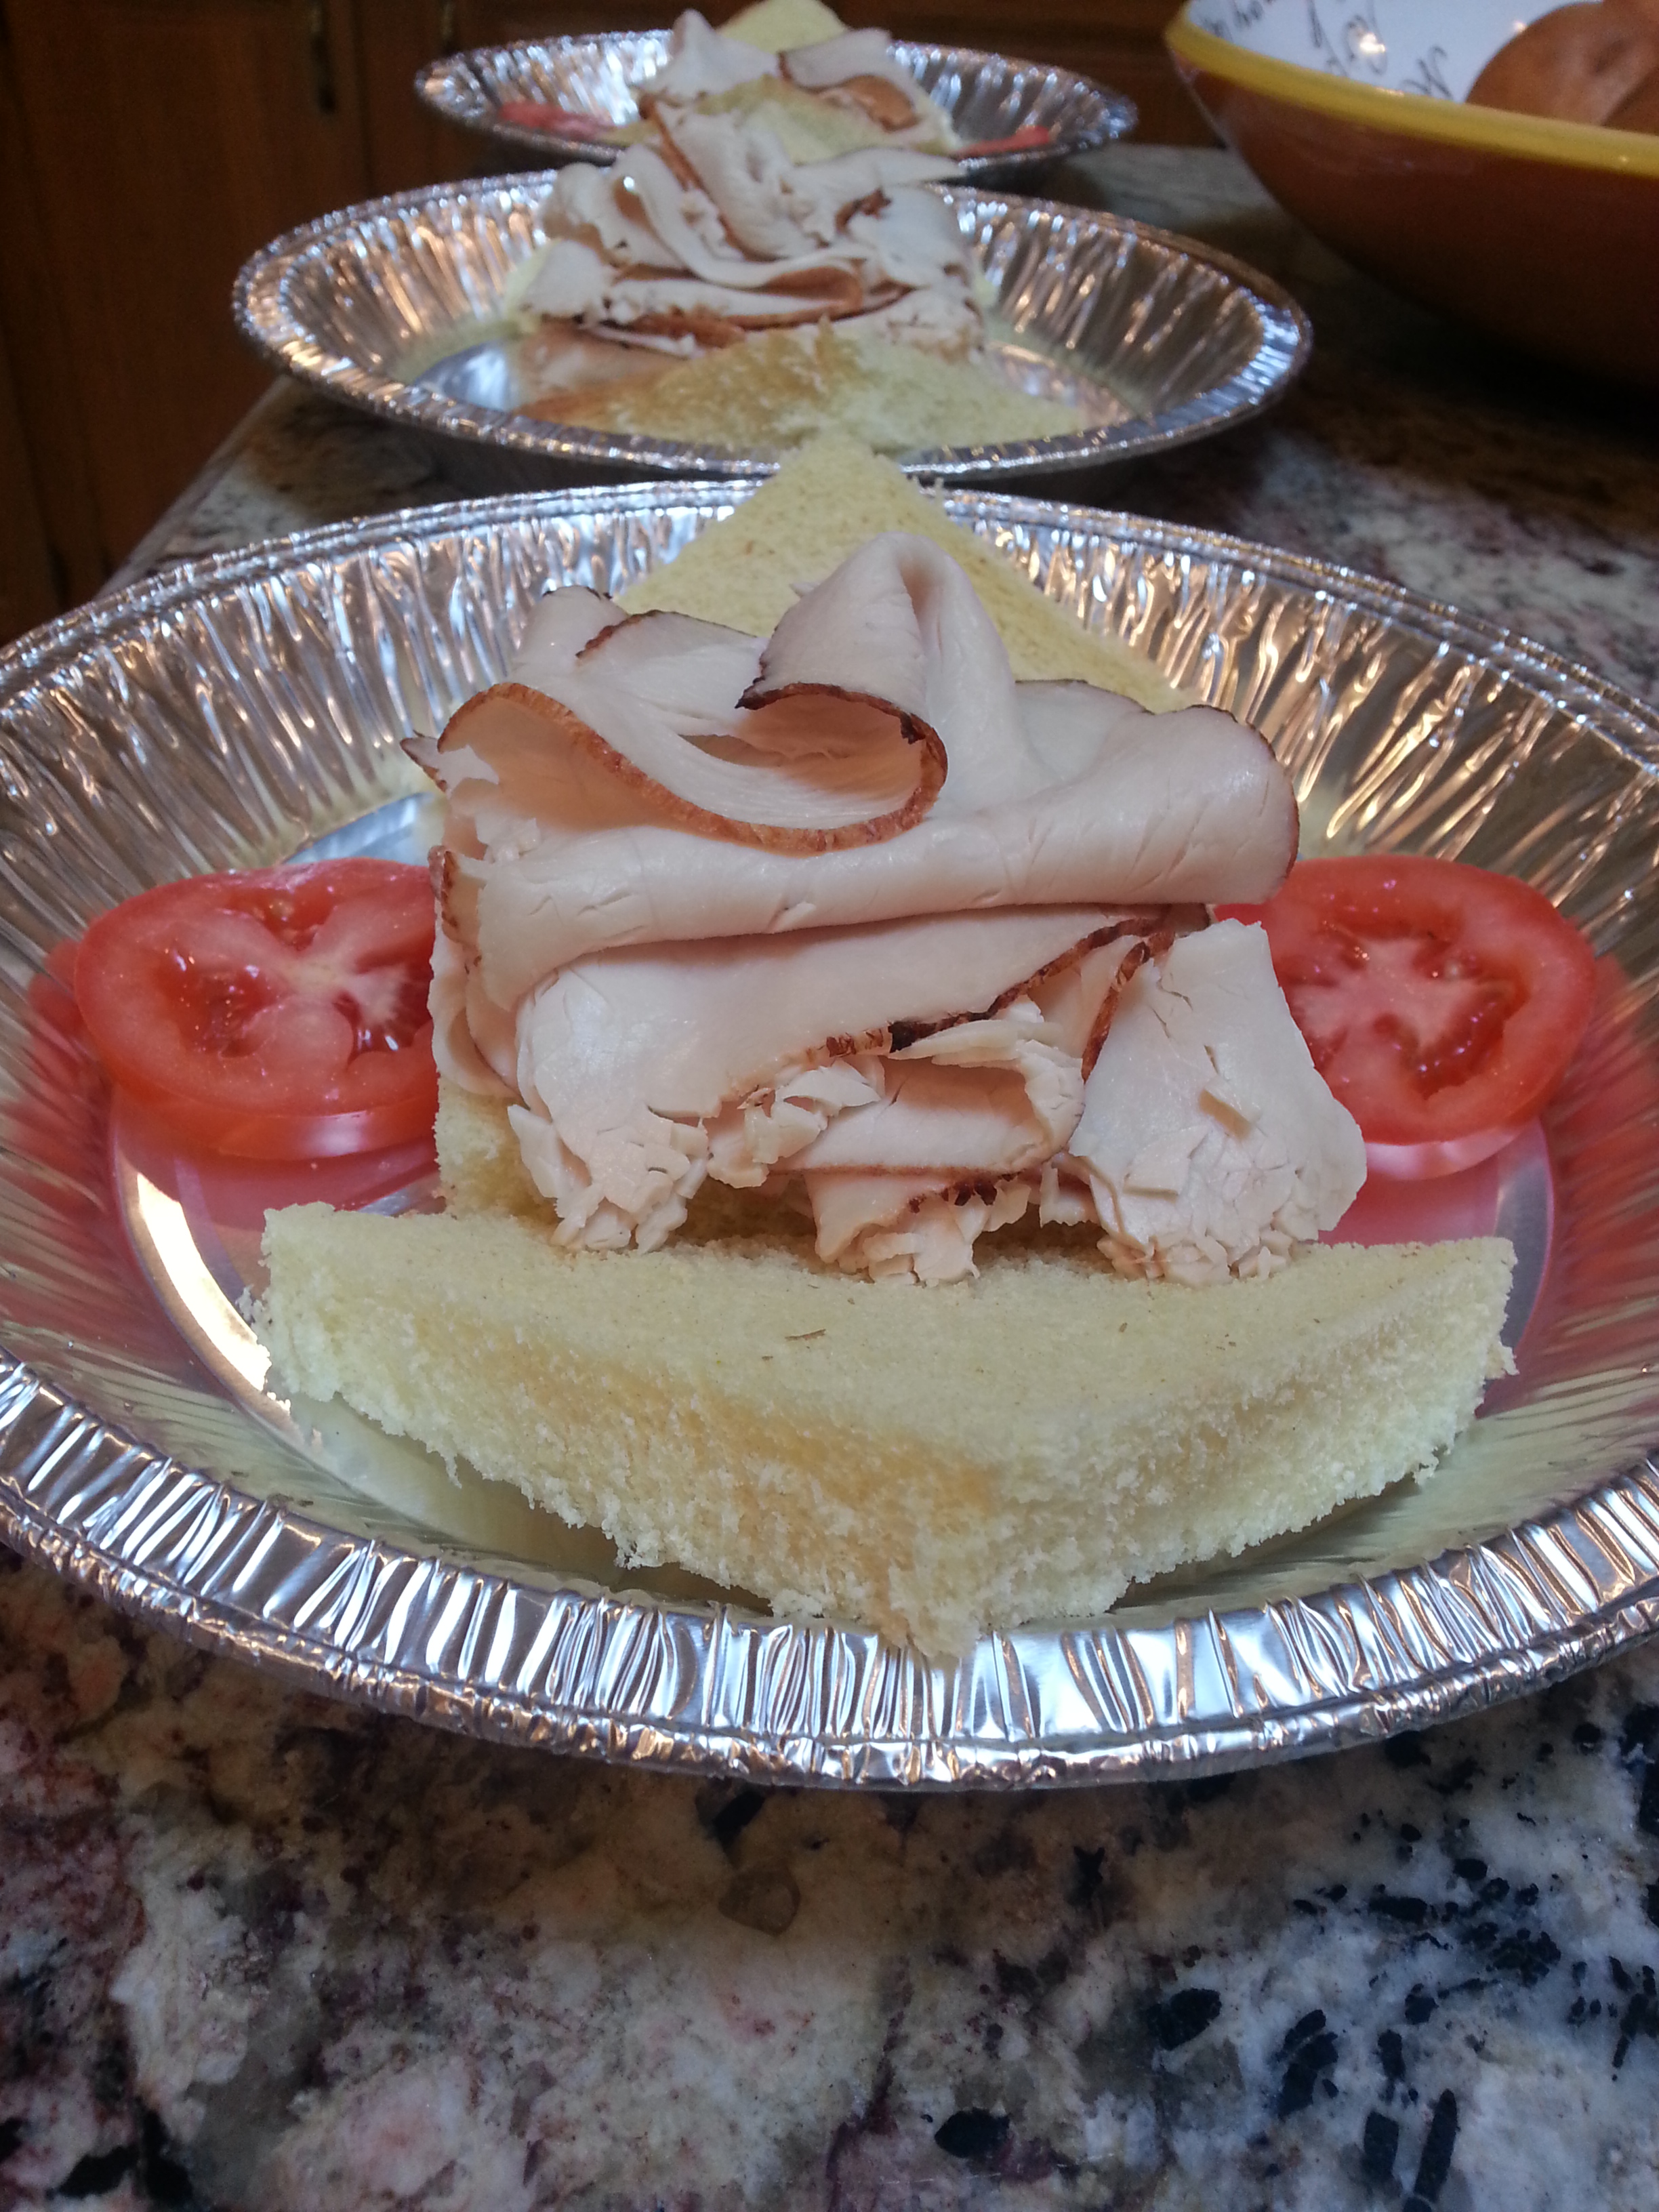
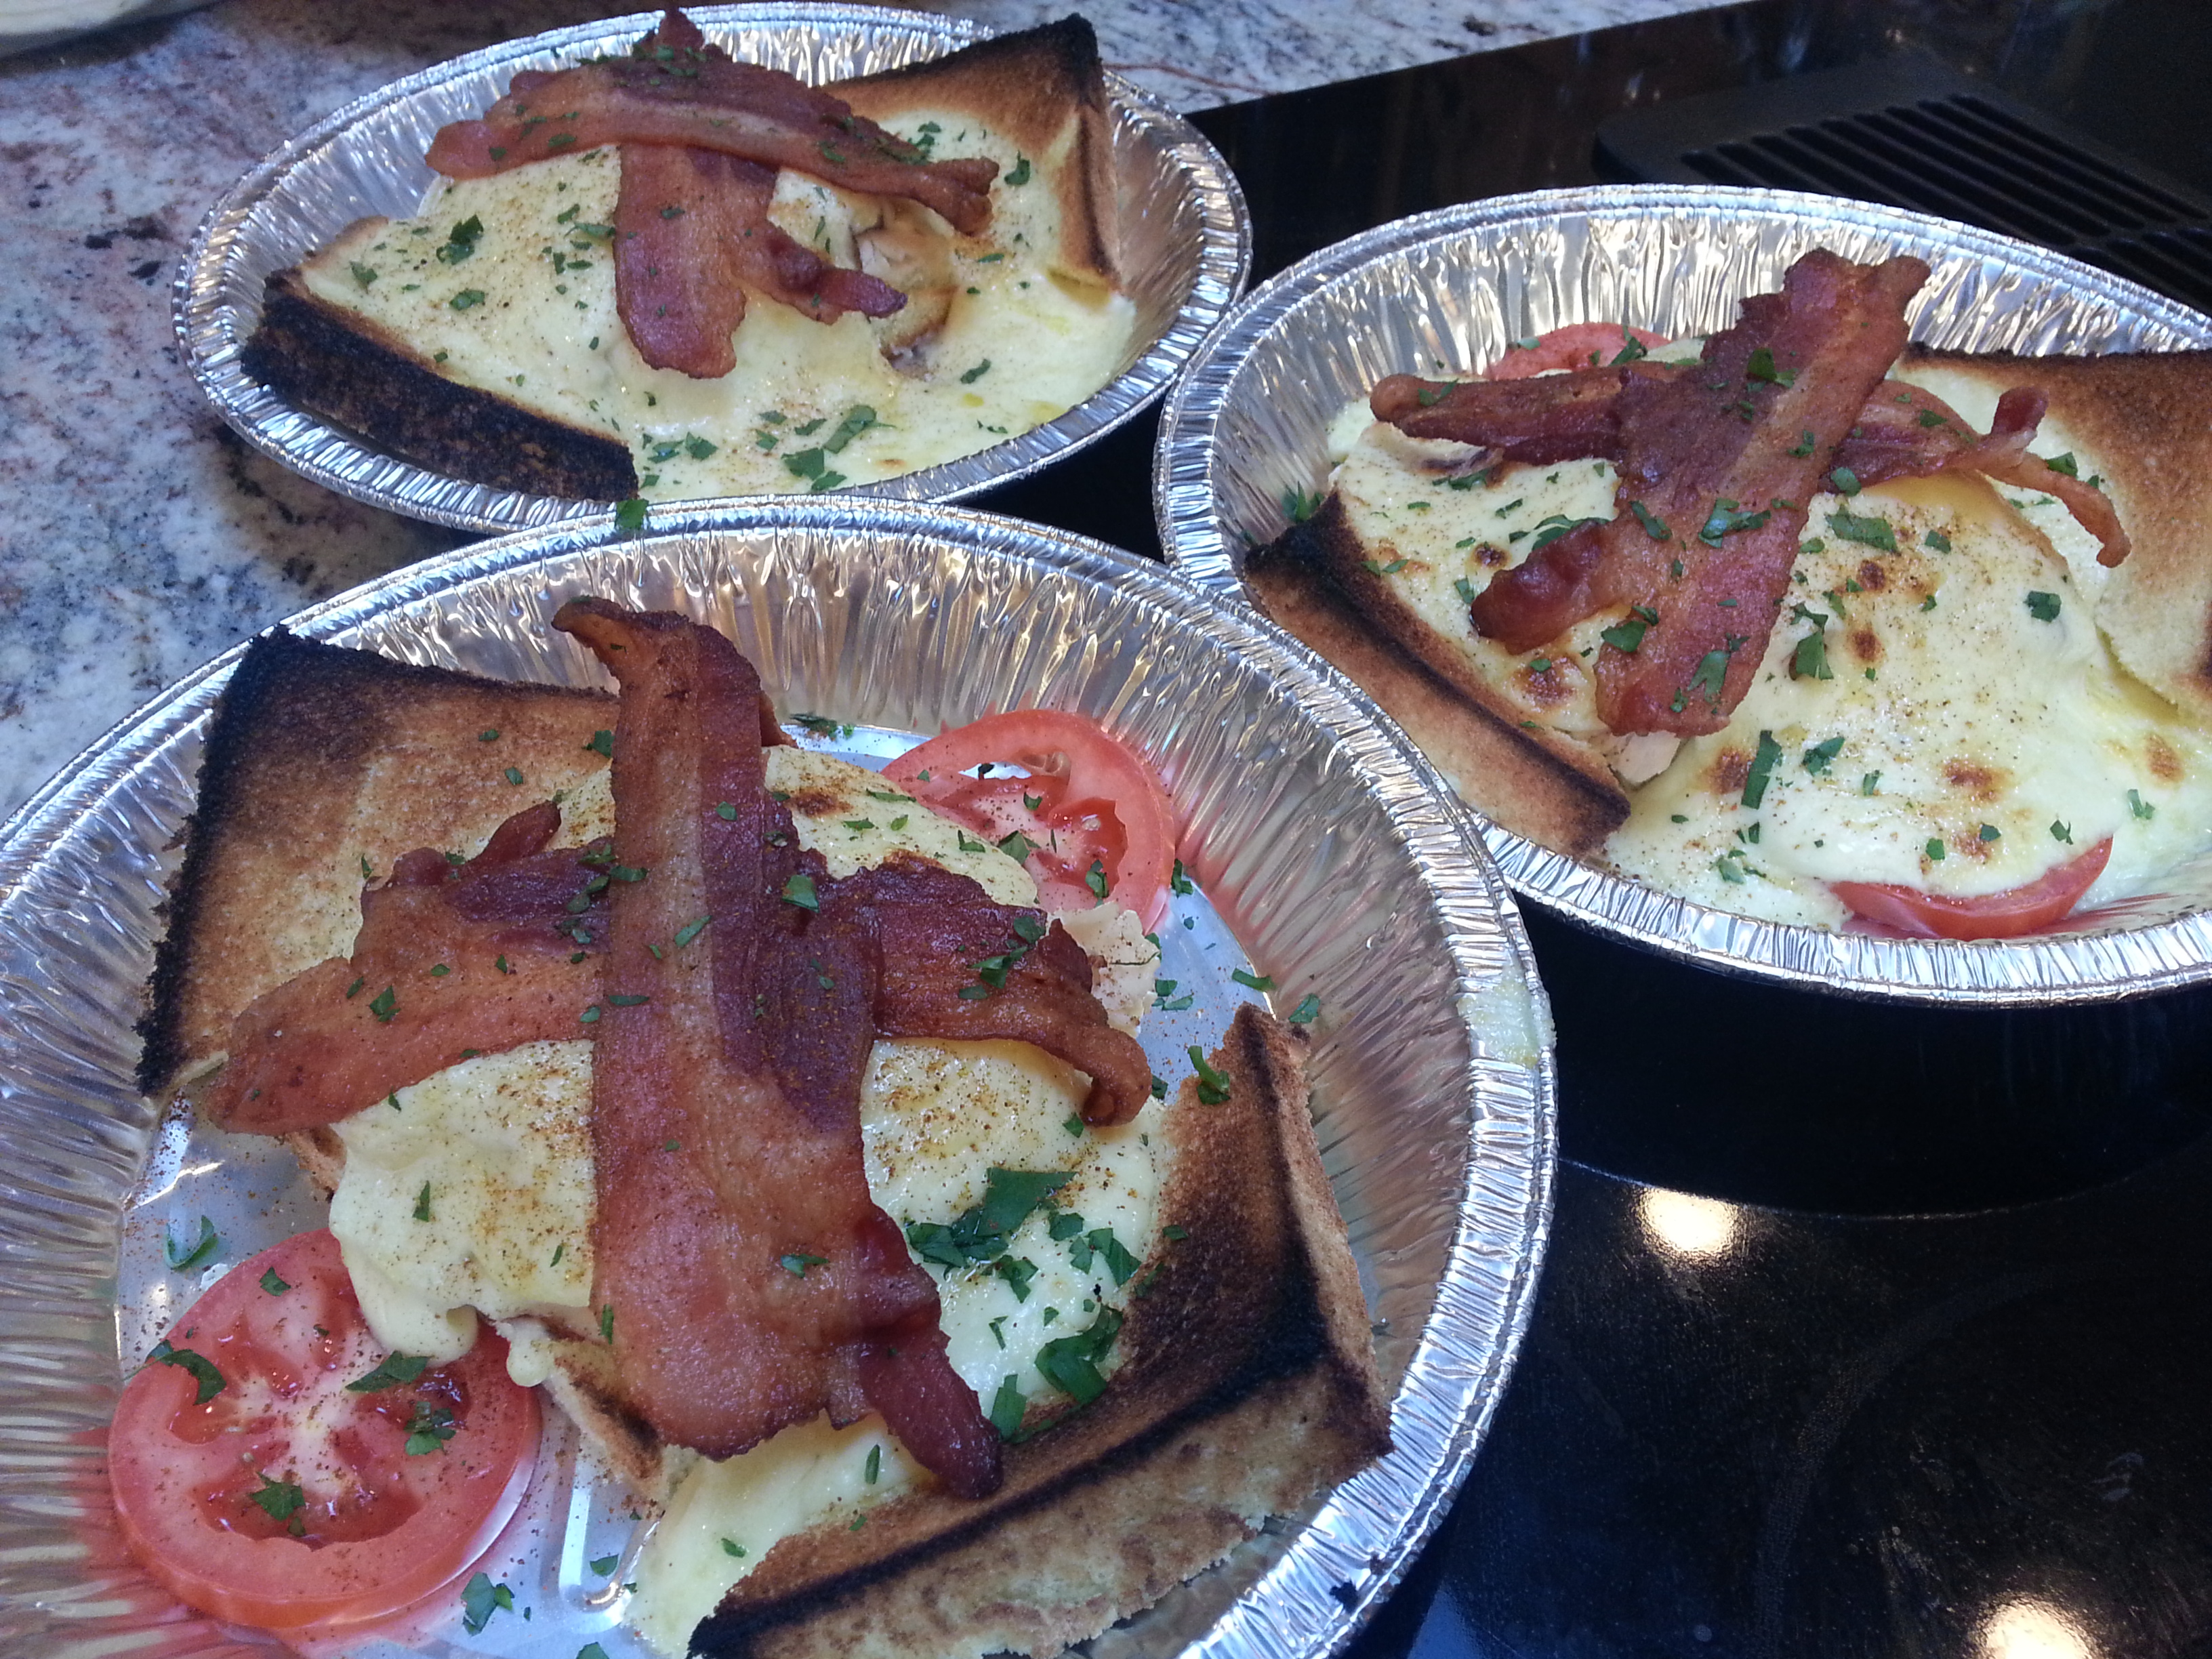
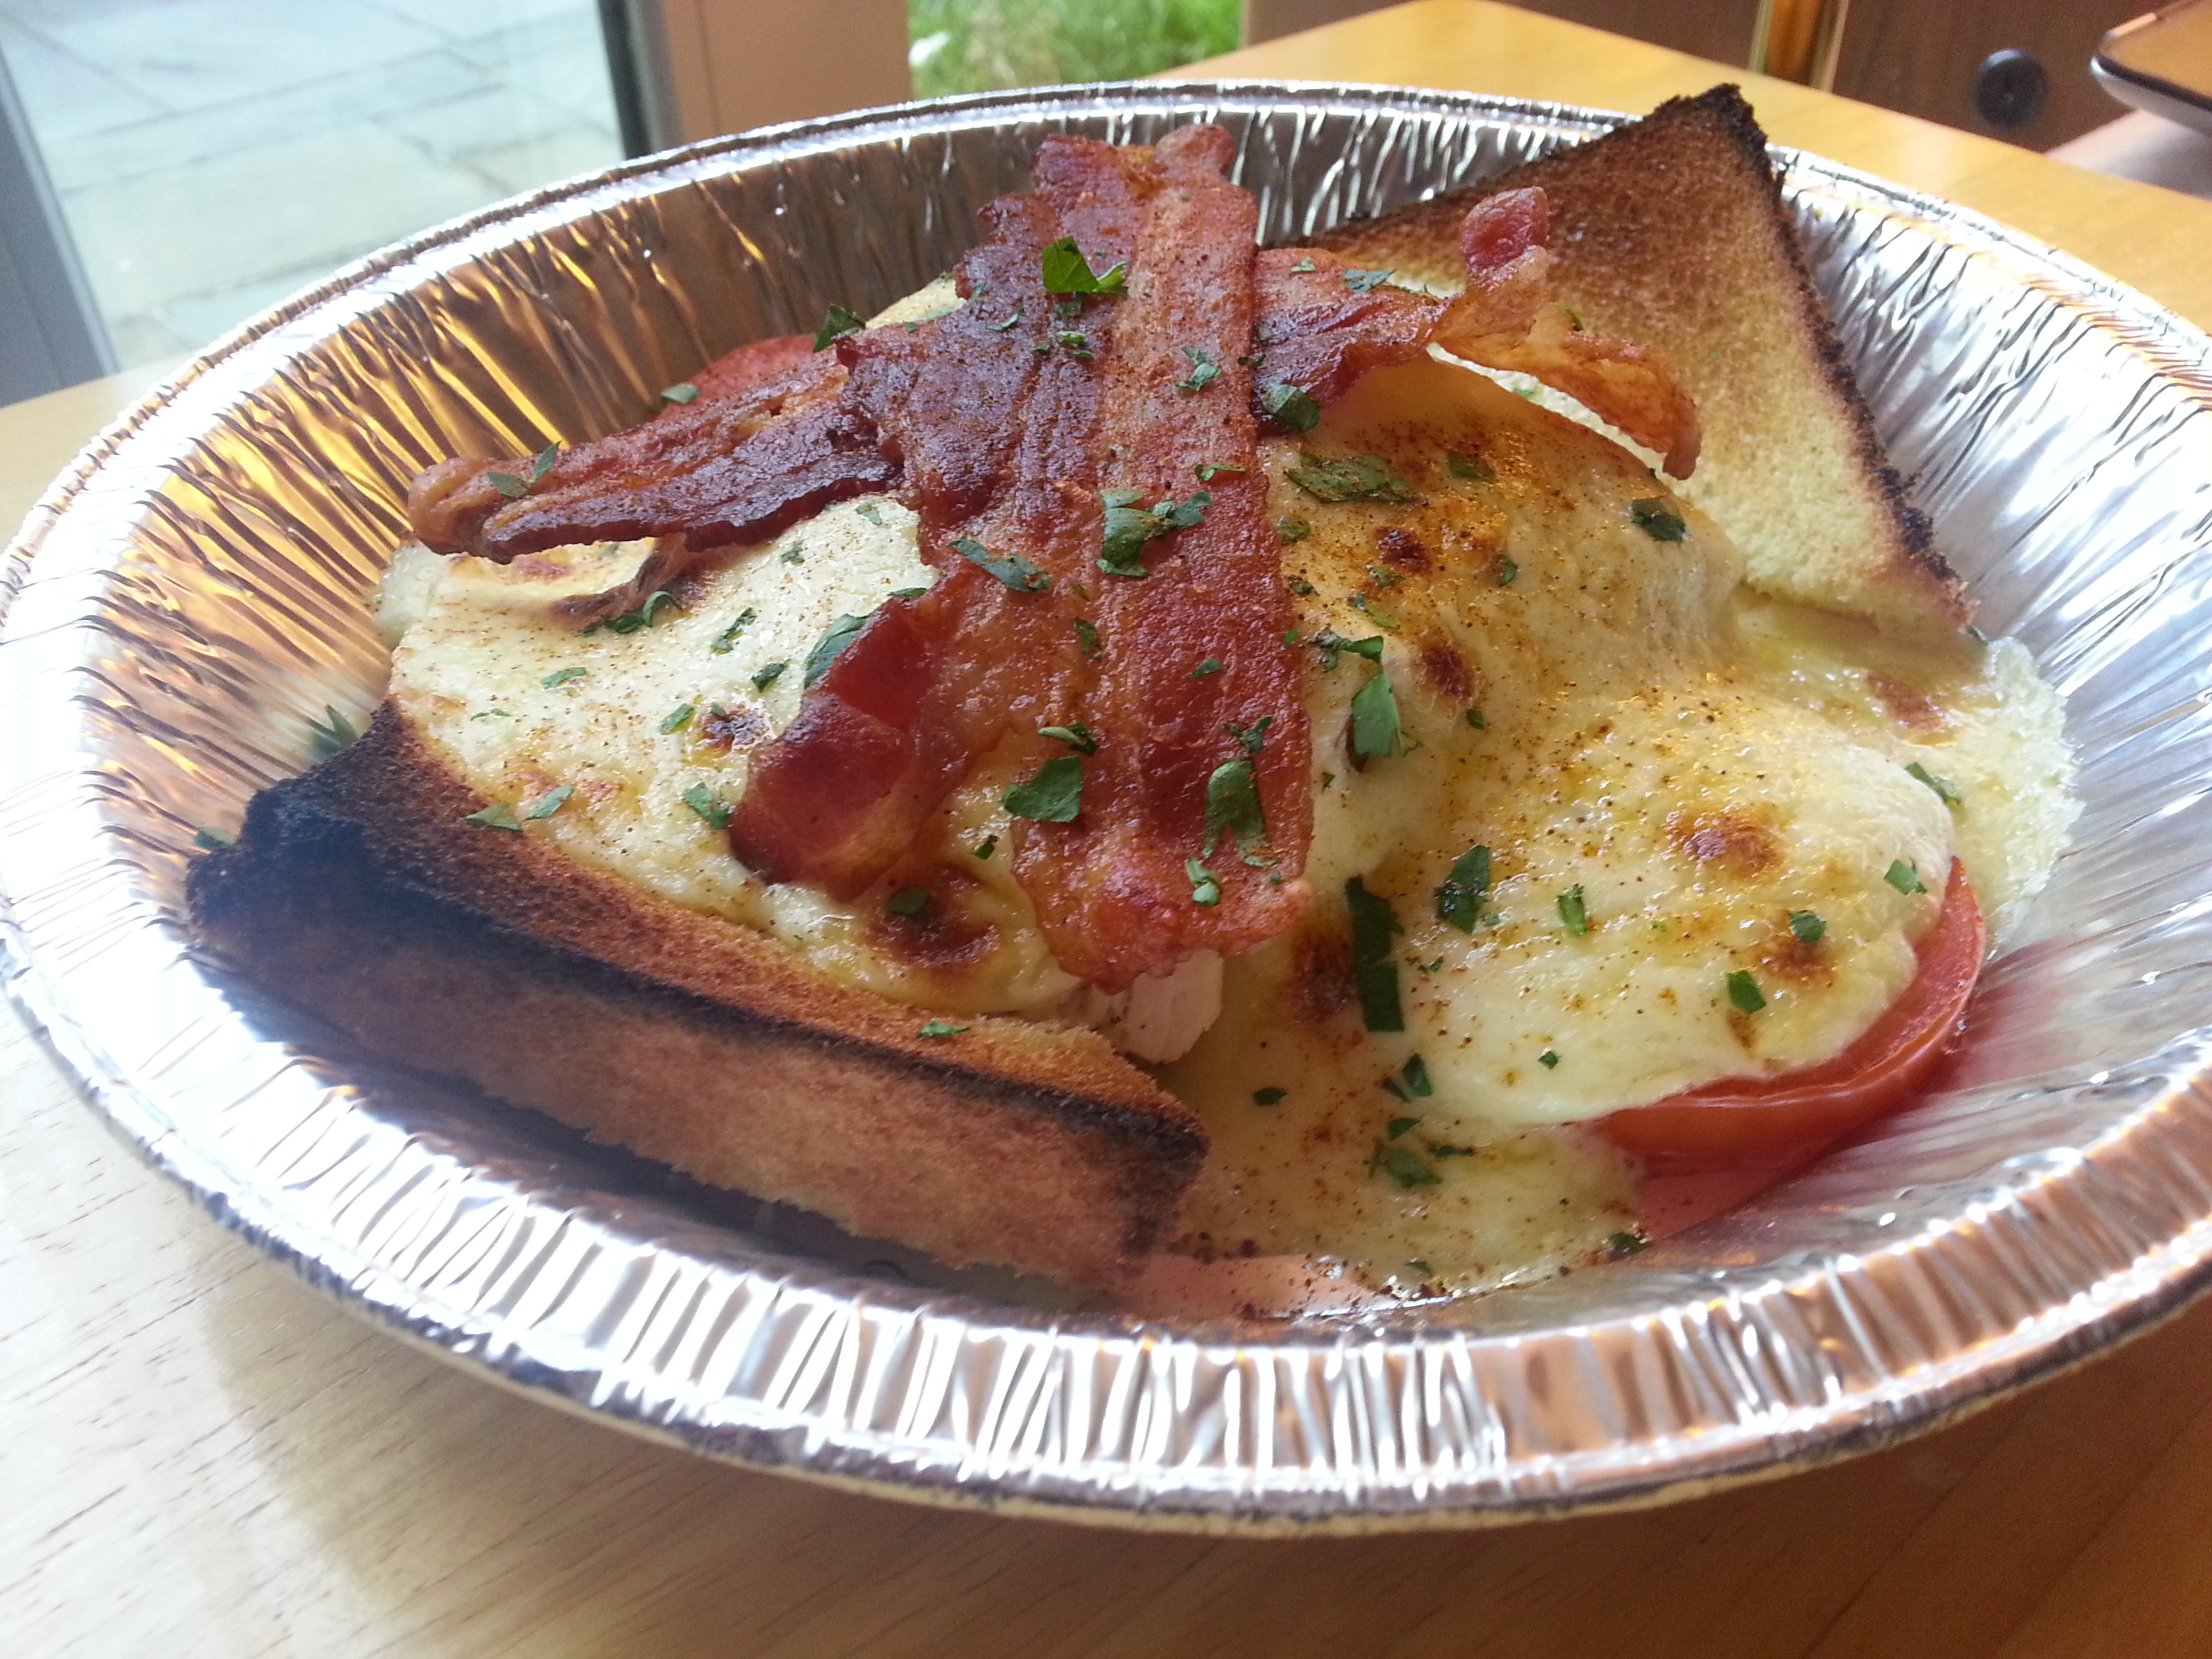
But the Hot Brown was what intrigued me the most. Not only was it an iconic dish, but I’d never made it before, and had only seen prepared briefly on a Food Network segment done at the Brown Hotel. On one of the recipe cards she shared with me, Lynn wrote down the Brown Hotel’s recipe for their signature dish. What is this incredible food item, you might ask? It is an open faced turkey sandwich on thick slices of Texas toast, covered by creamiest, richest pecorino romano mornay sauce I have ever made, broiled until golden, and then finished with sliced bacon, fresh parsley, and paprika.

20130504_164420

And yes, this whole ordeal ended with pie. Because you should always save room for pie.

Pickled Shrimp

  • 1 lb. peeled, jumbo cooked shrimp with tails
  • 1/2 red onion, diced
  • 1/2 yellow bell pepper, sliced
  • 1 fresh bay leaf
  • 1/3 cup peanut oil
  • 1/3 cup white wine vinegar
  • 1 tbsp. sugar
  • 1 tbsp. lemon zest
  • 1 tbsp. fresh lemon juice
  • 1 tsp. Dijon mustard
  • 1 tsp. hot sauce
  • 1 tsp. kosher salt
  • 1 garlic cloves, pressed
  • 1 tsp. dried crushed red pepper

20130503_170453Layer the shrimp, onion, bell pepper, and bay leaf in a quart-sized mason jar.

20130503_170919Whisk the remaining ingredients together, and then pour over the shrimp and vegetables. Seal and allow the shrimp to marinate for 1 day, shaking and turning the jar every few hours or so.
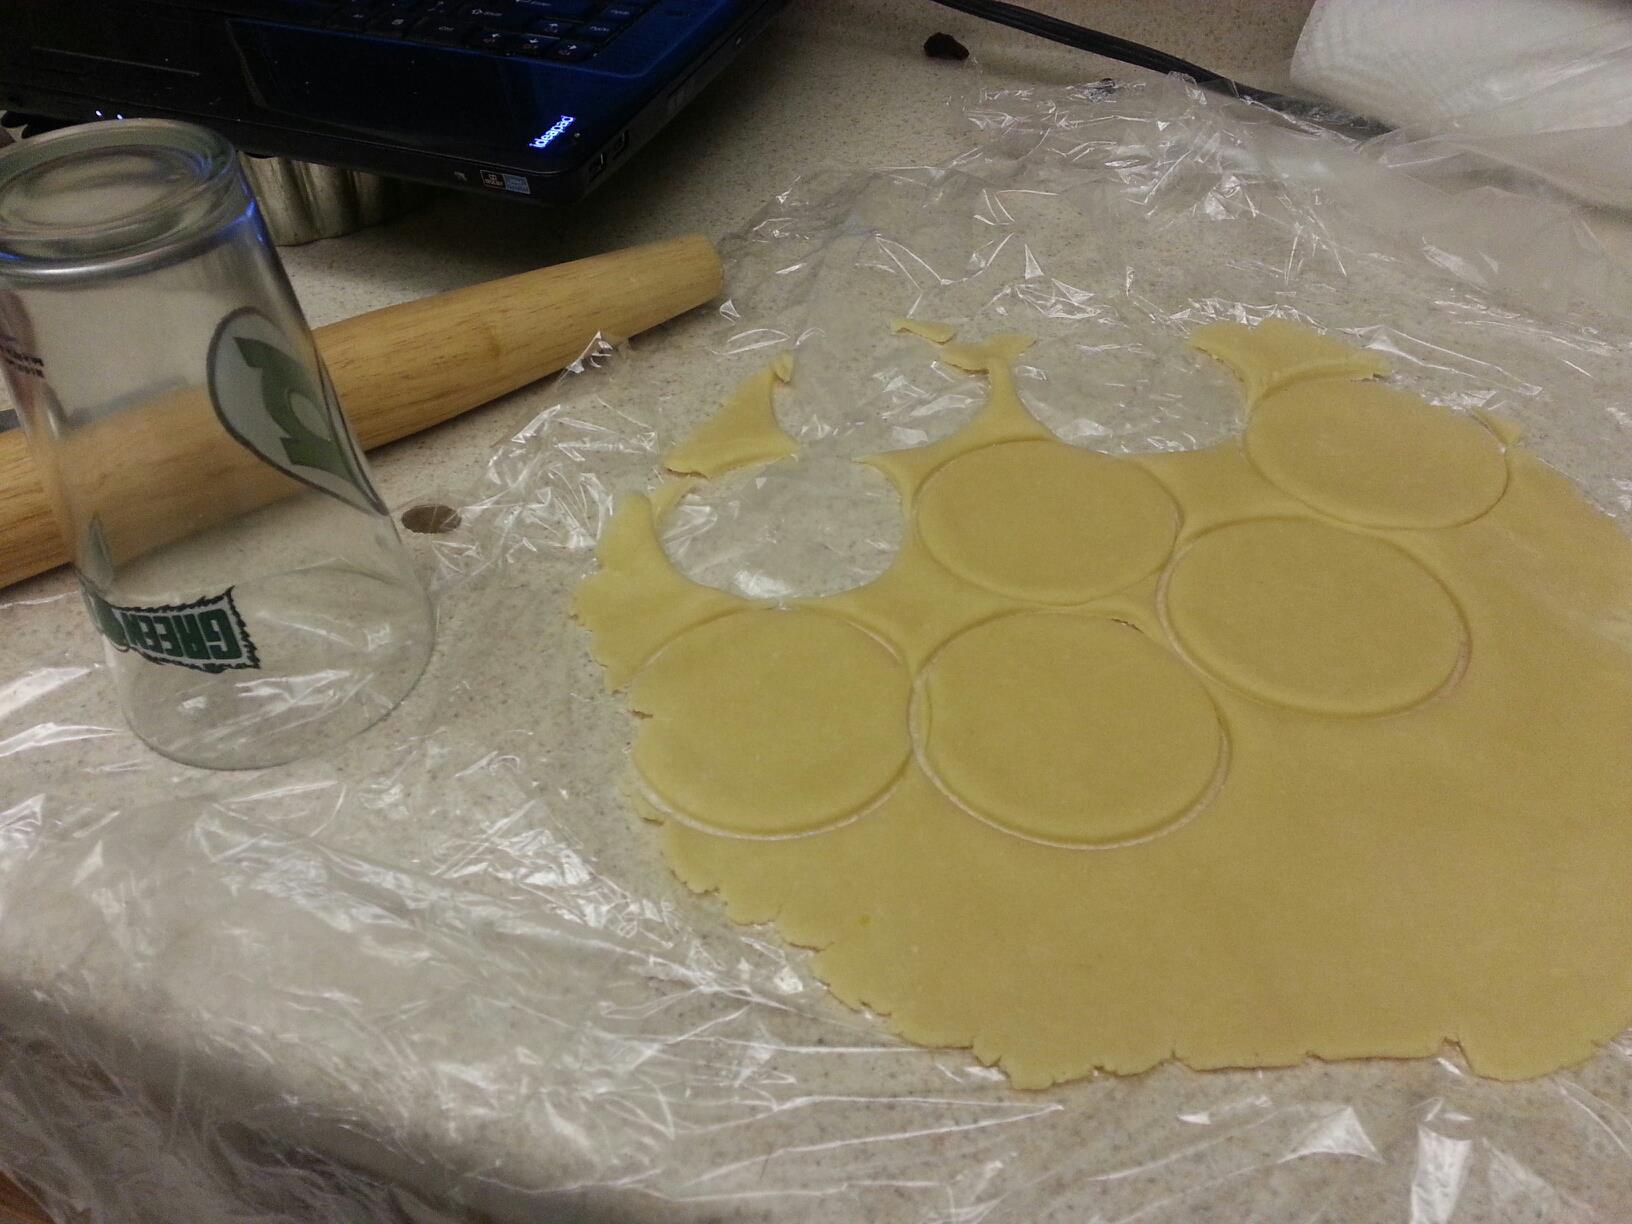
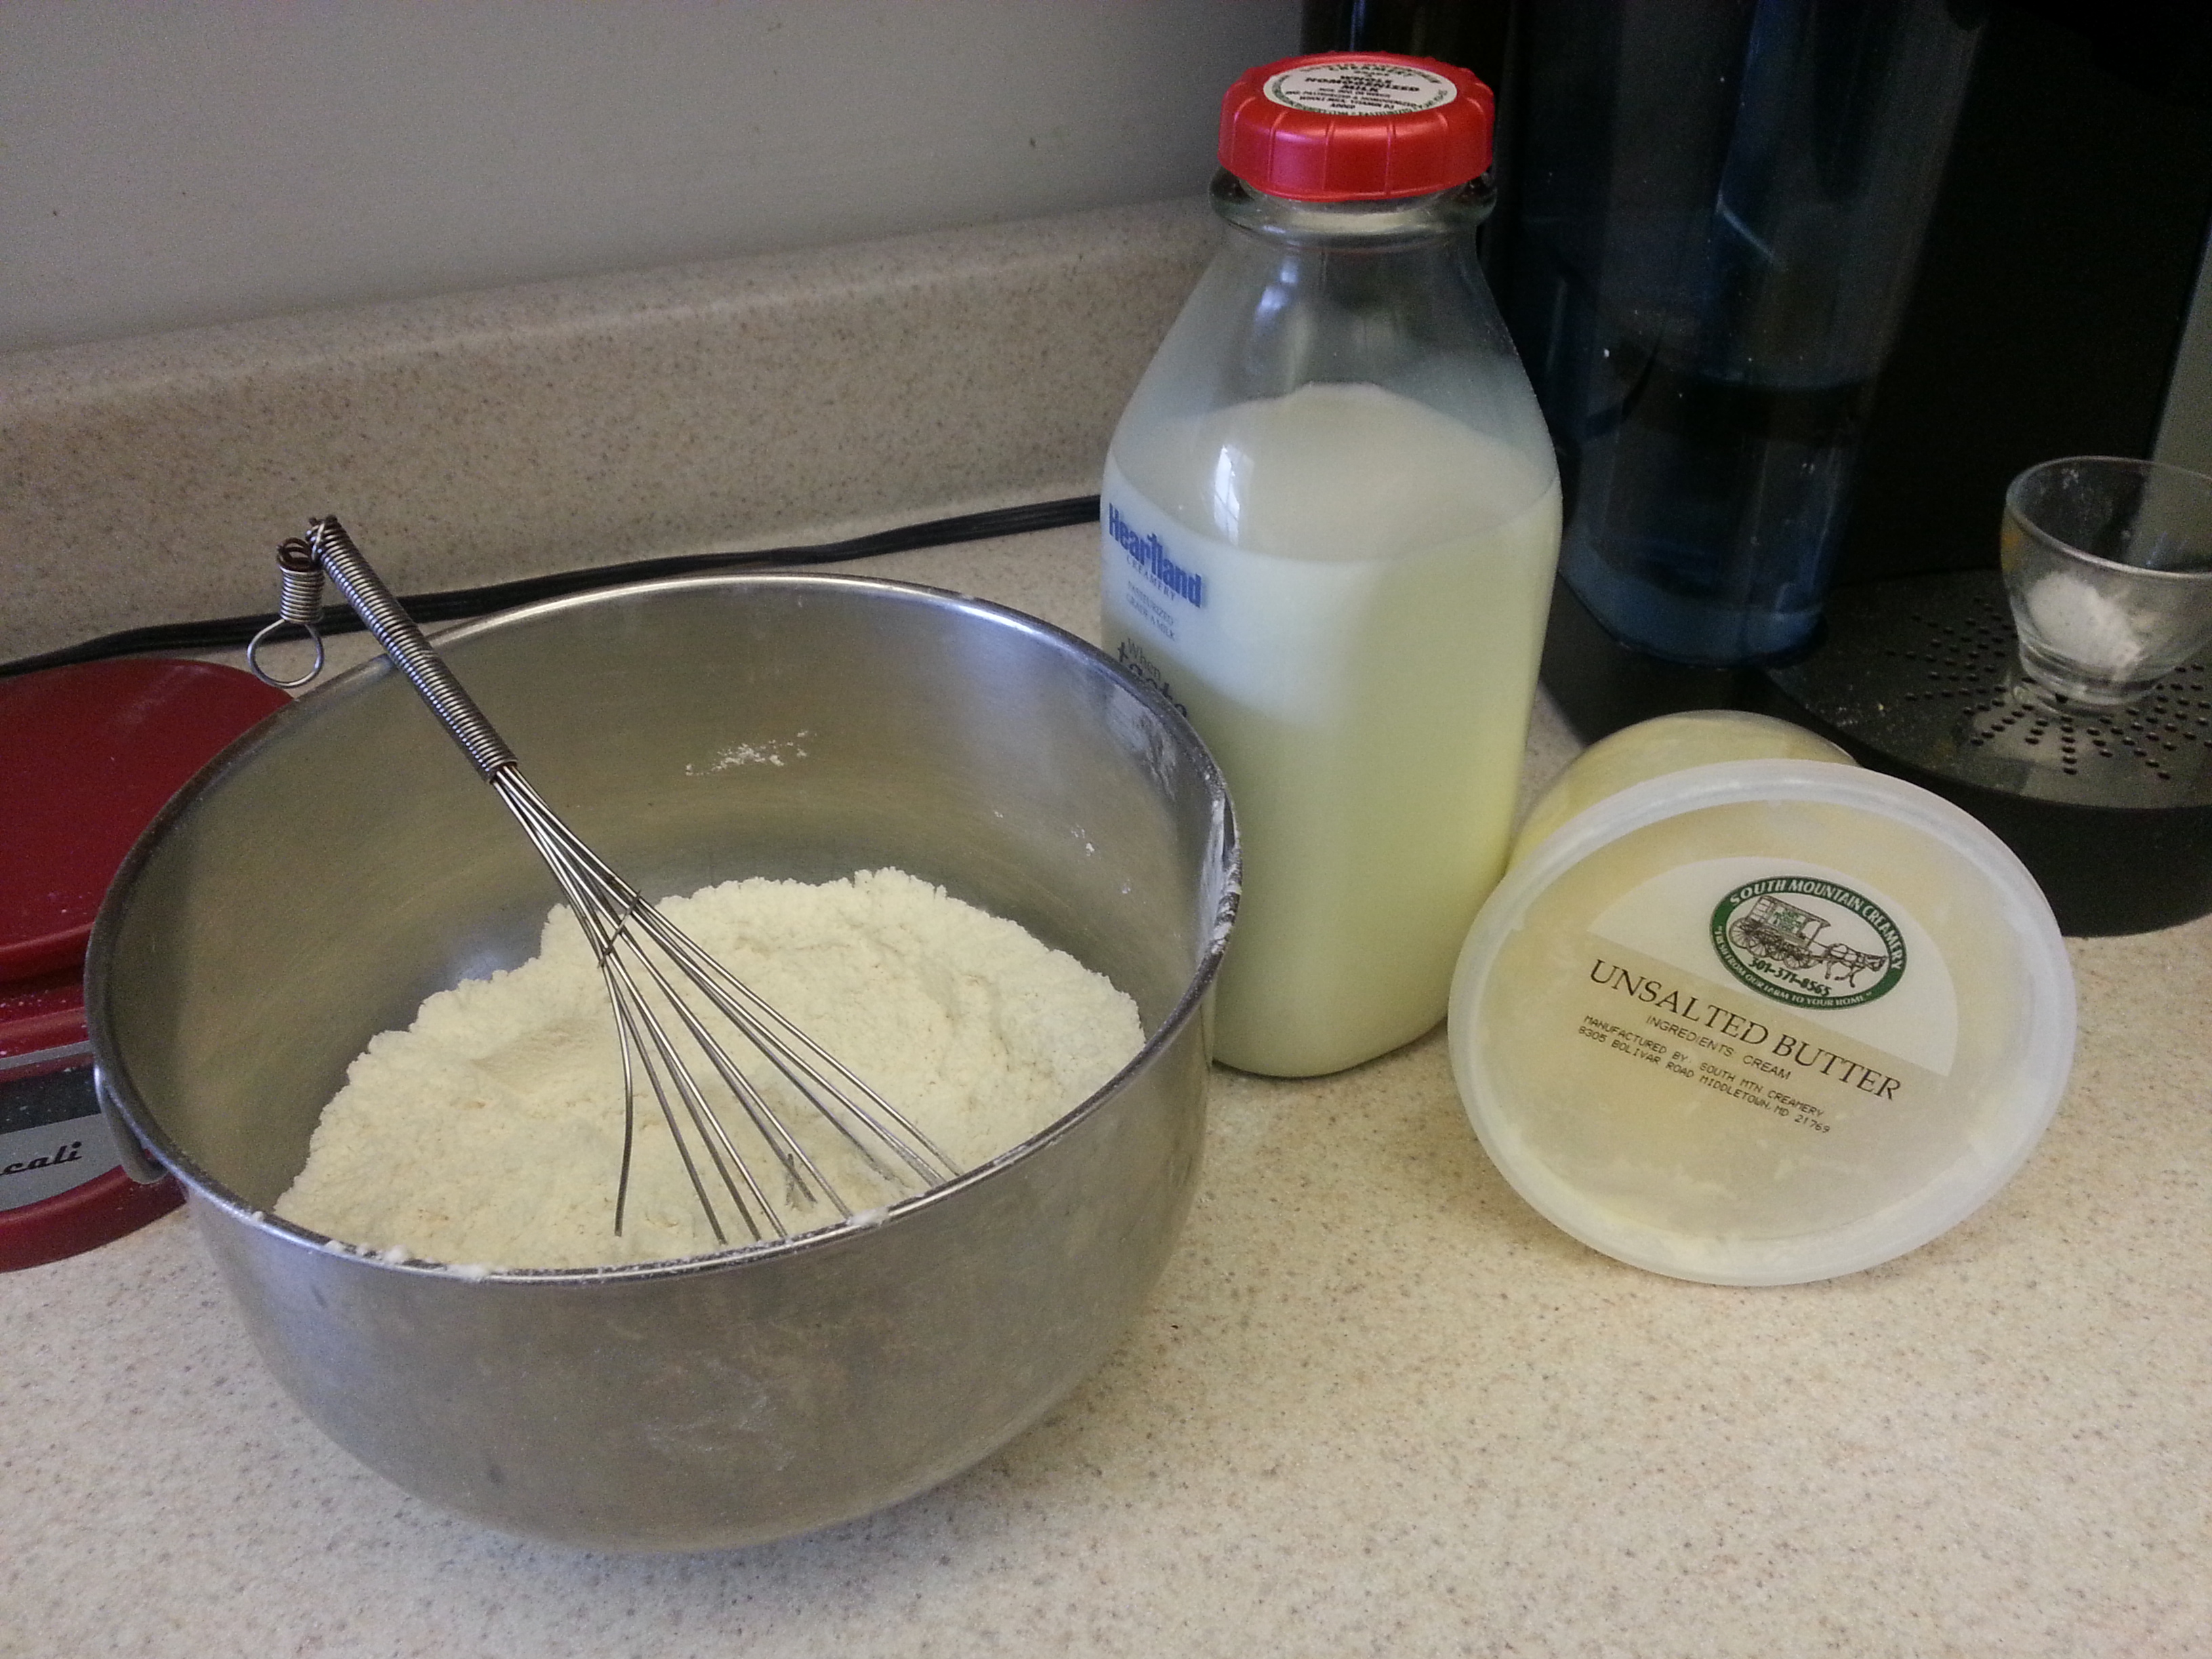
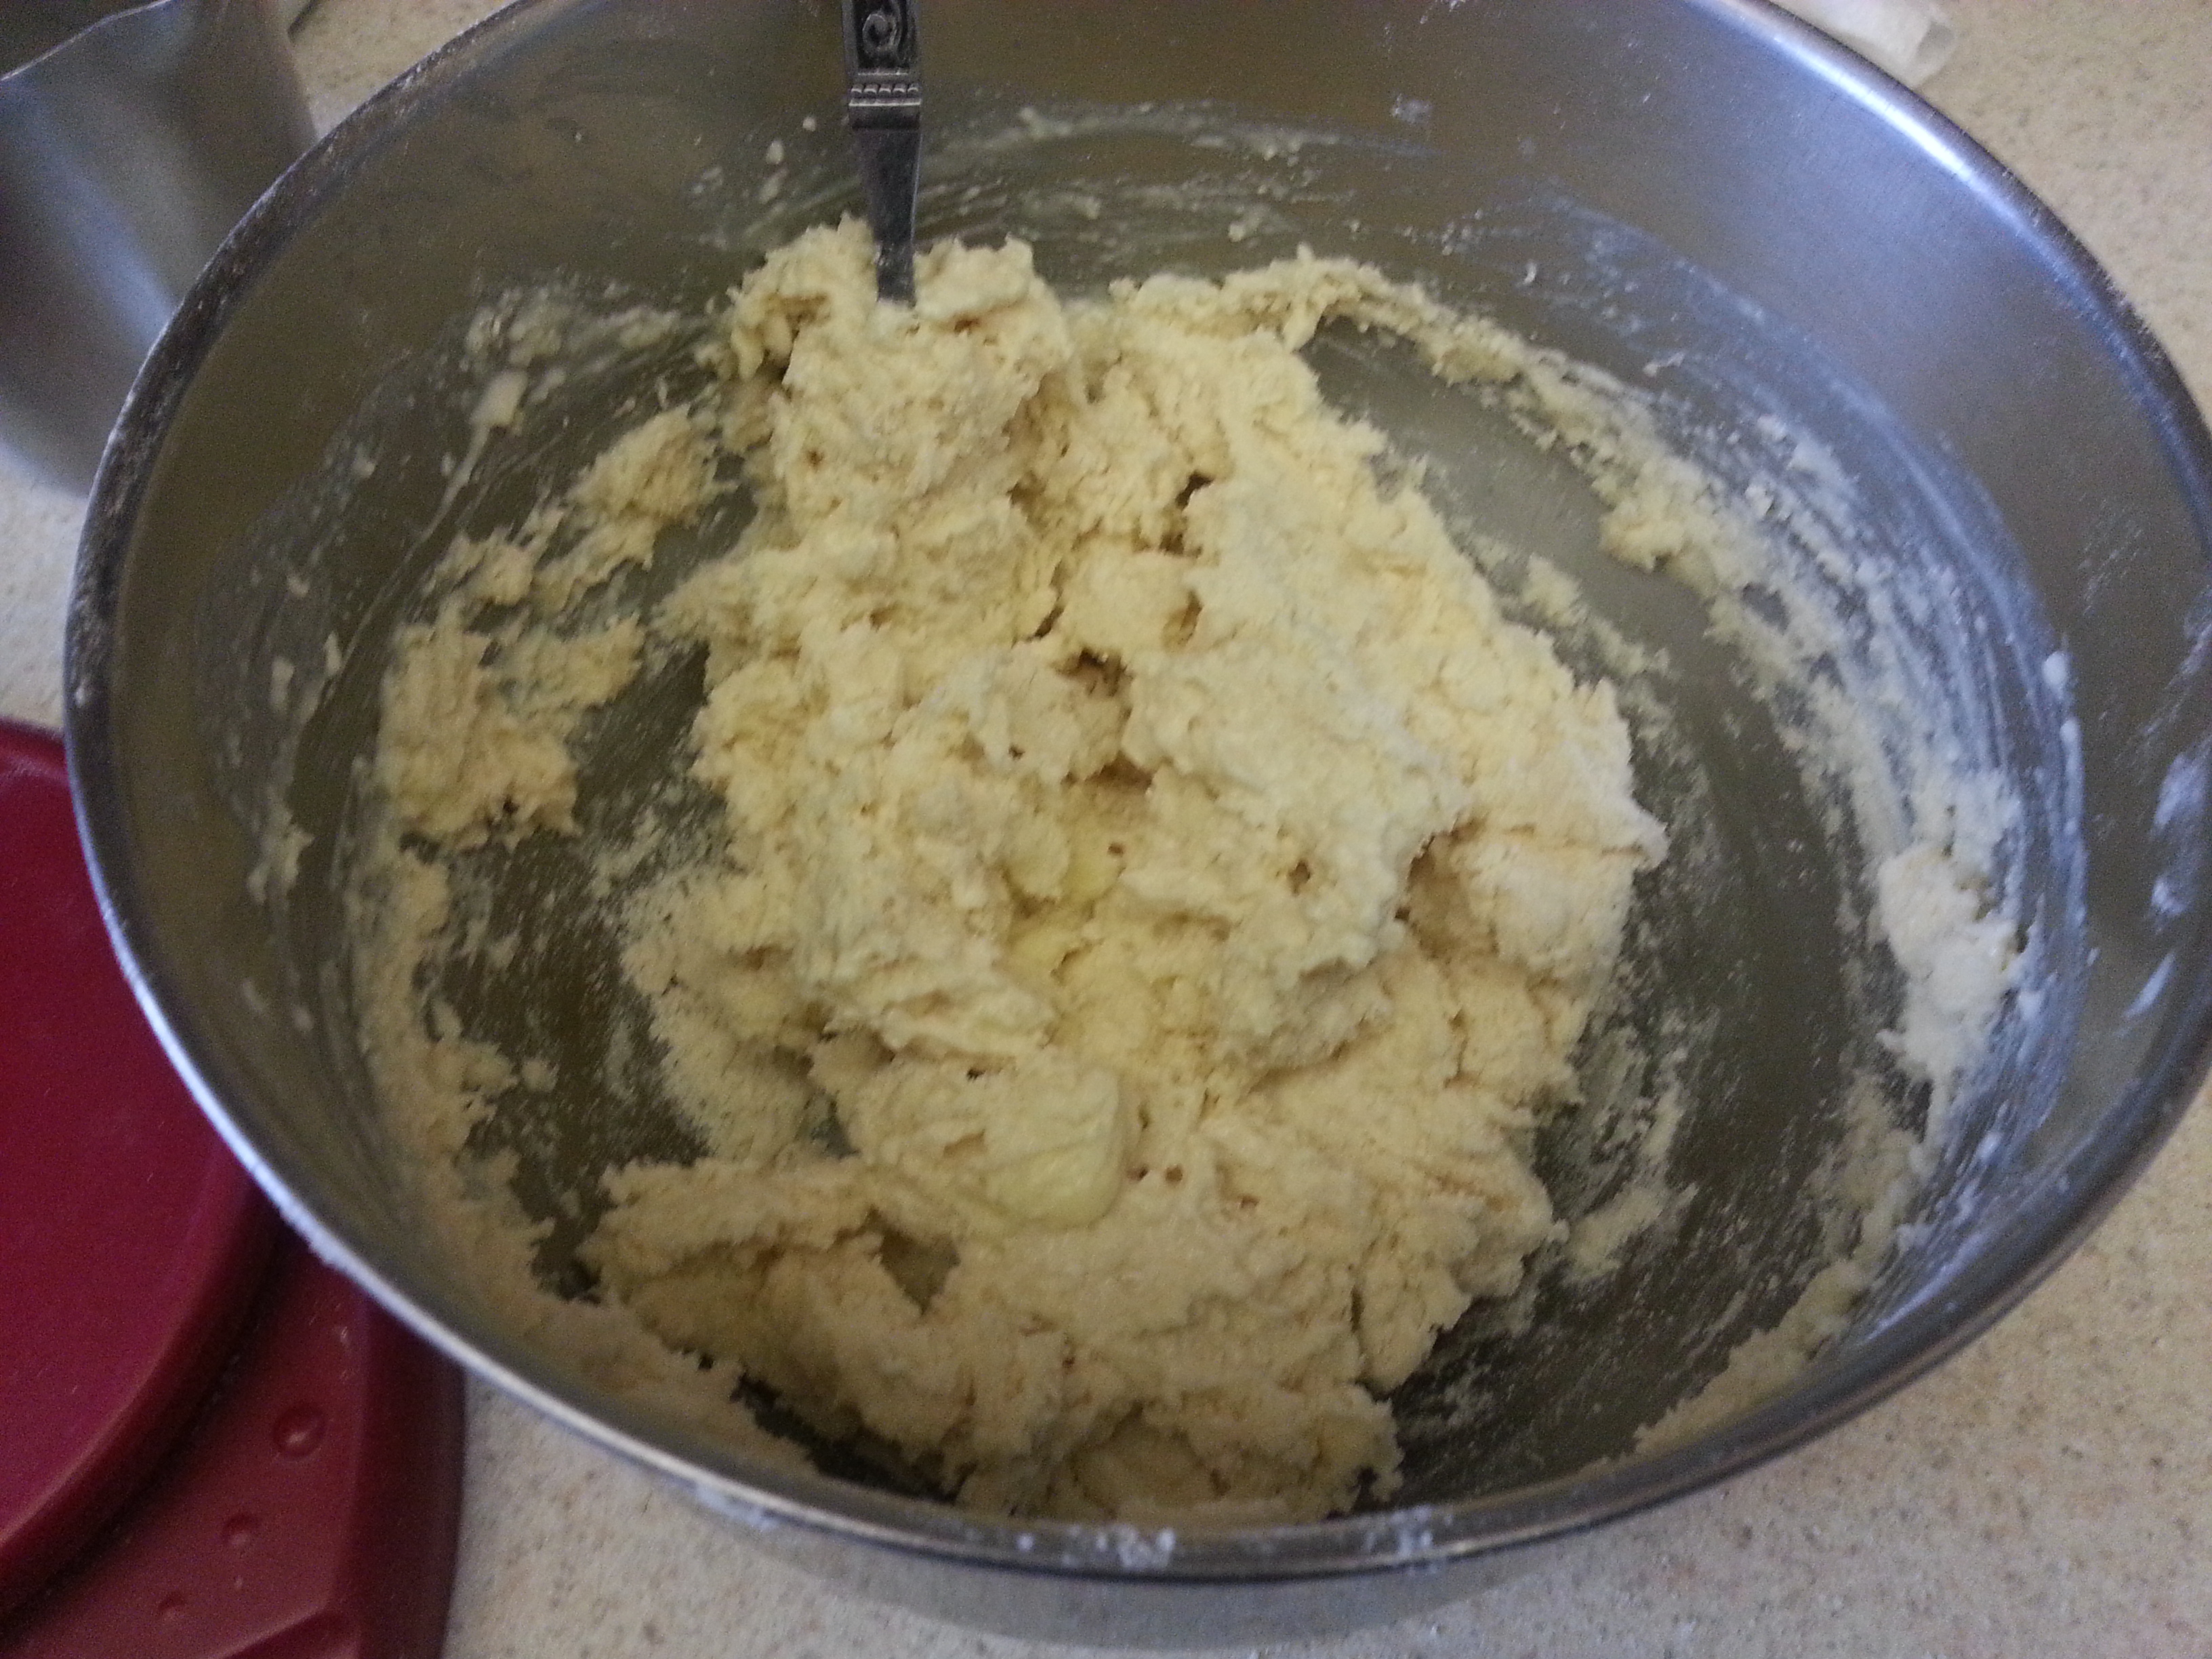
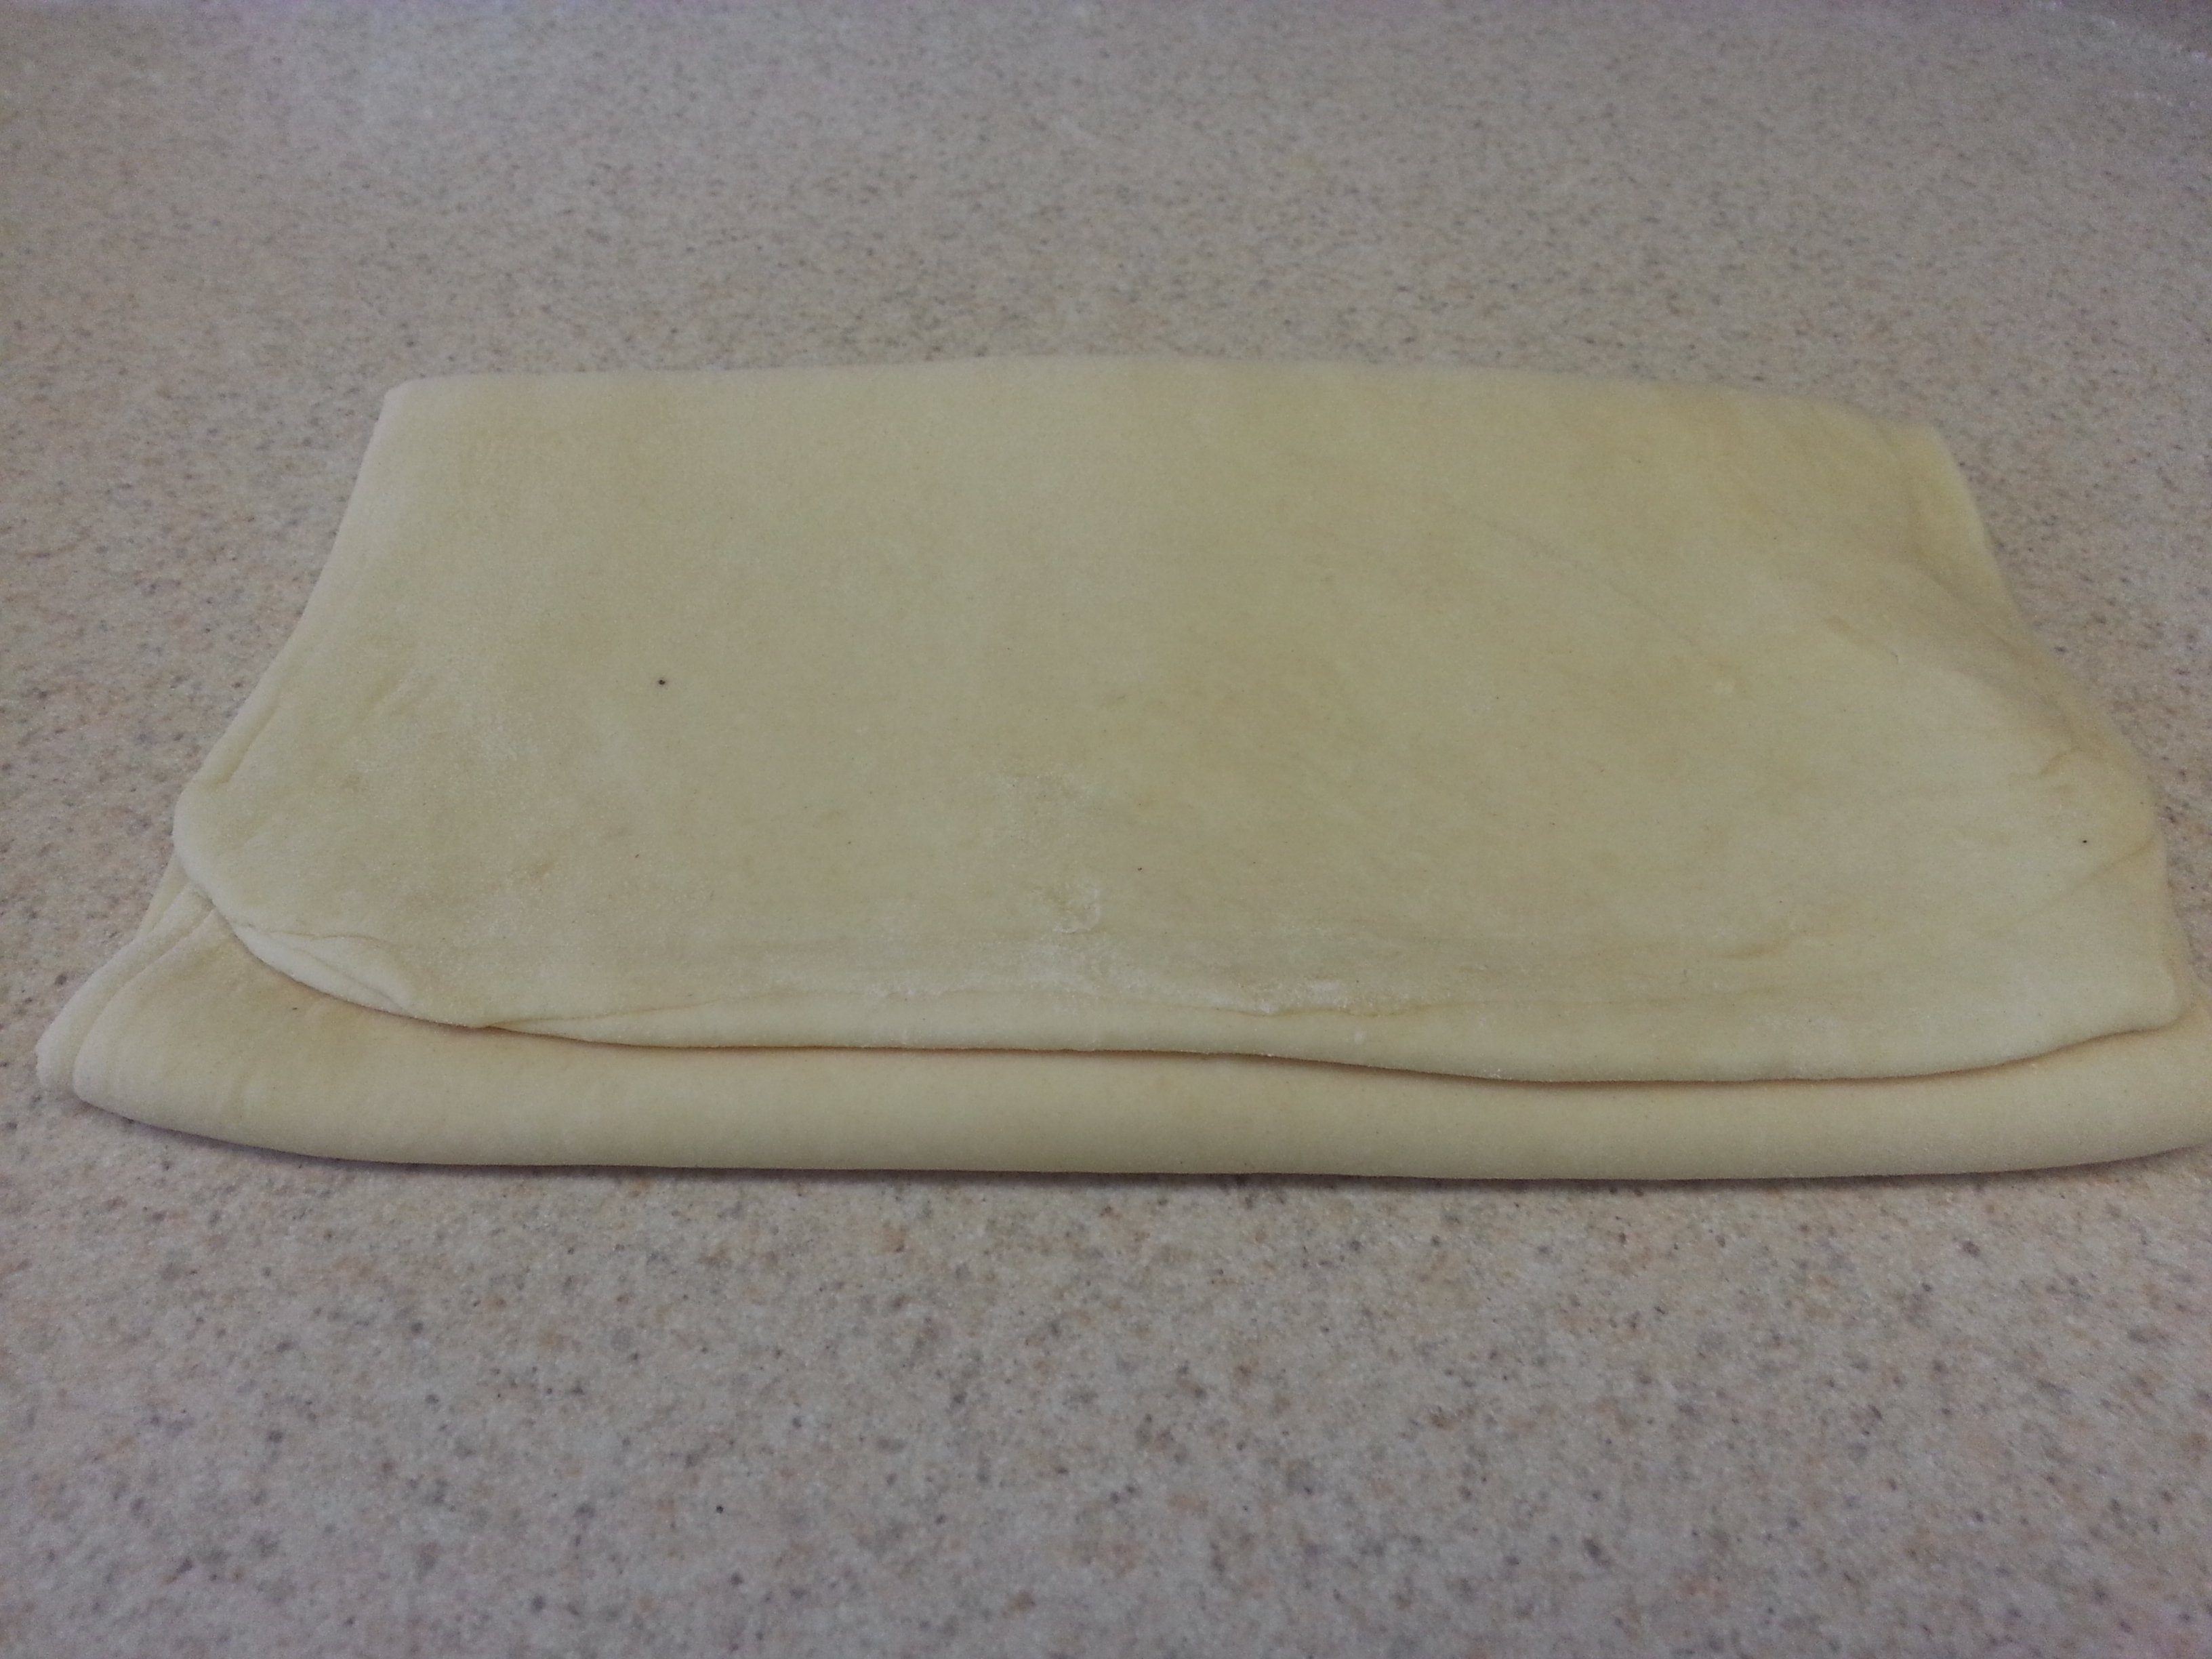
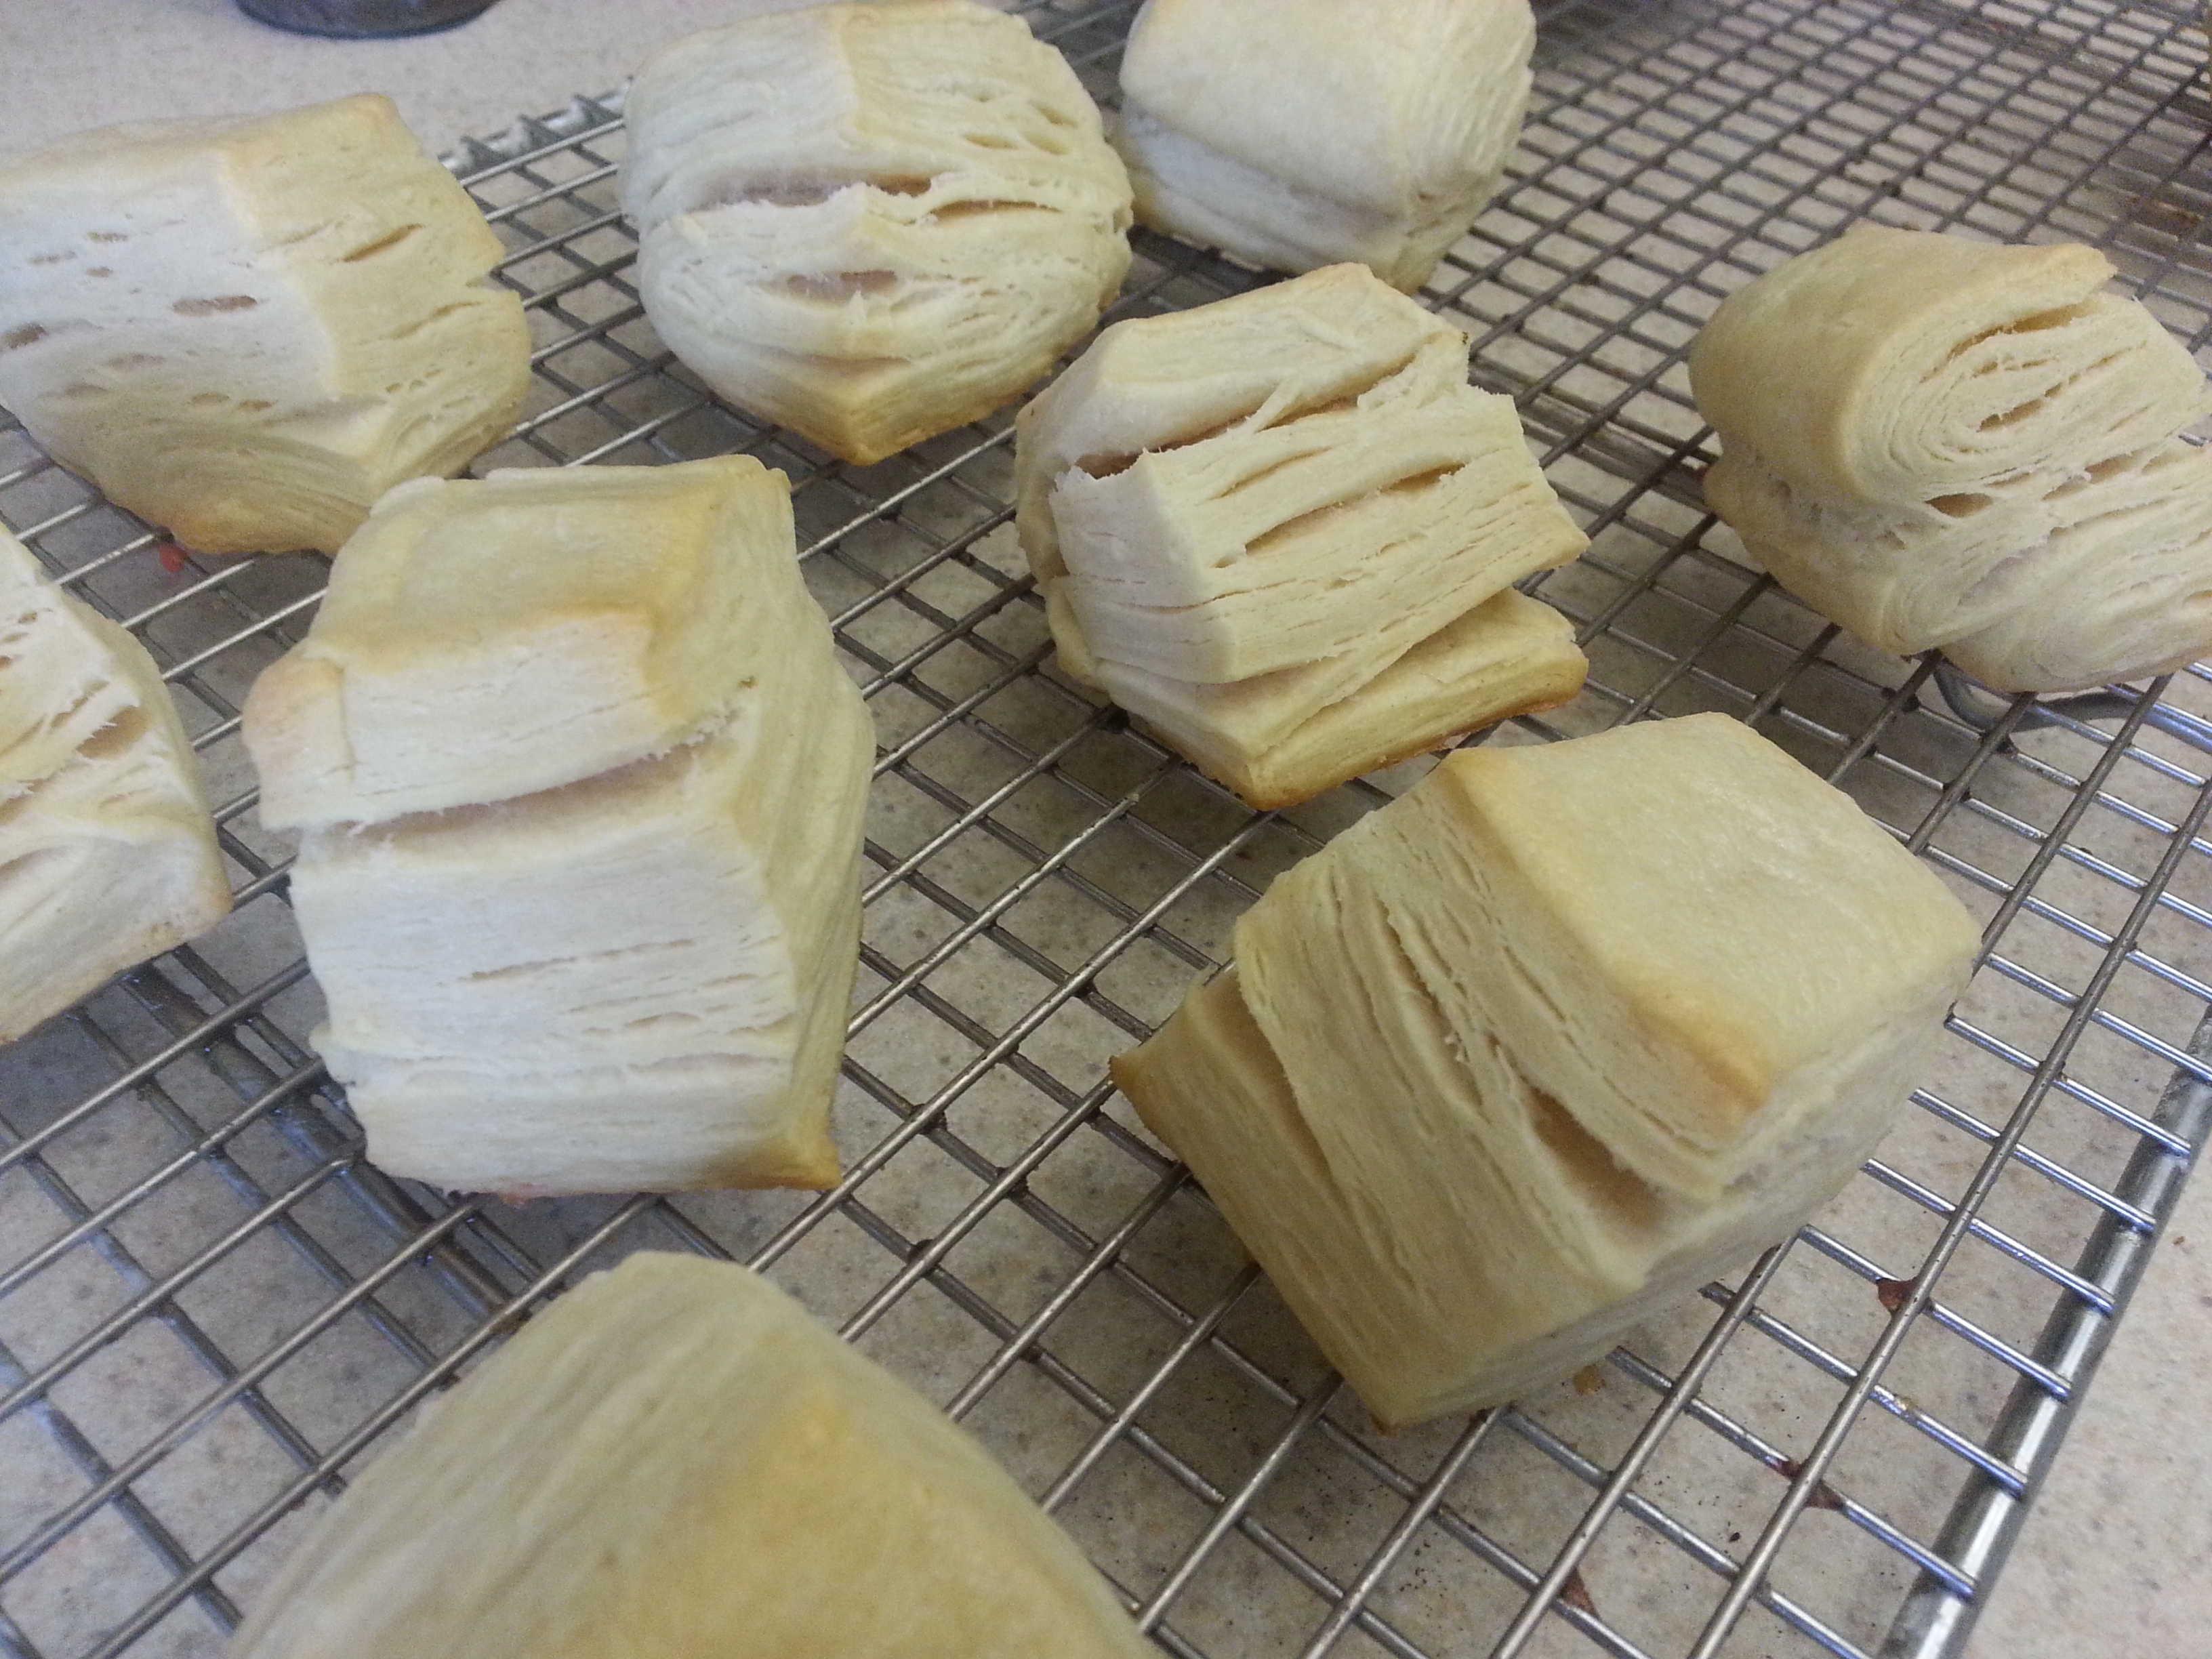
20130503_171702

20130504_111819

20130504_163846

Ham Biscuits

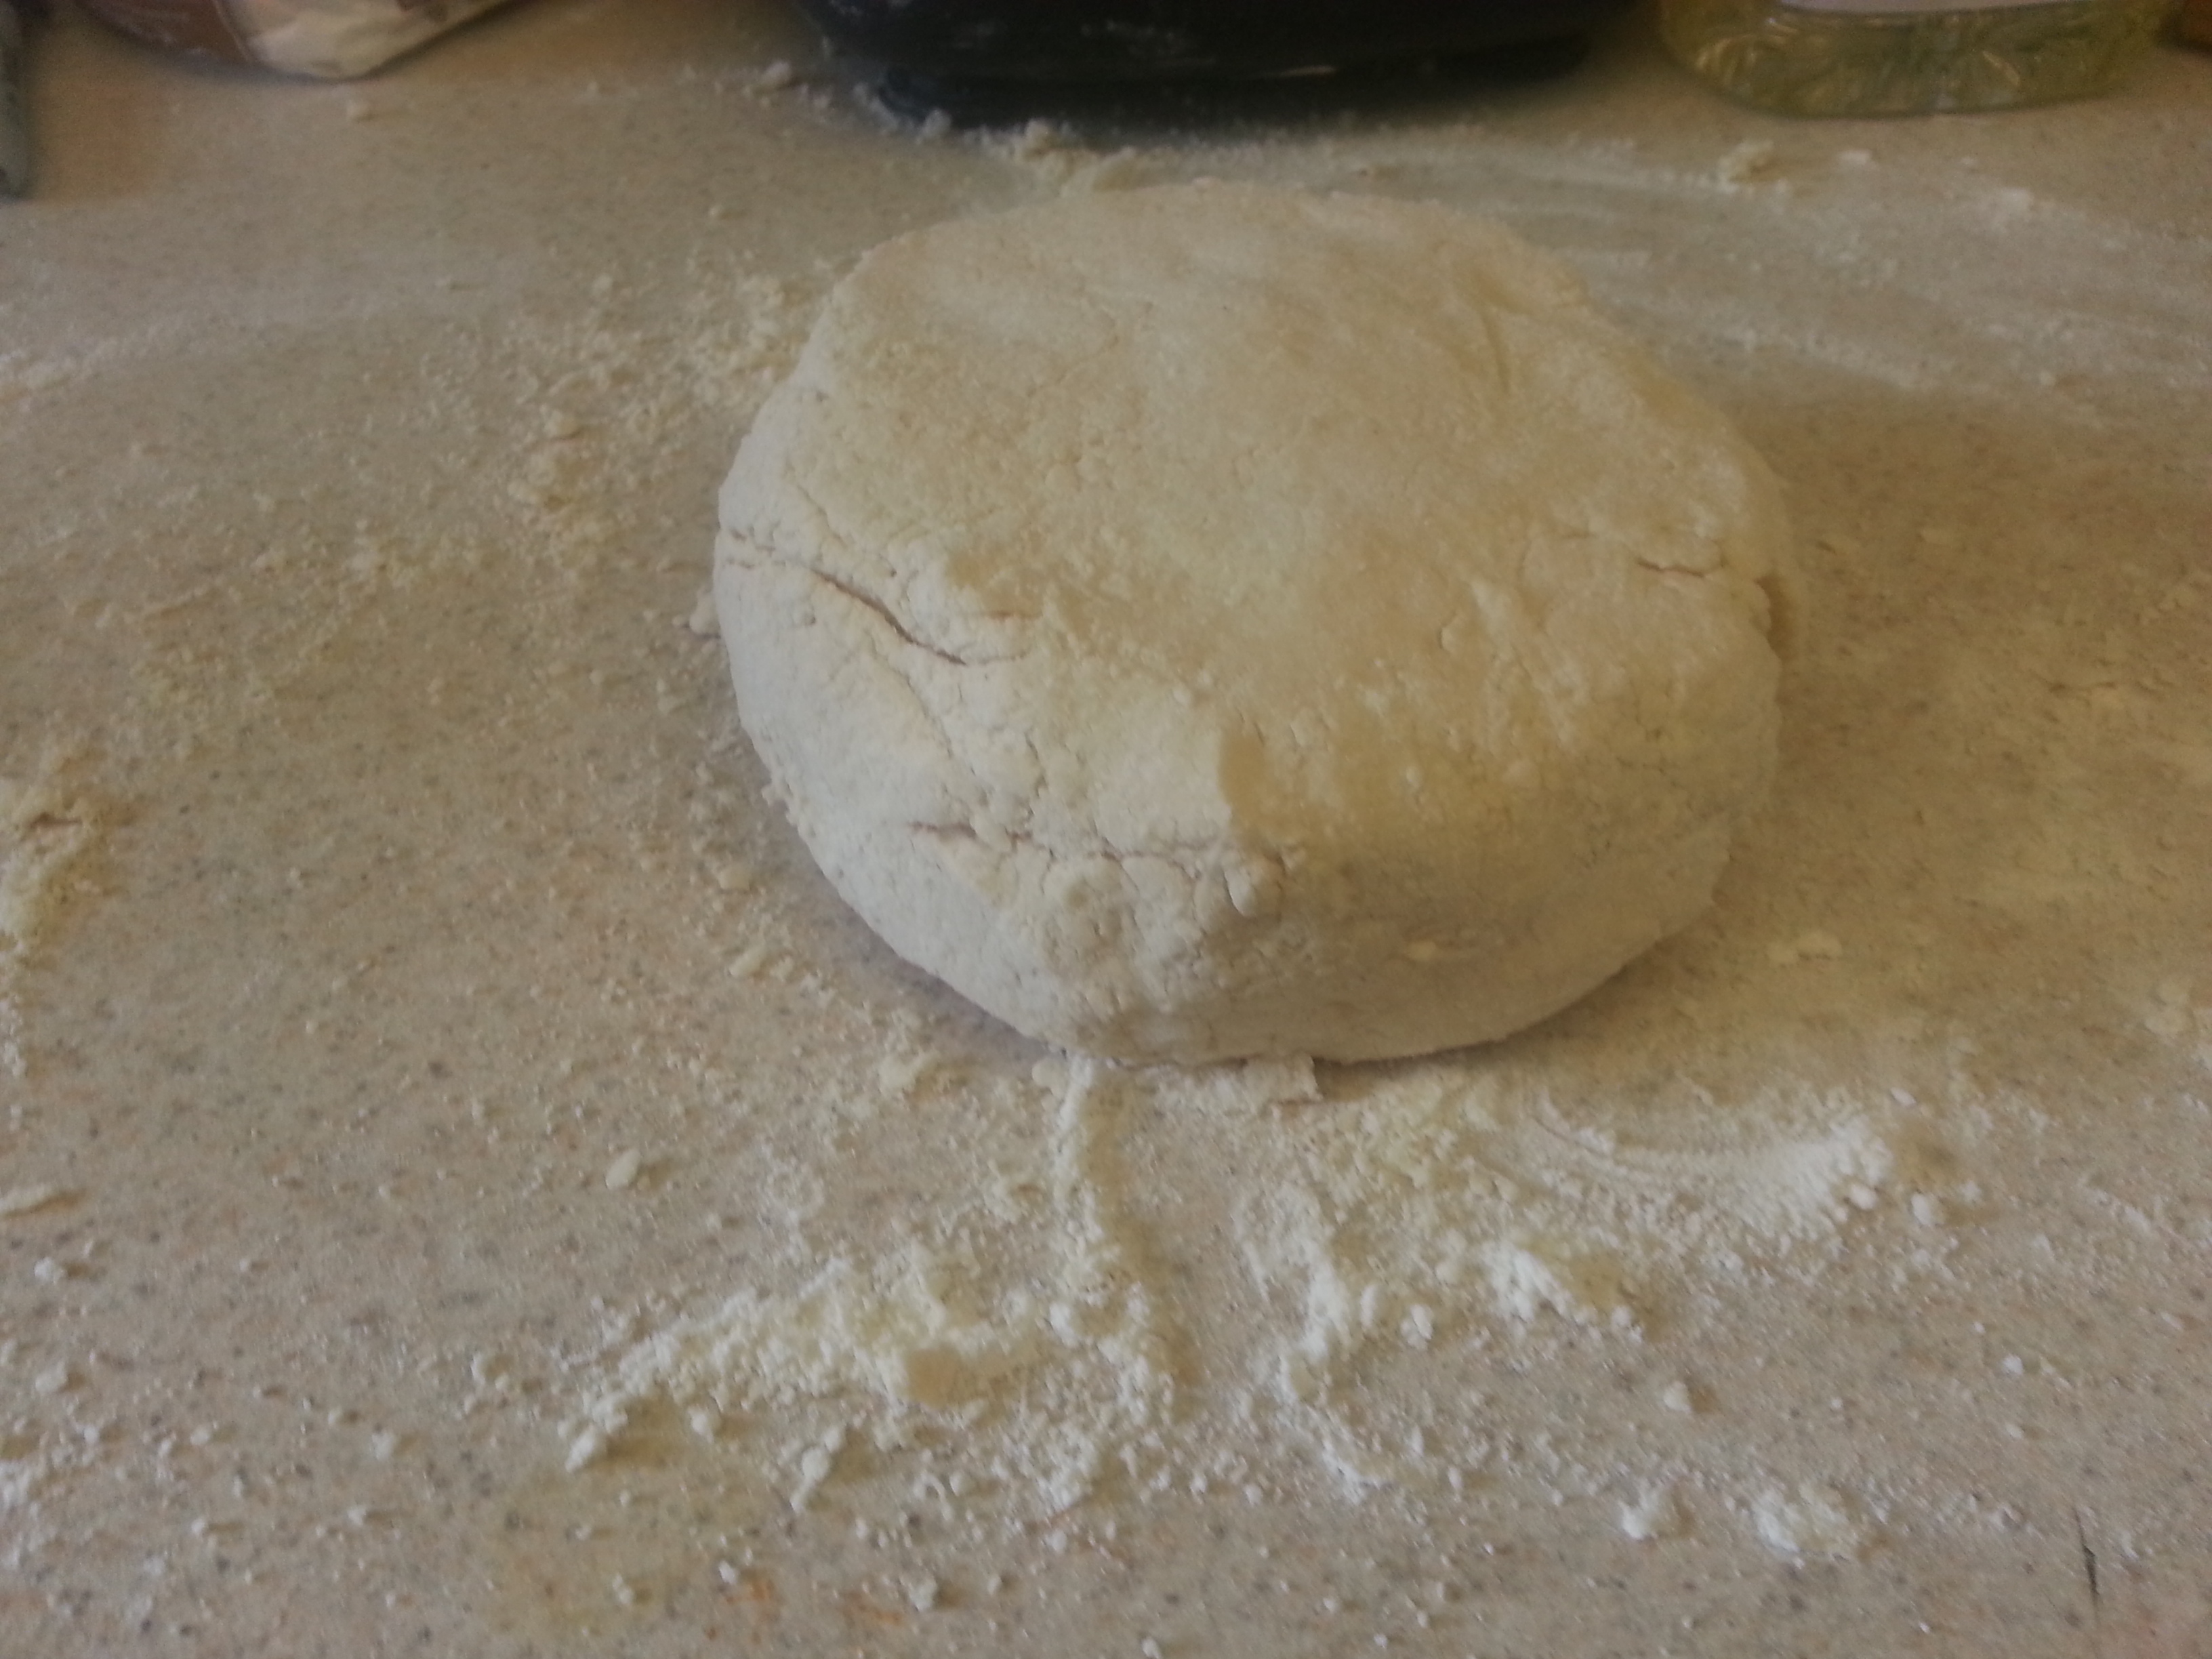
These biscuits needed to be sturdier, and a little taller than normal to accommodate being made into sandwiches. Three leavening agents keep them light and fluffy, while giving you some freedom with manipulating the dough.

  • 1/2 envelope active dry yeast
  • 2 tbsp. warm water (110-115 degrees F)
  • 2 1/2 cups all-purpose flour
  • 1/2 tbsp. sugar
  • 1/2 tbsp. baking powder
  • 1/2 tsp. baking soda
  • 1/2 tsp. salt
  • 4 oz. cream cheese, cut into pieces and chilled
  • 2 oz. unsalted butter, cut into pieces and chilled
  • 1/2 cup plus 2 tbsp. buttermilk
  • Slices of country ham
  • Dijon mustard, mayonnaise, or other condiments

Preheat oven to 400 degrees F.

Combine yeast and warm water in a small bowl; let stand 5 minutes or until foamy.

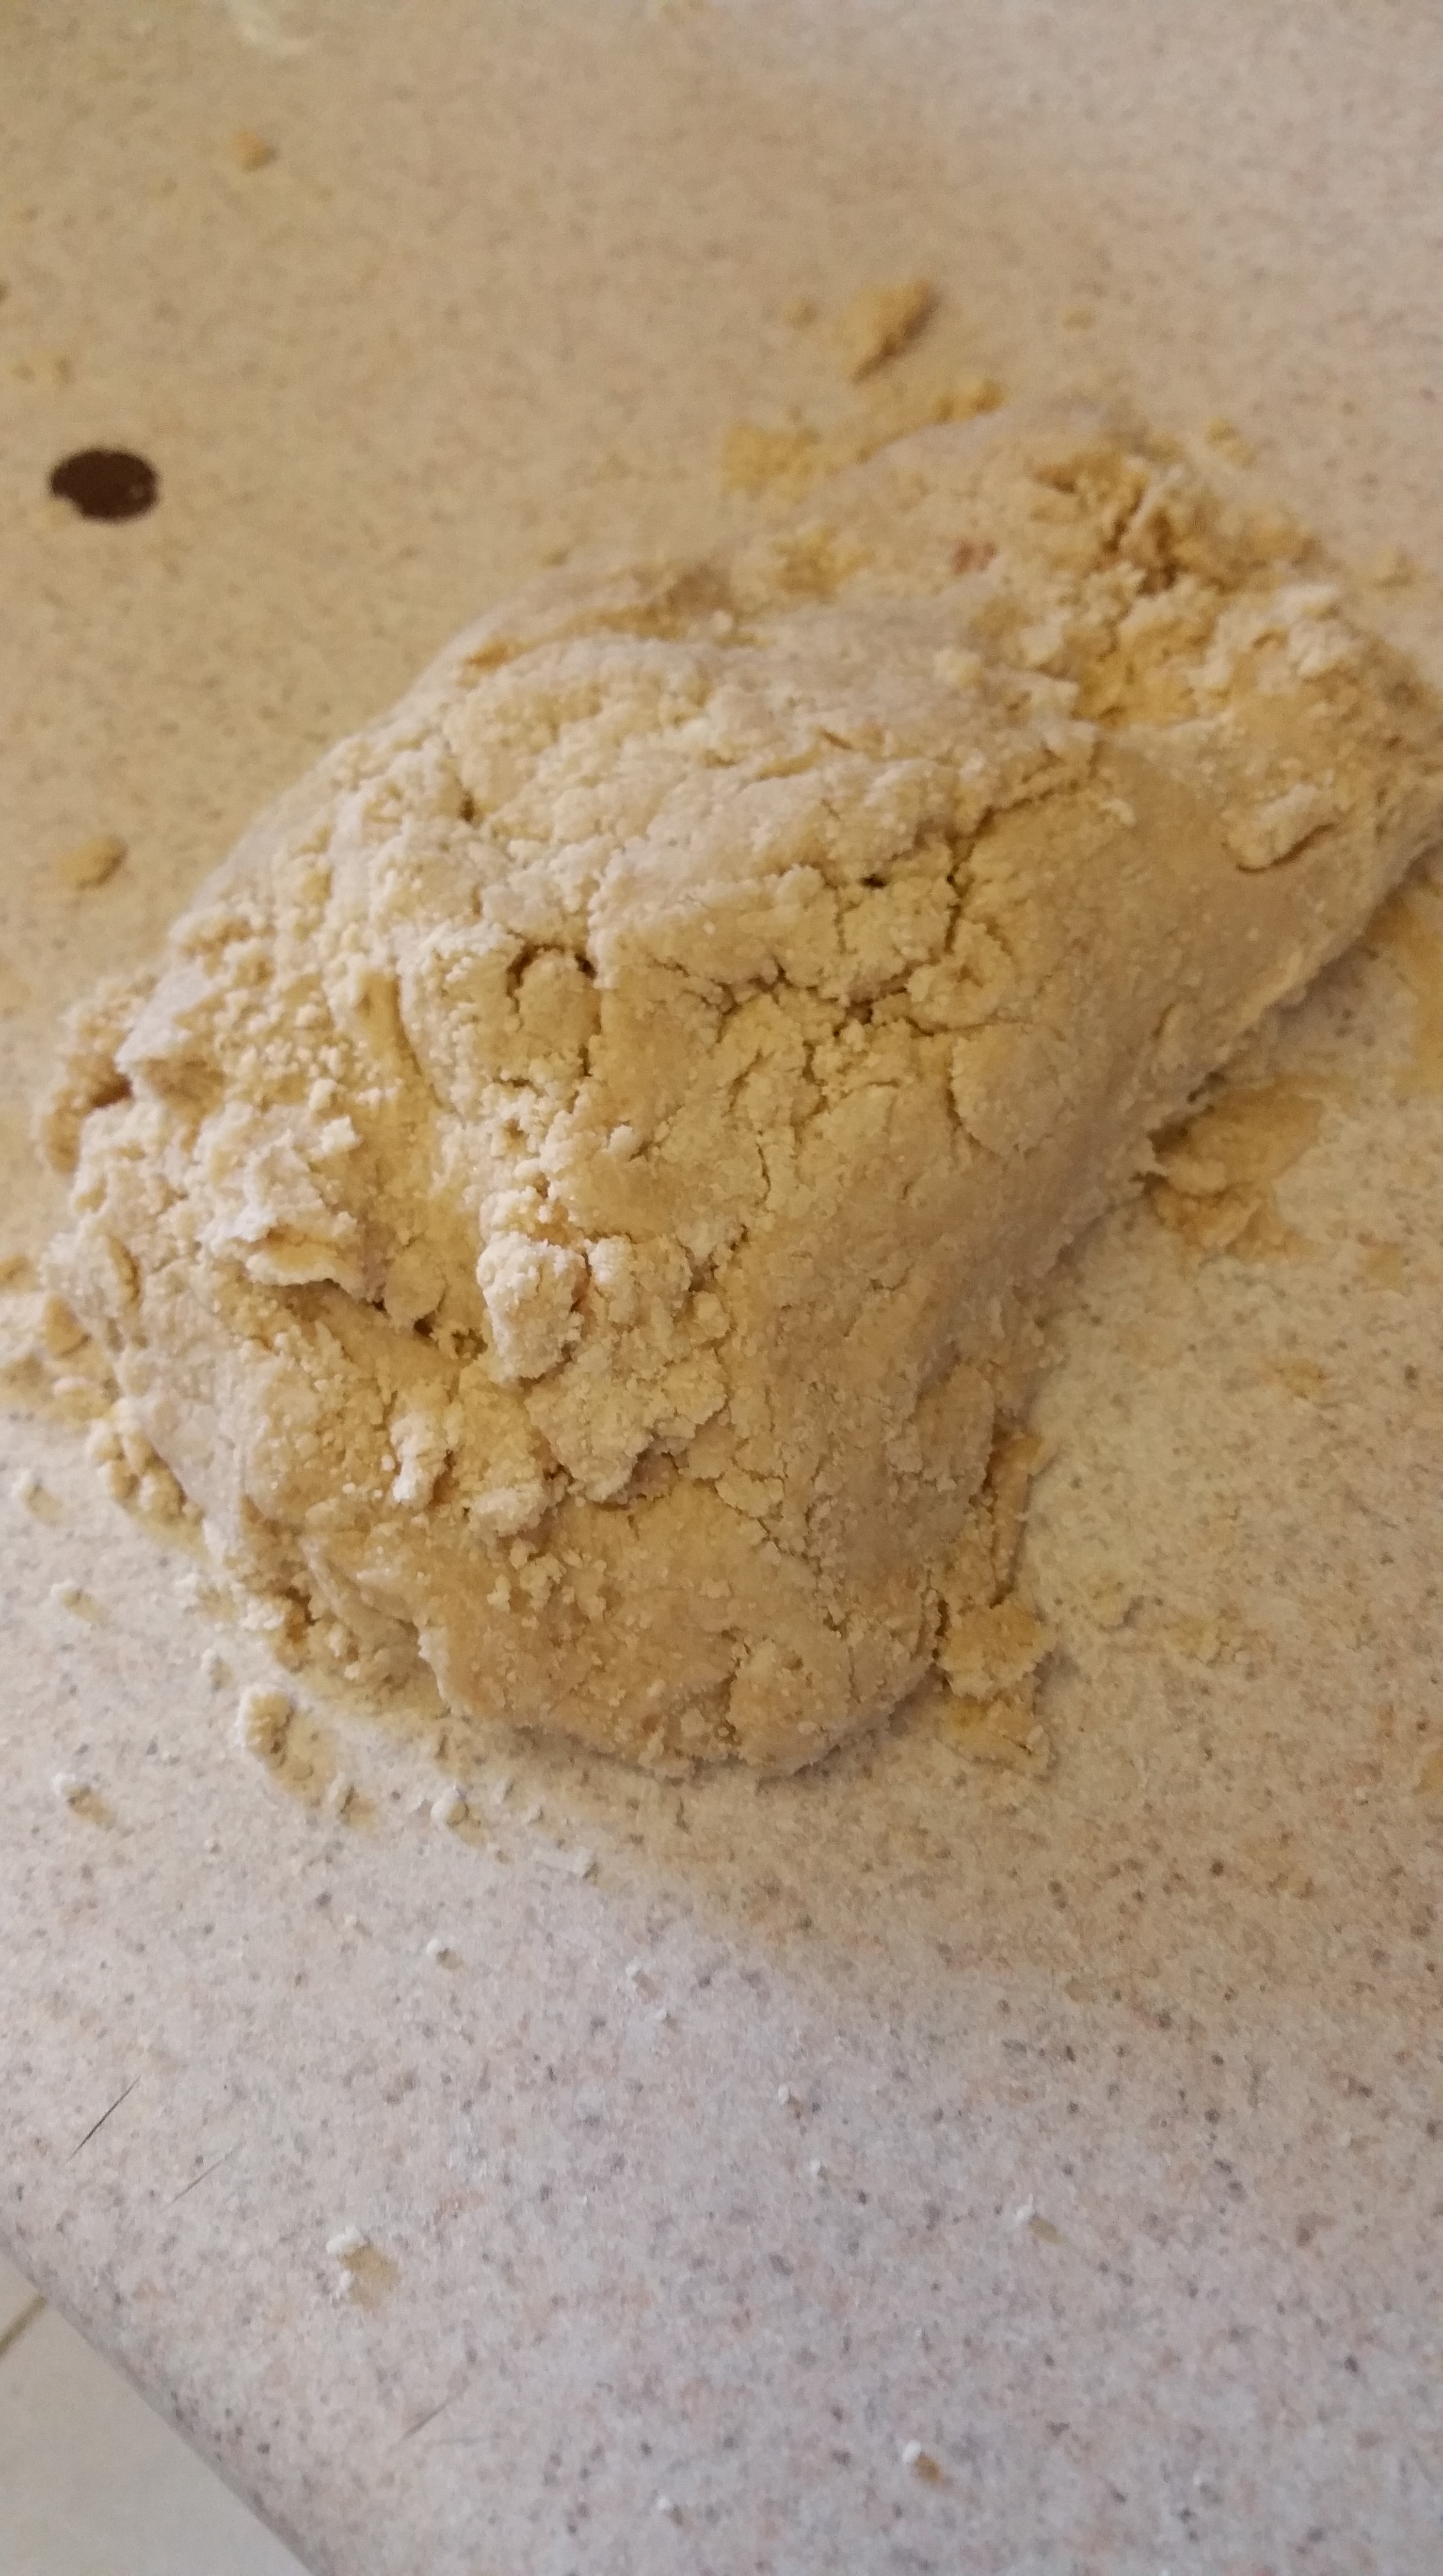
Whisk together flour, sugar, baking soda, baking powder, and salt, then cut cream cheese and cold butter into flour mixture with a pastry blender or fork until crumbly.

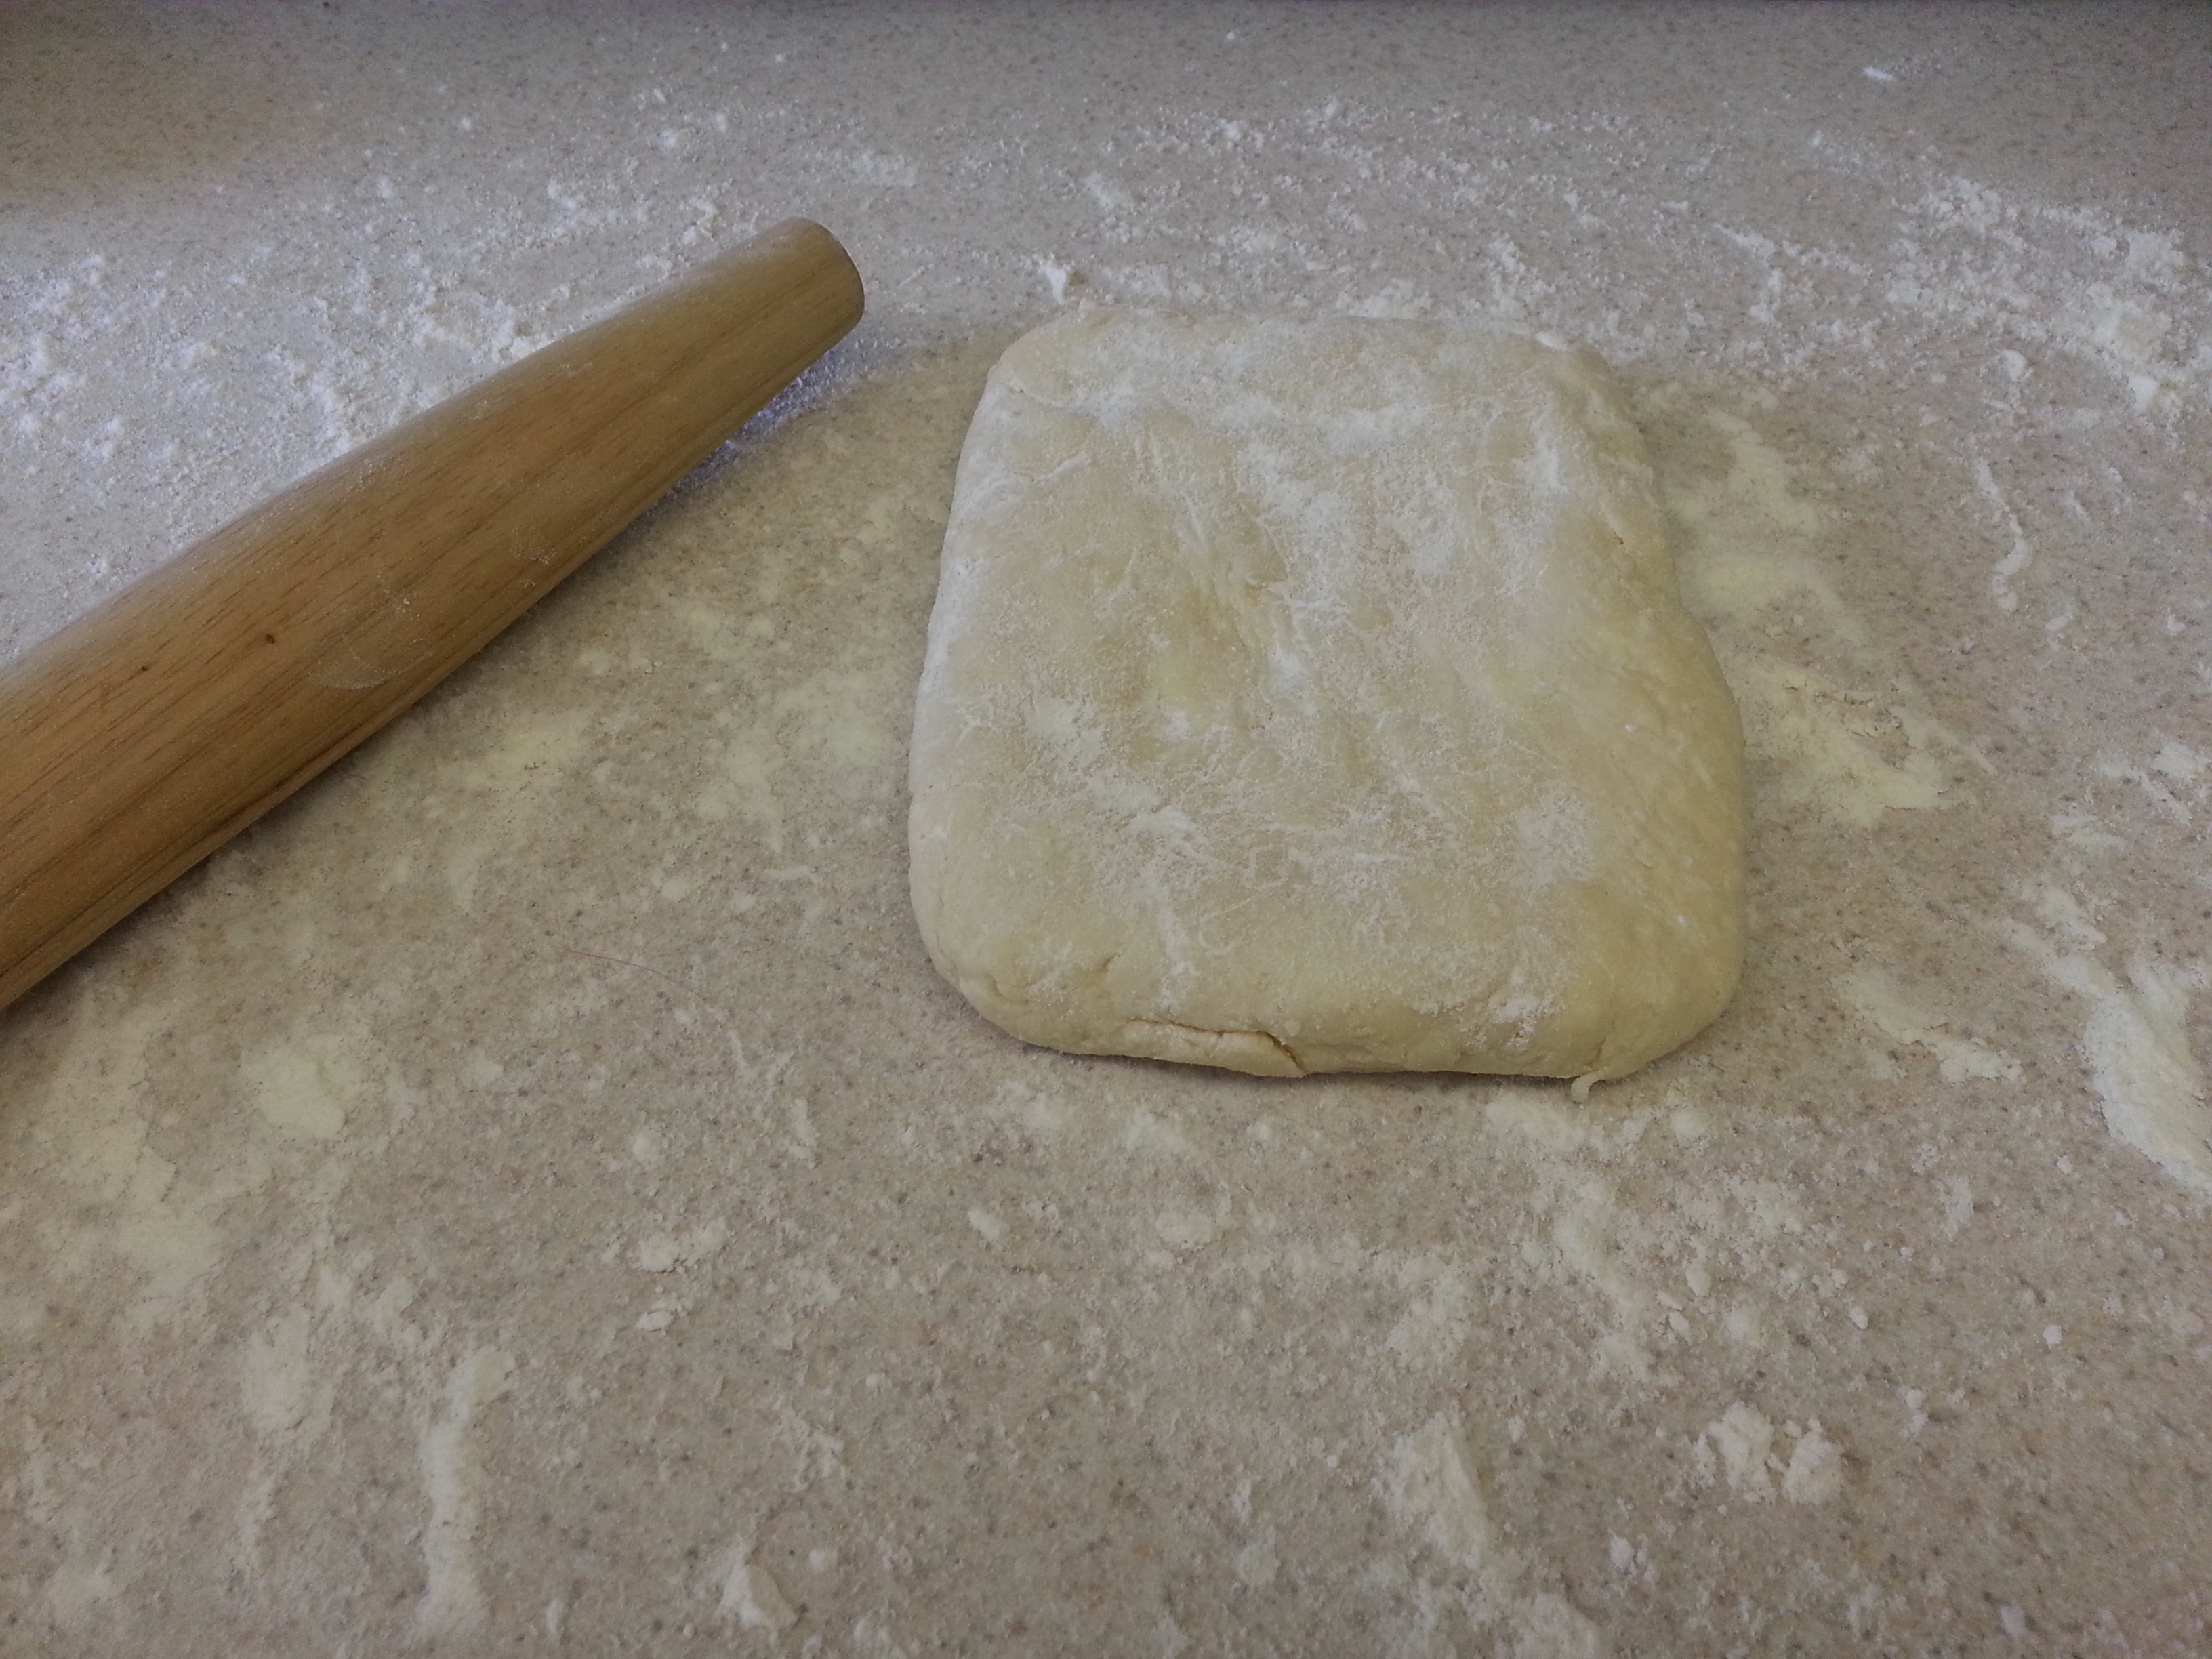
Combine yeast mixture and buttermilk, and then add to the flour mixture, stirring just until dry ingredients are moistened. Turn dough out onto a lightly floured surface, and knead lightly 6 to 8 times.

20130504_073019
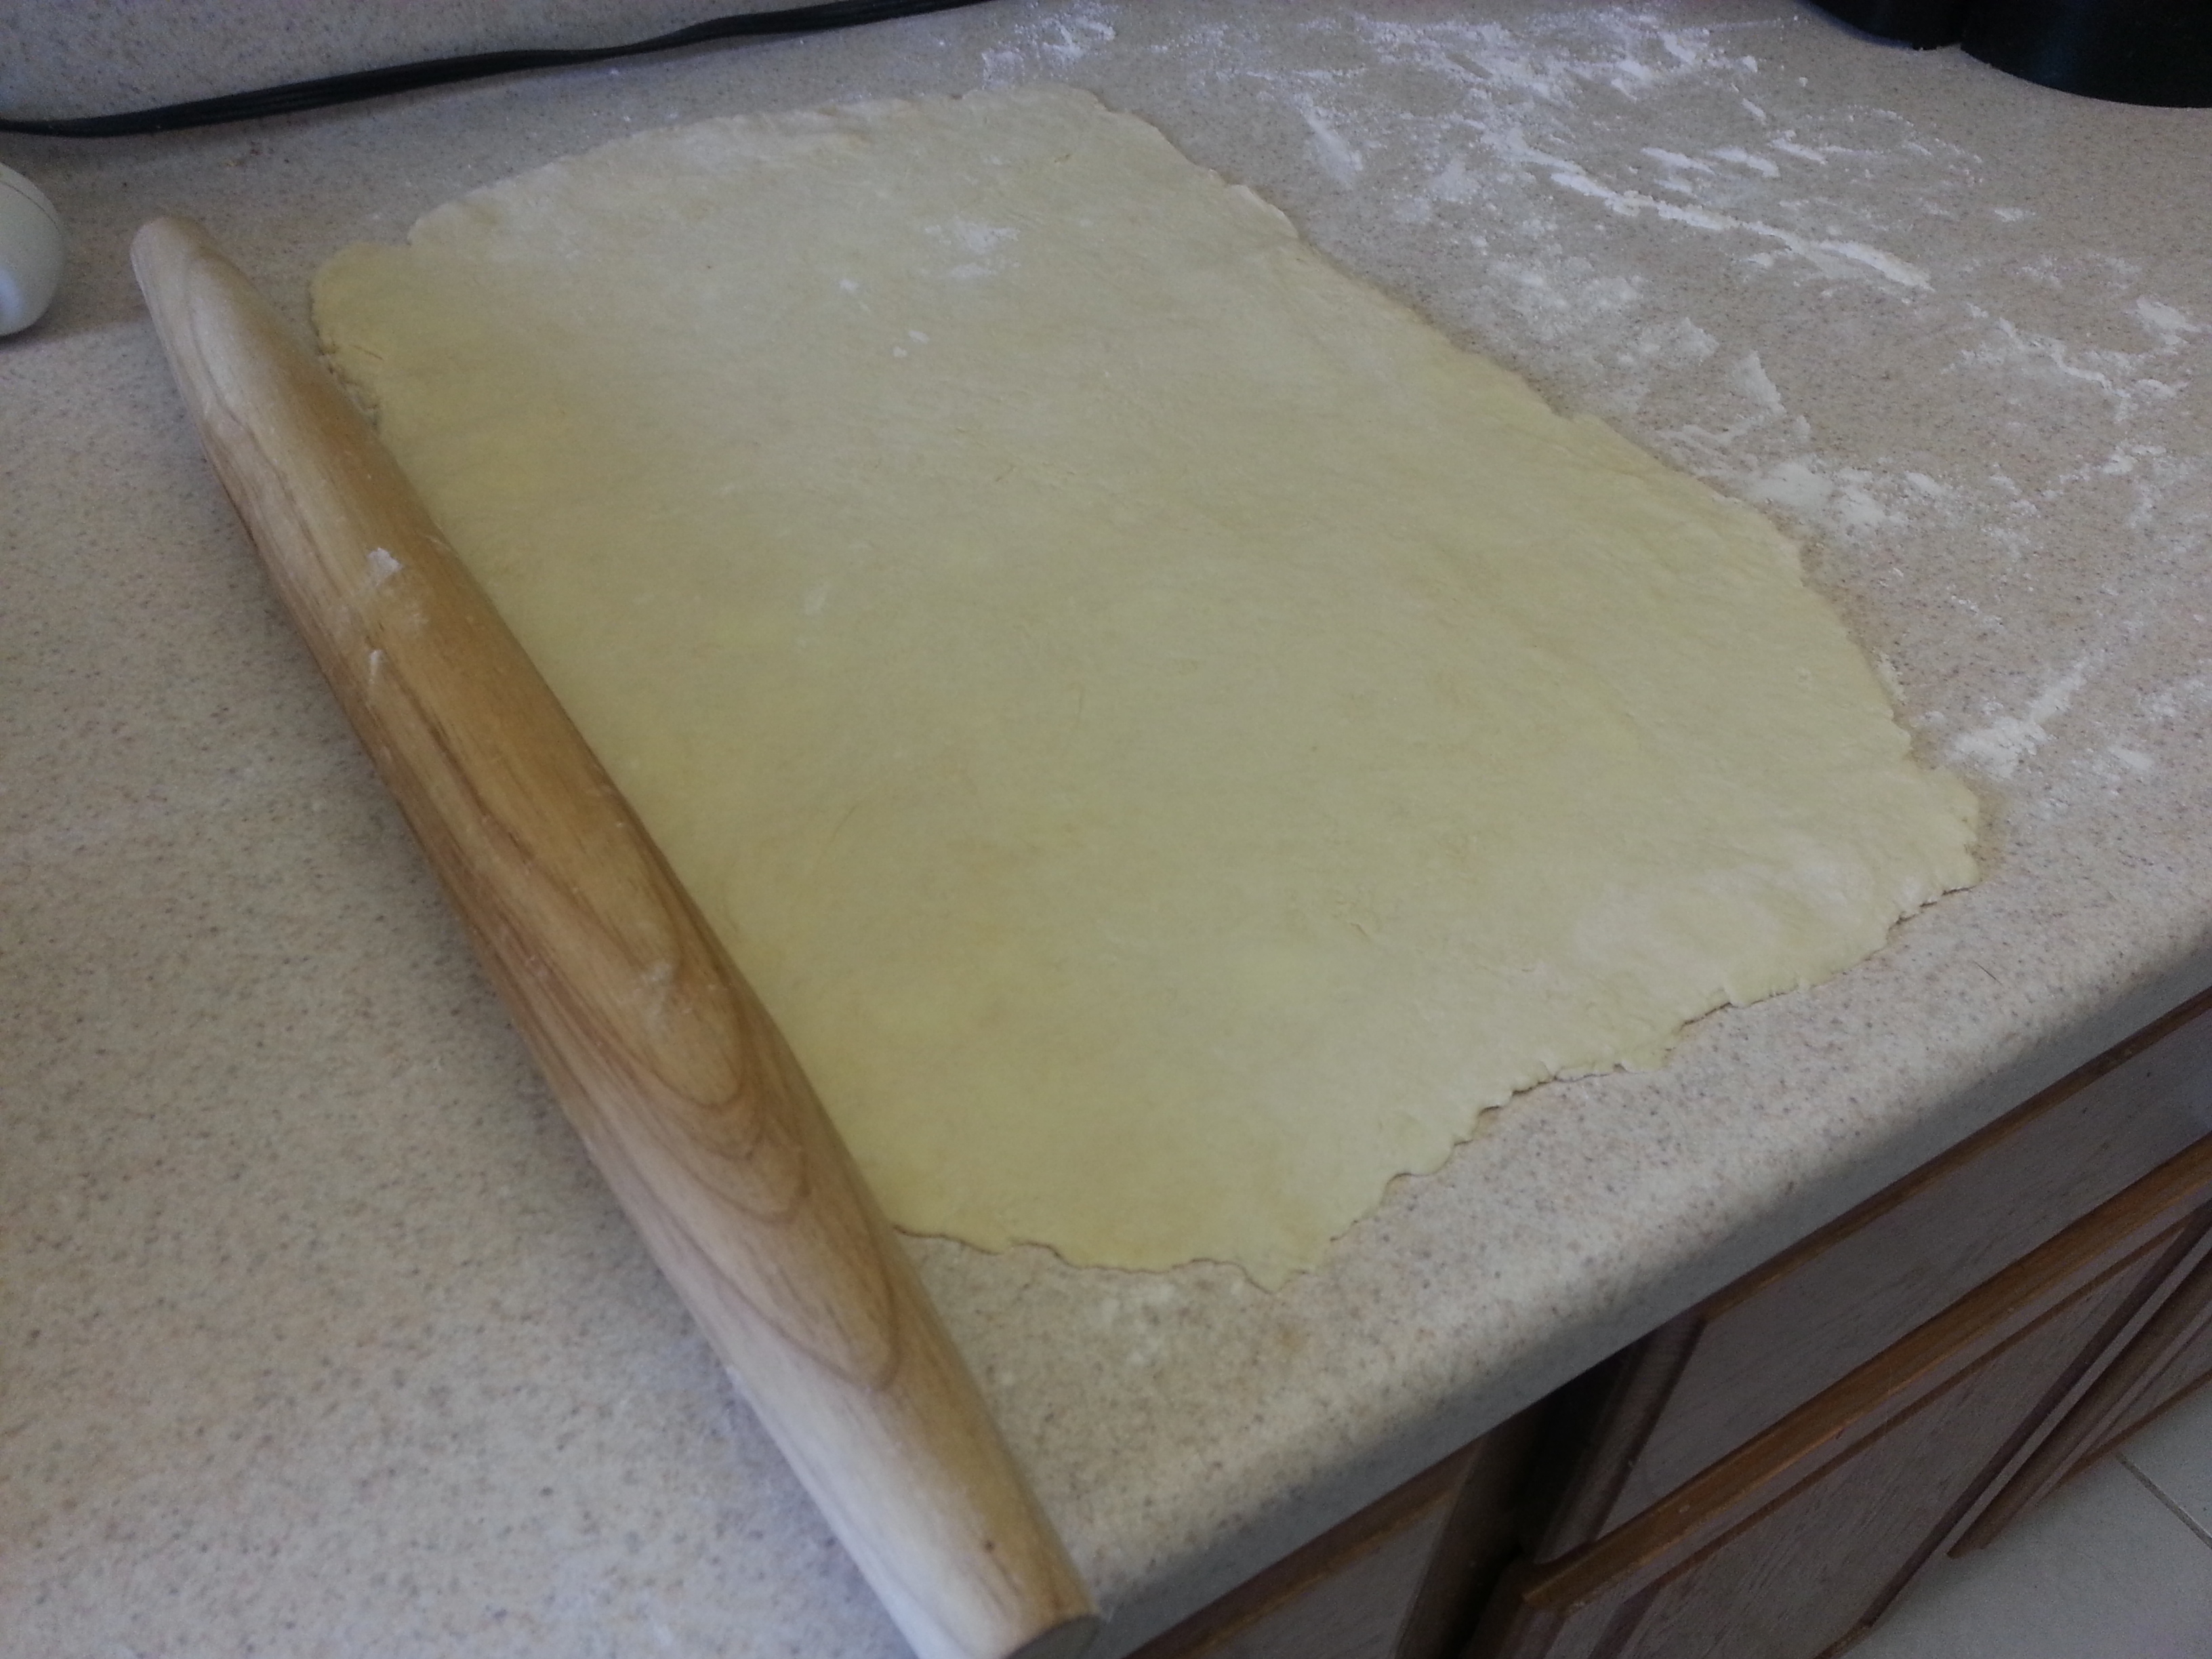
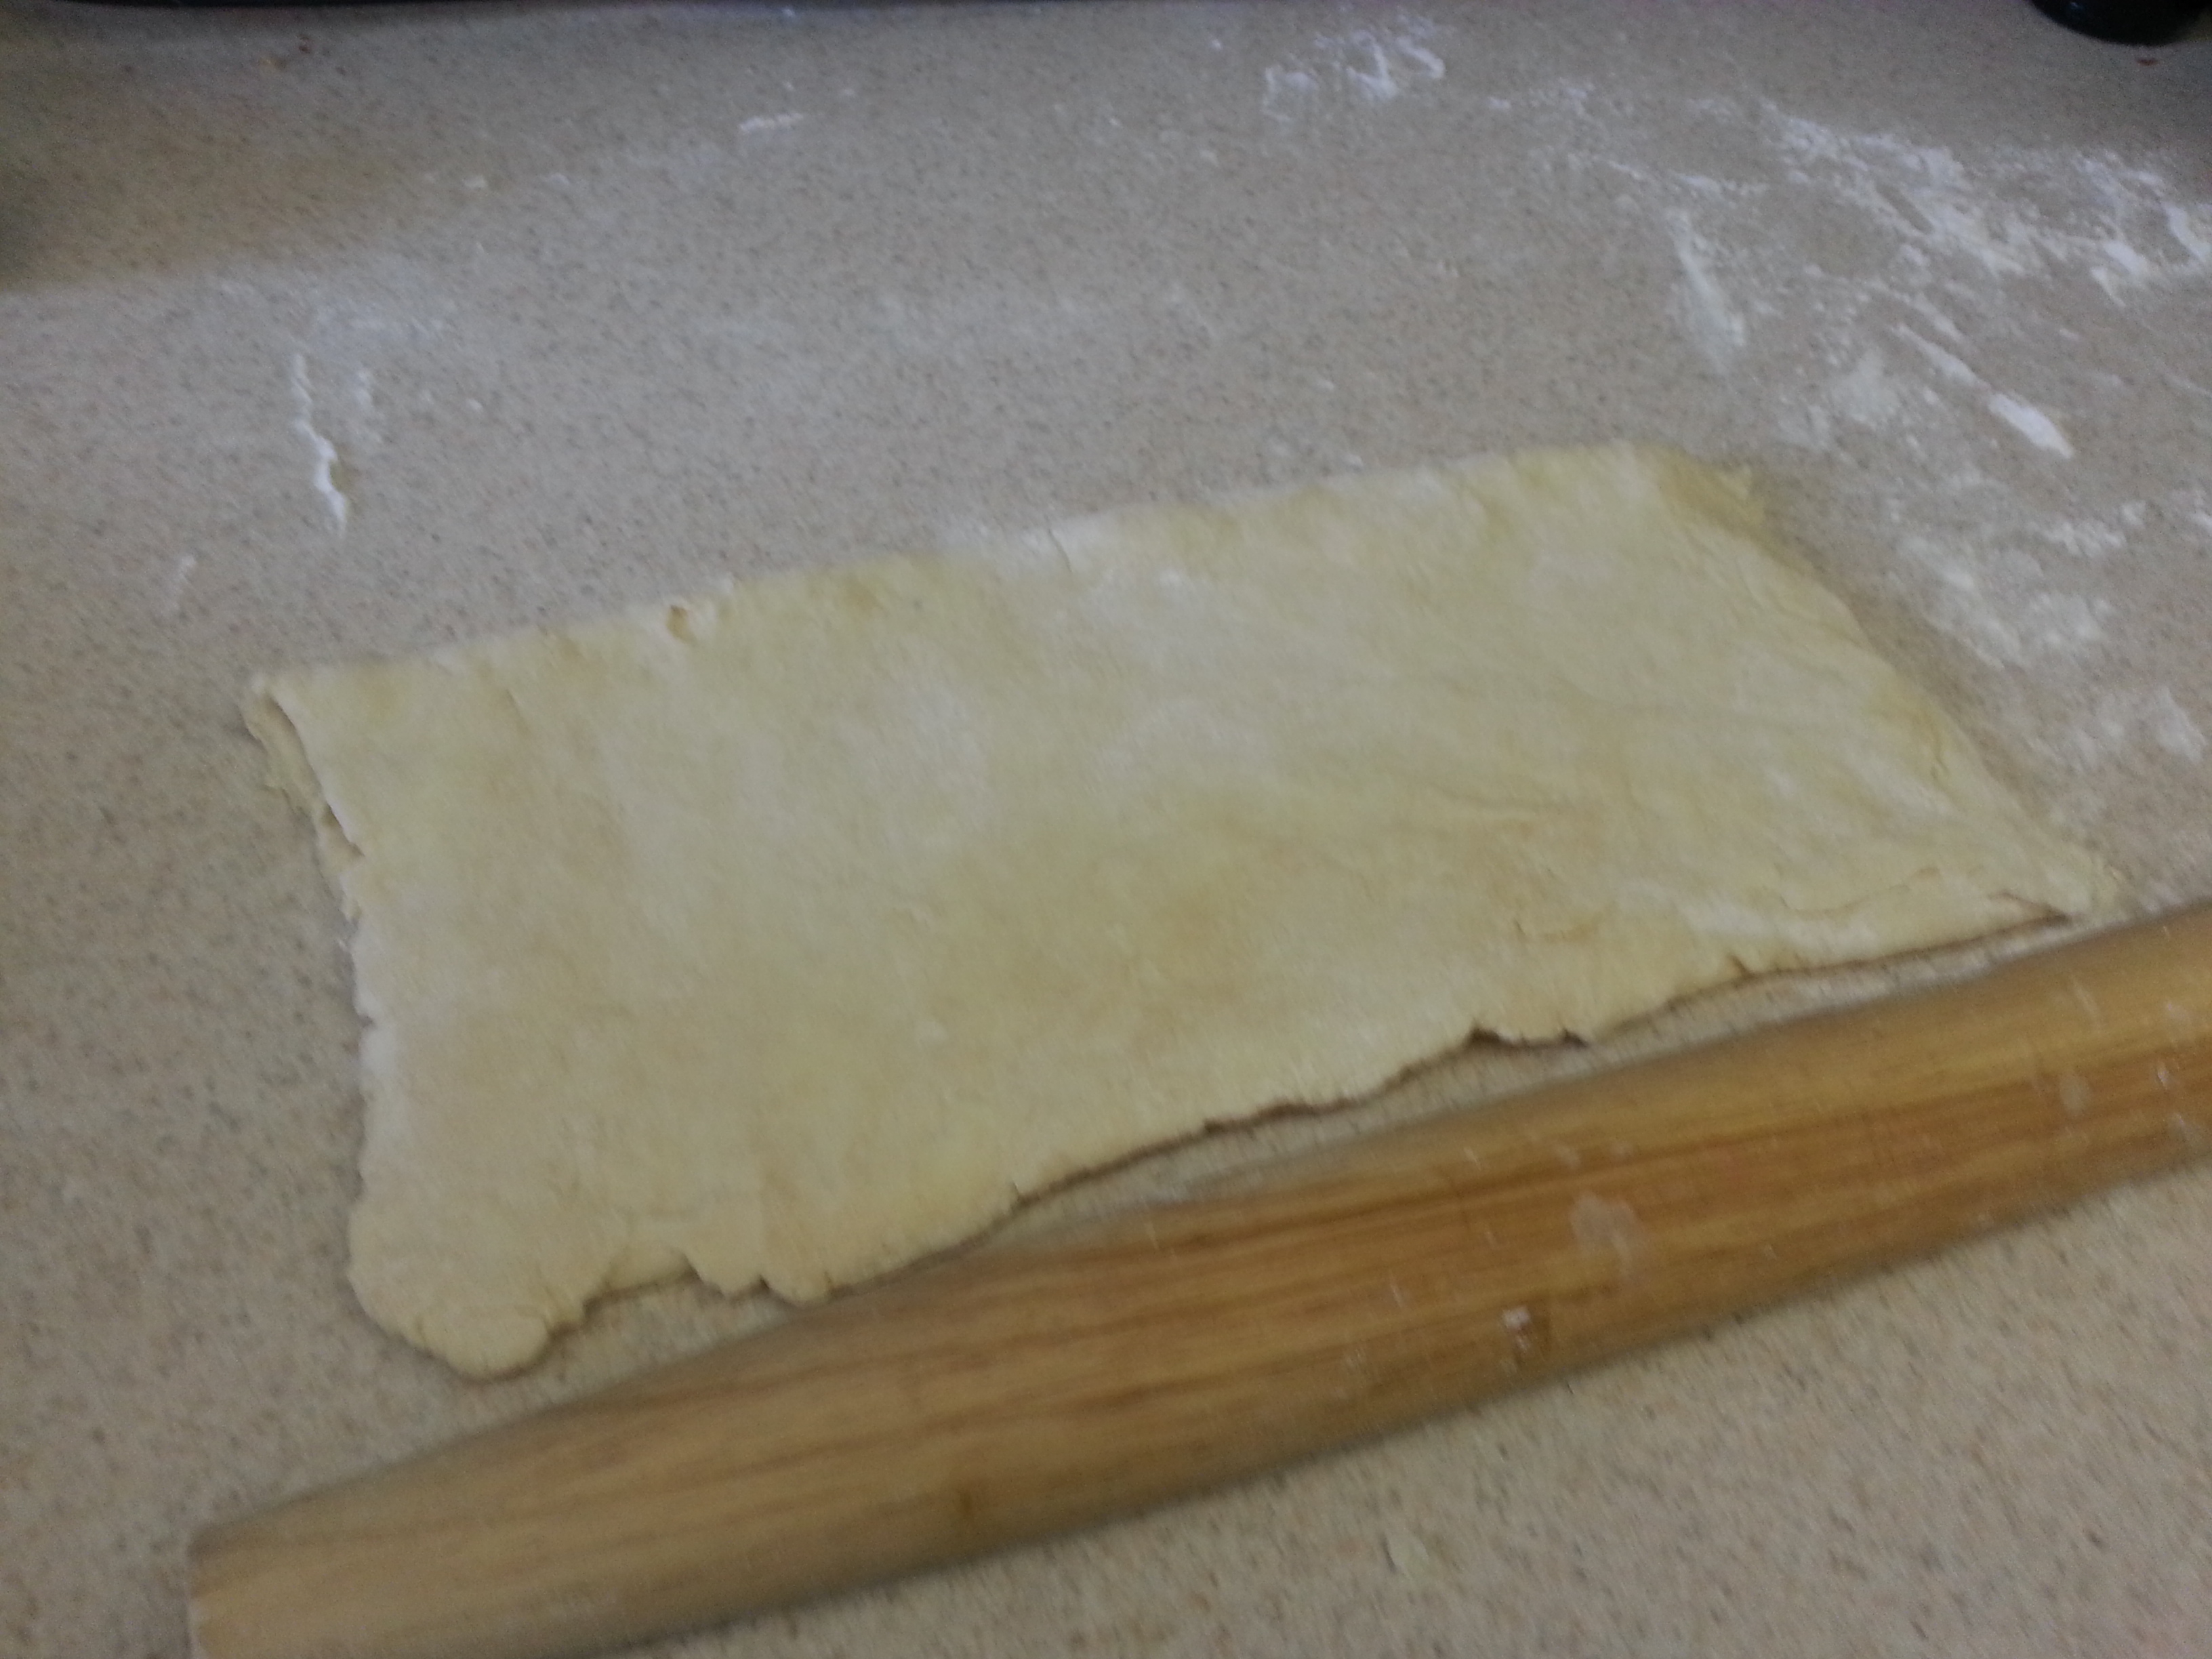
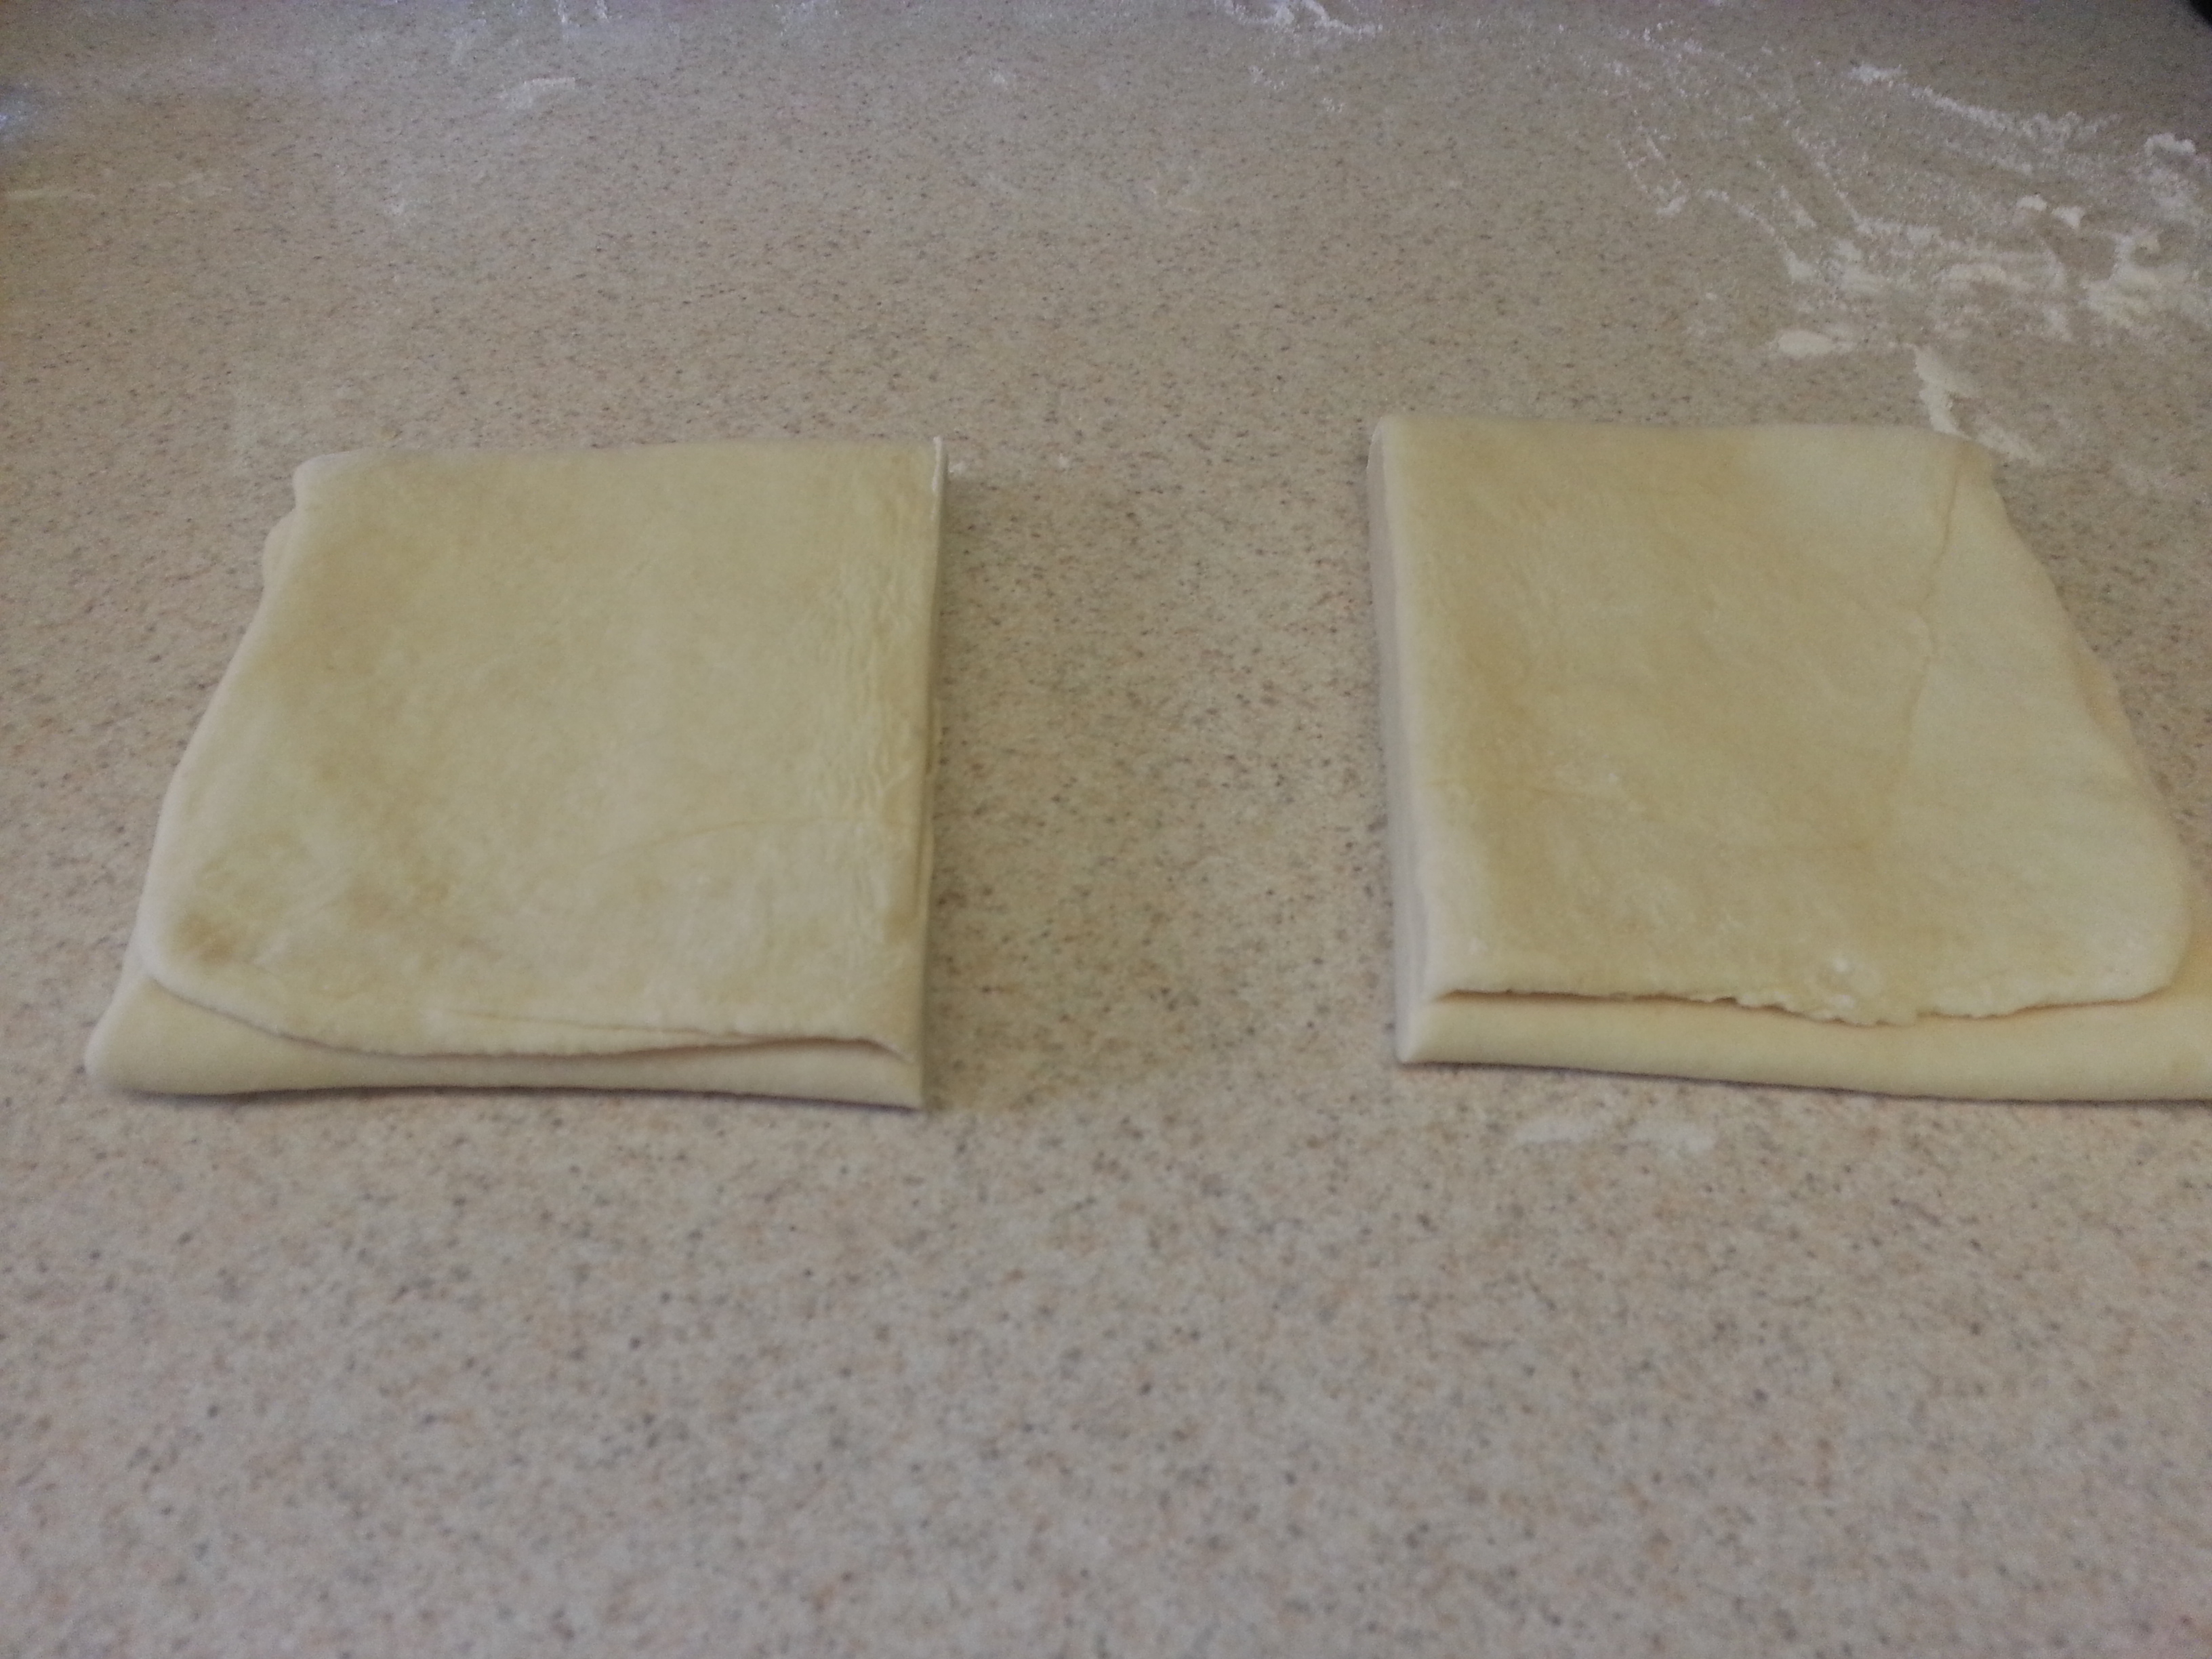
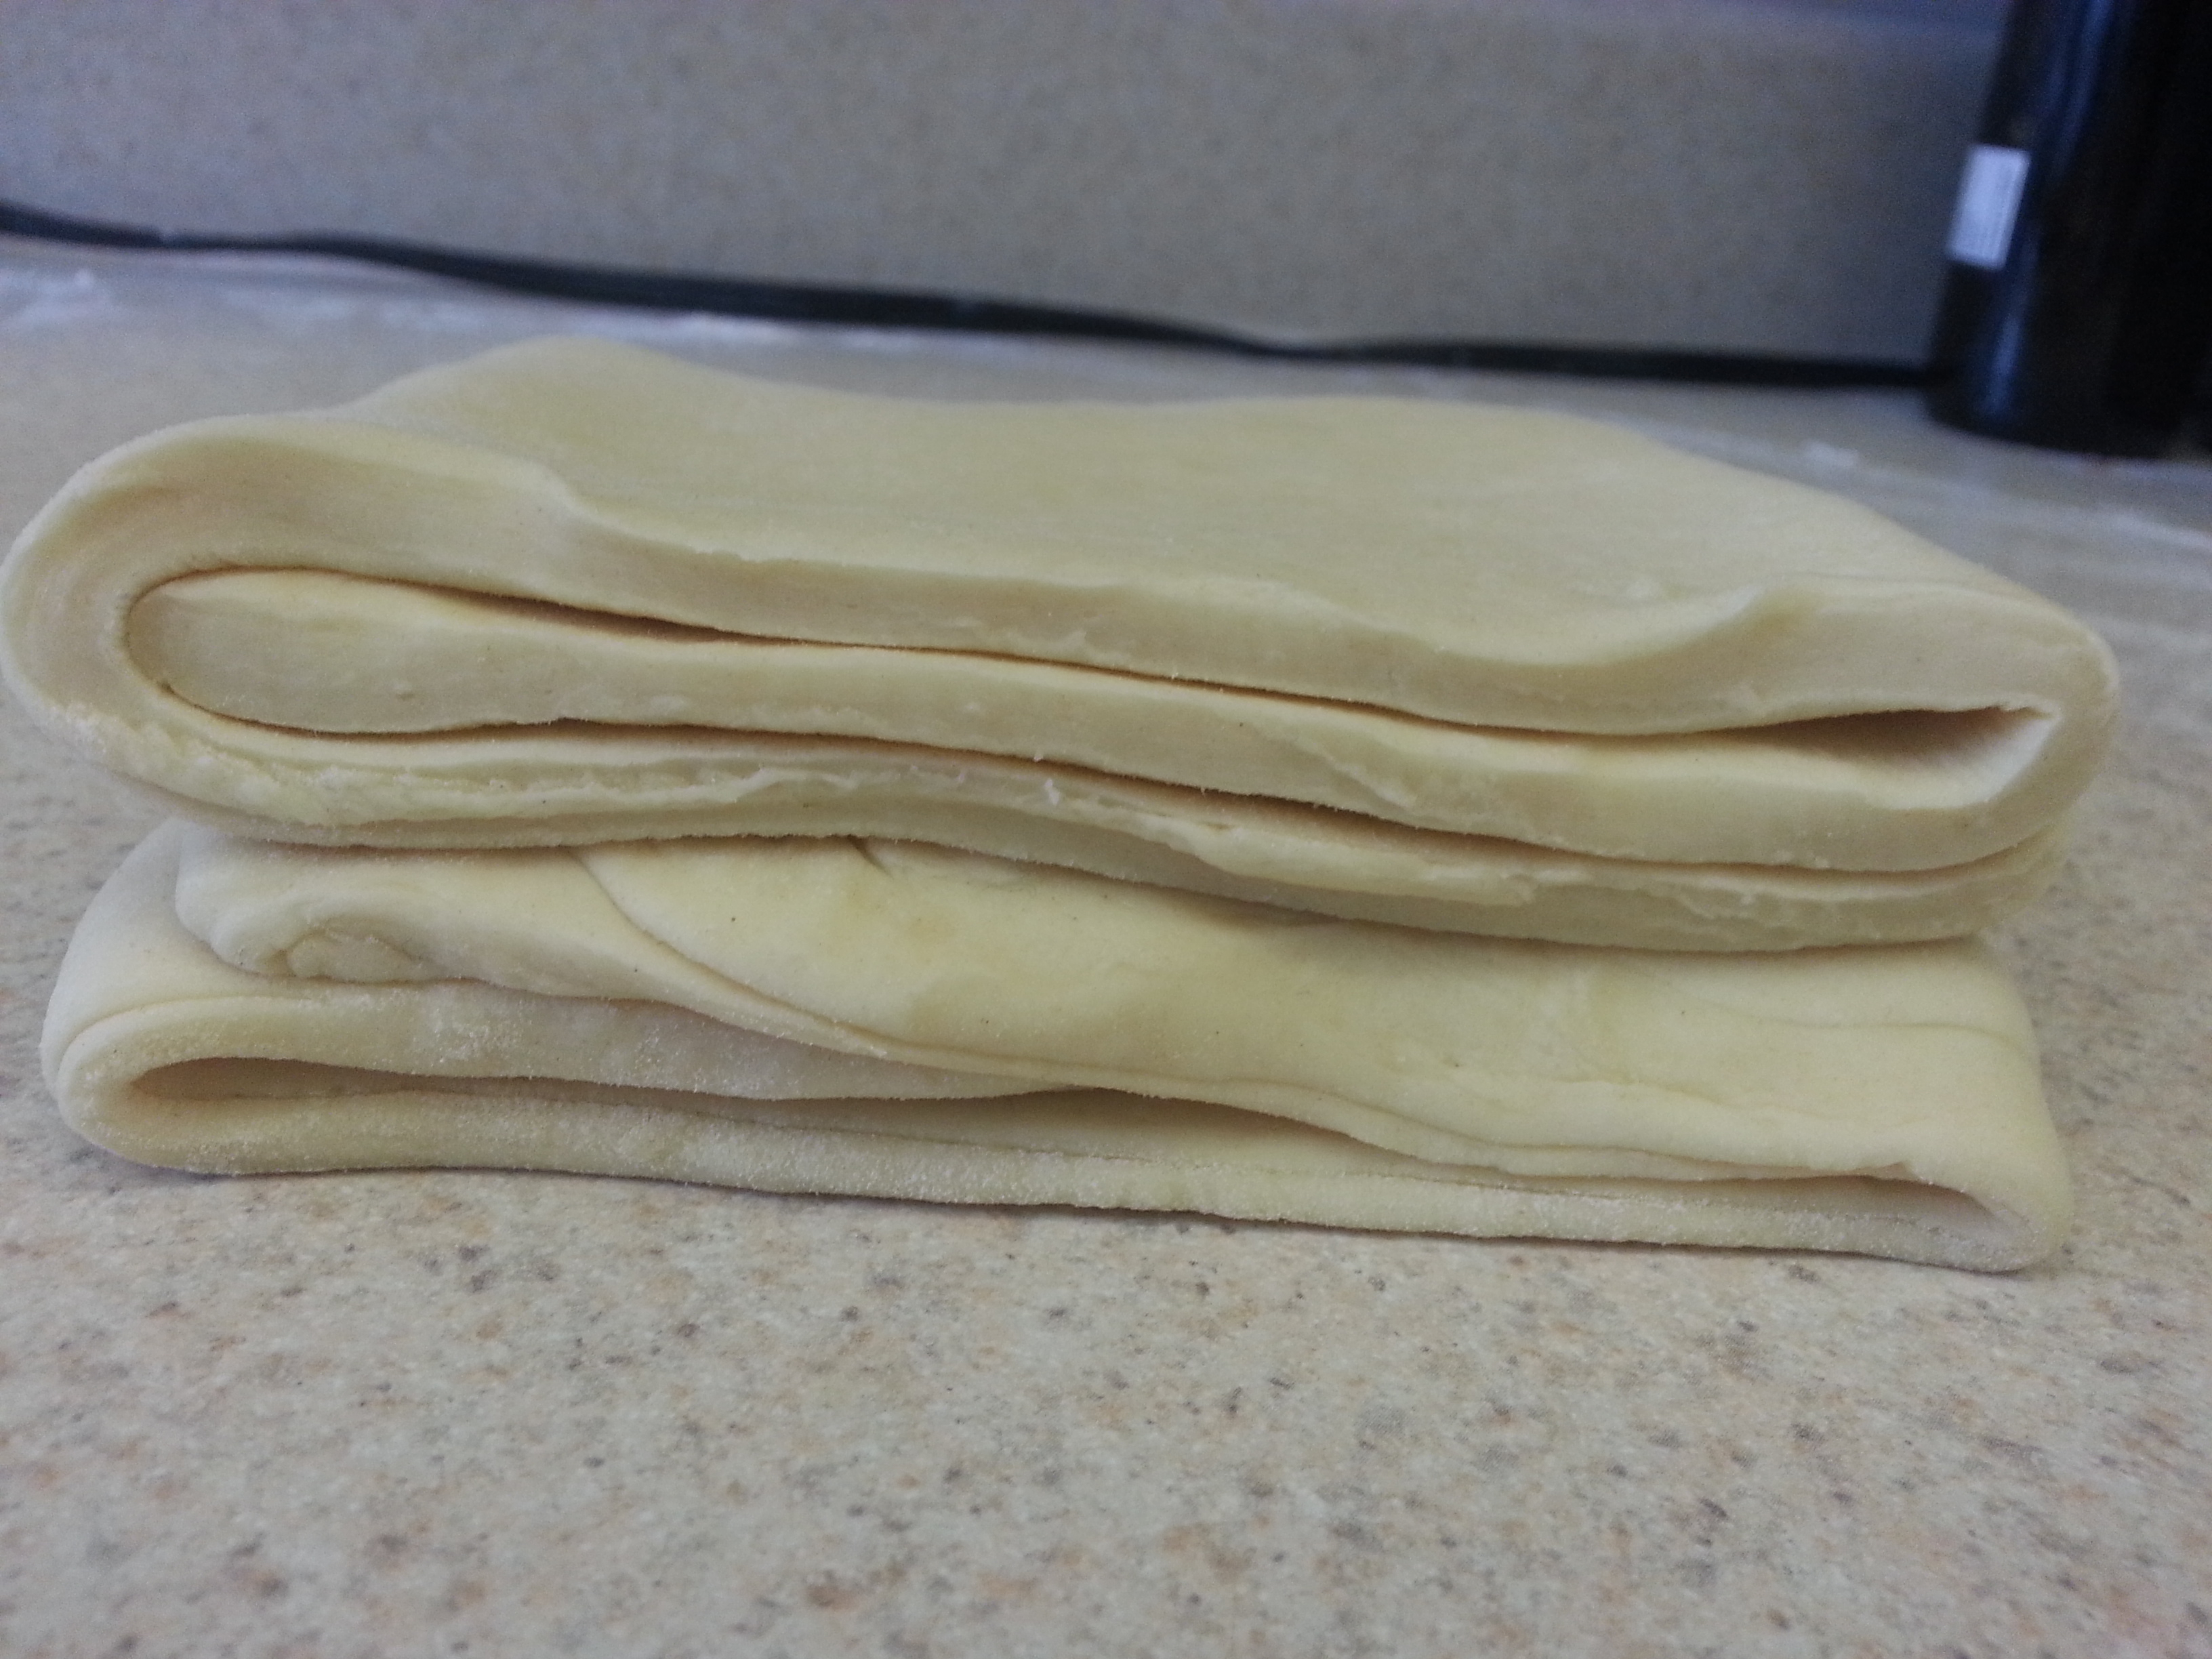
Roll or pat the dough to 3/4-inch thickness. Cut with a round cutter or slice into squares.

20130504_073652
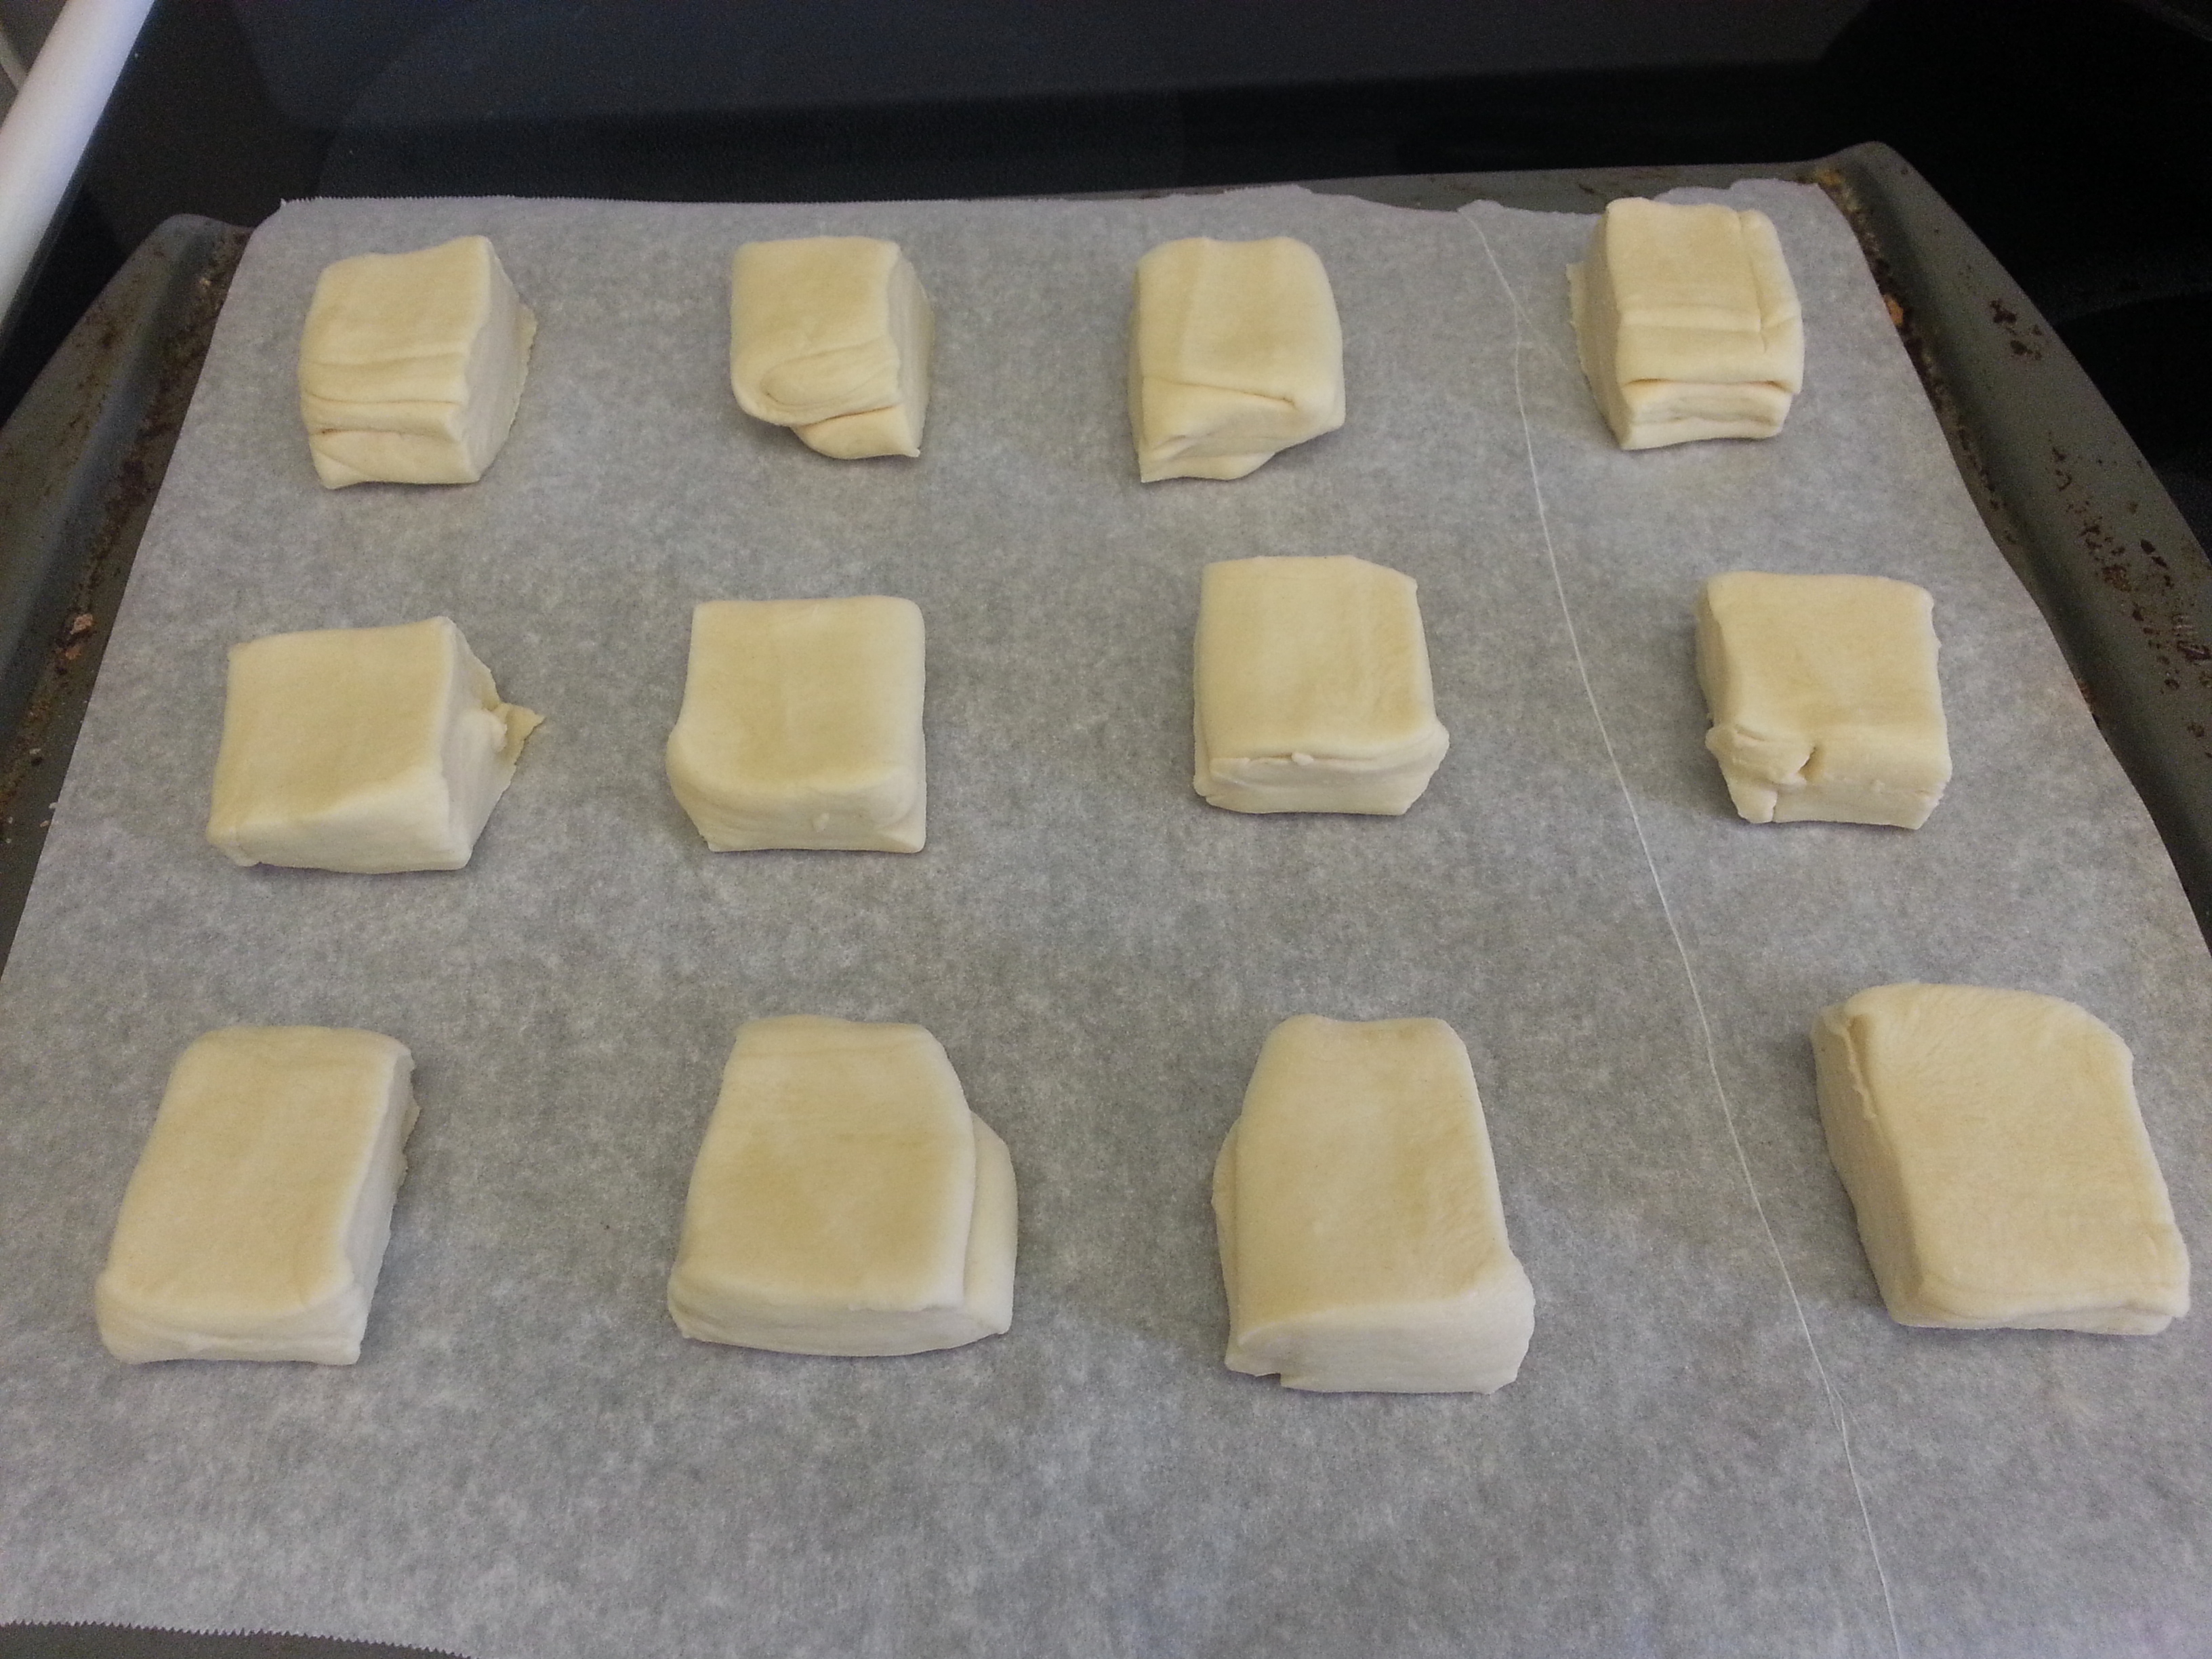
Arrange biscuits on a parchment-lined baking sheet, brush with an egg wash or melted butter, and bake for 15 minutes or until deep golden-brown.

20130504_075415

Split biscuits and top with thin slices of country ham and condiments as desired.

20130504_160022

Roasted Brussels Sprouts

  • 1 lb. Brussels sprouts, washed, outer leaves removed, and cut in half.
  • 1 tbsp. olive oil
  • 2 slices bacon (cooked), and 1 tbsp. bacon drippings
  • 1/2 tbsp. white wine vinegar
  • 1/2 red onion, diced
  • 1 tsp. herbs de provence
  • Salt and pepper to taste

20130504_094401

Toss all ingredients together in a large bowl and taste for seasoning. Then spread the sprouts on a baking sheet and roast at 375 degrees F until lightly browned, but not soft. It will take anywhere for 15-30 minutes depending on the size of your sprouts.
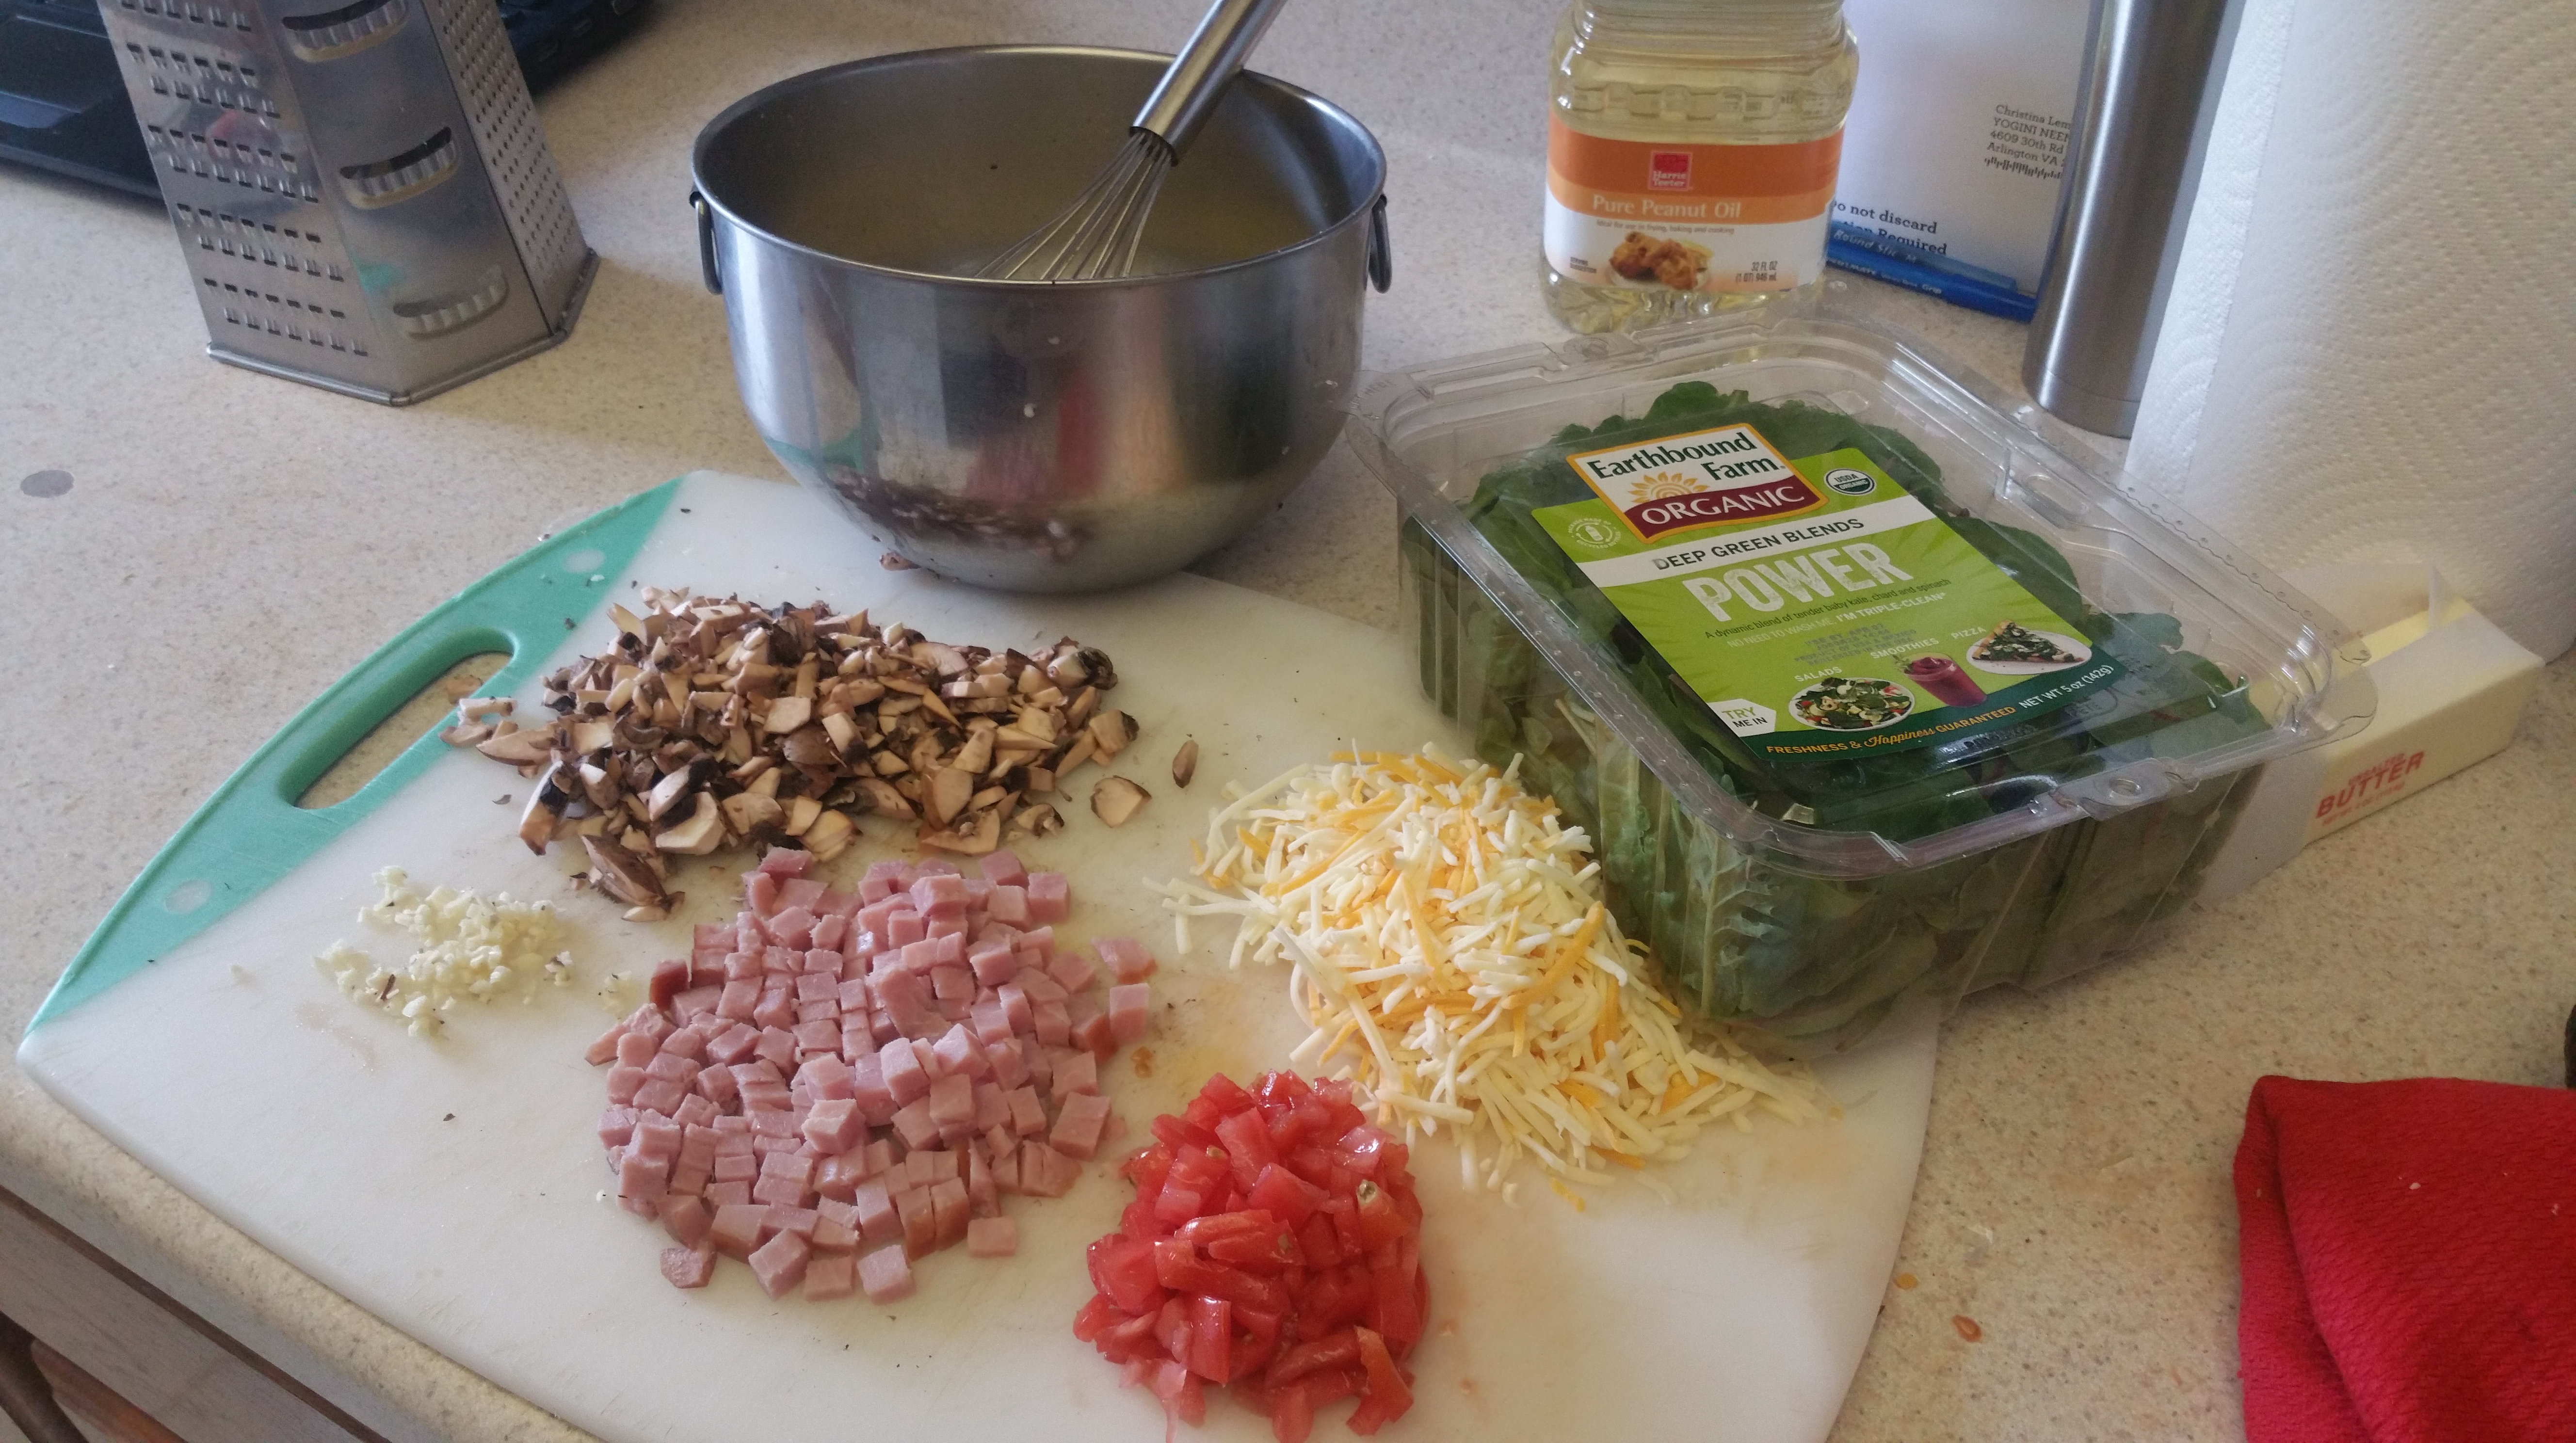
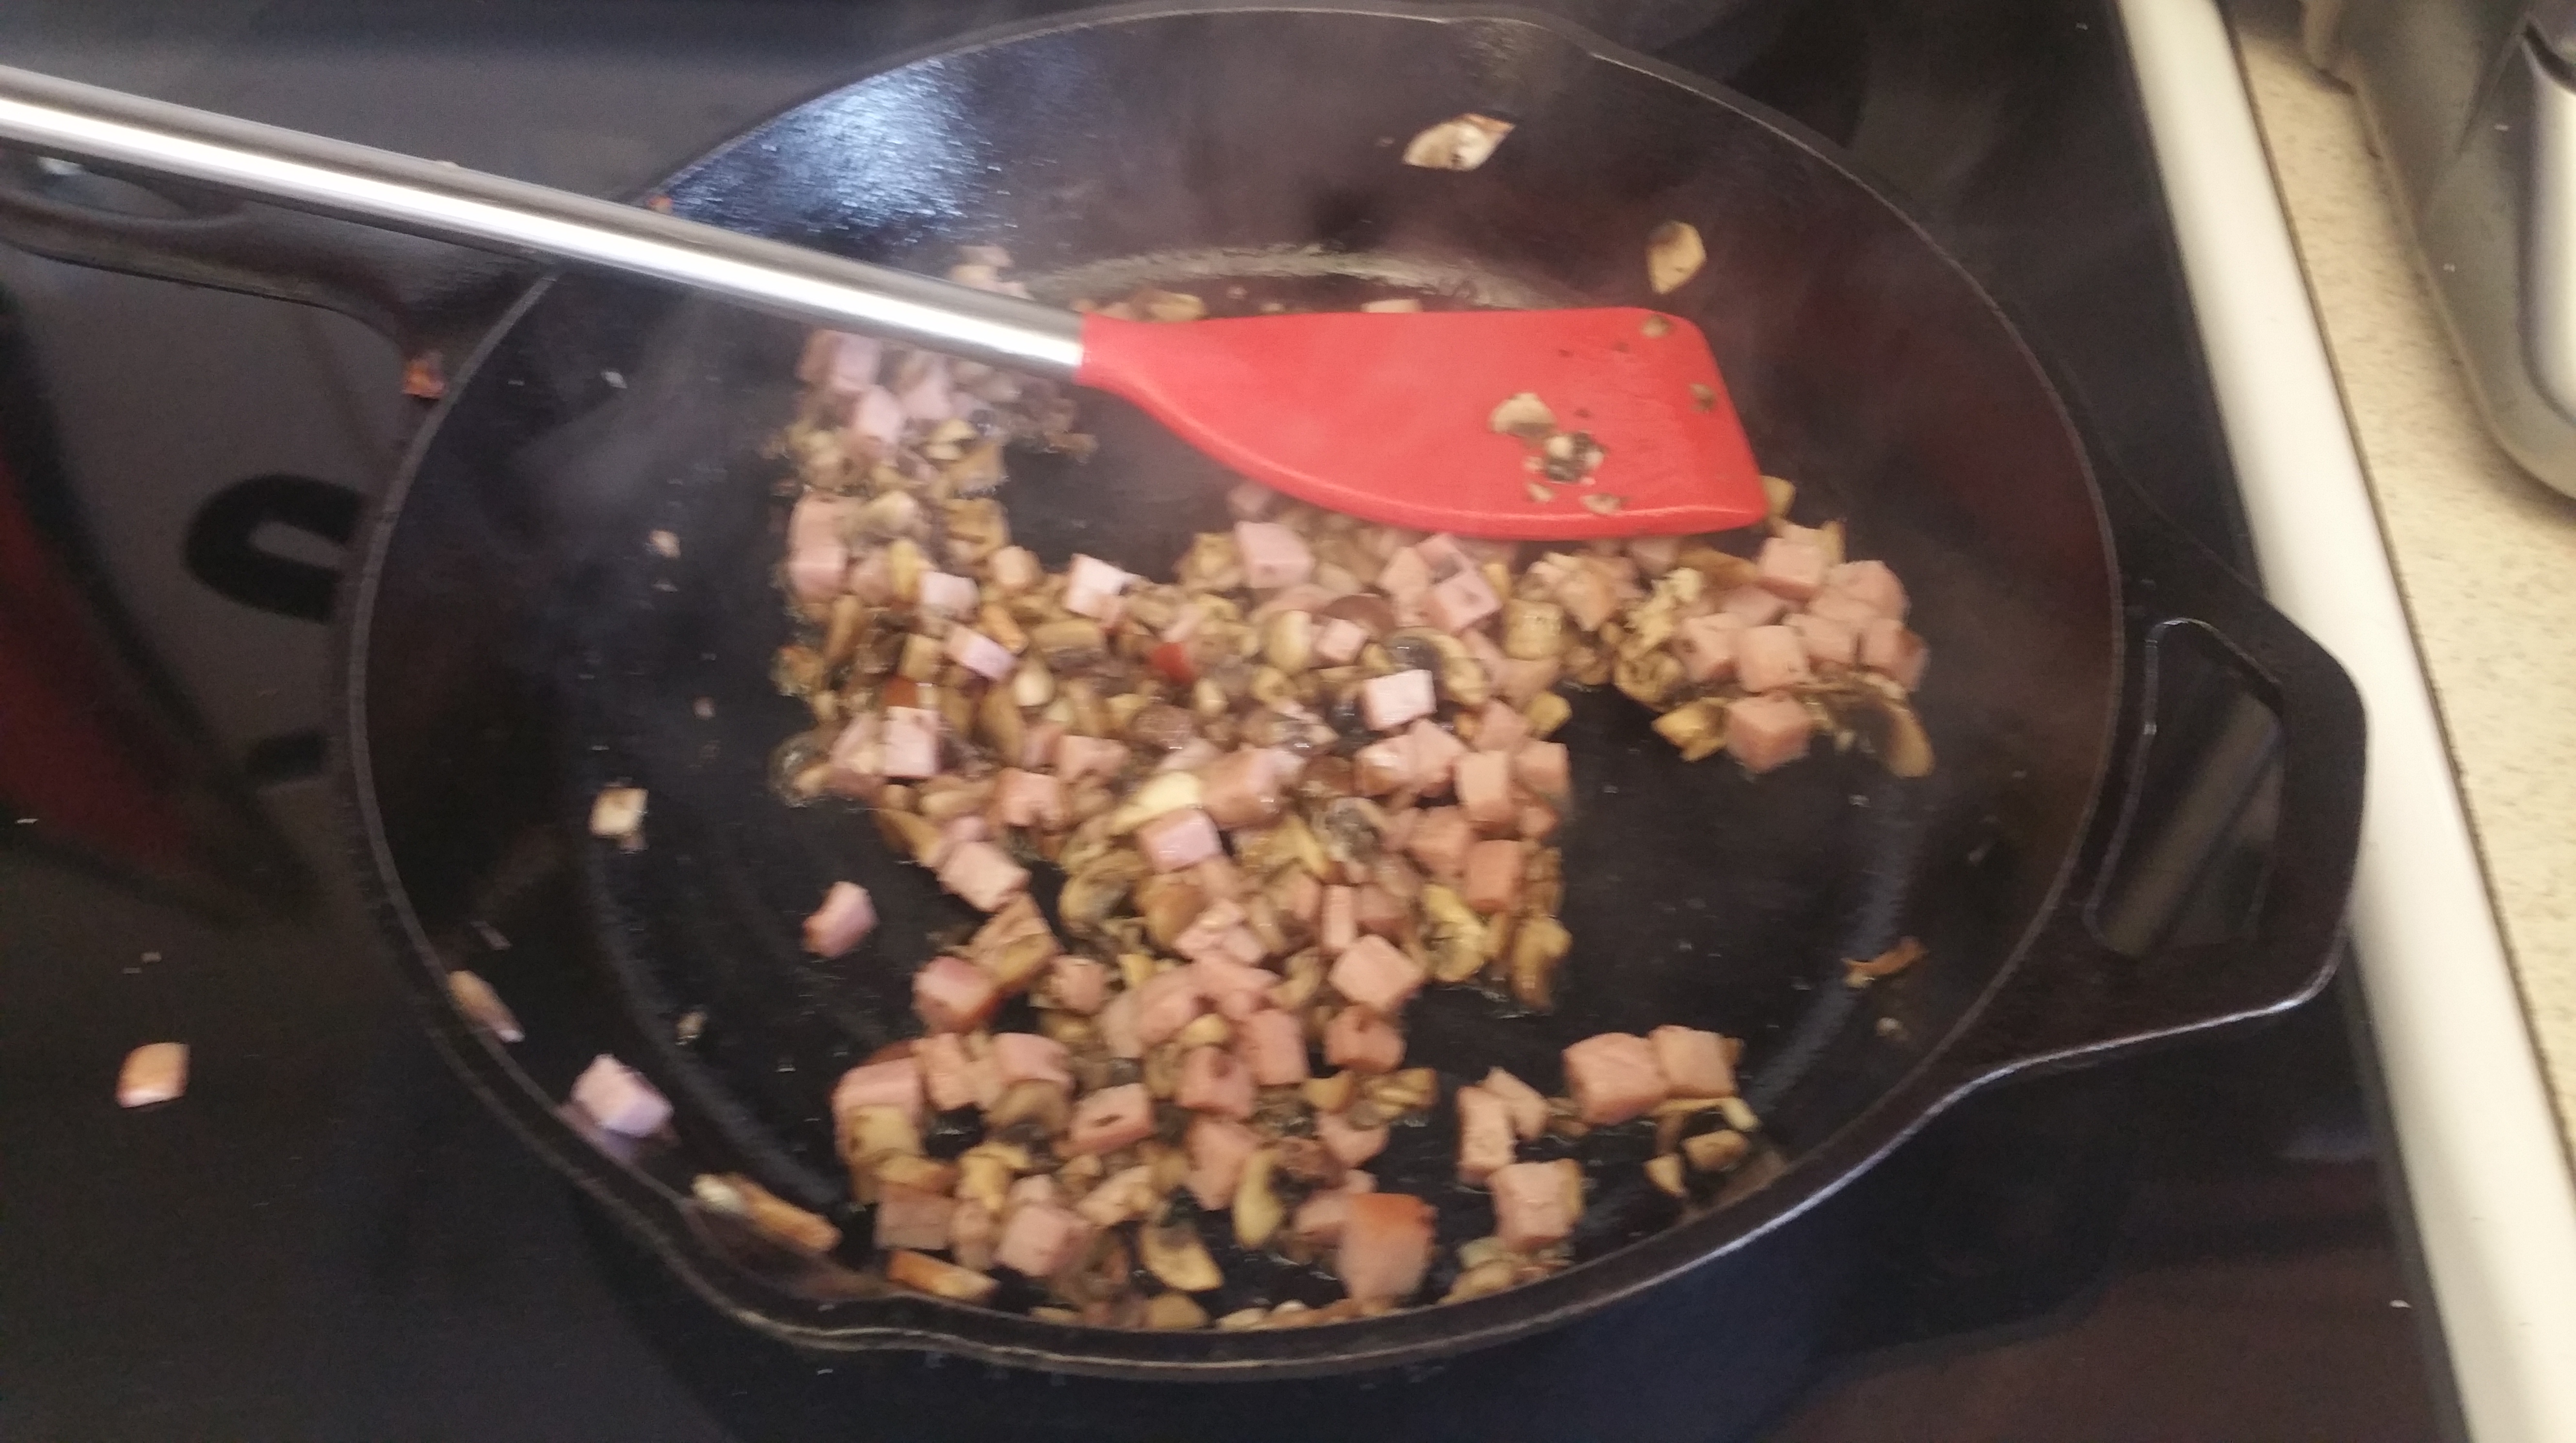
20130504_15125220130504_163931

Kentucky Hot Brown

I used the Brown Hotel’s original recipe and followed it to a T. The only exception being that I was able to make three sandwiches, rather than two. Honestly, I think that the amount of sauce this yields could easily be spread across four. The recipe can be found here, but here’s a photo sequence and my description of the process…

Gather your ingredients and preheat a broiler.

20130504_171142
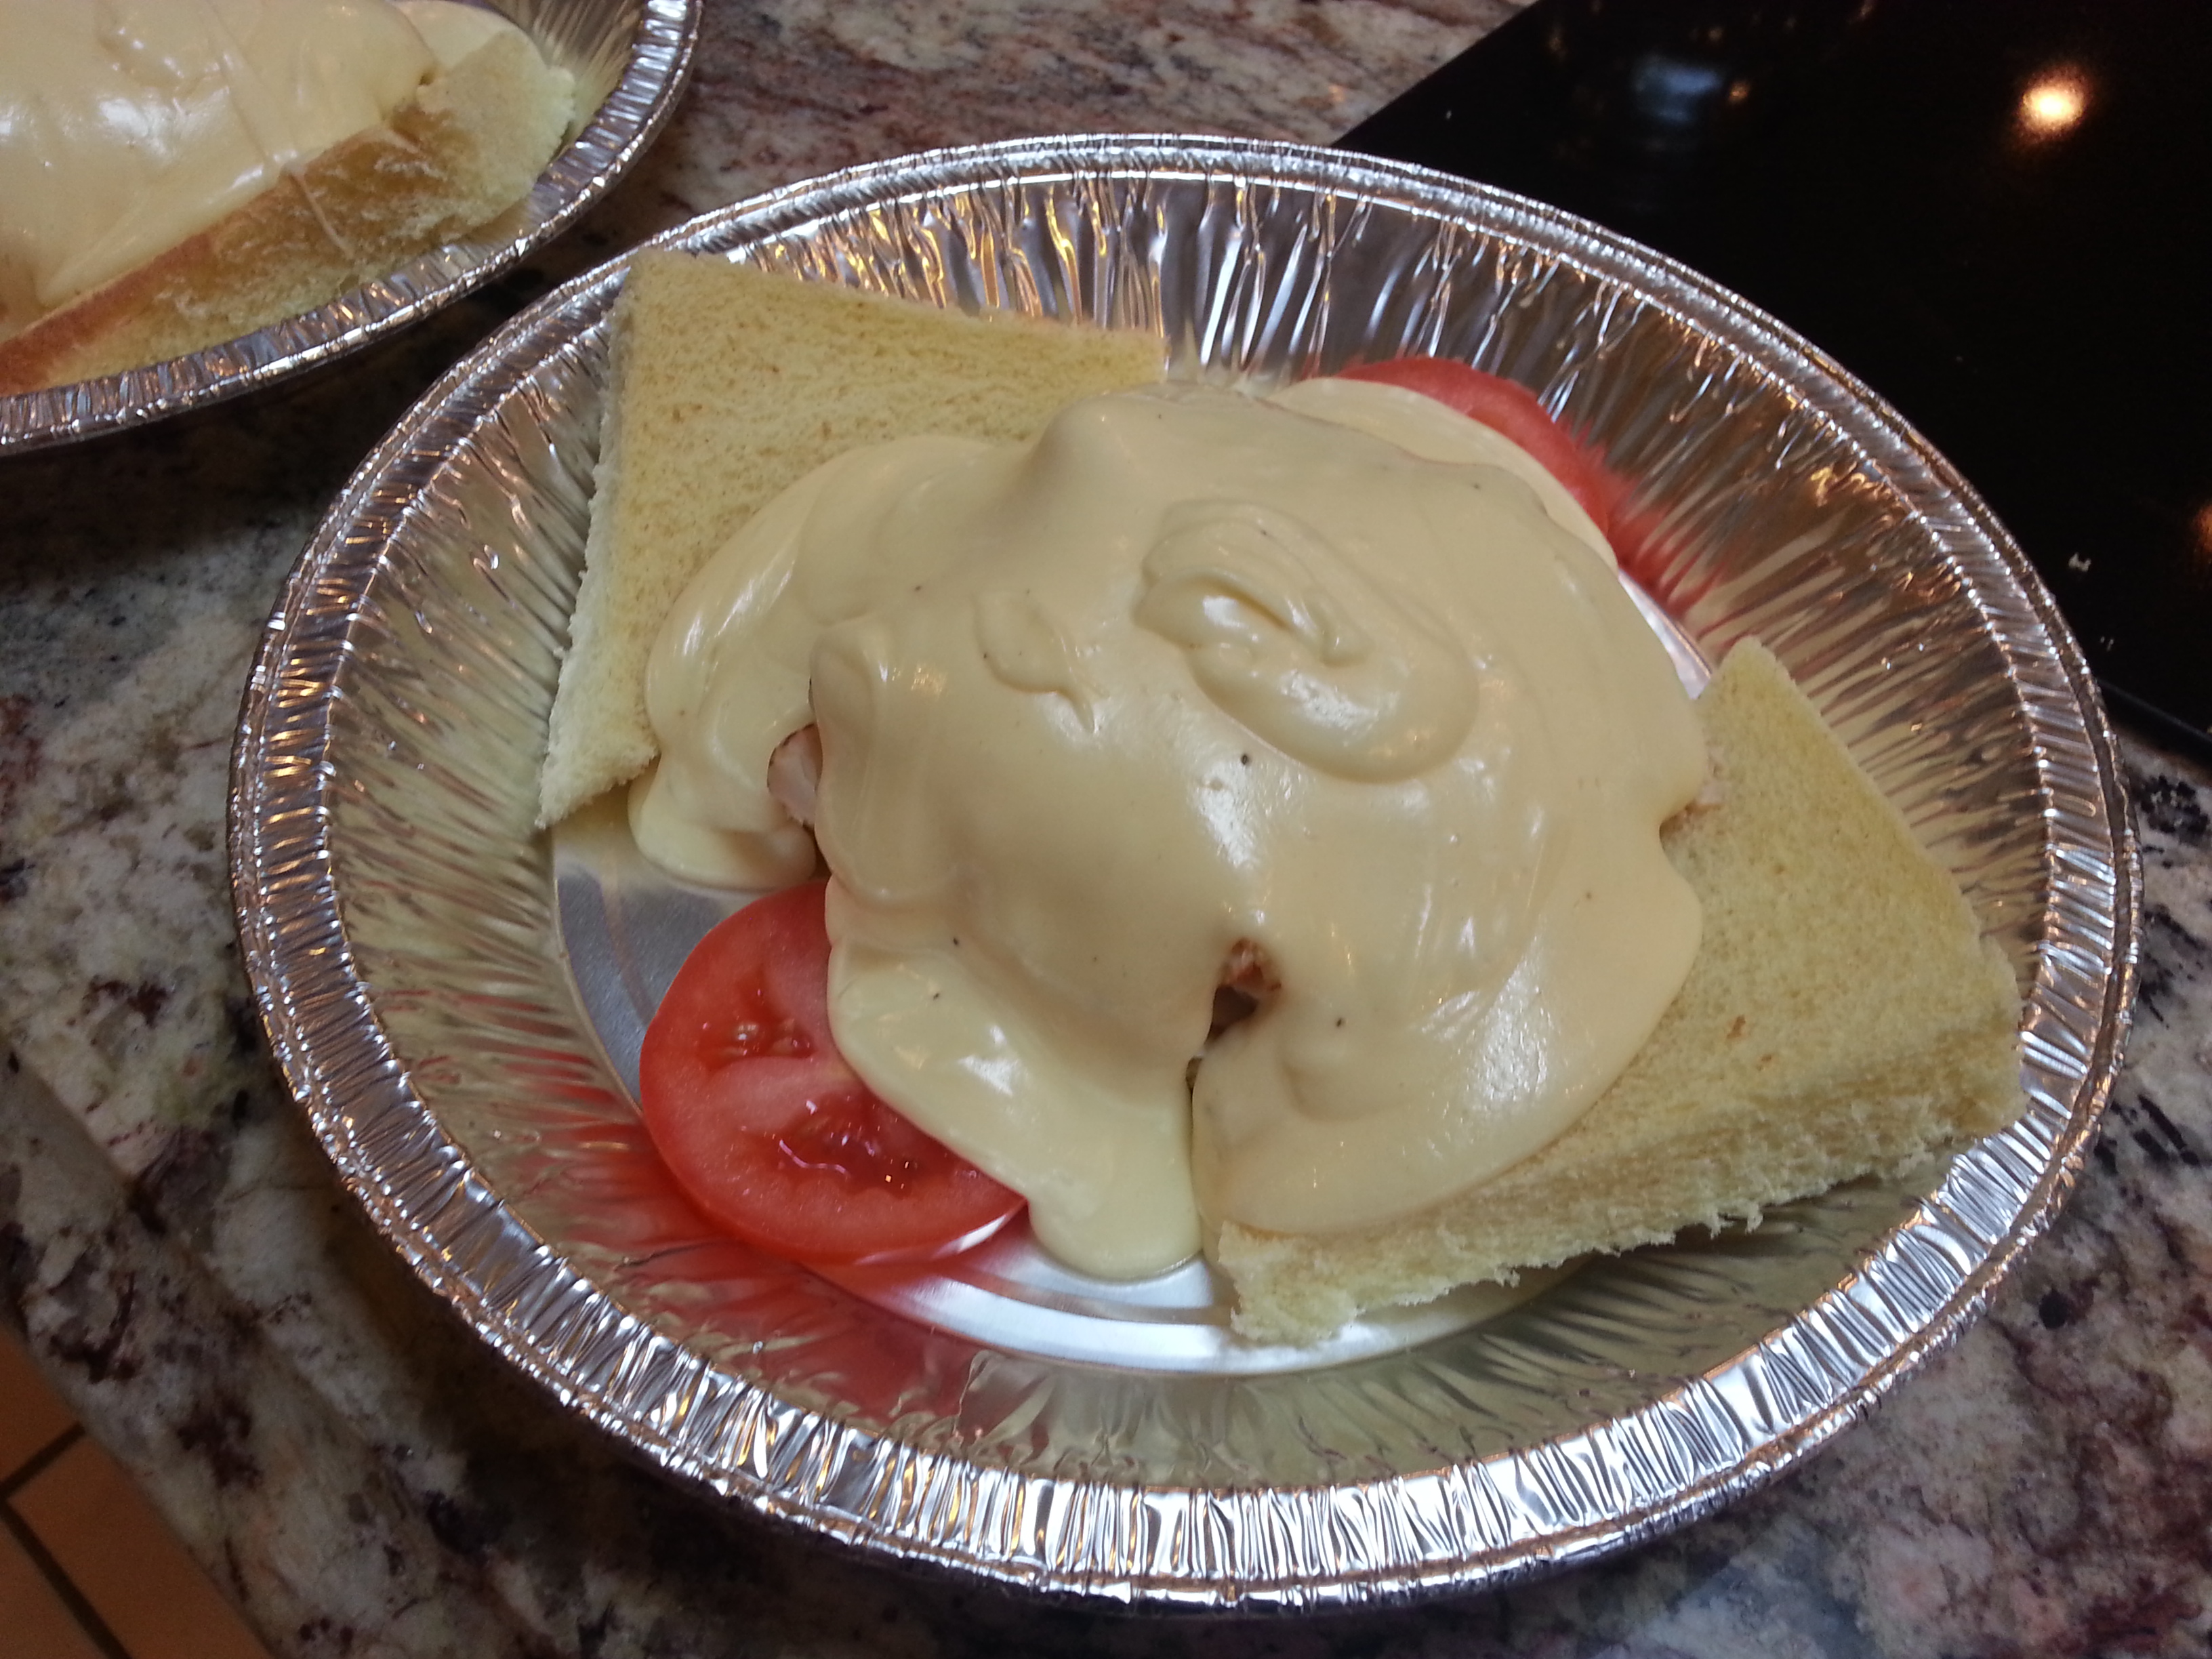
Lay one piece of crustless Texas toast in an oven-safe dish, and cut the other into triangles, putting them on either side of the whole piece.

20130504_170551Layer turkey on top, and put a slice of Roma tomato on two sides of the Texas toast.

20130504_172040

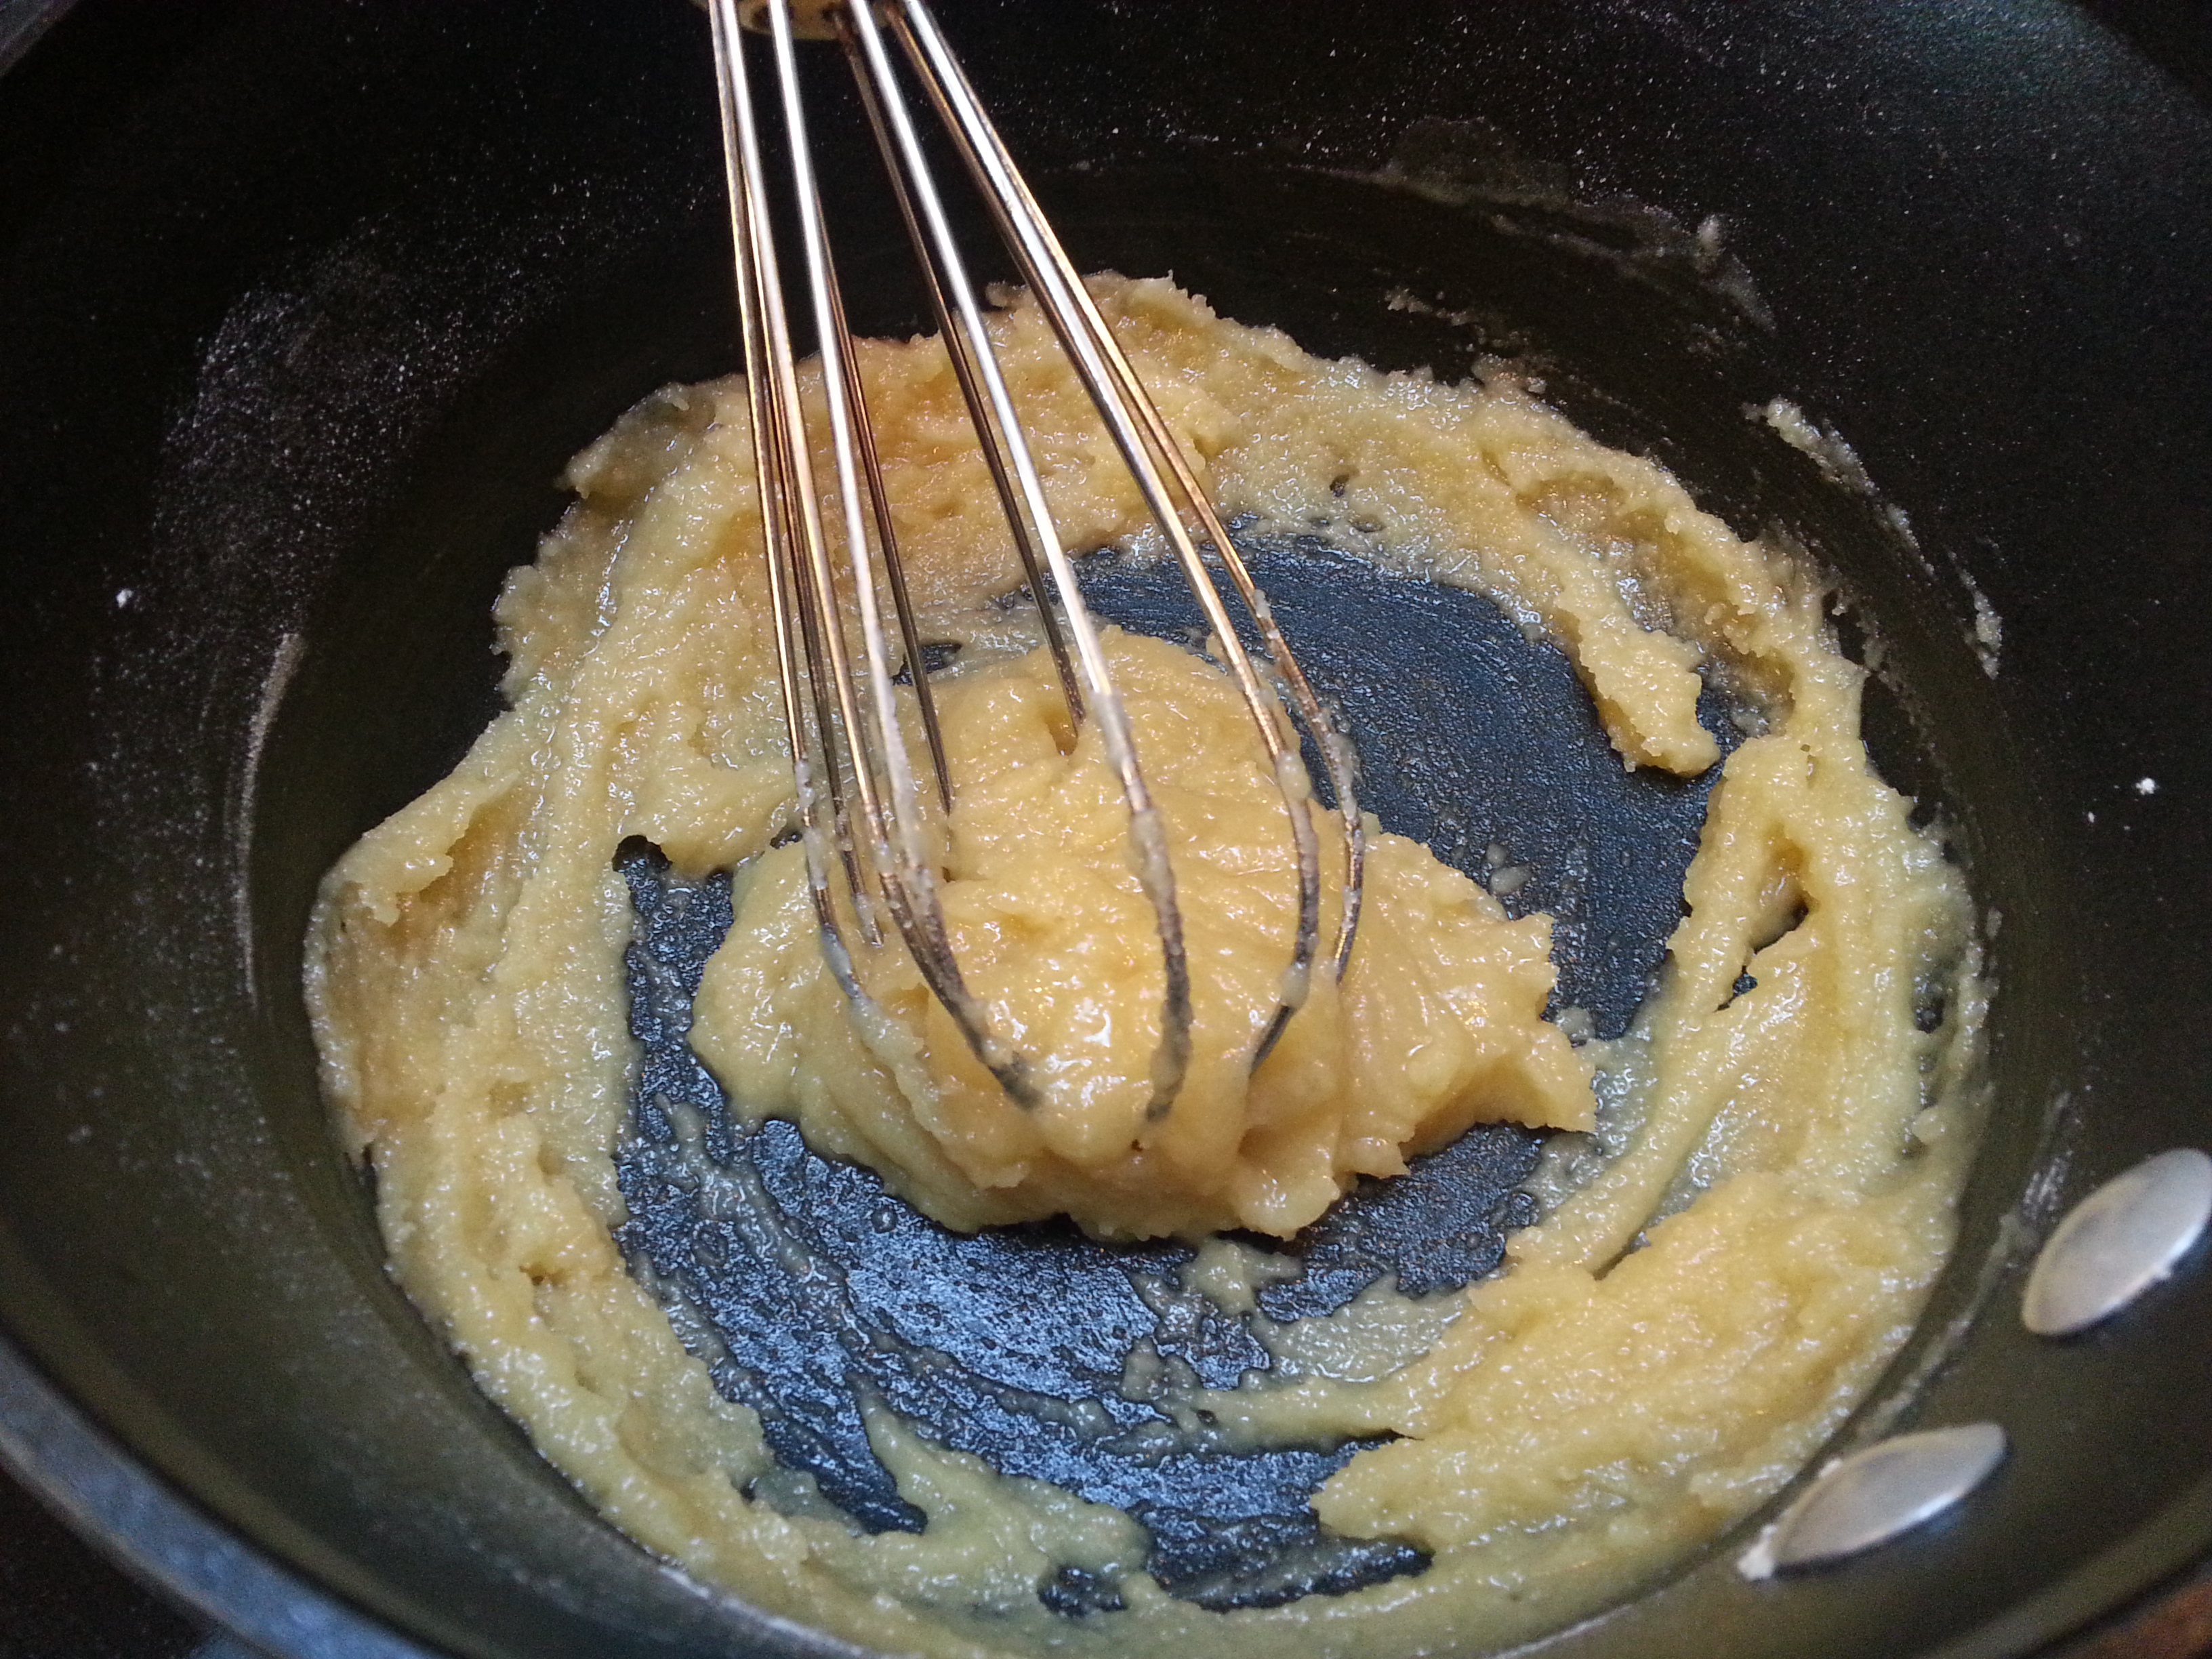
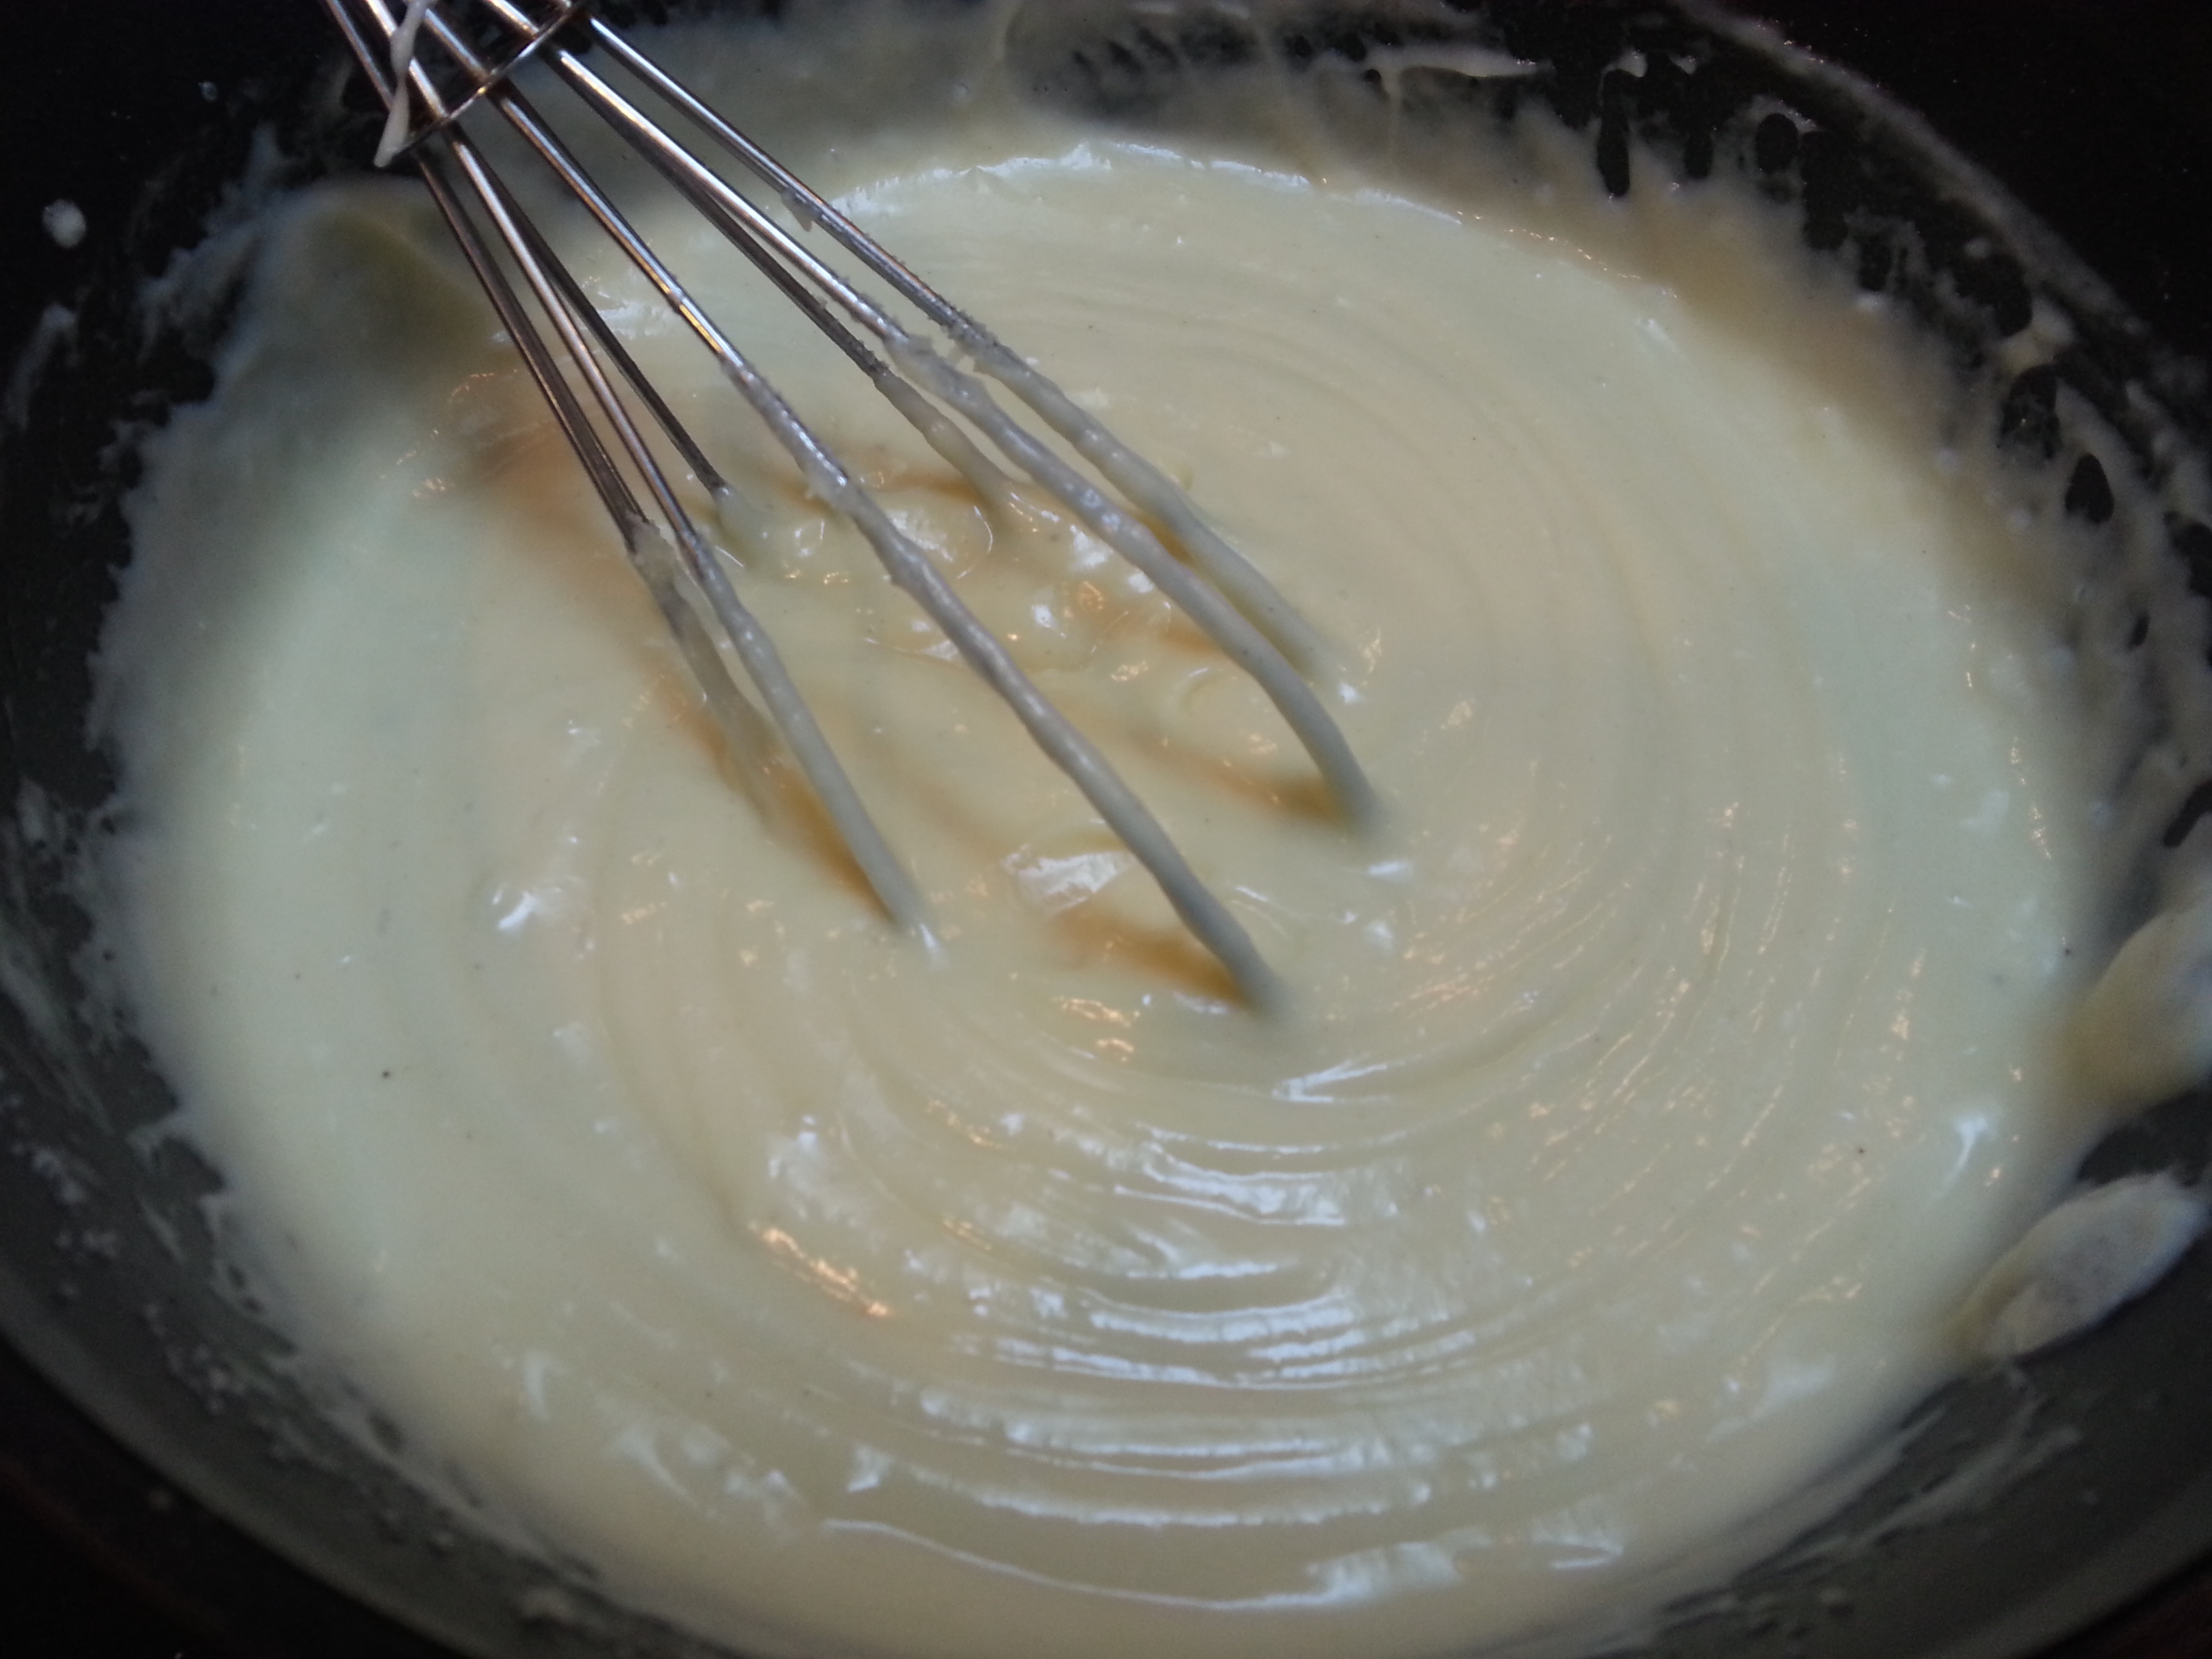
Make a roux and cook it until smooth, then add the cream and cook over medium heat, whisking constantly until the mixture begins to simmer lightly and gets very thick.

20130504_17251920130504_172656
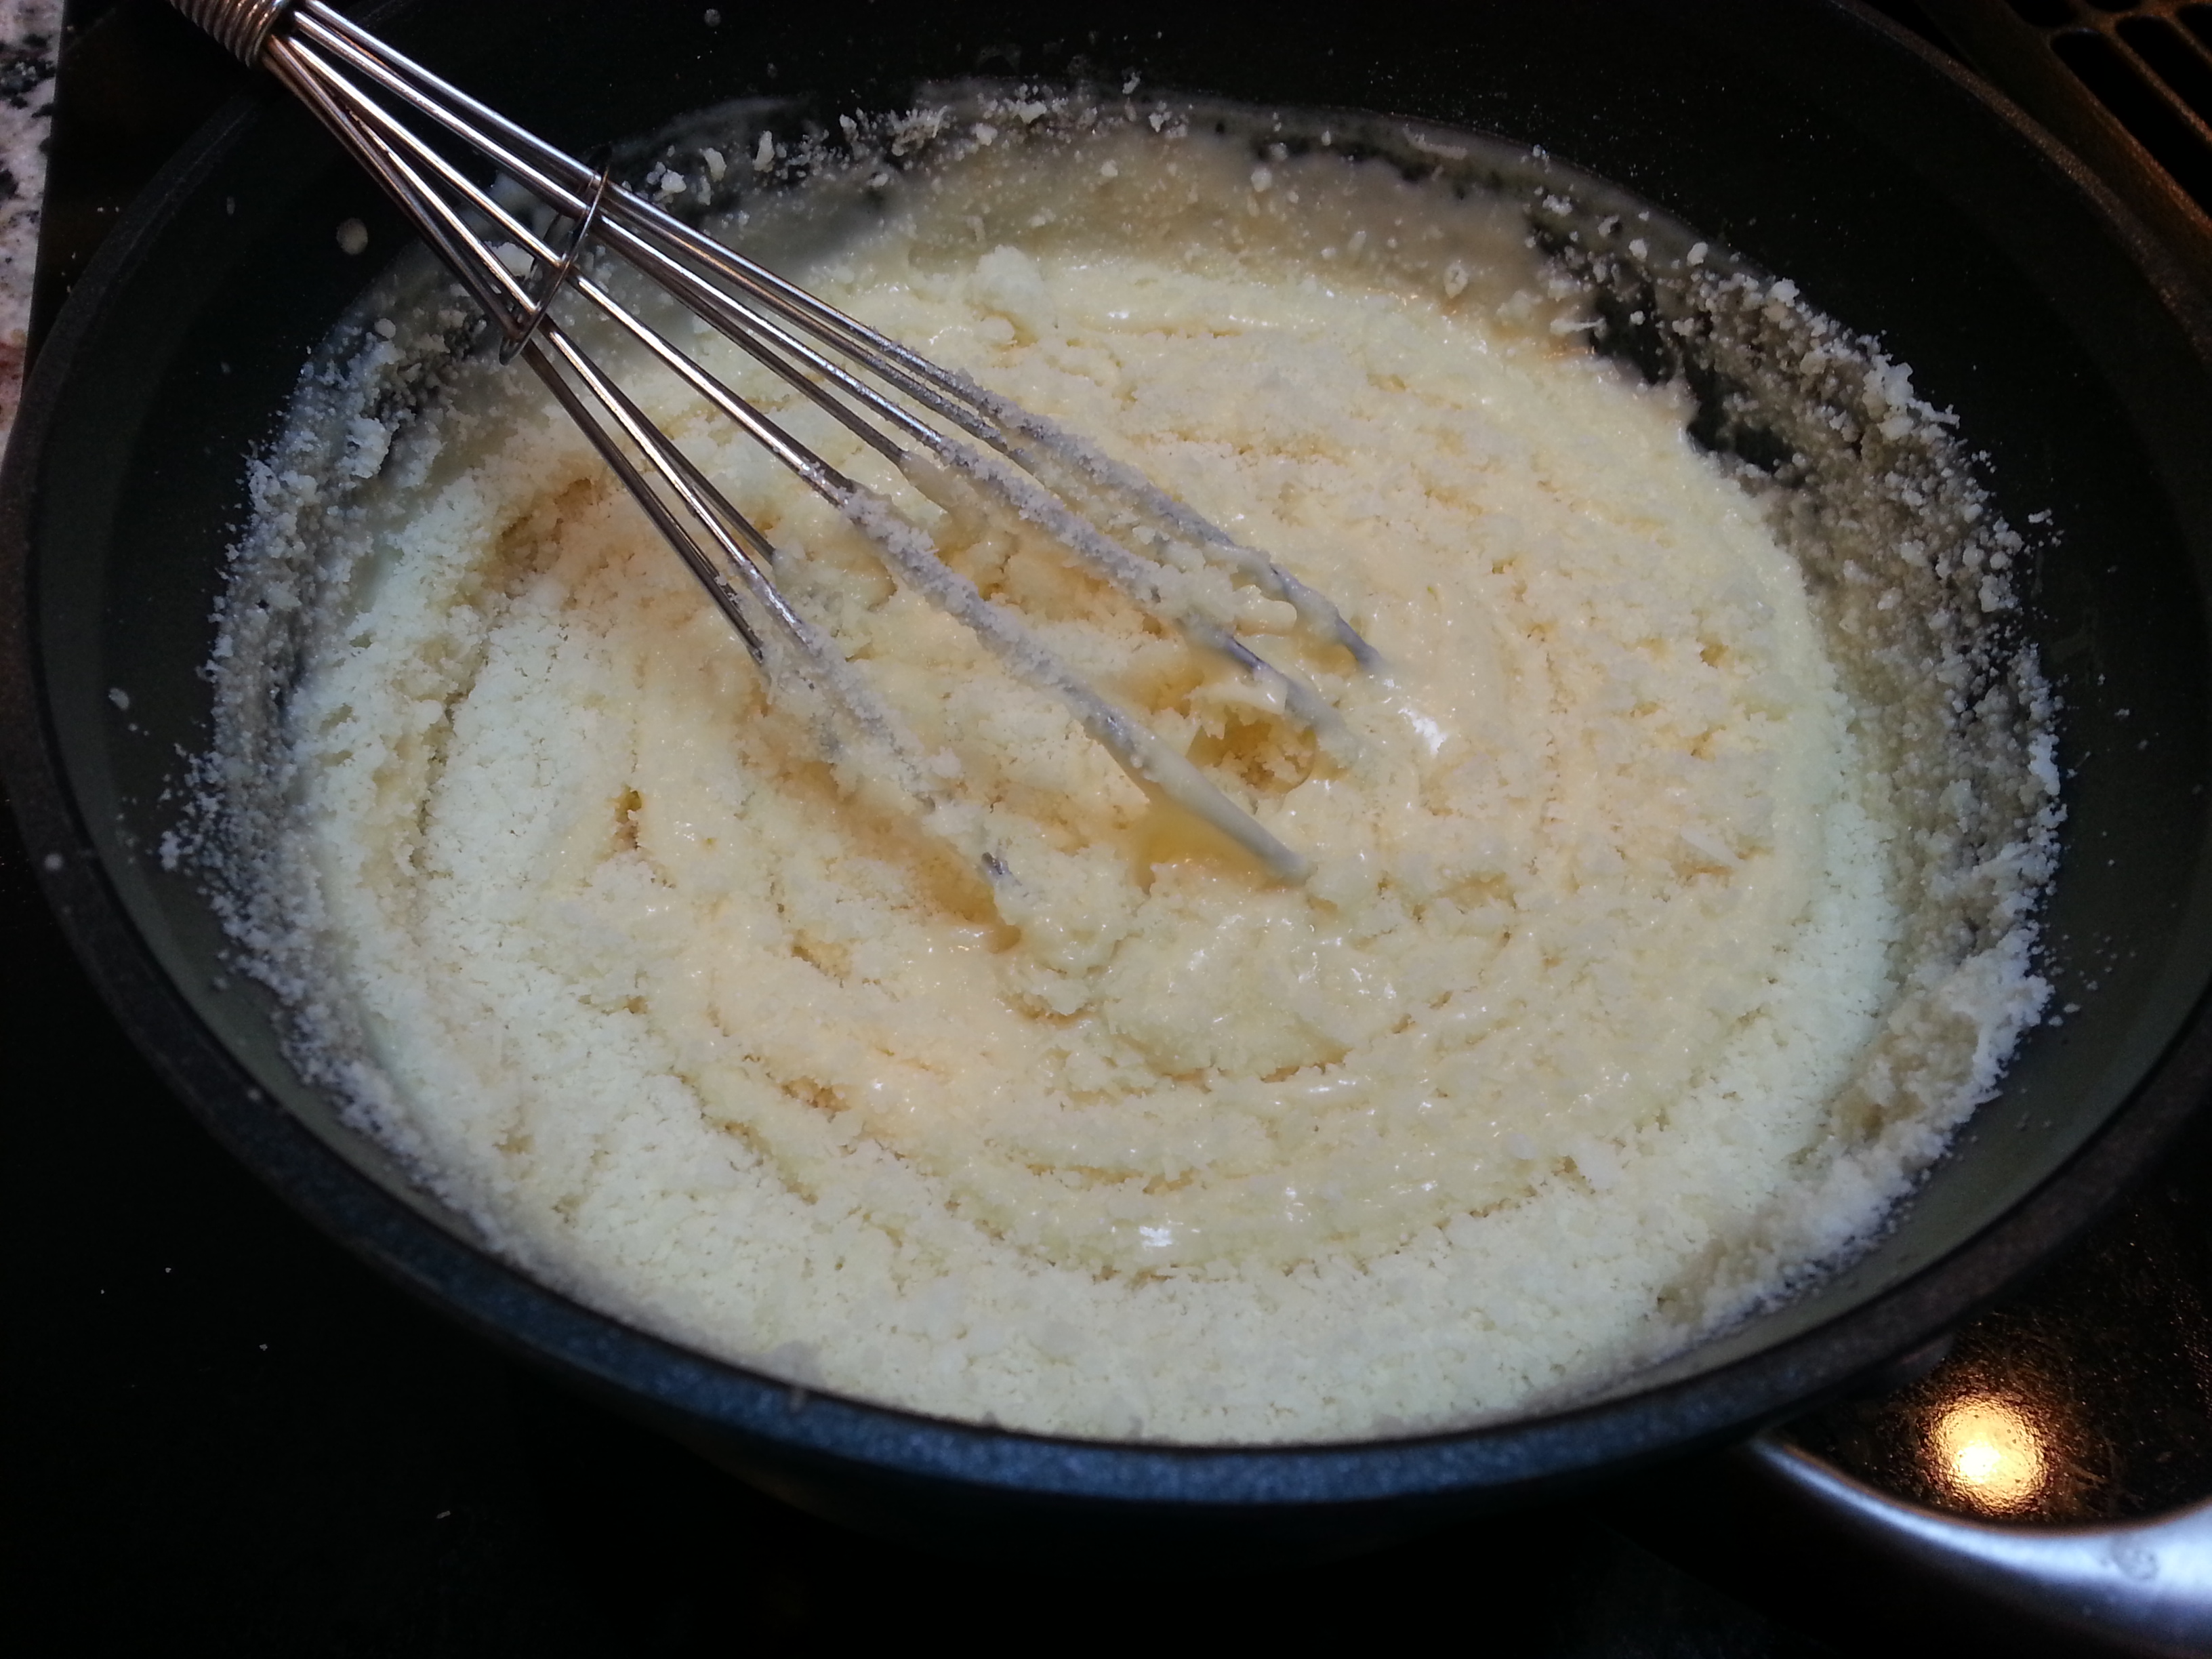
Add the pecorino cheese and whisk until smooth. Add salt and pepper to taste.

20130504_17353620130504_173625Ladle the hot mornay sauce on top of the turkey, and then place the sandwich under the broiler until lightly browned on top.

20130504_173800

Top with two slices of bacon and finish with a sprinkle of fresh parsley and paprika.
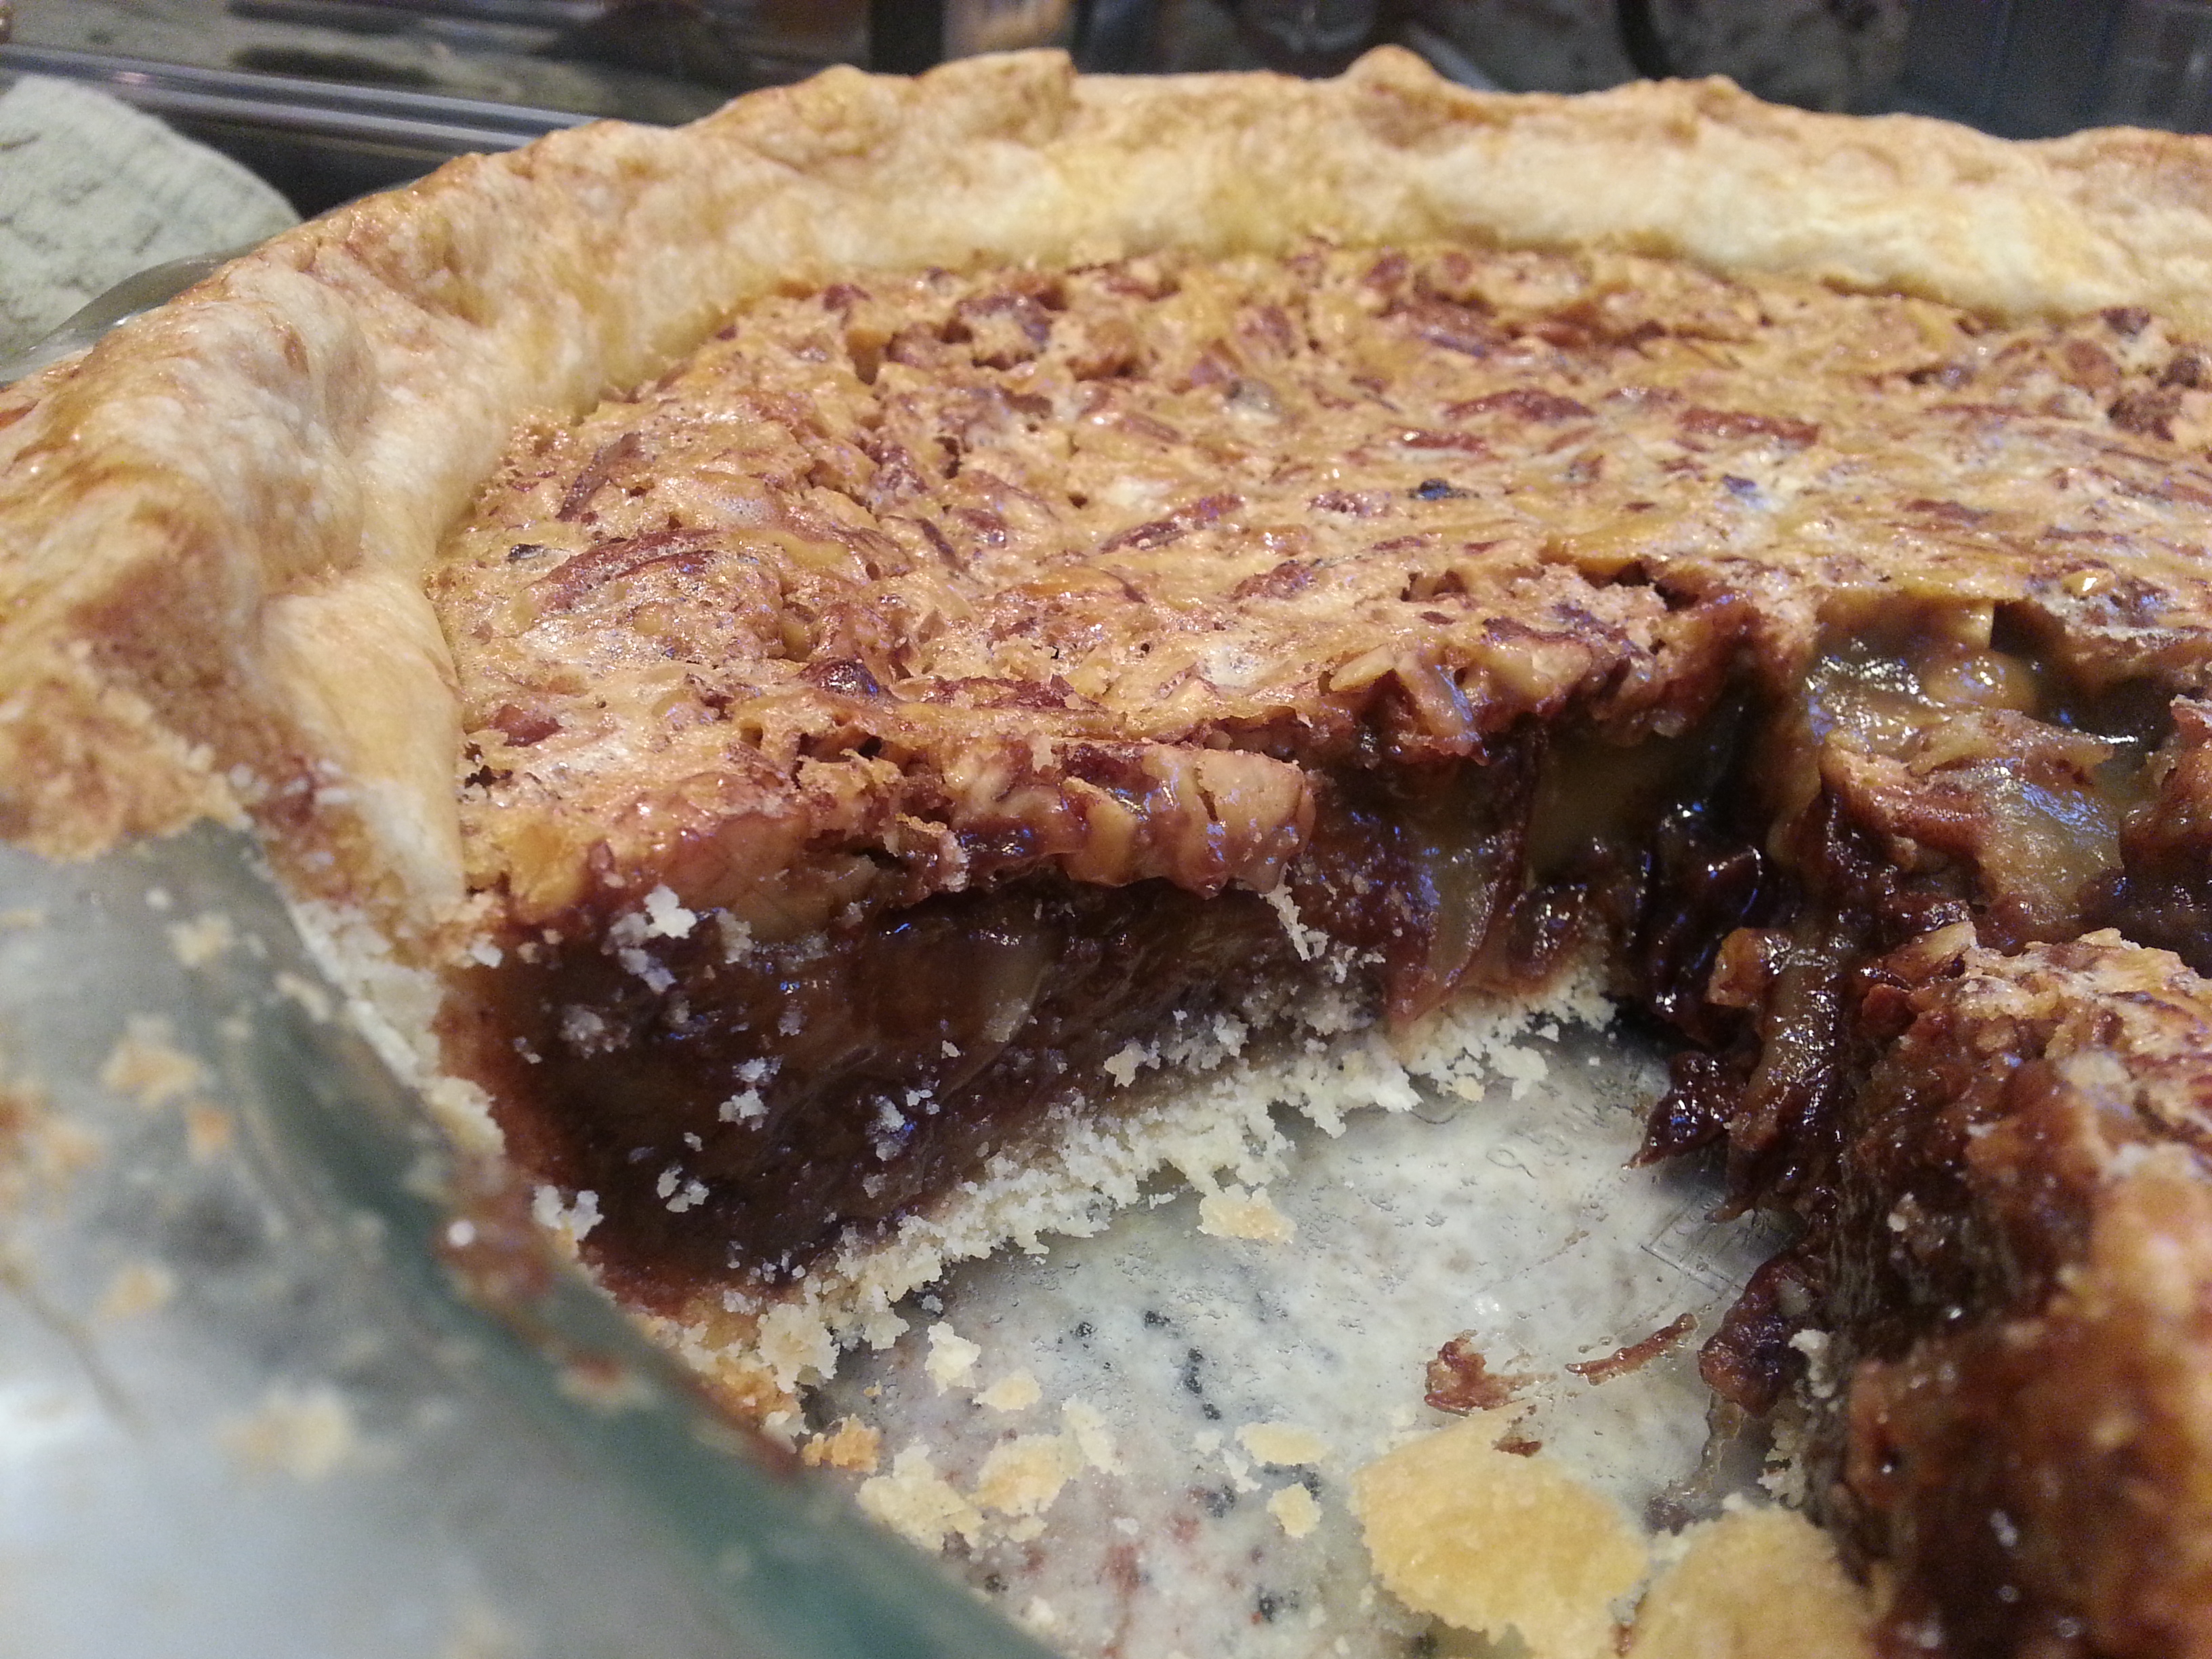
20130504_17465620130504_175043

Dark Bay Pie

The Derby Pie originated at the Melrose Inn, but the name is trademarked  by the Kern family and the owners are not shy about suing to protect it. Although numerous variations and recipes for this type of pie exist, to refer to anything that is not Kern’s recipe (which is again, heavily guarded by the owners) as Derby Pie is breaking the law. Hence, why my truly delicious AND SHAREABLE recipe has its own moniker, given for the final product’s similarity in color to that particular horse coat color.

  • 1 1/4 cups toasted, roughly chopped nuts – I used a mixture of pecans and walnuts
  • 3 large eggs
  • 3/4 cup brown sugar
  • 1/4 cup white sugar
  • 1/2 cup light corn syrup
  • 1/4 cup dark corn syrup
  • 1/2 cup all-purpose flour
  • 1/2 cup butter, melted and cooled
  • 1/2 tsp. salt
  • 2 tablespoons bourbon
  • 1 1/2 teaspoons vanilla extract
  • 3/4 cup semisweet chocolate chips
  • Pastry for one 9 in. crust

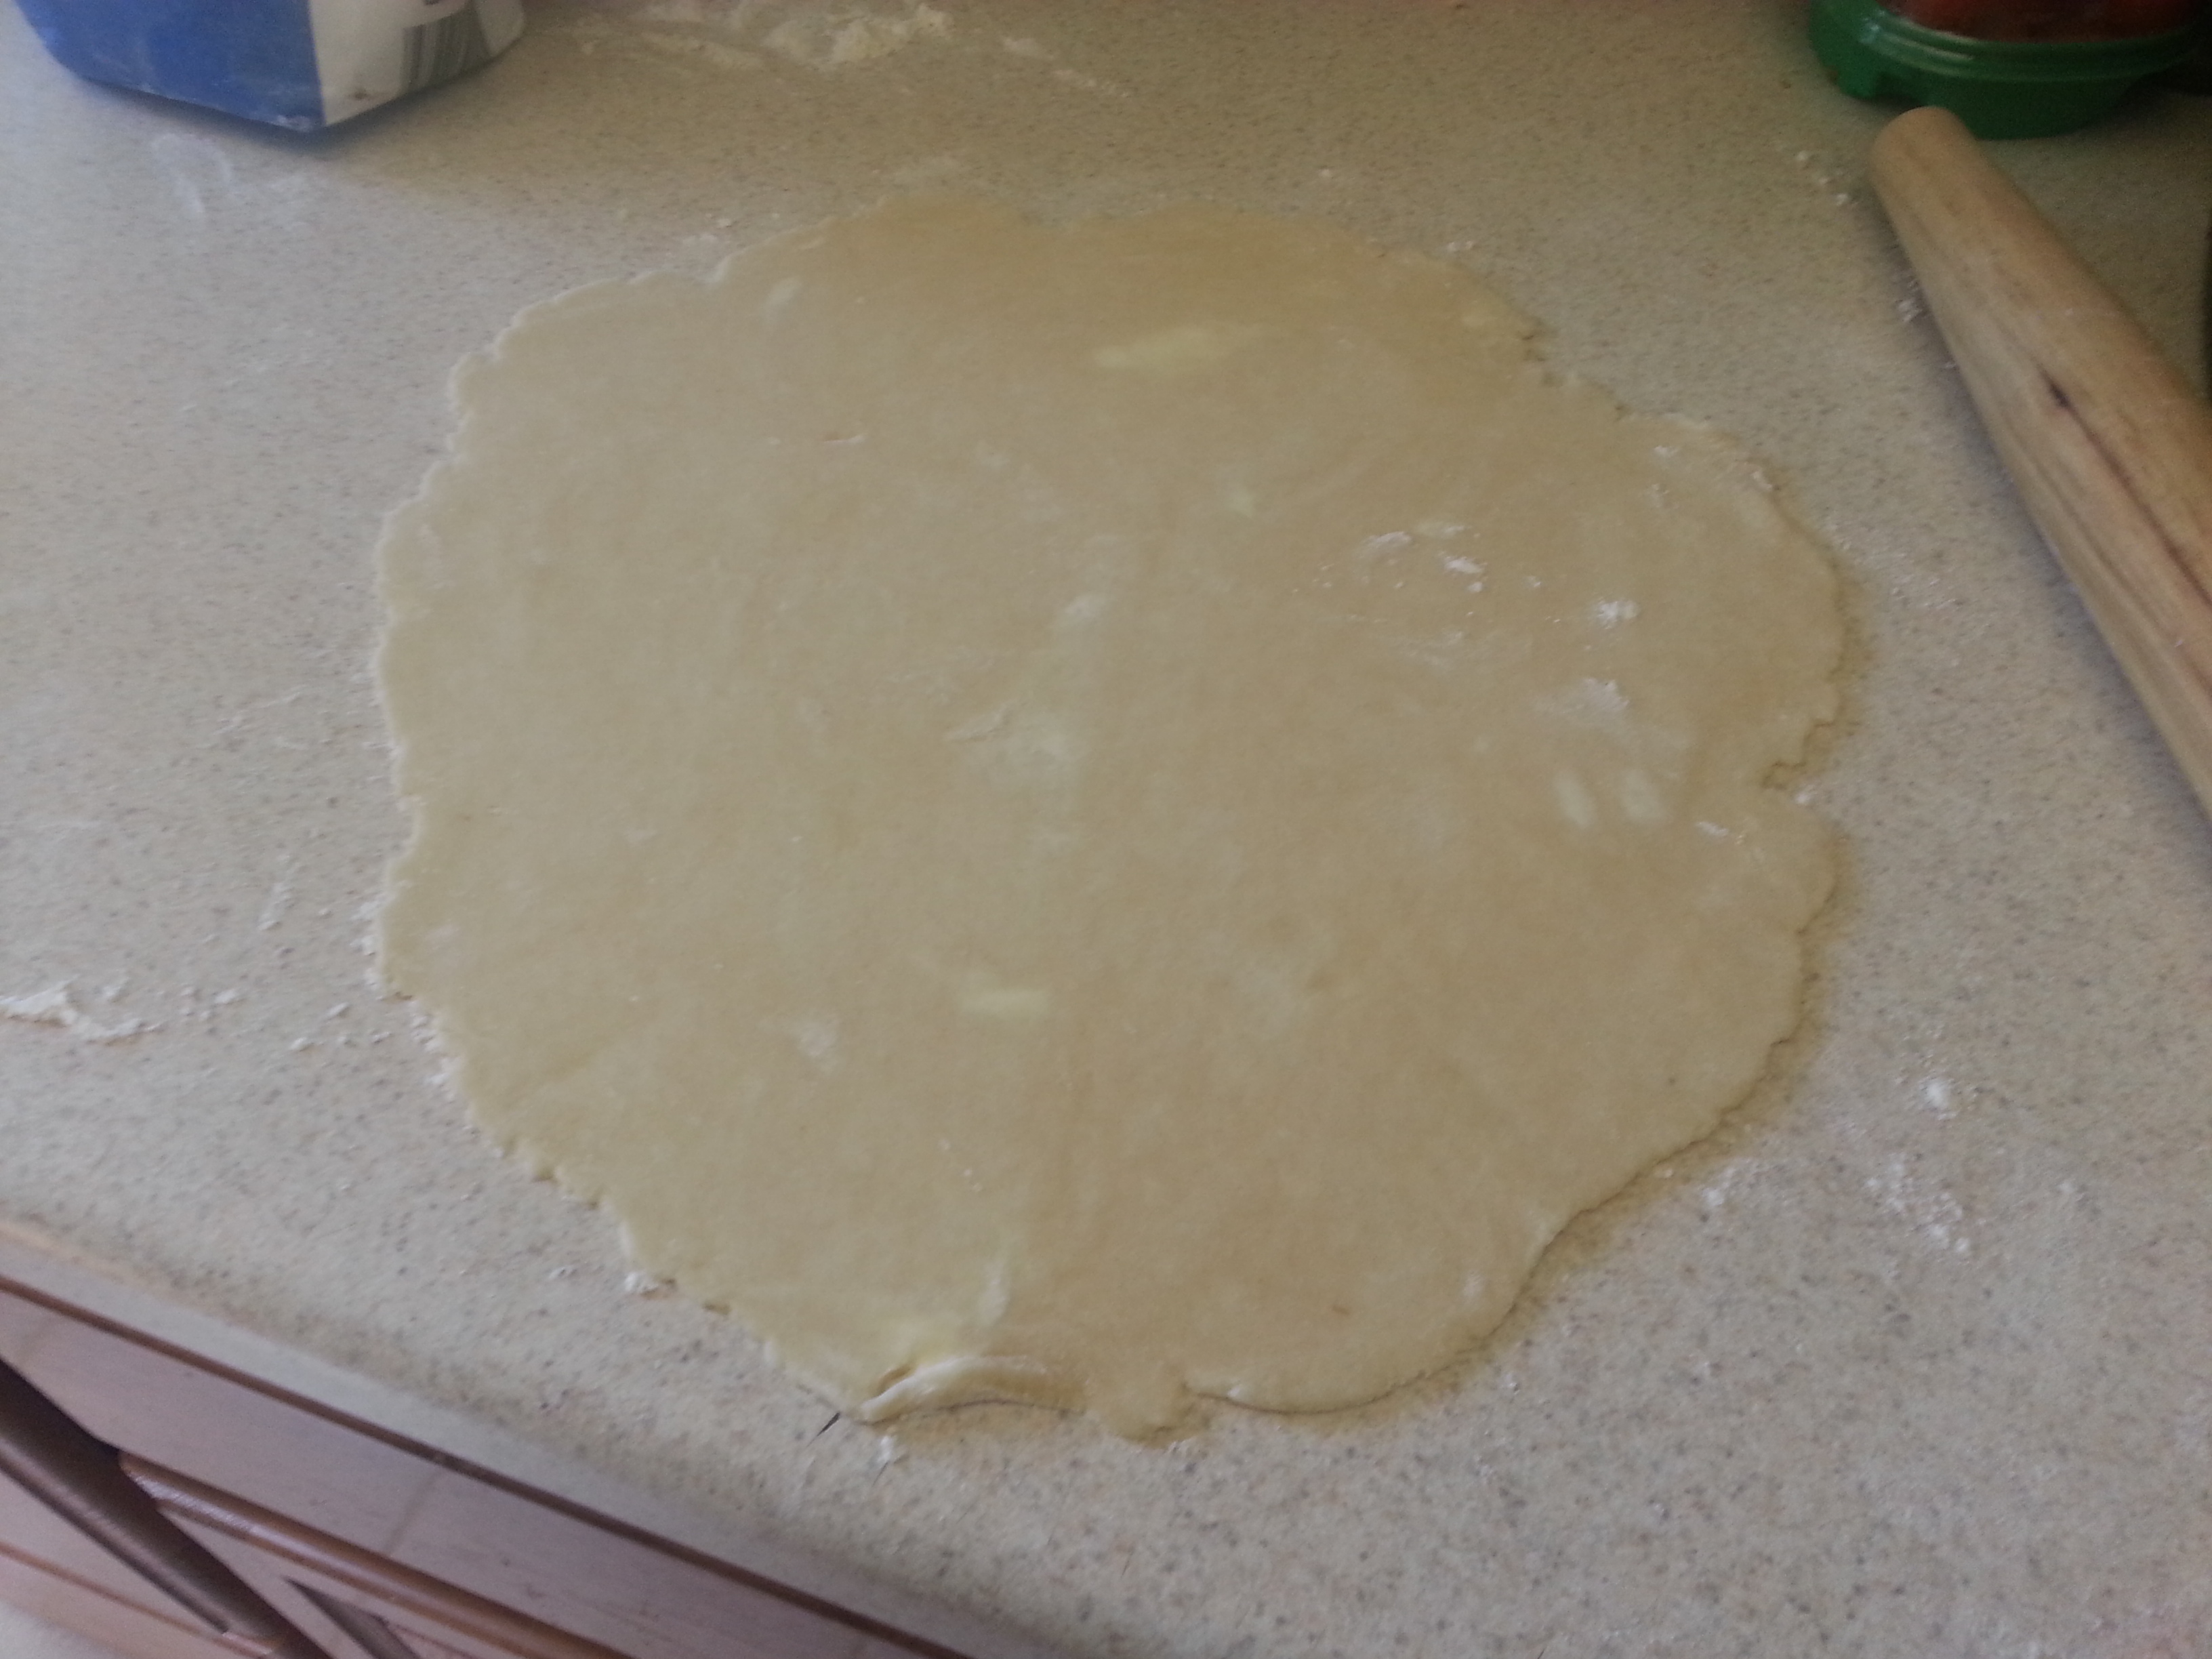
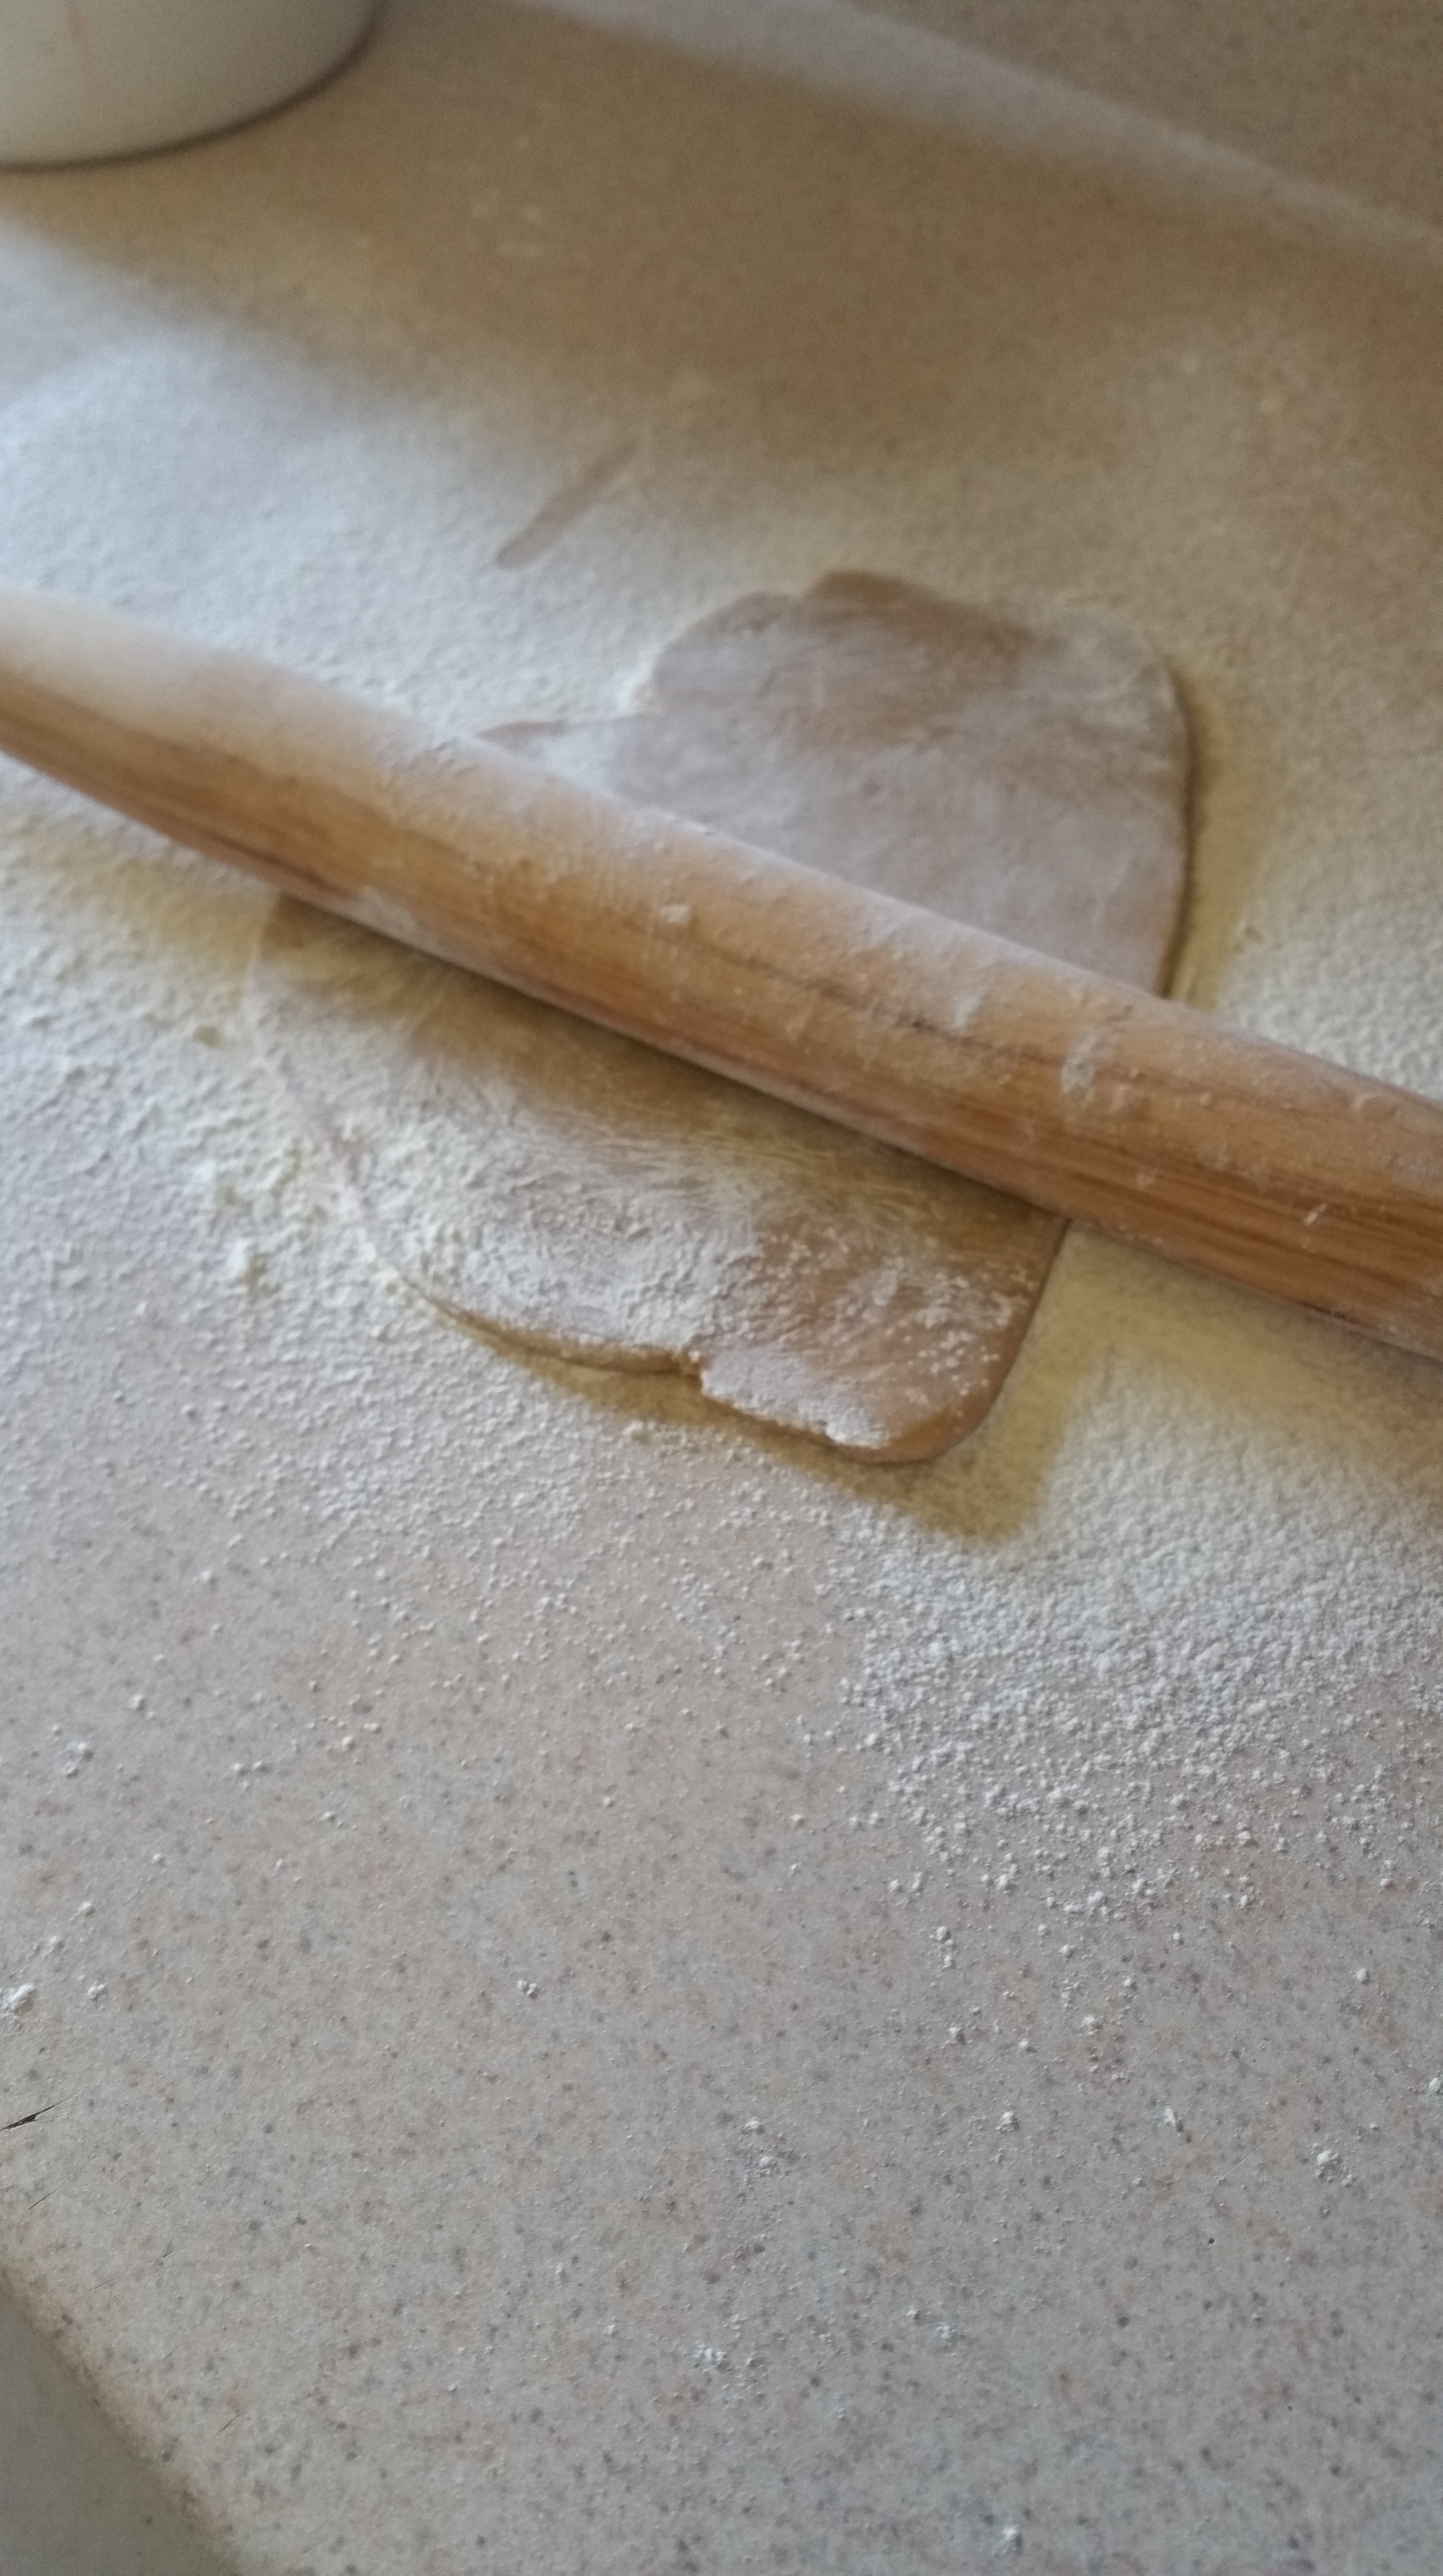
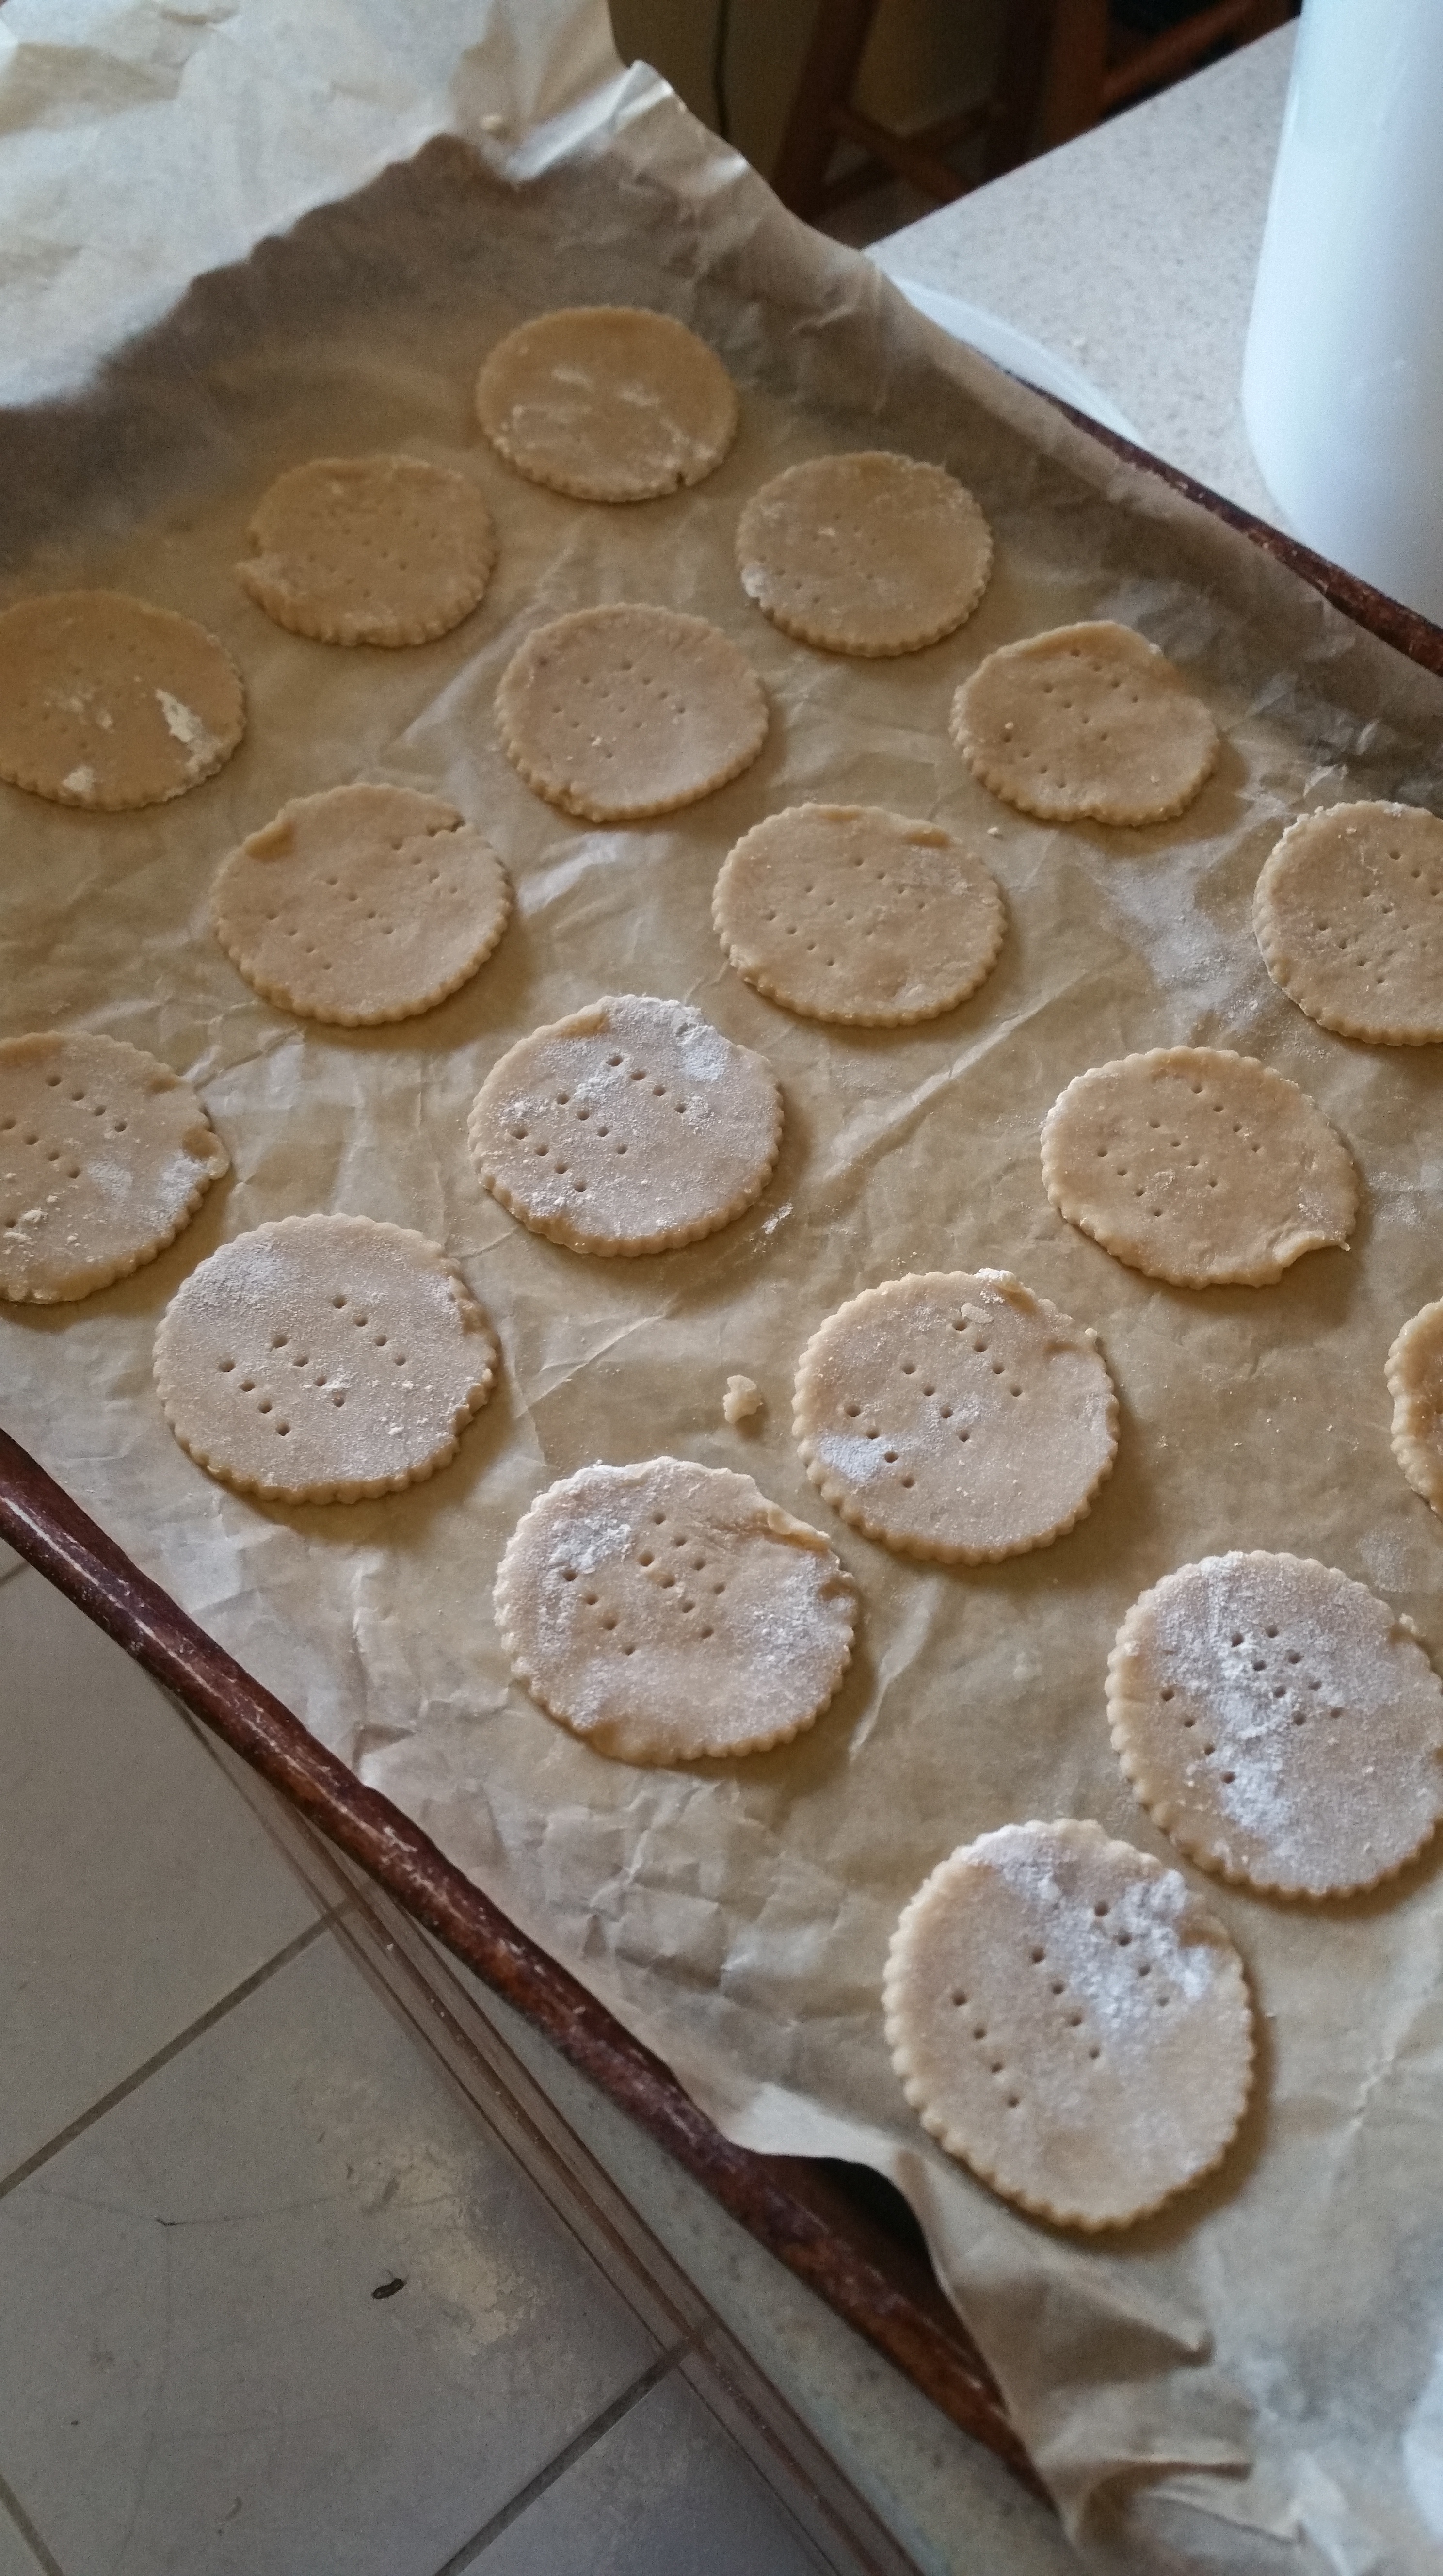
First, prepare your pastry. I use my super-no-fail pate brisee, of course! You can find that recipe right here, in the butter tart tutorial. After making the dough, patting into a disc, and refrigerating it, roll it out into a circle a bit larger than your pie pan, and then fit into the pan and crimp the edges. Return the crust to the refrigerator and chill for 30 minutes.

20130504_09175720130504_092234

Preheat an oven to 350 degrees F.

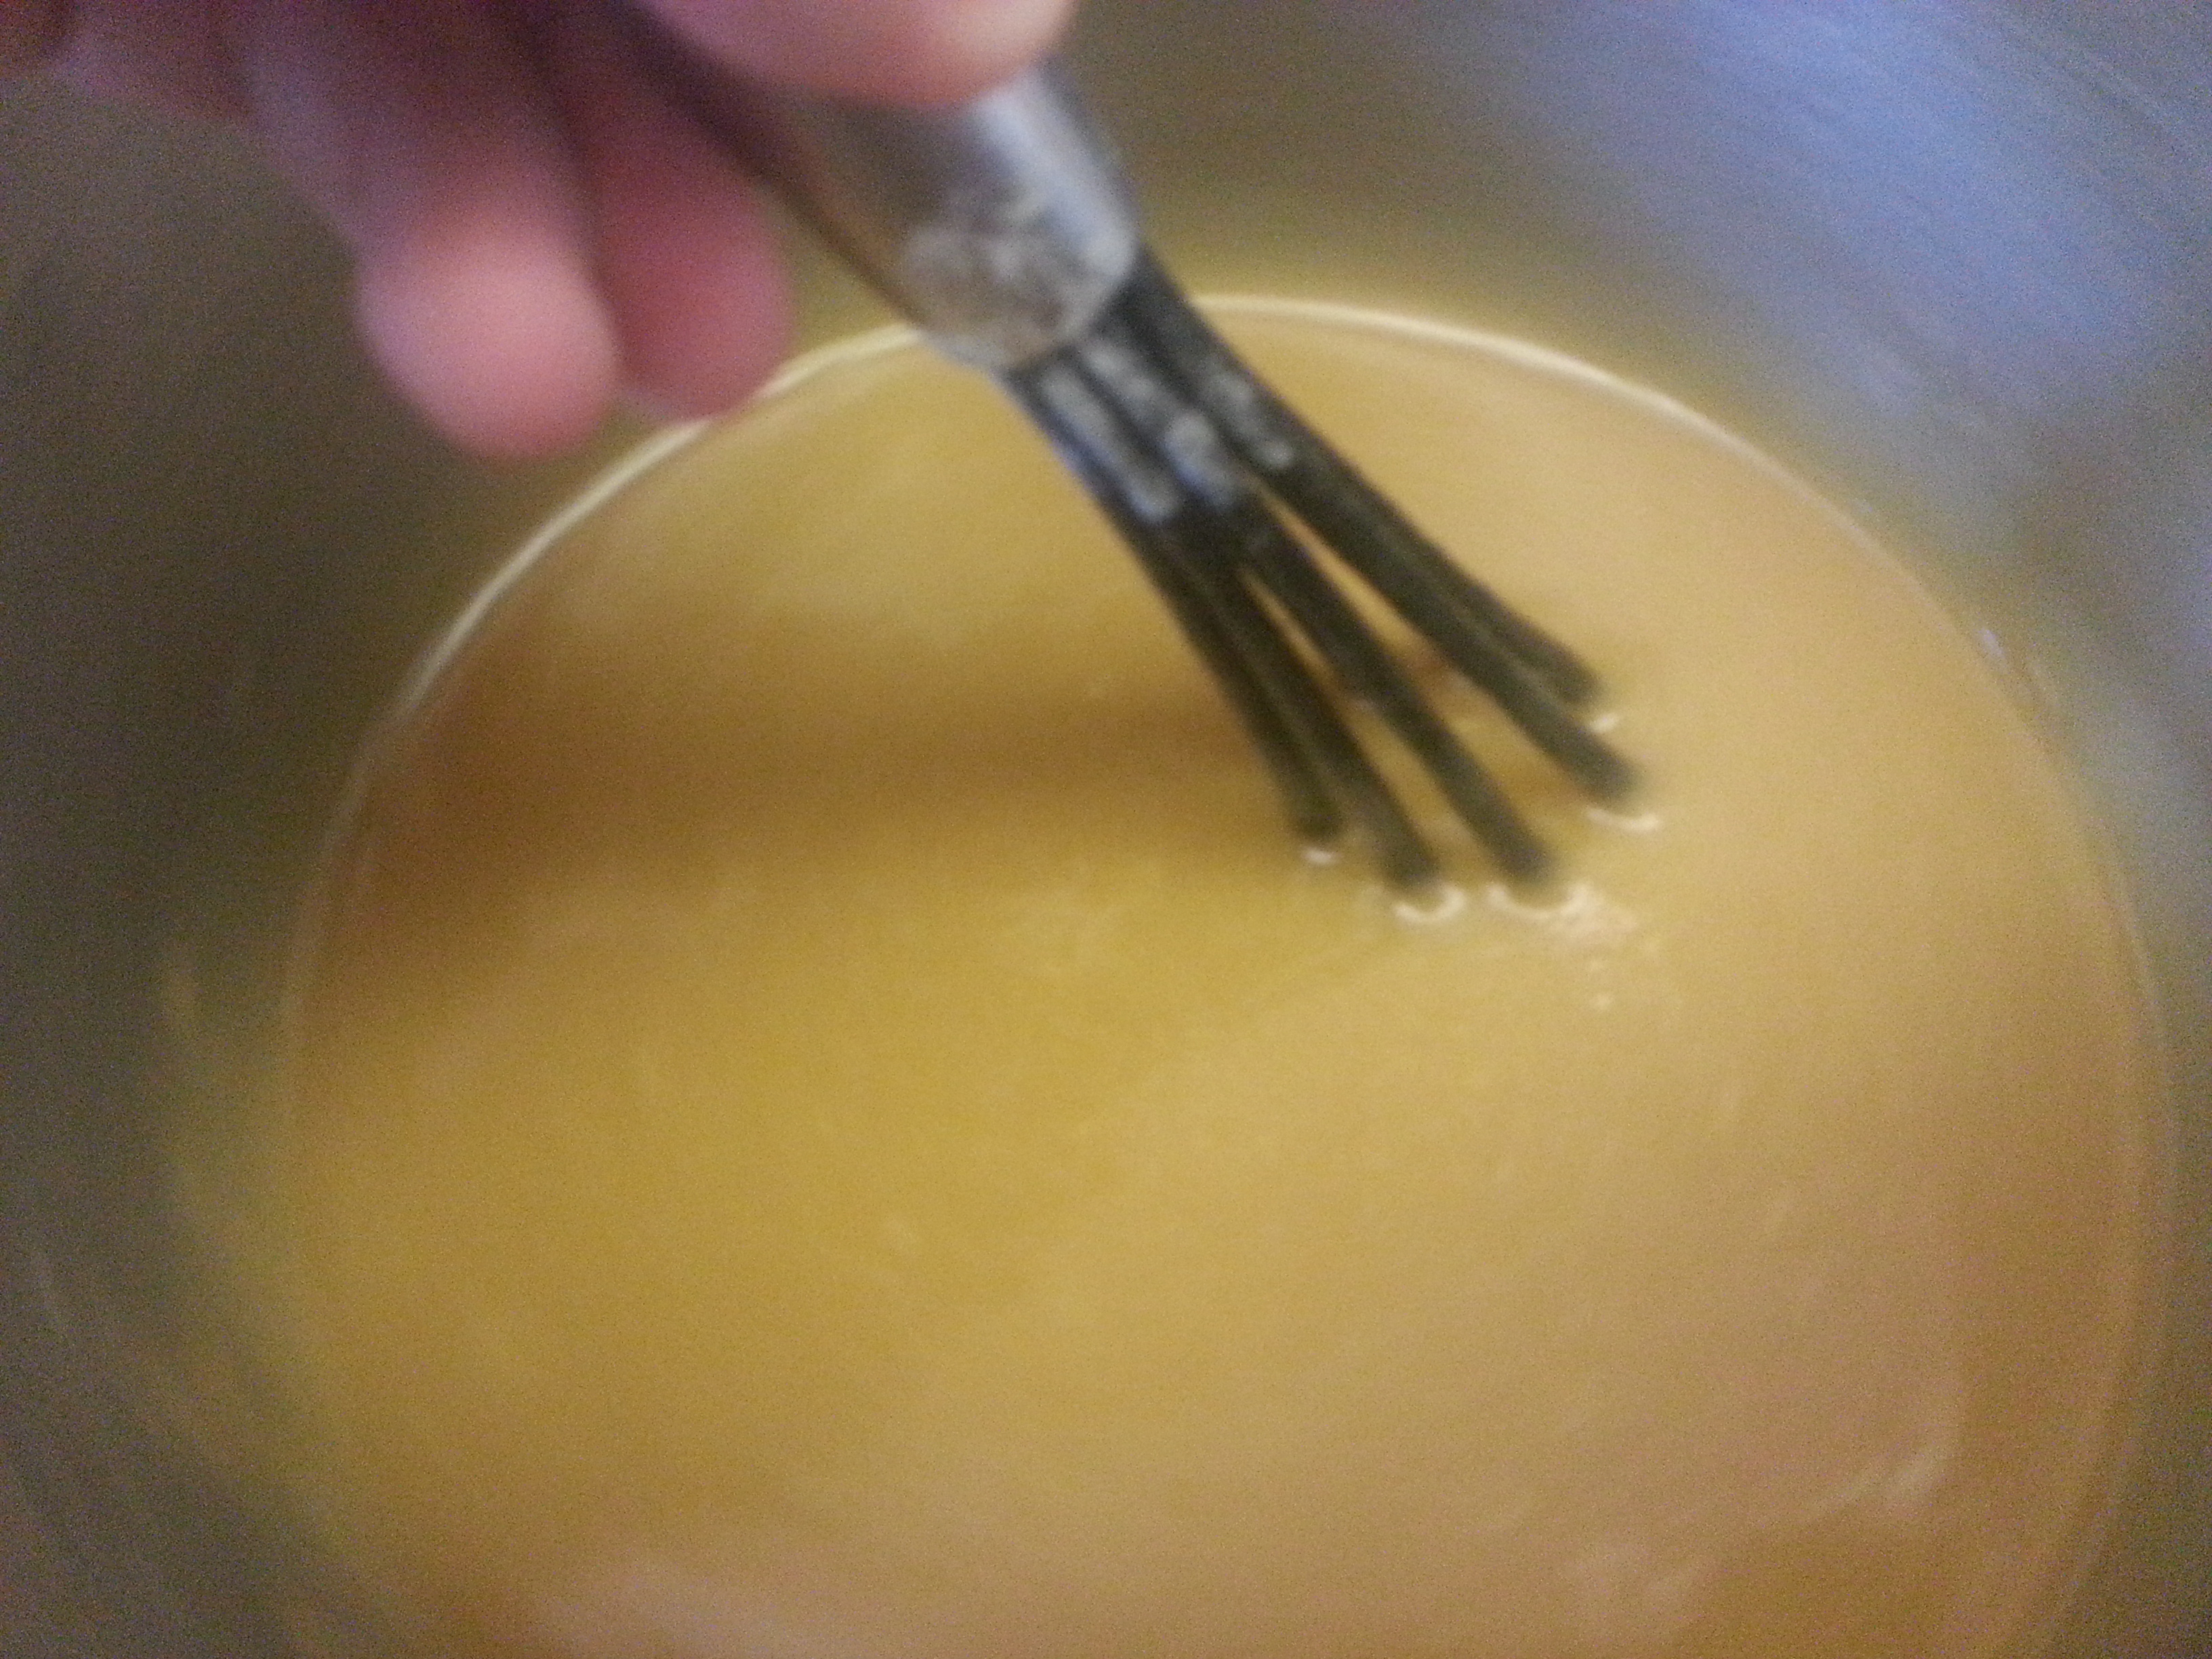
In a large bowl, whisk the eggs until thoroughly blended and slightly foamy. Add the brown sugar, white, sugar, light corn syrup, dark corn syrup, flour, and salt and whisk until smooth.  Add the melted butter, bourbon, and vanilla extract and mix thoroughly.

20130504_101233

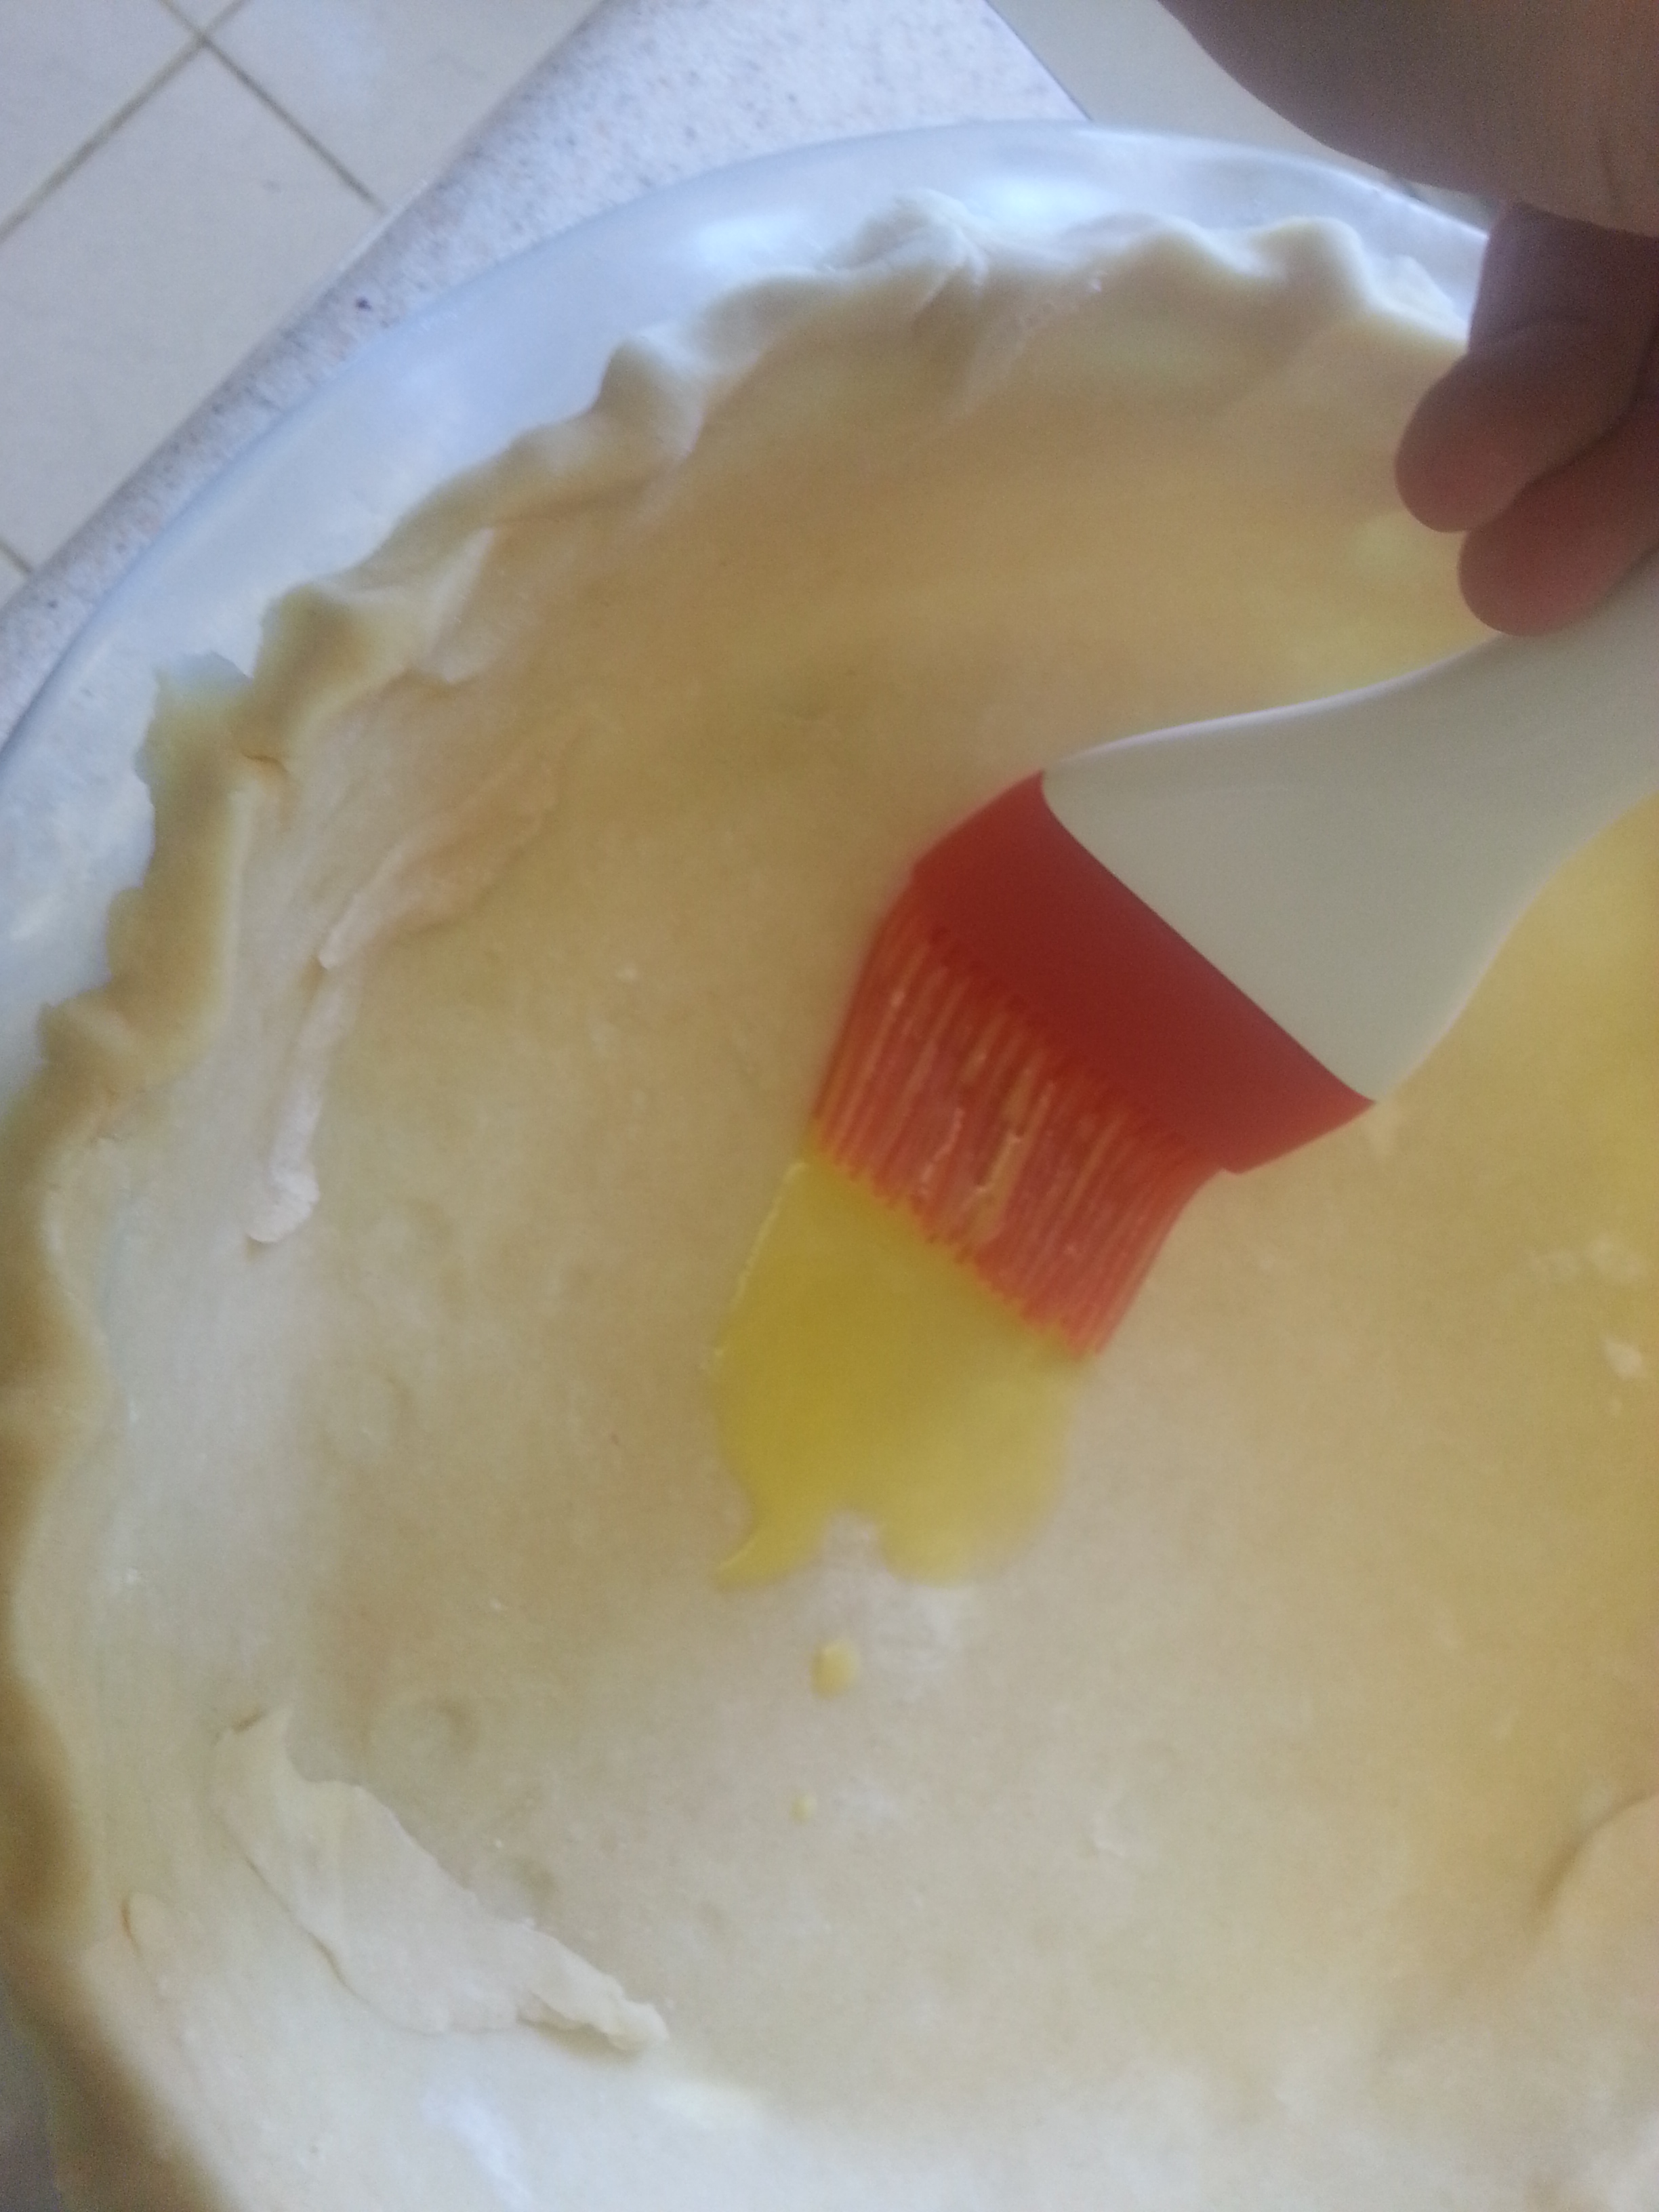
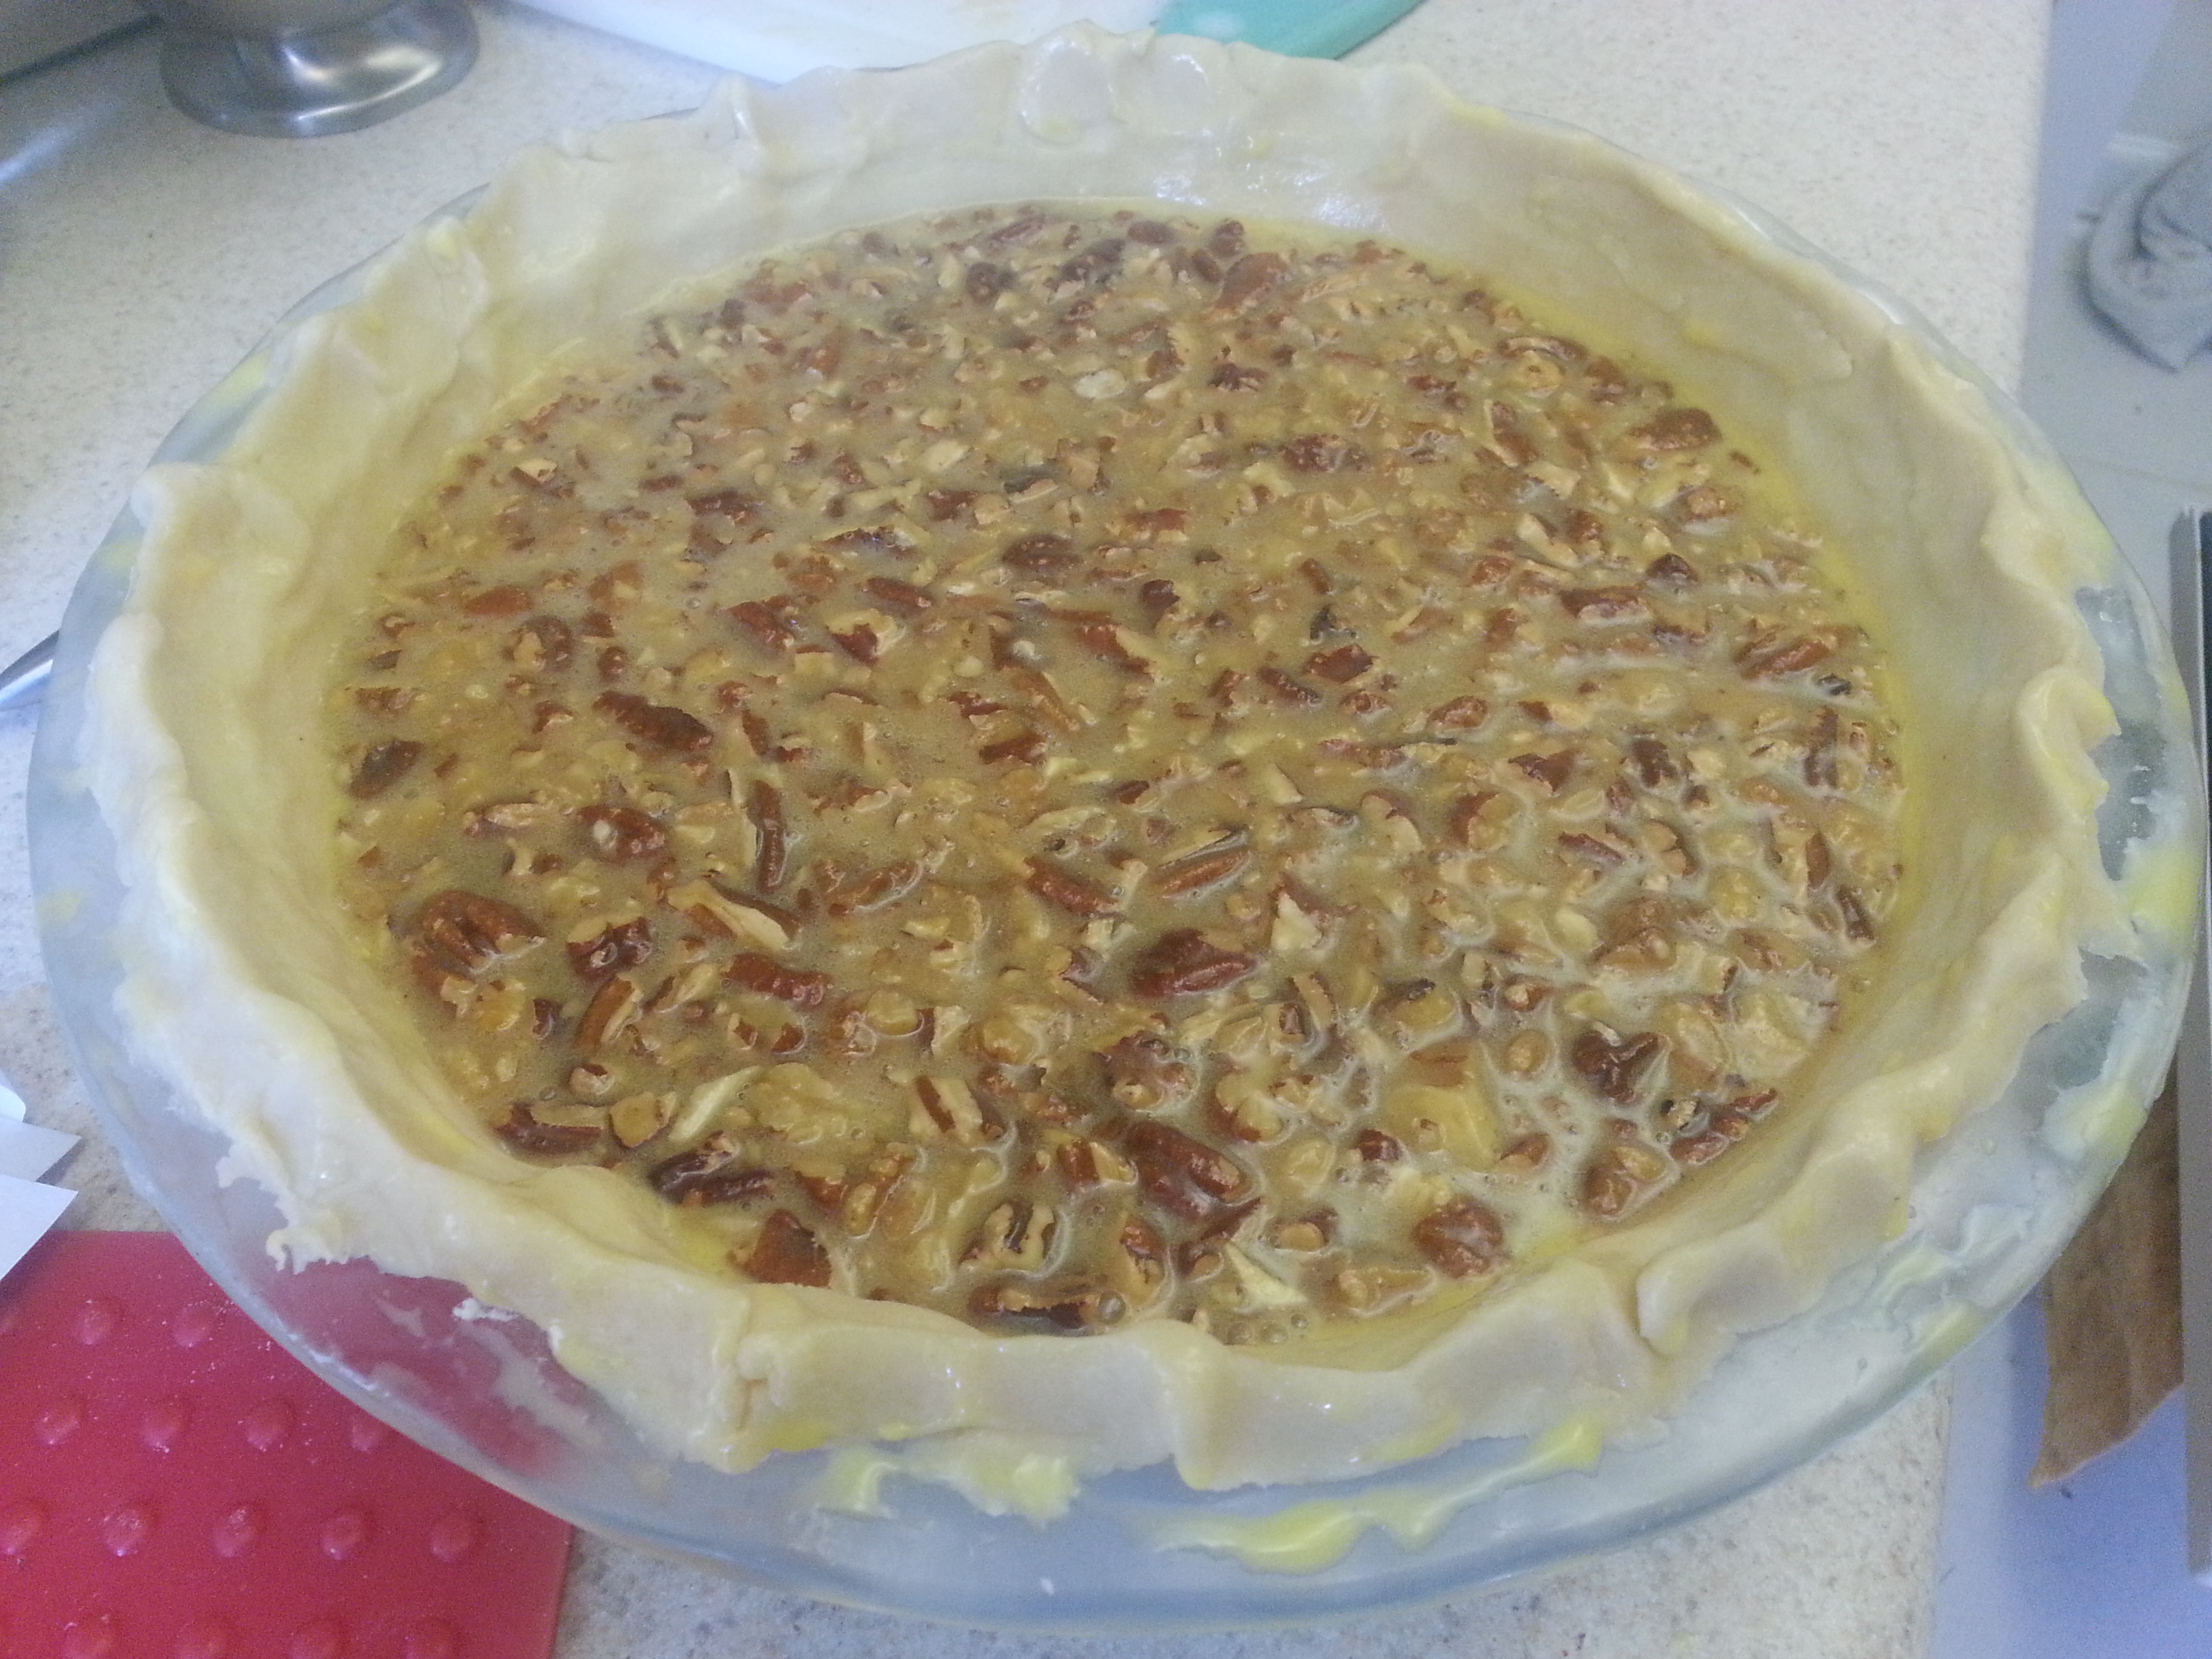
Fold the nuts and chocolate chips into the mixture, brush the inside of the pie crust with a little bit of egg wash, and then pour the filling into the prepared pie crust.

20130504_10154920130504_101333(0)20130504_101745Bake for 50-60 minutes or until the center is just set and the edges are golden brown. It will deflate slightly as it cools.

20130504_11153020130504_11164120130504_112339

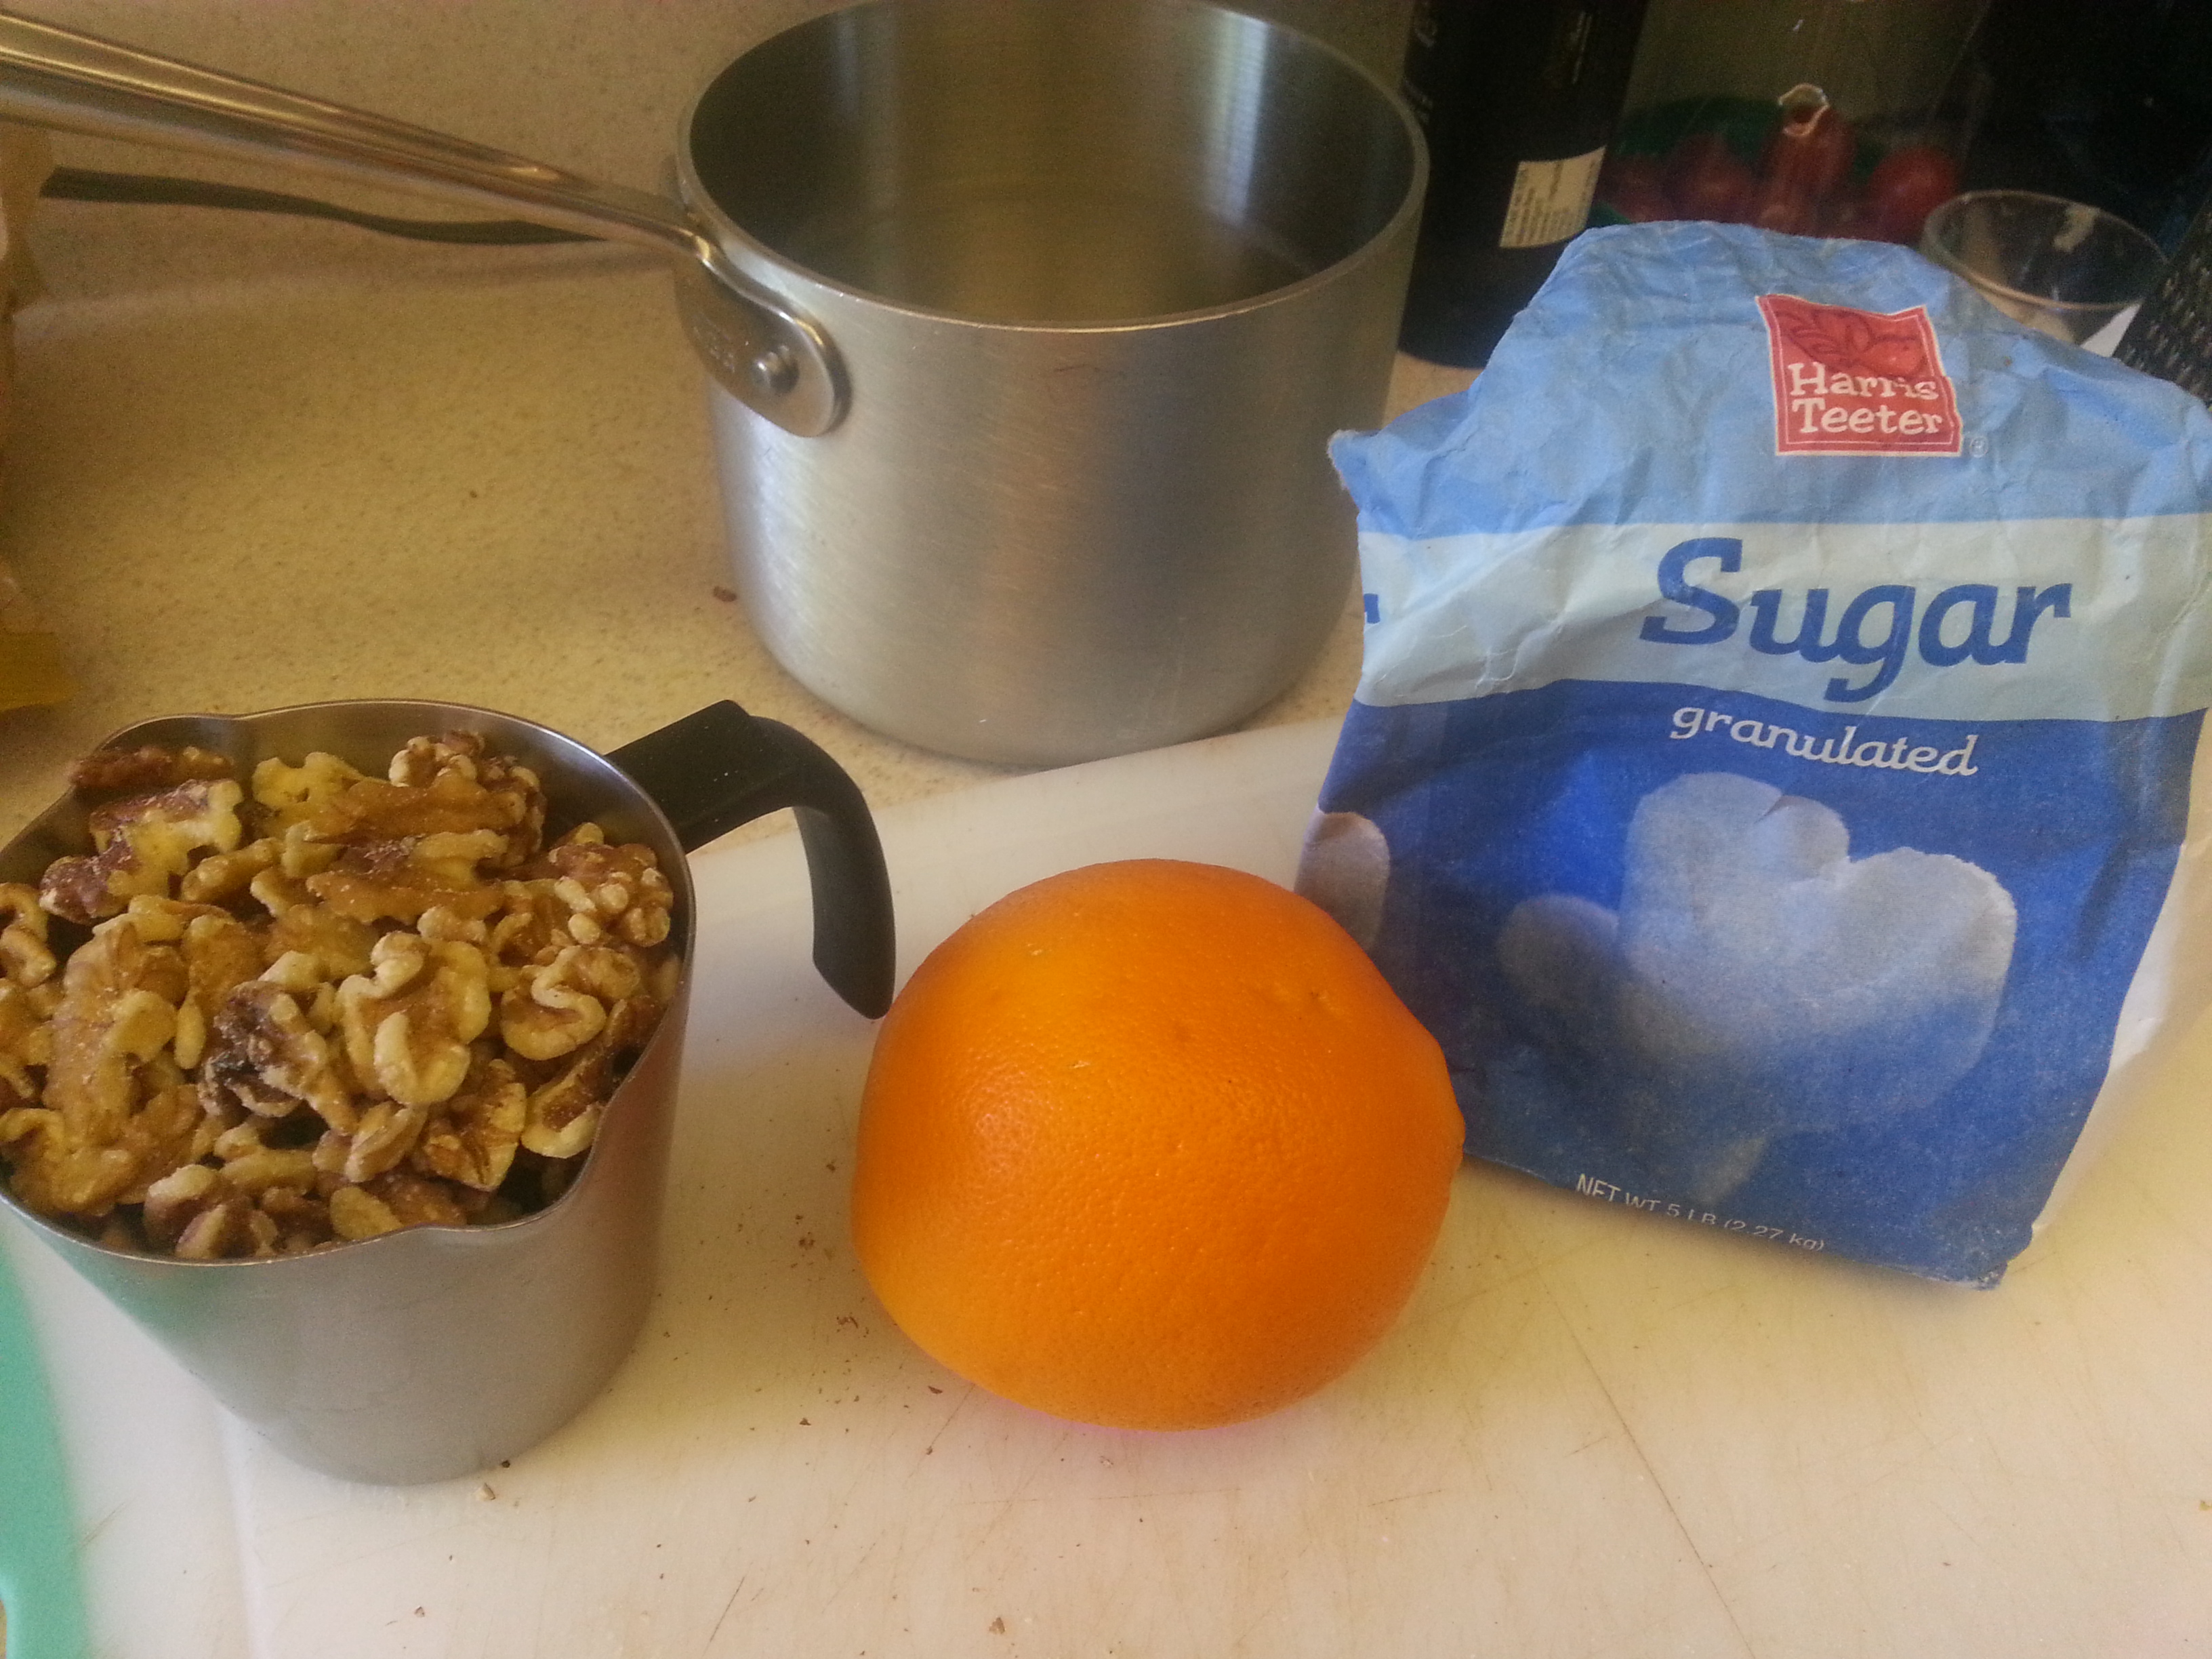
An hour after finishing everything up, I was putting my recipe cards safely back into the book when I noticed another one from Lynn that contained three simple ingredients: An orange, a cup of sugar, and two cups of pecans. Well shoot, I already had everything…so why not? Roger and I have since decided that these are far too habit forming. If you make them, not eating the entire batch will truly be a challenge.

Orange Pecans (and Walnuts)

Lynn’s recipe called for 2 cups of pecans, but I had a mixture of pecans and walnuts leftover from the Dark Bay pie, so I went with that.

20130504_113957
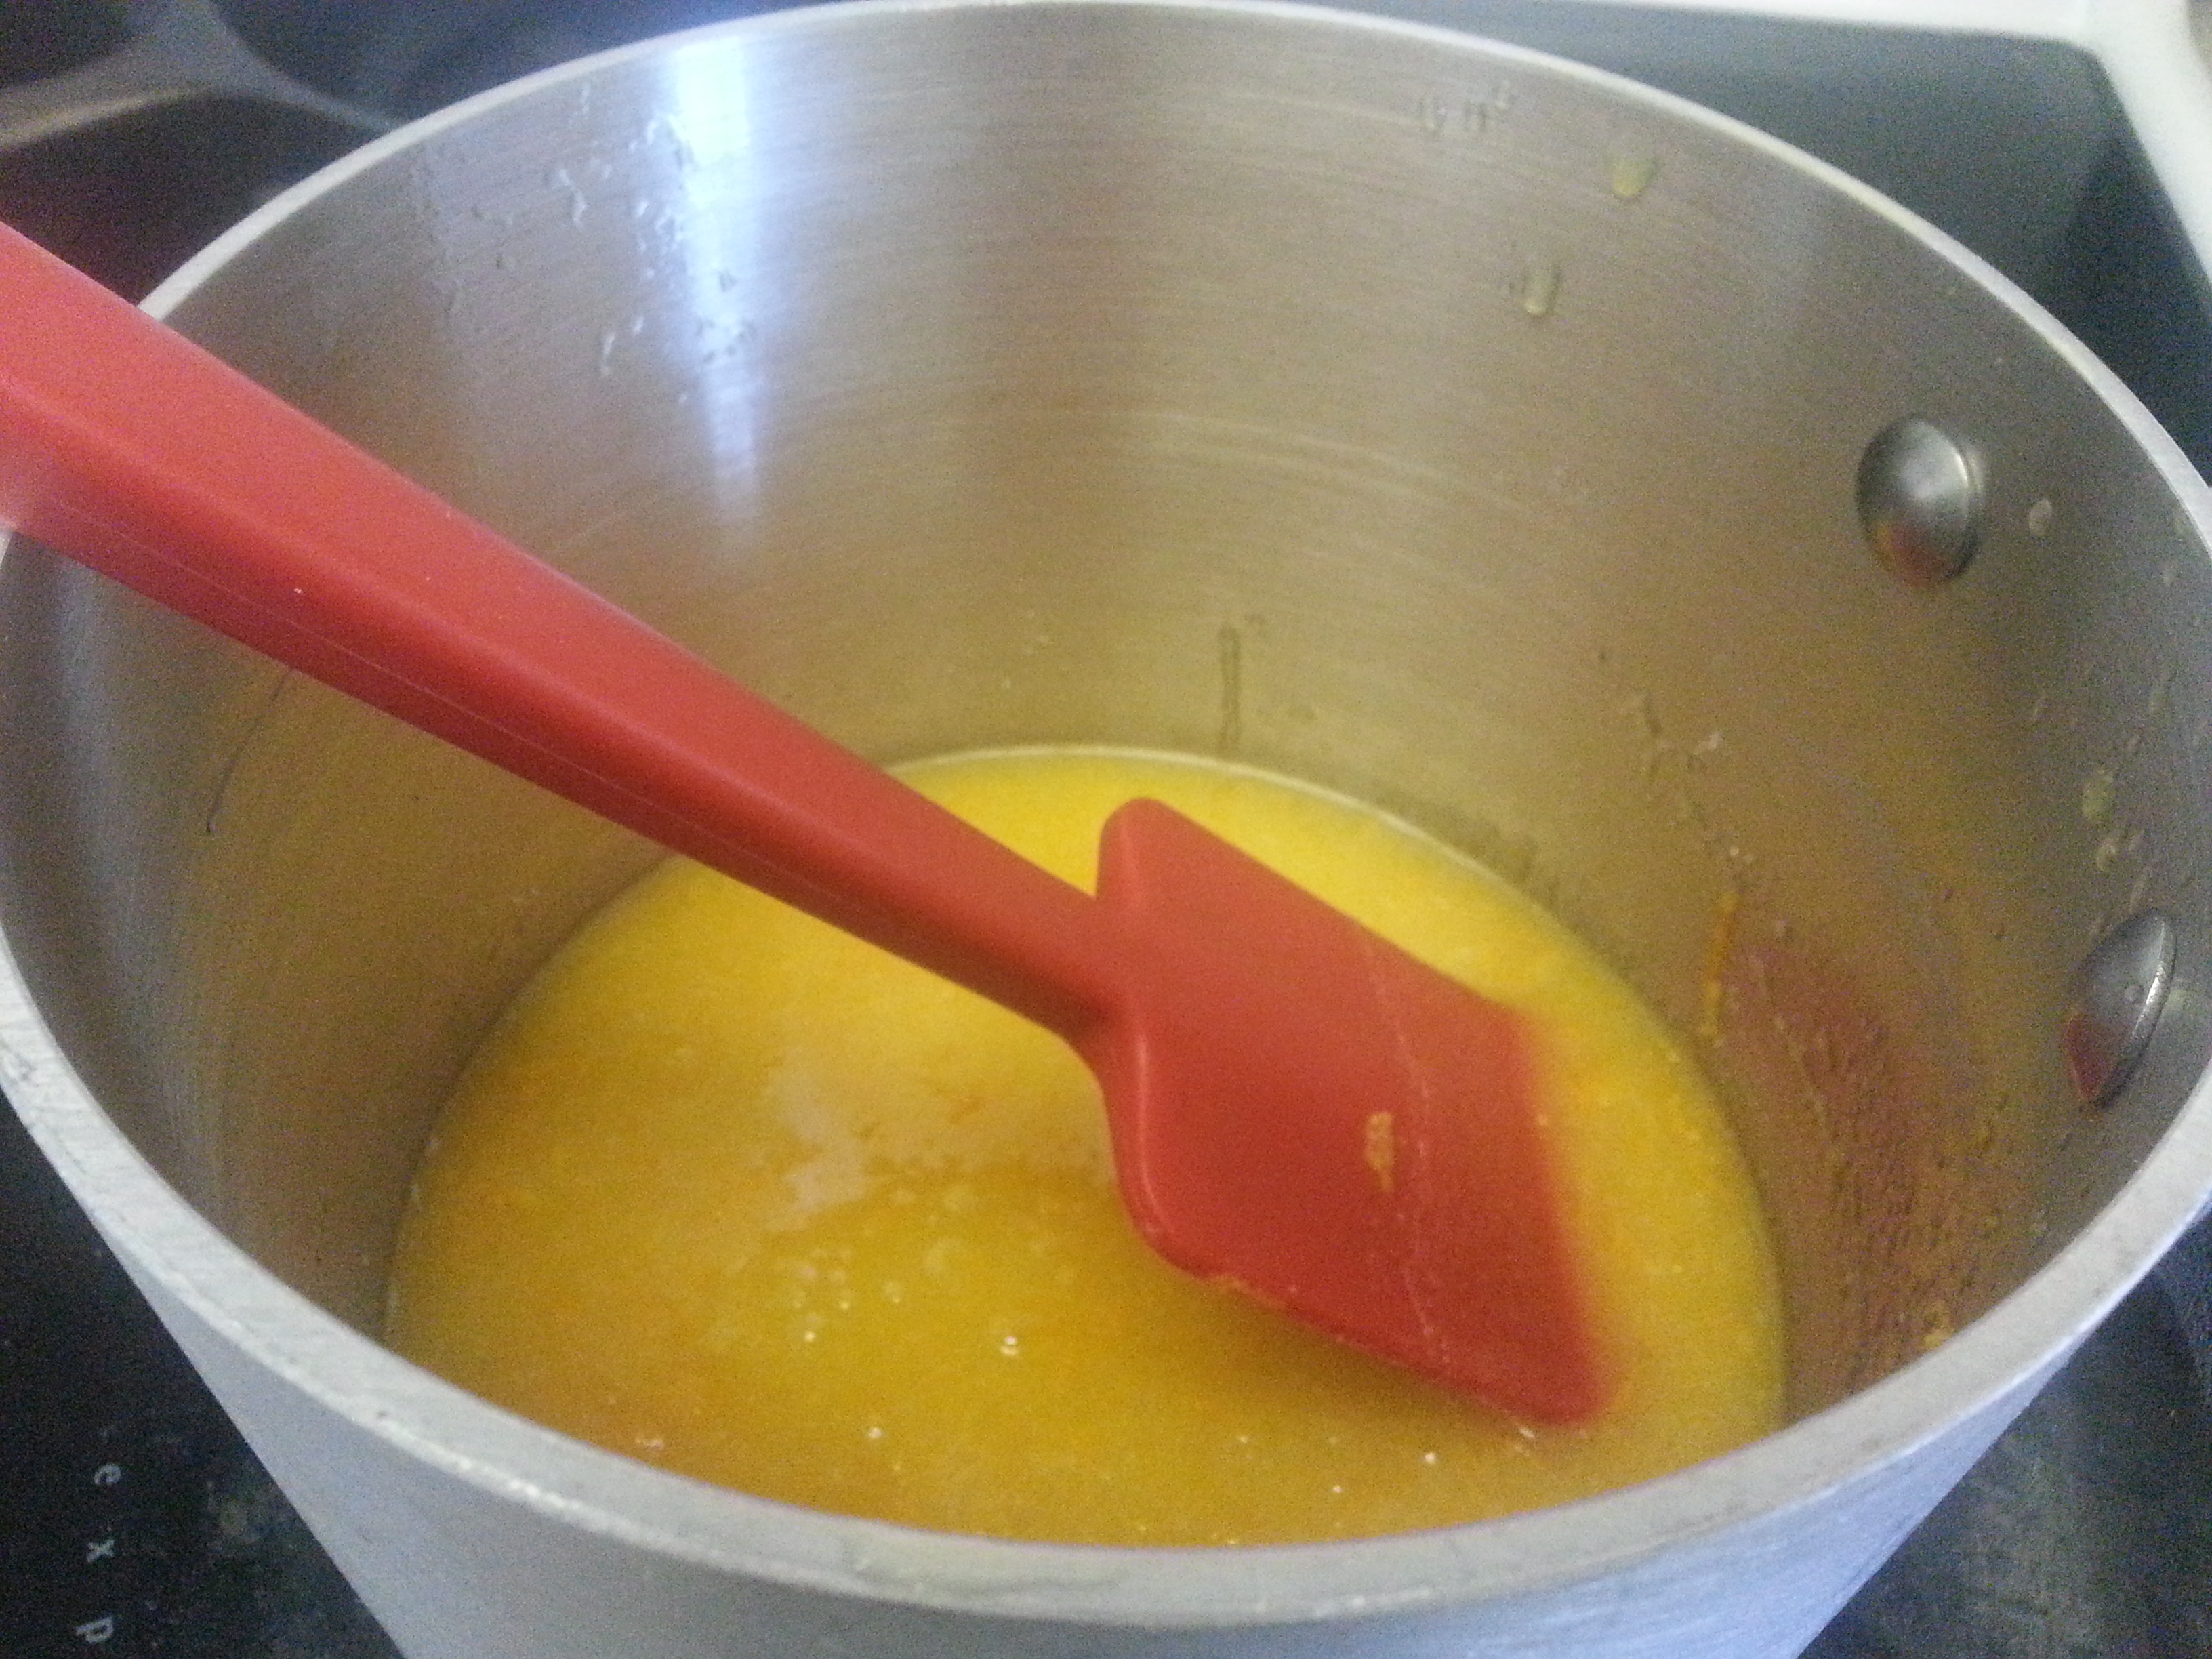
Zest and juice the orange into a small, heavy bottomed saucepan. Add the sugar and mix well. Put the pan over medium high heat.

20130504_114512
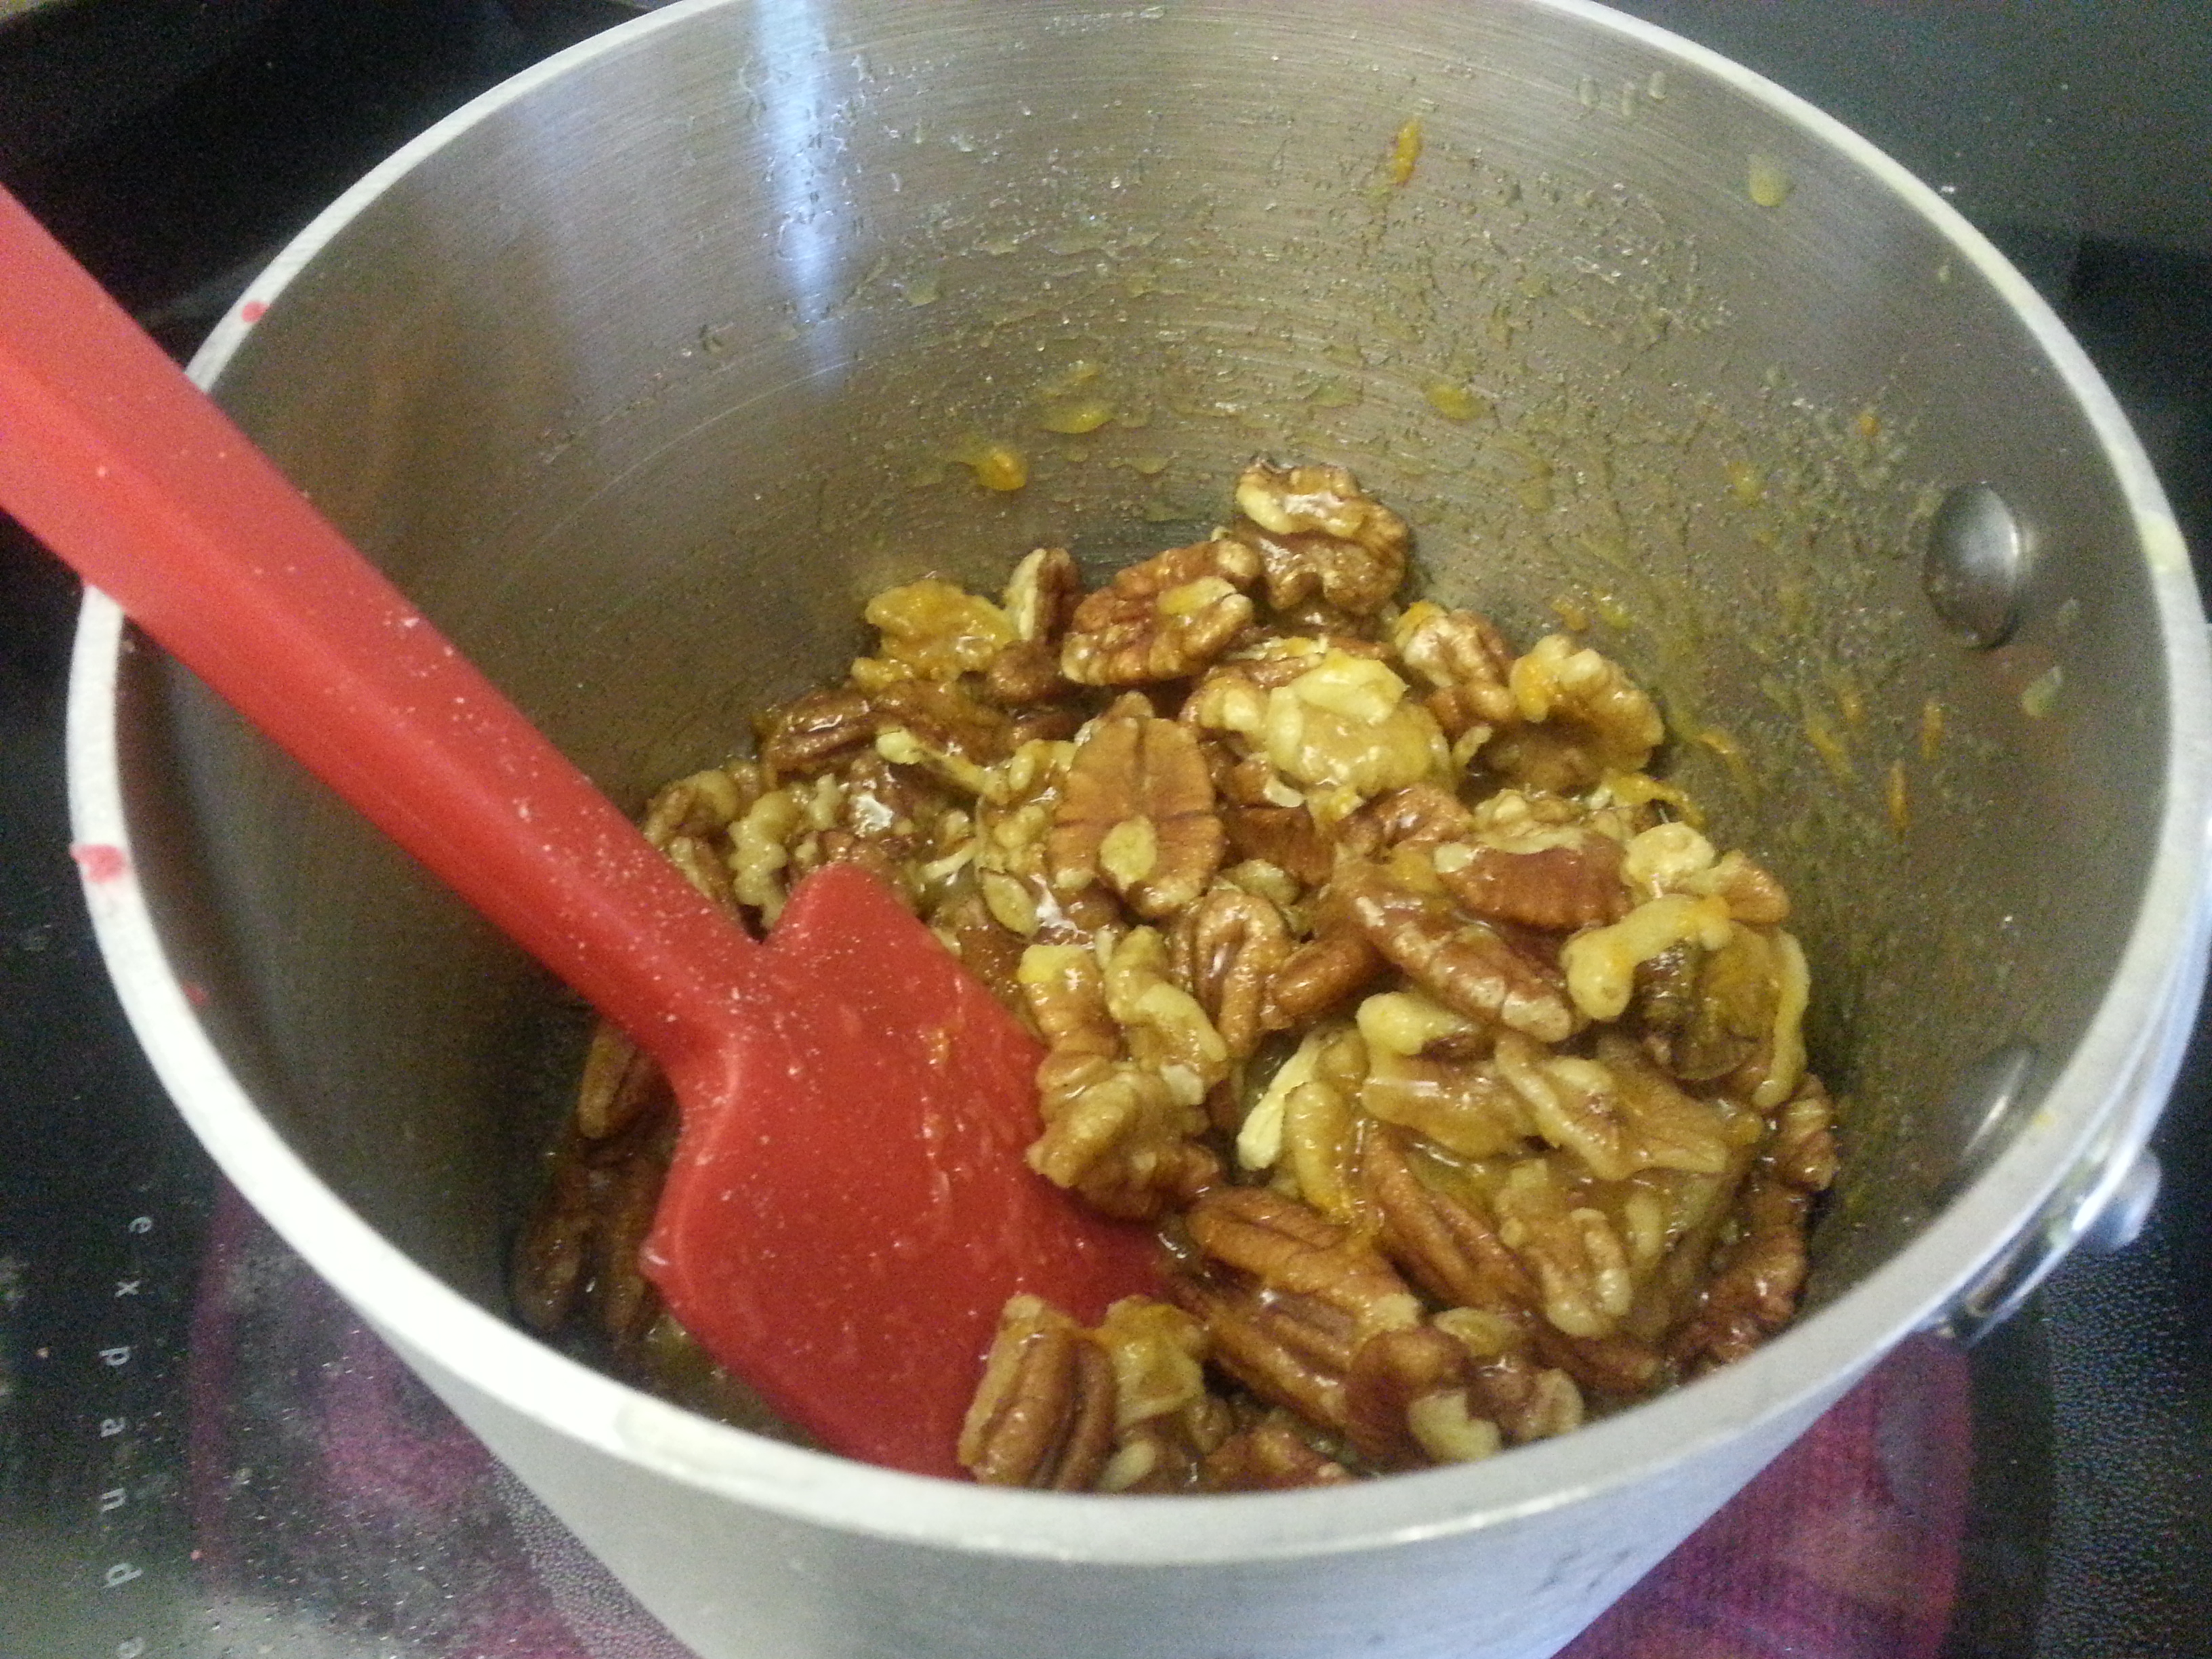
Once the sugar has begun to dissolve, add the nuts to the pot. Bring the mixture to a simmer, stirring vigorously throughout, and cook until most of the liquid has been absorbed (5-6 minutes).

20130504_114629Spread the nuts out onto a baking sheet and separate using a fork. Once completely cool, store in a well-sealed container at room temperature. And again, this is if you actually have any to store.

20130504_115611

20130504_125706So that was what we enjoyed with frosty mint juleps as Orb made his valiant gallop from almost the back of the pack, to a massive garland of roses.

20130504_20073320130504_192851

Dioji found all of this very exhausting.

Dioji found all of this very exhausting.

It was a really wonderful way to spend a Saturday, tasting and seeing things that reminded me of my mother-in-law. Sometimes it hurts to think about Lynn, because the fact that she is gone is still so raw. But Saturday was one of the first times that the cheerfulness I remember overshadowed those pangs of sadness. I am grateful that she shared so much of her home with me, and hope that I have done her proud sharing it with you.

Ciao for now,

Neen

Oh, Canada? Thanks for the Butter Tarts!

13 Apr

When I visit Pittsburgh, there are certain things that are required eating. It’s unfortunate (or maybe fortunate?) that I’m not there long enough to entirely destroy the faaaairly clean  diet I have so carefully constructed for race season. I’m not ashamed to admit that I’ve had excessively vivid dreams about pancakes at Pamela’s. We seem to lack decent breakfast places around where we live here, and really it’s probably the easiest meal to cook anyway, but sometimes…damn, I want those pancakes.

However this isn’t about my homeland. The Shakespeare Association of America’s yearly conference was held in Toronto, ON this year, so one of our resident Canadians was waxing poetic about some of her favorite foods from home. One of these was Nanaimo Bars, which if you haven’t made, you really, really should. It’s a three layer bar cookie that has pretty much everything good in it: graham crackers, coconut, almonds, chocolate, butter, vanilla custard…nom nom nom…you get the idea. The official recipe from the city of Nanaimo can be found here: http://www.nanaimo.ca/EN/main/visitors/NanaimoBars.html I followed it to the letter, using Bird’s custard powder as was specifically recommended to me for maximum authenticity.

But for me, the treat that sounded most delicious was the Butter Tart. From the very name, you can probably guess why it appealed to me. I’ve given monologues on my love for making pastry dough, and just about any recipe that requires a good pâte brisée is right up my alley. People fear pie dough, it’s one of those elusive kitchen tasks that scares off a lot of cooks. It is heat and humidity sensitive, so you really need to trust your intuition. Fortunately, the advent of the food processor has made it much easier to manipulate. For things like biscuits I still prefer to go by hand, but when it comes to tart or pie shells I really prefer the food processor to get that perfectly fine sandy texture. And honestly? If you put all of the ingredients together and just doesn’t seem right, pat it out until it’s thin, sprinkle some cinnamon and sugar on top, and make cut-out cookies. Bake at 375 F until they feel dry, about 7-8 minutes. Have no fear my friends, because even screwed up pie dough is delicious and useful.

Anyway, I digress. After my friend and colleague finished describing the butter tart, all I could think was that it sounded like someone took pecan pie filling, nixed the nuts, and put in raisins instead. Intriguing! Since the tarts are small, I decided to use a butter-cream caramel for the filling, and rather than relying on corn syrup to help it set up I went with some eggs. Between caramel and raisins, it seemed like there was quite enough sweetness going on there already.

Butter Tarts

adapted from The Joy of Baking and a description from a certain Curator of Art.

Neen’s Super-No-Fail Pâte Brisée

  • 1 1/4 cups all purpose flour
  • 4 oz. butter, cut into small pieces and briefly chilled in the freezer (5-10 minutes)
  • 3/4 tsp. salt
  • 1 tbsp. granulated sugar
  • 1/8 – 1/4 cup cold water (the colder, the better.)

Butter Tart Filling

  • 5 tbsp. unsalted butter
  • 1 cup light brown sugar
  • 2 eggs at room temperature
  • 1 tsp. vanilla extract
  • 1/4 cup heavy cream
  • 1/2 cup raisins

Preheat the oven to 375 degrees F.

Begin by making the pâte brisée. Combine the flour, sugar, and salt in the bowl of a food processor and blend well. Add the butter and pulse until the mixture is a fine, sandy texture. Slowly add water, pulsing intermittently, just until the dough begins to form pebbly chunks. Once you can pinch the dough between your fingers and it adheres together, it’s ready. Quickly bring the dough together in a ball and then pat out into a circle about 6-7 in. in diameter. Wrap it up in plastic wrap, and refrigerate until it feels firm enough to roll out. I don’t like the dough to get too hard, so I usually only wait about 15 minutes. I find it easier to work with when it is still a little bit soft.

Once the dough has chilled, roll it out until it’s about 1/4 in. thick, and then cut into circles 4 in. in diameter. For size reference, I used a pint glass to do that part.

cutting tart shells

Fit the dough circles into a 12 cup muffin tin and pat them down gently and evenly. (Take your extra dough scraps and make cookies!) Set the tart shells aside while you prepare the filling.

tart shells

Using a stand or hand mixer, beat the butter and brown sugar together until light, smooth, and creamy. Add the eggs one at a time, beating between additions, and then add the vanilla extract.

Stir in the cream by hand and mix until smooth.

Place an even amount of raisins in the bottom of each tart shell and then add a spoonful of filling to each tart. Repeat spooning filling into the shells until you’ve used all of it. It ended up being about 2 tbsp. in each tart.

Bake the tarts for 16-17 minutes, or until the filling is puffed up and has set. The pastry will be golden-brown. The filling will deflate after you take them out of the oven.

Place the pan on a wire rack and cool the tarts completely before de-panning. I actually chilled them in the fridge for an hour or two and then ran a knife around the edge of each. They came out very easily, one of the fortunate side effects of buttery pastry. Serve chilled or at room temperature.

whole tarts

The recipe makes 12, but I cut them in half to serve, so there were 24 portions to go around.

more finished tarts

Verdict? Well, my friend and colleague said that they tasted just like the ones her grandmother used to make—and that that was a very good thing. It made my day to hear such a compliment, as you can imagine.

So get to making this delicious treat from our friends up north! Between these and the Nanaimo bars, you might find yourself wondering how quickly you can pack up and move to where they are consistently available.

Ciao for now,

Neen

Completely Counter-intuitive

18 Mar

Guess what we’re going to do today? We’re going to make BISCUITS! And we’re probably going to make a few people cry or write me angry letters.

I make biscuits and bacon for Joe almost single weekend, and use a pretty basic method. Always by hand, never in the food processor. Always all-butter (a cube or two of lard if I have it), never shortening. Always patted gently, never rolled out, and cut only once. Dough scraps are mashed together to make a mutant (but still delicious) biscuit, but the dough is NEVER re-rolled. And if it gets remotely warm while being handled, to the freezer with it!

The point here is that I’ve been threatened by enough Southern cooks in my life to know that YOU DO NOT OVER HANDLE THE BISCUIT DOUGH. Want them tender, crispy, and flaky? The less you touch it, the better. Otherwise: Bricks. Buttery, delicious bricks, but heavy and flat all the same.

There was an incident. I blame the bad reality television I leave on in the background when I’m in the kitchen. I was probably momentarily horrified by seeing an individual take a piece of raw chicken out of a marinade to cook, and then proceed to begin reducing the remaining marinade into a sauce. Mmm, salmonella! Anyway, an incident. I tossed my flour, salt, and baking powder together and then added the cubed, cold butter. As I worked my hands through it, quickly breaking and smearing the butter into small fragments, I thought “This is taking longer than usual…”

After adding the milk, the dough came together as usual…but the texture was different. It wasn’t sticky or too dry to come together, it just felt different. I chalked it up to paranoia and tossed the dough in the fridge. As I began to close the door to the refrigerator, I noticed that the 16 oz. tub of butter I’d bought earlier was nearly empty. “How did I go through this much butter this week? I didn’t even bake anything for work…”

(Censored expletive.)

"Why does this feel so light?"

“Why does this feel so light?”

A synapse clearly fired wrong, because the normal ratio of butter to milk is 1:2 in my biscuit dough recipe. Normally it’s 3 oz. butter and 6 oz. milk. And yet somehow that morning I was convinced that they were equal 6 oz. portions. “Now what?”

It occurred to me that the proportion of butter:flour made the ratio slightly closer to a croissant dough or pate brisee than a biscuit, but croissants use yeast, so it’s not abnormal there to handle the dough a lot. And pate brisee doesn’t need to rise, and has practically no liquid at all. At this point I figured that while I was already going off into left field, that I might as well just go all the way and see what resulted.

Something wonderful happened.

Flaky Layer Biscuits

The second time I made these, I made a few improvements to the methodology, and a 1 oz. reduction in the amount of butter. This was because the most inner layers in the first batch were over-saturated and a little greasy for my taste.

  • 9 oz. flour (about 2 cups, lightly scooped)
  • 5 oz. butter, cubed and chilled
  • 6 oz. whole milk or buttermilk
  • 2 tsp. baking powder
  • 1 tsp. salt

In a medium sized mixing bowl, mix the flour, salt, and baking powder.

20130317_083011

Add the cubed butter. Smear and break up the pieces until the mixture is pebbly. The largest pieces of butter should be pea-sized.

Add the milk / buttermilk and stir the mixture with a fork until a rough dough forms.

20130317_084012

Transfer the dough to the counter and pat it into a small rectangle.

20130317_093225

Wrap this in plastic wrap and refrigerate it for a half-hour or until it is firm enough to roll.

Remove the dough from the plastic wrap and roll into a 9 x 17 in. rectangle.

20130317_093459

Letter-fold (as in my croissant recipe) into thirds, and then rotate the dough 90 degrees and repeat the process.

20130317_09354820130317_09361020130317_09371820130317_101009

Wrap the folded dough in plastic wrap and refrigerate for a half-hour.

Remove the dough from the plastic wrap and roll into a 9 x 17 in. rectangle, and again letter fold into thirds, rotate, and fold again. This time, cut the rectangle in half, and stack the two squares on top of one another, making sure that the folded sides of each square are at opposite ends. Press down, and then wrap the folded dough tightly in plastic wrap and refrigerate for a half-hour.

20130317_10115920130317_105140 20130317_10152120130317_101543

Remove the dough from the plastic wrap for the final time, and repeat the previous three-step process. Then roll or press it out to 1/2 in. thickness.

20130317_10522720130317_105420

Cut into 12 squares with a sharp knife or pizza wheel. Place the biscuits on a parchment-lined baking sheet and refrigerate while the oven preheats.

20130317_105805

Preheat the oven to 375 degrees. Brush the tops of the biscuits with a beaten egg or a little bit of cream or milk.

20130317_110659

Bake for 20-25 minutes or until fluffy and golden brown.

20130317_11385220130317_113830

Then you can enjoy slowly peeling apart all of the buttery layers and eating a delicious biscuit. Perfectly soft and flaky in the middle, a touch salty, and crisp on the outside. Voila!

20130317_114122

I was convinced these were going to be masonry equipment, but the result was opposite in nearly every way. The texture was just incredible, and they needed absolutely nothing spread on them (although fresh jam would be fantastic I’m sure). If, like me, you wish to gamble with your cholesterol numbers…they’re kind of amazing alongside a fried egg that’s still slightly runny.

It’s not the quickest biscuit recipe, but it’s hands-down my new favorite. I doubt I’ll have the patience to make it my every-weekend recipe. Even so, it was truly the happiest of accidents.

So go ahead. Handle the dough, roll the dough, and go nuts. Follow what I’ve written and you too will wonder why everyone has been lying to you. Maybe it’s a conspiracy among southern cooks to never reveal this secret. If I disappear, I wish you to assume that I’ve been kidnapped by someone’s grandma and locked in a basement for my crimes. Happy baking!

Ciao for now,

Neen