Archive | Recipes RSS feed for this section

The Zen Balance of Maple-Cured Smoked Bacon

16 Jul

Talk about a hiatus, eh? Well, Neen has not abandoned her Notes, but the last few weeks have been a little bit tricky. My last week at the Folger was the epitome of bittersweet, and frankly I’ll admit that I’m still grappling with what and who I am now. It sounds strange; I never thought that I was so attached to seeing myself as Associate Production Editor of Shakespeare Quarterly until I suddenly couldn’t do it anymore.

Now Im the boss. That is beyond weird. Yes, the individual who hates being bossy or delegating tasks was suddenly thrust into the bizarre managerial scenario of being her own boss. And though I’m not perfect at it, I’m getting the hang of keeping my days busy and varied. I do crave a little bit of structure, which is on the horizon in the form of a recent acceptance into Tufts’ graduate certificate program in nutrition science for communications professionals, and (provided the application and interview process go well) beginning yoga teacher training in the fall at Pure Prana.

Where I’m headed with my career is vaguer. I write new letters and apply for jobs every day, but nothing has leapt off of the page at me yet. So part of what I am hoping to do through these personal and professional development courses is figuring out what exactly I’d like to be next. I’ve already decided that I don’t want my identity to hinge on it…who I am is Neen.  And pigeon-holing a person, or boiling down their essence to a single occupation? Well…that seems oversimplified to say the very least.

But there are some constants and certainties in life, and one of those is surely cooking. It has remained (along with family) as my home base, my safe place throughout this entire internal earthquake. It has been where I manage to find a center…and so what recipe more appropriate to share with you than the sweet-salty balancing of over-the-top-crazy-good MAPLE BACON.

My last few days at the office were full of last-minute trips to my favorite walkable spots on the Hill, and especially to Eastern Market. I decided to make some duck prosciutto (recipe here) and try out my new Cameron stovetop smoker on a batch of maple bacon. After acquiring the necessary animal parts at Union Meat (thanks guys!), I stopped to talk to Mrs. Calomiris and she as always sent me on my way with an armload of the perfect accompaniments, and an extra banana and a handful of cherries (“for your walk back to the office”). I felt rejuvenated after that trip, and ready to forge ahead with so many of the food projects I’d put off due to lack of time. So yes, while I haven’t written to you recently…oh, I have been cooking. And rest assured that this “so-good-it’s-gonna-make-you-swear” bacon is just the first of many treats to come.

Maple Cured Smoked Bacon

  • 5 lb. pork belly, skin on
  • 2 oz. kosher salt
  • ¼ cup dark brown sugar
  • 2 tsp. pink curing salt
  • 1 tsp. freshly ground black pepper (I used a citrus pepper blend)
  • ¼ cup dark grade b maple syrup

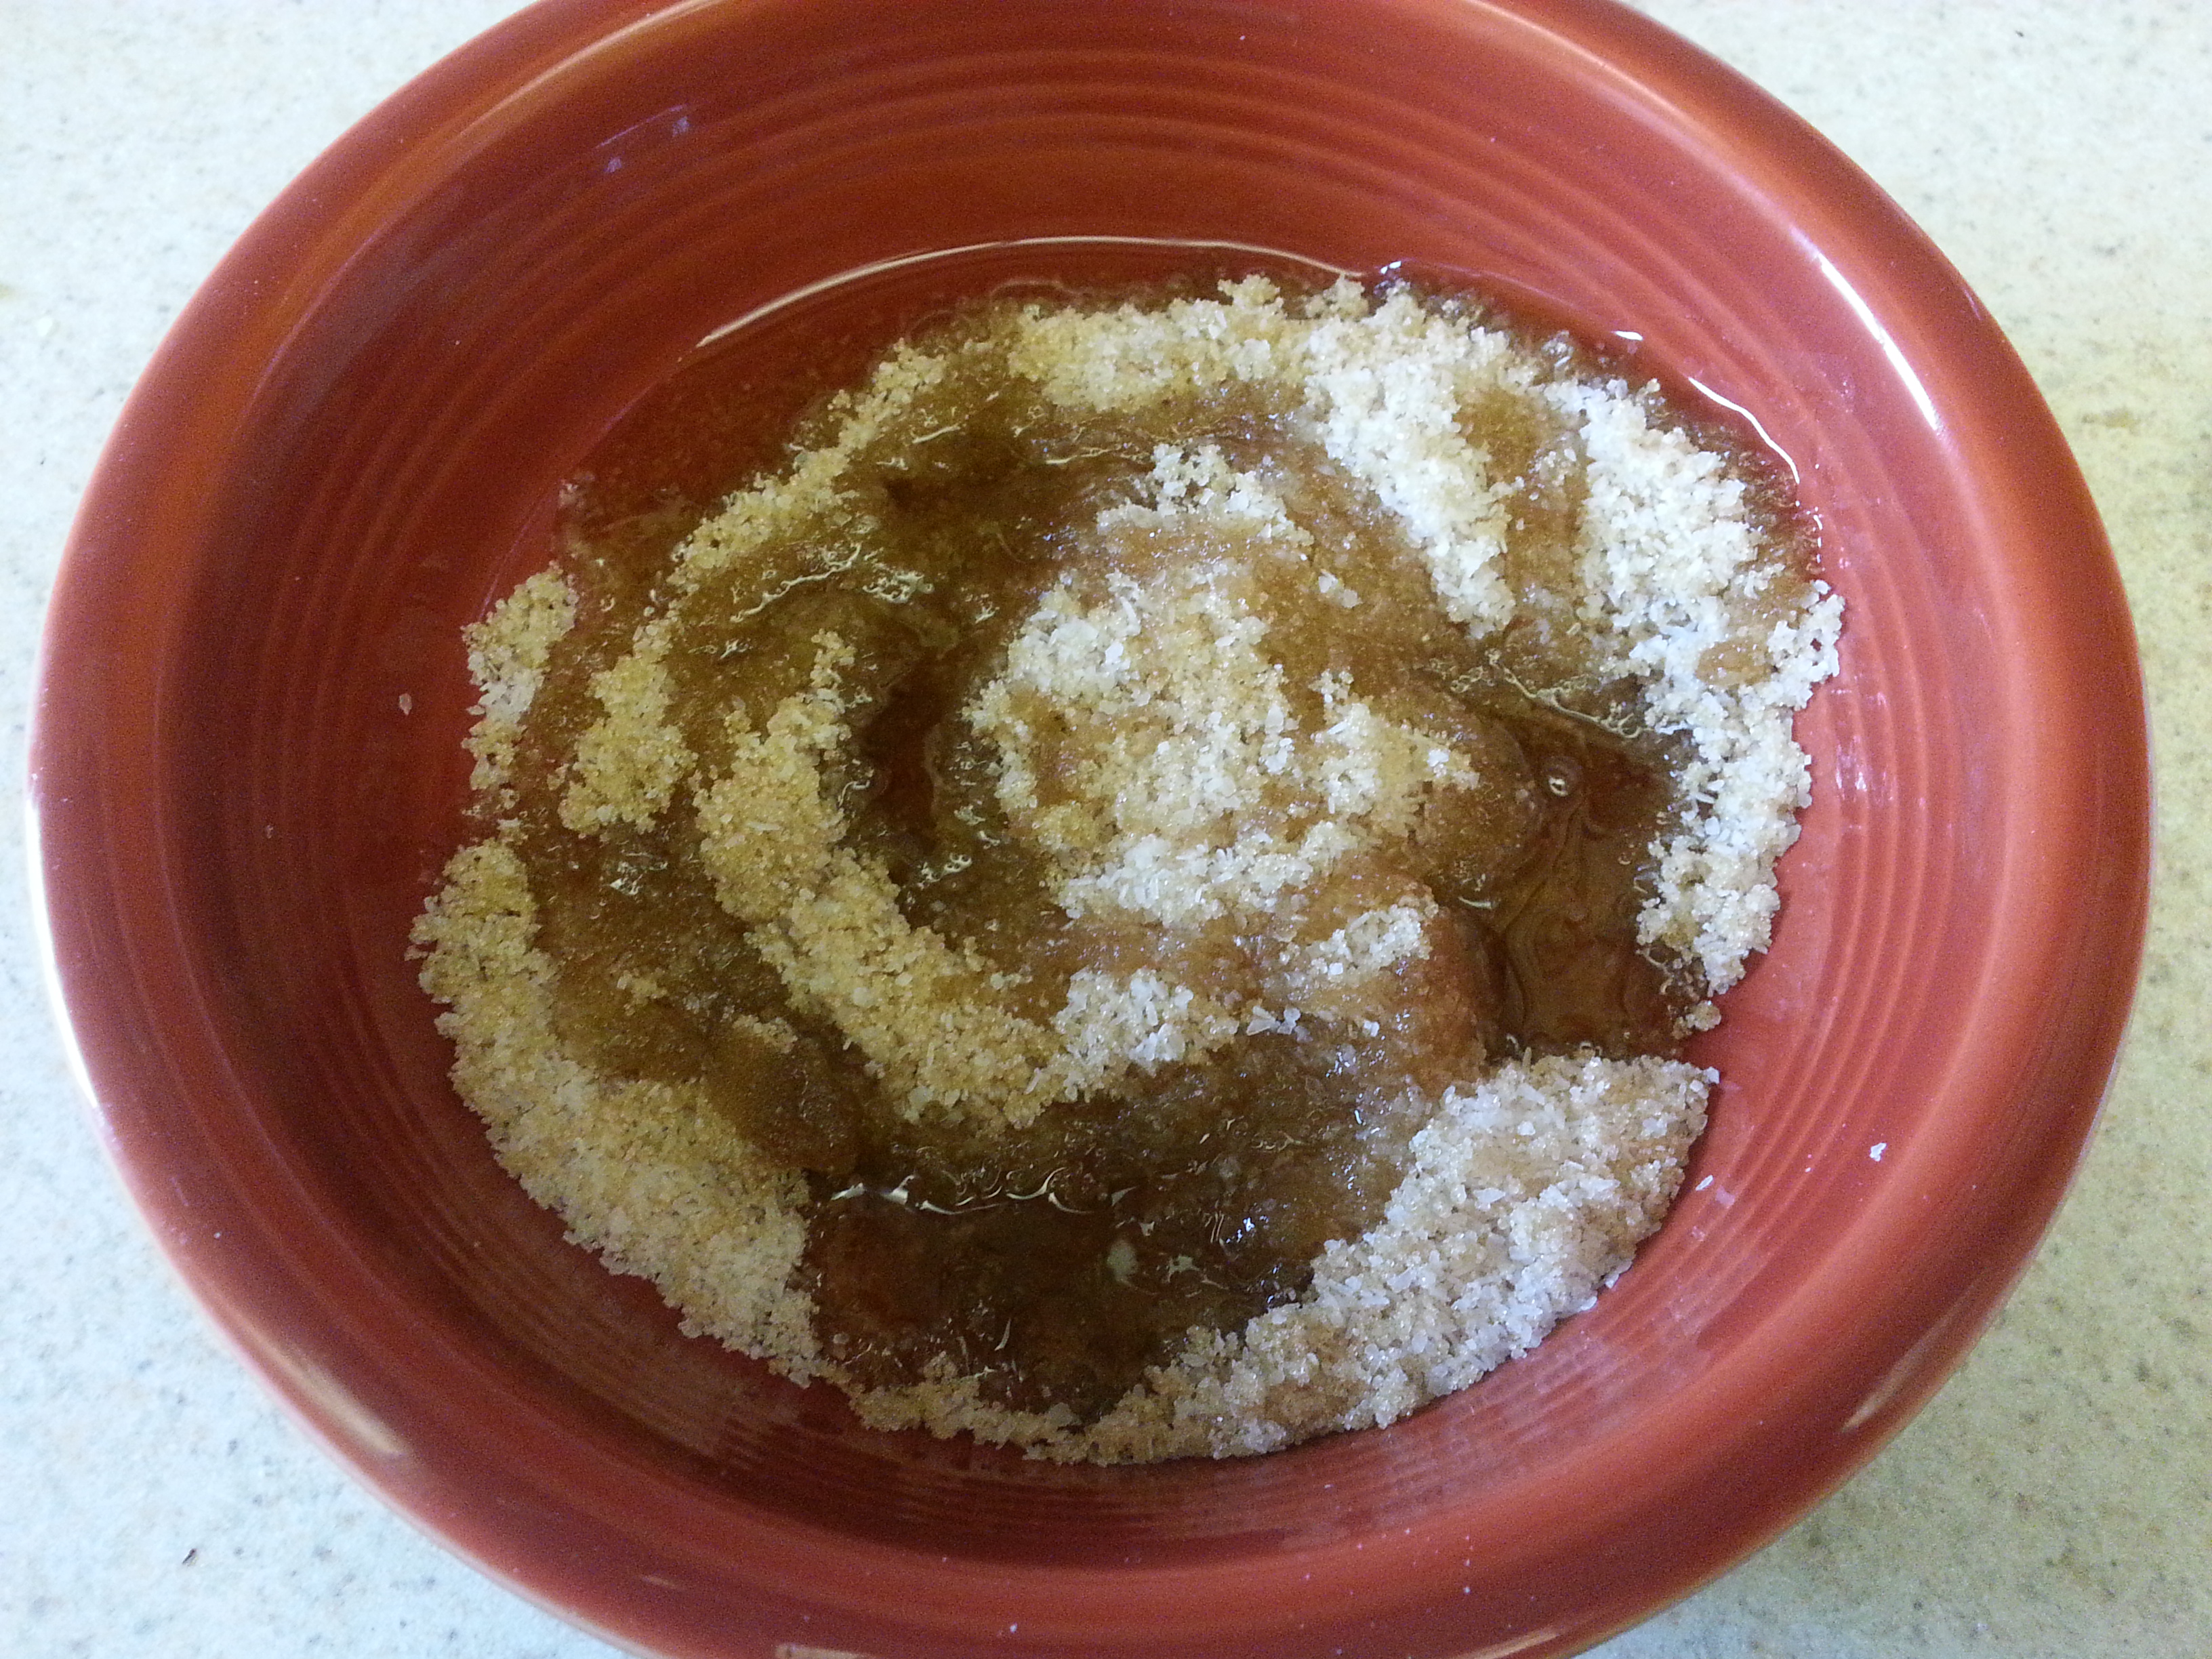
Combine the kosher salt, brown sugar, pink salt, and black pepper, and mix well. Add the maple syrup and stir until the ingredients are thoroughly combined.

20130612_17185520130612_171934
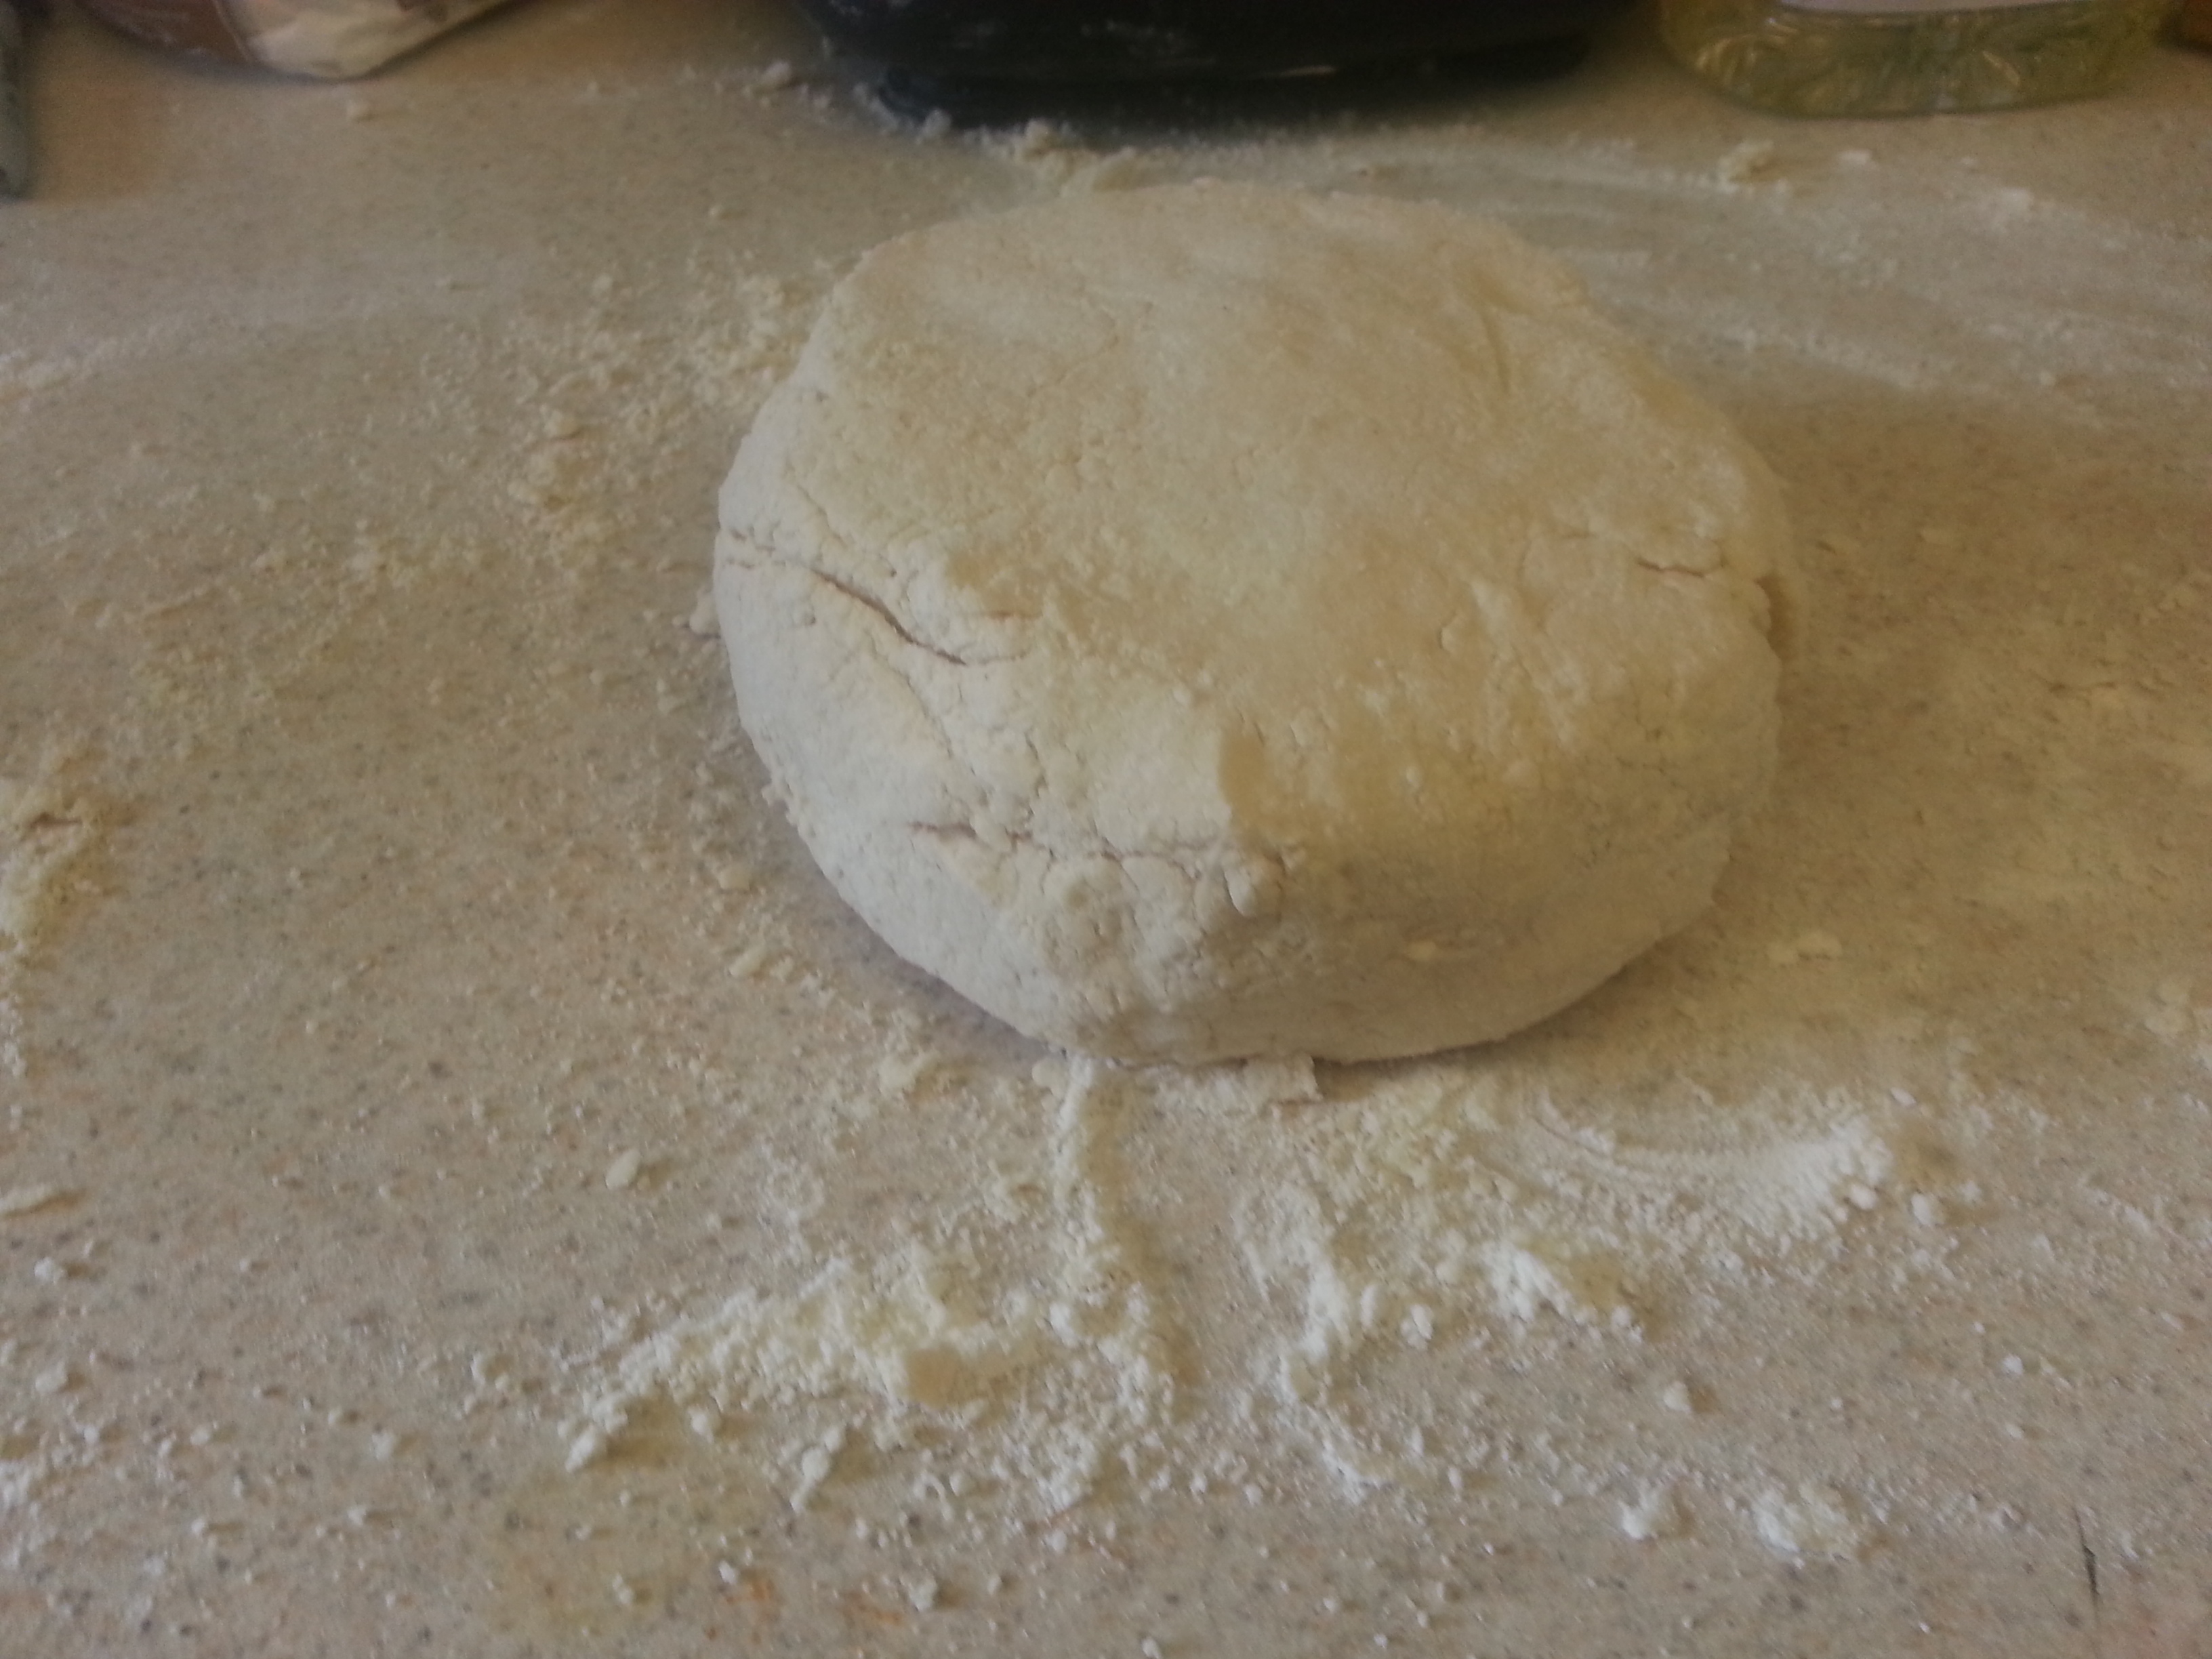
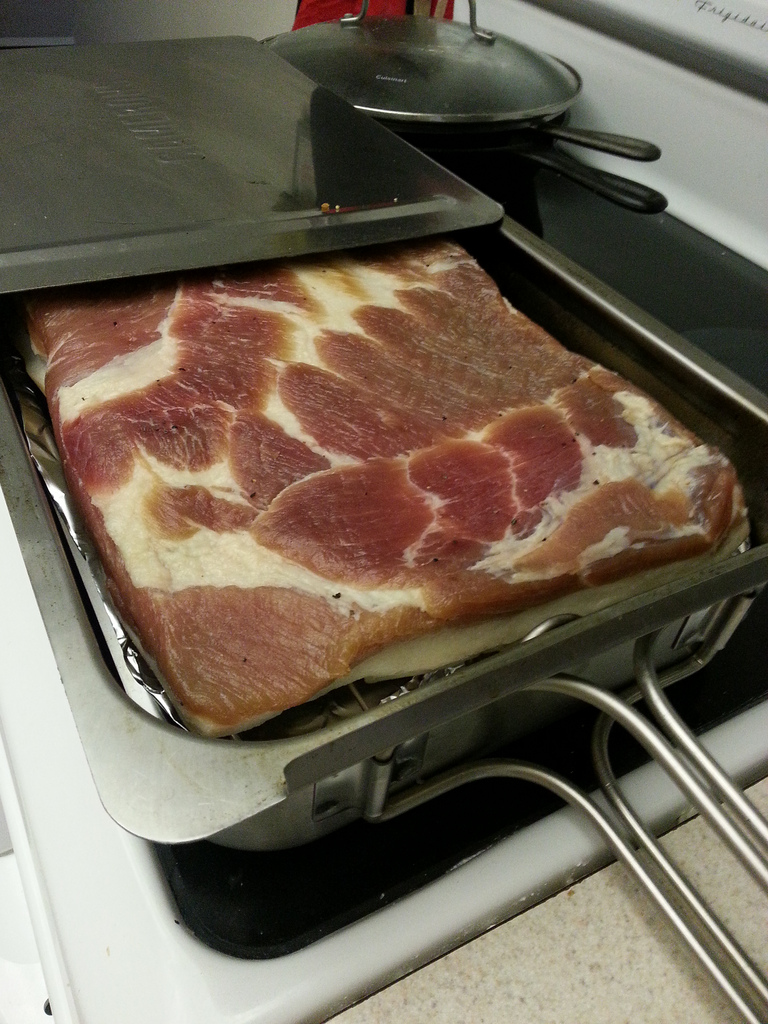
Trim the pork belly until it is as uniformly shaped as possible. This is important because you want the cure to penetrate the meat evenly. Place the trimmed pork belly in a snug-fitting nonreactive baking dish. I used a 9×13 in. pyrex baking pan, but the pan you use will be dependent on the size and shape of your piece of meat.

20130612_172003Rub the meat thoroughly with the cure on all sides.

20130612_172401Cover the baking dish with plastic wrap and press down to remove as much air as possible. Move the dish to the refrigerator and allow the belly to cure for one week, flipping it every other day to redistribute the cure.

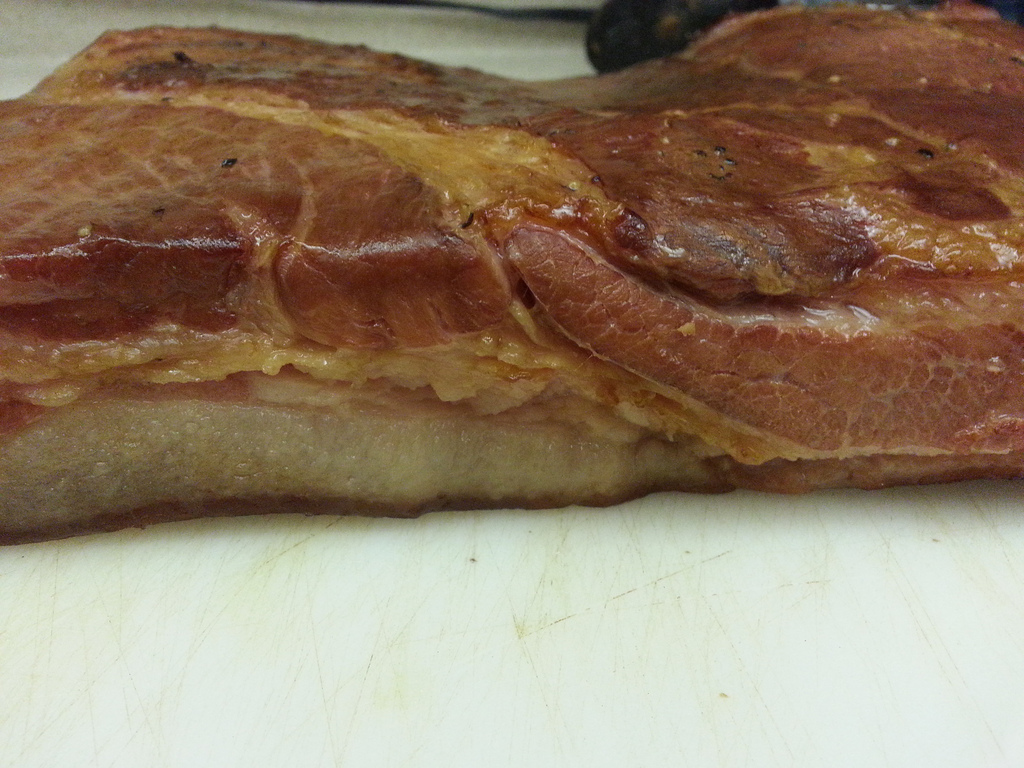
The bacon is cured when the meat is firm to the touch at the thickest point. If it still feels squishy at the end of a week, flip it and allow it to cure for another 24 hours. This belly took 8 days to fully cure. Once the meat feels firm, rinse and pat dry and move it to a wire rack over a baking sheet and refrigerate uncovered for 24 hours. This will allow the surface of the meat to develop a sticky pellicle for the important forthcoming smoky goodness to adhere to.

Now, if you have an outdoor smoker you’ll want to preheat it to about 250 degrees. I used an indoor stovetop smoker set over medium heat. For this batch, I selected applewood chips to add a little bit of fruitiness to the caramel-y molasses flavors in the brown sugar and maple syrup cure.

9299857471_6773c4974b_b
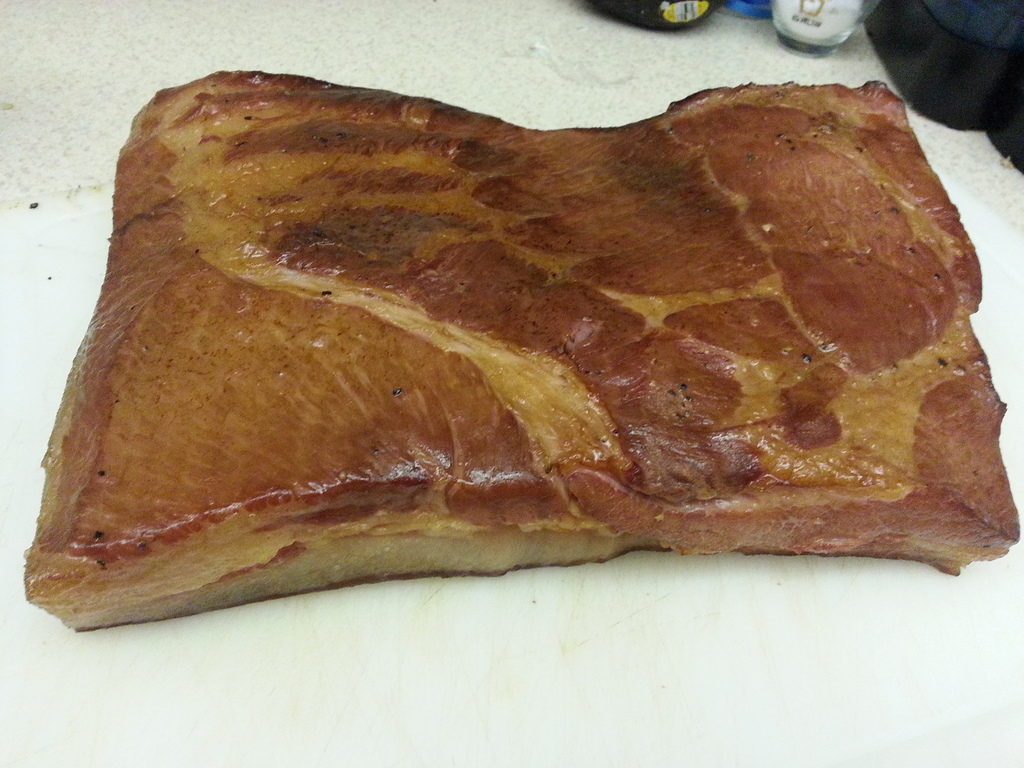
Smoke until the belly reaches an internal temperature of 150 degrees and then allow it to cool completely before attempting to slice.

9299823731_80b87f011f_b9299844553_eda8328fcf_b
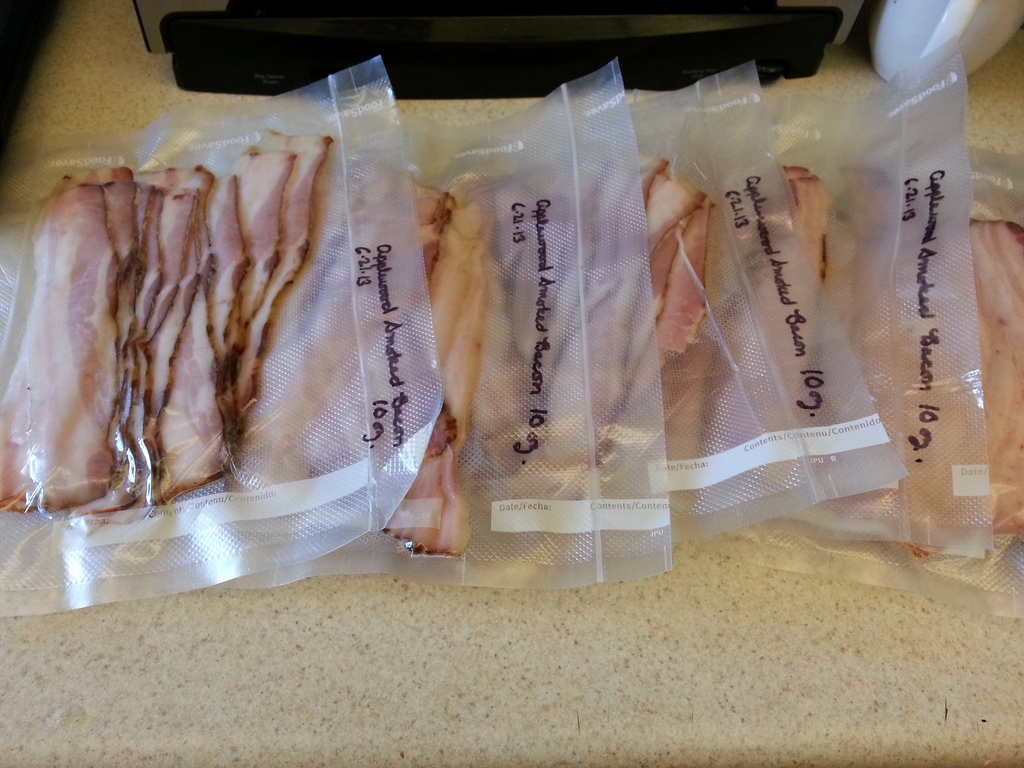
Go ahead and slice it down yourself if you’re feeling like Chef Sakai. Me? I sought the excellent helpful hands of the folks at Springfield Butcher. For a more than reasonable $7 fee, they sliced the whole belly down for me and I had over 4 lbs. of perfectly even slices to share with family over our vacation trip to Fenwick Island.

9302600758_fbfc61dd8e_b9302584984_d72cf909bf_b9302554436_55faeb656f_b20130624_075909Verdict? Salty, sweet, deep caramel richness, and a fruity smoky finish. Well-rounded to the point of reaffirming my belief that finding balance in the kitchen is just a step away from translating it to other facets of life. Nobody has everything figured out, and even if someone did…wouldn’t that be kind of boring and predictable? I think I’ll keep looking for and refining the edges, because like the yogis always tell me: When you fall out of an inversion or a balancing posture, just reset your foundation and try again. Falling just means you’re reaching for something new.

20130705_09463620130705_094656

Something better.

Ciao for now,

Neen

Recipe Megapost: My Old Kentucky Home

6 May

Roger, our native Kentuckian, invited Joe and I over for Derby Day this year. He and Lynn always loved celebrating the Kentucky Derby. I imagine that it was particularly special for her, having grown up so close to Churchill Downs.

While I pawned mint julep duty off on the men-folk, I took charge of the food. Roger’s only “must-have” request was derby pie, an amazing chocolate-nut pie that’s possibly sweeter than actually winning the race itself. Other than that, I was free to do as I pleased.

It got me thinking a lot about Lynn. She liked to get me cookbooks, especially Southern ones. Last summer she gave me an edition of Seasoned Cooking of Kentucky, and several years ago an edition of Charleston Receipts. But the foods that make me think of her are the ones that she talked about the way that I talk about food from Pittsburgh, and those that she eventually wrote down for me the on cards I received at the bridal shower last year.

20130503_142327One of the things I remember her always loving was ham biscuits. Exactly what they sound like; cured, country ham (not the sweet, smoked style of Virginia), thin sliced and piled on top of fresh, fluffy biscuits. Roger mentioned in one of his recent emails to me that they were indeed her favorite, so I searched high and low—the wonderful butcher at Union Meat finally came through with beautiful, red slices of country ham, and I went on a search for a sturdy, slider-style biscuit recipe. The next item on the menu was from one of the books she’d given me.  Pickled shrimp are a popular picnic food in the summer that sounded just refreshing enough to cut some of the richness in the menu (oh believe me, we haven’t even started). Steamed, chilled shrimp, mixed with some vegetables, herbs, and a sweet/sour pickling liquid, all layered into a jar to marinate overnight. Along with the ham biscuits, and pickled shrimp, I figured a vegetable had to enter into the picture somewhere, so I roasted some beautiful spring Brussels sprouts with herbs de provence,  red onion, and bacon and served them at room temperature. They were an amazing contrast to the shrimp.

But the Hot Brown was what intrigued me the most. Not only was it an iconic dish, but I’d never made it before, and had only seen prepared briefly on a Food Network segment done at the Brown Hotel. On one of the recipe cards she shared with me, Lynn wrote down the Brown Hotel’s recipe for their signature dish. What is this incredible food item, you might ask? It is an open faced turkey sandwich on thick slices of Texas toast, covered by creamiest, richest pecorino romano mornay sauce I have ever made, broiled until golden, and then finished with sliced bacon, fresh parsley, and paprika.

20130504_164420

And yes, this whole ordeal ended with pie. Because you should always save room for pie.

Pickled Shrimp

  • 1 lb. peeled, jumbo cooked shrimp with tails
  • 1/2 red onion, diced
  • 1/2 yellow bell pepper, sliced
  • 1 fresh bay leaf
  • 1/3 cup peanut oil
  • 1/3 cup white wine vinegar
  • 1 tbsp. sugar
  • 1 tbsp. lemon zest
  • 1 tbsp. fresh lemon juice
  • 1 tsp. Dijon mustard
  • 1 tsp. hot sauce
  • 1 tsp. kosher salt
  • 1 garlic cloves, pressed
  • 1 tsp. dried crushed red pepper

20130503_170453Layer the shrimp, onion, bell pepper, and bay leaf in a quart-sized mason jar.

20130503_170919Whisk the remaining ingredients together, and then pour over the shrimp and vegetables. Seal and allow the shrimp to marinate for 1 day, shaking and turning the jar every few hours or so.

20130503_171702

20130504_111819

20130504_163846

Ham Biscuits

These biscuits needed to be sturdier, and a little taller than normal to accommodate being made into sandwiches. Three leavening agents keep them light and fluffy, while giving you some freedom with manipulating the dough.

  • 1/2 envelope active dry yeast
  • 2 tbsp. warm water (110-115 degrees F)
  • 2 1/2 cups all-purpose flour
  • 1/2 tbsp. sugar
  • 1/2 tbsp. baking powder
  • 1/2 tsp. baking soda
  • 1/2 tsp. salt
  • 4 oz. cream cheese, cut into pieces and chilled
  • 2 oz. unsalted butter, cut into pieces and chilled
  • 1/2 cup plus 2 tbsp. buttermilk
  • Slices of country ham
  • Dijon mustard, mayonnaise, or other condiments

Preheat oven to 400 degrees F.

Combine yeast and warm water in a small bowl; let stand 5 minutes or until foamy.

Whisk together flour, sugar, baking soda, baking powder, and salt, then cut cream cheese and cold butter into flour mixture with a pastry blender or fork until crumbly.

Combine yeast mixture and buttermilk, and then add to the flour mixture, stirring just until dry ingredients are moistened. Turn dough out onto a lightly floured surface, and knead lightly 6 to 8 times.

20130504_073019Roll or pat the dough to 3/4-inch thickness. Cut with a round cutter or slice into squares.

20130504_073652Arrange biscuits on a parchment-lined baking sheet, brush with an egg wash or melted butter, and bake for 15 minutes or until deep golden-brown.

20130504_075415

Split biscuits and top with thin slices of country ham and condiments as desired.

20130504_160022

Roasted Brussels Sprouts

  • 1 lb. Brussels sprouts, washed, outer leaves removed, and cut in half.
  • 1 tbsp. olive oil
  • 2 slices bacon (cooked), and 1 tbsp. bacon drippings
  • 1/2 tbsp. white wine vinegar
  • 1/2 red onion, diced
  • 1 tsp. herbs de provence
  • Salt and pepper to taste

20130504_094401

Toss all ingredients together in a large bowl and taste for seasoning. Then spread the sprouts on a baking sheet and roast at 375 degrees F until lightly browned, but not soft. It will take anywhere for 15-30 minutes depending on the size of your sprouts.

20130504_15125220130504_163931

Kentucky Hot Brown

I used the Brown Hotel’s original recipe and followed it to a T. The only exception being that I was able to make three sandwiches, rather than two. Honestly, I think that the amount of sauce this yields could easily be spread across four. The recipe can be found here, but here’s a photo sequence and my description of the process…

Gather your ingredients and preheat a broiler.

20130504_171142Lay one piece of crustless Texas toast in an oven-safe dish, and cut the other into triangles, putting them on either side of the whole piece.

20130504_170551Layer turkey on top, and put a slice of Roma tomato on two sides of the Texas toast.

20130504_172040

Make a roux and cook it until smooth, then add the cream and cook over medium heat, whisking constantly until the mixture begins to simmer lightly and gets very thick.

20130504_17251920130504_172656Add the pecorino cheese and whisk until smooth. Add salt and pepper to taste.

20130504_17353620130504_173625Ladle the hot mornay sauce on top of the turkey, and then place the sandwich under the broiler until lightly browned on top.

20130504_173800

Top with two slices of bacon and finish with a sprinkle of fresh parsley and paprika.

20130504_17465620130504_175043

Dark Bay Pie

The Derby Pie originated at the Melrose Inn, but the name is trademarked  by the Kern family and the owners are not shy about suing to protect it. Although numerous variations and recipes for this type of pie exist, to refer to anything that is not Kern’s recipe (which is again, heavily guarded by the owners) as Derby Pie is breaking the law. Hence, why my truly delicious AND SHAREABLE recipe has its own moniker, given for the final product’s similarity in color to that particular horse coat color.

  • 1 1/4 cups toasted, roughly chopped nuts – I used a mixture of pecans and walnuts
  • 3 large eggs
  • 3/4 cup brown sugar
  • 1/4 cup white sugar
  • 1/2 cup light corn syrup
  • 1/4 cup dark corn syrup
  • 1/2 cup all-purpose flour
  • 1/2 cup butter, melted and cooled
  • 1/2 tsp. salt
  • 2 tablespoons bourbon
  • 1 1/2 teaspoons vanilla extract
  • 3/4 cup semisweet chocolate chips
  • Pastry for one 9 in. crust

First, prepare your pastry. I use my super-no-fail pate brisee, of course! You can find that recipe right here, in the butter tart tutorial. After making the dough, patting into a disc, and refrigerating it, roll it out into a circle a bit larger than your pie pan, and then fit into the pan and crimp the edges. Return the crust to the refrigerator and chill for 30 minutes.

20130504_09175720130504_092234

Preheat an oven to 350 degrees F.

In a large bowl, whisk the eggs until thoroughly blended and slightly foamy. Add the brown sugar, white, sugar, light corn syrup, dark corn syrup, flour, and salt and whisk until smooth.  Add the melted butter, bourbon, and vanilla extract and mix thoroughly.

20130504_101233

Fold the nuts and chocolate chips into the mixture, brush the inside of the pie crust with a little bit of egg wash, and then pour the filling into the prepared pie crust.

20130504_10154920130504_101333(0)20130504_101745Bake for 50-60 minutes or until the center is just set and the edges are golden brown. It will deflate slightly as it cools.

20130504_11153020130504_11164120130504_112339

An hour after finishing everything up, I was putting my recipe cards safely back into the book when I noticed another one from Lynn that contained three simple ingredients: An orange, a cup of sugar, and two cups of pecans. Well shoot, I already had everything…so why not? Roger and I have since decided that these are far too habit forming. If you make them, not eating the entire batch will truly be a challenge.

Orange Pecans (and Walnuts)

Lynn’s recipe called for 2 cups of pecans, but I had a mixture of pecans and walnuts leftover from the Dark Bay pie, so I went with that.

20130504_113957Zest and juice the orange into a small, heavy bottomed saucepan. Add the sugar and mix well. Put the pan over medium high heat.

20130504_114512Once the sugar has begun to dissolve, add the nuts to the pot. Bring the mixture to a simmer, stirring vigorously throughout, and cook until most of the liquid has been absorbed (5-6 minutes).

20130504_114629Spread the nuts out onto a baking sheet and separate using a fork. Once completely cool, store in a well-sealed container at room temperature. And again, this is if you actually have any to store.

20130504_115611

20130504_125706So that was what we enjoyed with frosty mint juleps as Orb made his valiant gallop from almost the back of the pack, to a massive garland of roses.

20130504_20073320130504_192851

Dioji found all of this very exhausting.

Dioji found all of this very exhausting.

It was a really wonderful way to spend a Saturday, tasting and seeing things that reminded me of my mother-in-law. Sometimes it hurts to think about Lynn, because the fact that she is gone is still so raw. But Saturday was one of the first times that the cheerfulness I remember overshadowed those pangs of sadness. I am grateful that she shared so much of her home with me, and hope that I have done her proud sharing it with you.

Ciao for now,

Neen

Oh, Canada? Thanks for the Butter Tarts!

13 Apr

When I visit Pittsburgh, there are certain things that are required eating. It’s unfortunate (or maybe fortunate?) that I’m not there long enough to entirely destroy the faaaairly clean  diet I have so carefully constructed for race season. I’m not ashamed to admit that I’ve had excessively vivid dreams about pancakes at Pamela’s. We seem to lack decent breakfast places around where we live here, and really it’s probably the easiest meal to cook anyway, but sometimes…damn, I want those pancakes.

However this isn’t about my homeland. The Shakespeare Association of America’s yearly conference was held in Toronto, ON this year, so one of our resident Canadians was waxing poetic about some of her favorite foods from home. One of these was Nanaimo Bars, which if you haven’t made, you really, really should. It’s a three layer bar cookie that has pretty much everything good in it: graham crackers, coconut, almonds, chocolate, butter, vanilla custard…nom nom nom…you get the idea. The official recipe from the city of Nanaimo can be found here: http://www.nanaimo.ca/EN/main/visitors/NanaimoBars.html I followed it to the letter, using Bird’s custard powder as was specifically recommended to me for maximum authenticity.

But for me, the treat that sounded most delicious was the Butter Tart. From the very name, you can probably guess why it appealed to me. I’ve given monologues on my love for making pastry dough, and just about any recipe that requires a good pâte brisée is right up my alley. People fear pie dough, it’s one of those elusive kitchen tasks that scares off a lot of cooks. It is heat and humidity sensitive, so you really need to trust your intuition. Fortunately, the advent of the food processor has made it much easier to manipulate. For things like biscuits I still prefer to go by hand, but when it comes to tart or pie shells I really prefer the food processor to get that perfectly fine sandy texture. And honestly? If you put all of the ingredients together and just doesn’t seem right, pat it out until it’s thin, sprinkle some cinnamon and sugar on top, and make cut-out cookies. Bake at 375 F until they feel dry, about 7-8 minutes. Have no fear my friends, because even screwed up pie dough is delicious and useful.

Anyway, I digress. After my friend and colleague finished describing the butter tart, all I could think was that it sounded like someone took pecan pie filling, nixed the nuts, and put in raisins instead. Intriguing! Since the tarts are small, I decided to use a butter-cream caramel for the filling, and rather than relying on corn syrup to help it set up I went with some eggs. Between caramel and raisins, it seemed like there was quite enough sweetness going on there already.

Butter Tarts

adapted from The Joy of Baking and a description from a certain Curator of Art.

Neen’s Super-No-Fail Pâte Brisée

  • 1 1/4 cups all purpose flour
  • 4 oz. butter, cut into small pieces and briefly chilled in the freezer (5-10 minutes)
  • 3/4 tsp. salt
  • 1 tbsp. granulated sugar
  • 1/8 – 1/4 cup cold water (the colder, the better.)

Butter Tart Filling

  • 5 tbsp. unsalted butter
  • 1 cup light brown sugar
  • 2 eggs at room temperature
  • 1 tsp. vanilla extract
  • 1/4 cup heavy cream
  • 1/2 cup raisins

Preheat the oven to 375 degrees F.

Begin by making the pâte brisée. Combine the flour, sugar, and salt in the bowl of a food processor and blend well. Add the butter and pulse until the mixture is a fine, sandy texture. Slowly add water, pulsing intermittently, just until the dough begins to form pebbly chunks. Once you can pinch the dough between your fingers and it adheres together, it’s ready. Quickly bring the dough together in a ball and then pat out into a circle about 6-7 in. in diameter. Wrap it up in plastic wrap, and refrigerate until it feels firm enough to roll out. I don’t like the dough to get too hard, so I usually only wait about 15 minutes. I find it easier to work with when it is still a little bit soft.

Once the dough has chilled, roll it out until it’s about 1/4 in. thick, and then cut into circles 4 in. in diameter. For size reference, I used a pint glass to do that part.

cutting tart shells

Fit the dough circles into a 12 cup muffin tin and pat them down gently and evenly. (Take your extra dough scraps and make cookies!) Set the tart shells aside while you prepare the filling.

tart shells

Using a stand or hand mixer, beat the butter and brown sugar together until light, smooth, and creamy. Add the eggs one at a time, beating between additions, and then add the vanilla extract.

Stir in the cream by hand and mix until smooth.

Place an even amount of raisins in the bottom of each tart shell and then add a spoonful of filling to each tart. Repeat spooning filling into the shells until you’ve used all of it. It ended up being about 2 tbsp. in each tart.

Bake the tarts for 16-17 minutes, or until the filling is puffed up and has set. The pastry will be golden-brown. The filling will deflate after you take them out of the oven.

Place the pan on a wire rack and cool the tarts completely before de-panning. I actually chilled them in the fridge for an hour or two and then ran a knife around the edge of each. They came out very easily, one of the fortunate side effects of buttery pastry. Serve chilled or at room temperature.

whole tarts

The recipe makes 12, but I cut them in half to serve, so there were 24 portions to go around.

more finished tarts

Verdict? Well, my friend and colleague said that they tasted just like the ones her grandmother used to make—and that that was a very good thing. It made my day to hear such a compliment, as you can imagine.

So get to making this delicious treat from our friends up north! Between these and the Nanaimo bars, you might find yourself wondering how quickly you can pack up and move to where they are consistently available.

Ciao for now,

Neen

Completely Counter-intuitive

18 Mar

Guess what we’re going to do today? We’re going to make BISCUITS! And we’re probably going to make a few people cry or write me angry letters.

I make biscuits and bacon for Joe almost single weekend, and use a pretty basic method. Always by hand, never in the food processor. Always all-butter (a cube or two of lard if I have it), never shortening. Always patted gently, never rolled out, and cut only once. Dough scraps are mashed together to make a mutant (but still delicious) biscuit, but the dough is NEVER re-rolled. And if it gets remotely warm while being handled, to the freezer with it!

The point here is that I’ve been threatened by enough Southern cooks in my life to know that YOU DO NOT OVER HANDLE THE BISCUIT DOUGH. Want them tender, crispy, and flaky? The less you touch it, the better. Otherwise: Bricks. Buttery, delicious bricks, but heavy and flat all the same.

There was an incident. I blame the bad reality television I leave on in the background when I’m in the kitchen. I was probably momentarily horrified by seeing an individual take a piece of raw chicken out of a marinade to cook, and then proceed to begin reducing the remaining marinade into a sauce. Mmm, salmonella! Anyway, an incident. I tossed my flour, salt, and baking powder together and then added the cubed, cold butter. As I worked my hands through it, quickly breaking and smearing the butter into small fragments, I thought “This is taking longer than usual…”

After adding the milk, the dough came together as usual…but the texture was different. It wasn’t sticky or too dry to come together, it just felt different. I chalked it up to paranoia and tossed the dough in the fridge. As I began to close the door to the refrigerator, I noticed that the 16 oz. tub of butter I’d bought earlier was nearly empty. “How did I go through this much butter this week? I didn’t even bake anything for work…”

(Censored expletive.)

"Why does this feel so light?"

“Why does this feel so light?”

A synapse clearly fired wrong, because the normal ratio of butter to milk is 1:2 in my biscuit dough recipe. Normally it’s 3 oz. butter and 6 oz. milk. And yet somehow that morning I was convinced that they were equal 6 oz. portions. “Now what?”

It occurred to me that the proportion of butter:flour made the ratio slightly closer to a croissant dough or pate brisee than a biscuit, but croissants use yeast, so it’s not abnormal there to handle the dough a lot. And pate brisee doesn’t need to rise, and has practically no liquid at all. At this point I figured that while I was already going off into left field, that I might as well just go all the way and see what resulted.

Something wonderful happened.

Flaky Layer Biscuits

The second time I made these, I made a few improvements to the methodology, and a 1 oz. reduction in the amount of butter. This was because the most inner layers in the first batch were over-saturated and a little greasy for my taste.

  • 9 oz. flour (about 2 cups, lightly scooped)
  • 5 oz. butter, cubed and chilled
  • 6 oz. whole milk or buttermilk
  • 2 tsp. baking powder
  • 1 tsp. salt

In a medium sized mixing bowl, mix the flour, salt, and baking powder.

20130317_083011

Add the cubed butter. Smear and break up the pieces until the mixture is pebbly. The largest pieces of butter should be pea-sized.

Add the milk / buttermilk and stir the mixture with a fork until a rough dough forms.

20130317_084012

Transfer the dough to the counter and pat it into a small rectangle.

20130317_093225

Wrap this in plastic wrap and refrigerate it for a half-hour or until it is firm enough to roll.

Remove the dough from the plastic wrap and roll into a 9 x 17 in. rectangle.

20130317_093459

Letter-fold (as in my croissant recipe) into thirds, and then rotate the dough 90 degrees and repeat the process.

20130317_09354820130317_09361020130317_09371820130317_101009

Wrap the folded dough in plastic wrap and refrigerate for a half-hour.

Remove the dough from the plastic wrap and roll into a 9 x 17 in. rectangle, and again letter fold into thirds, rotate, and fold again. This time, cut the rectangle in half, and stack the two squares on top of one another, making sure that the folded sides of each square are at opposite ends. Press down, and then wrap the folded dough tightly in plastic wrap and refrigerate for a half-hour.

20130317_10115920130317_105140 20130317_10152120130317_101543

Remove the dough from the plastic wrap for the final time, and repeat the previous three-step process. Then roll or press it out to 1/2 in. thickness.

20130317_10522720130317_105420

Cut into 12 squares with a sharp knife or pizza wheel. Place the biscuits on a parchment-lined baking sheet and refrigerate while the oven preheats.

20130317_105805

Preheat the oven to 375 degrees. Brush the tops of the biscuits with a beaten egg or a little bit of cream or milk.

20130317_110659

Bake for 20-25 minutes or until fluffy and golden brown.

20130317_11385220130317_113830

Then you can enjoy slowly peeling apart all of the buttery layers and eating a delicious biscuit. Perfectly soft and flaky in the middle, a touch salty, and crisp on the outside. Voila!

20130317_114122

I was convinced these were going to be masonry equipment, but the result was opposite in nearly every way. The texture was just incredible, and they needed absolutely nothing spread on them (although fresh jam would be fantastic I’m sure). If, like me, you wish to gamble with your cholesterol numbers…they’re kind of amazing alongside a fried egg that’s still slightly runny.

It’s not the quickest biscuit recipe, but it’s hands-down my new favorite. I doubt I’ll have the patience to make it my every-weekend recipe. Even so, it was truly the happiest of accidents.

So go ahead. Handle the dough, roll the dough, and go nuts. Follow what I’ve written and you too will wonder why everyone has been lying to you. Maybe it’s a conspiracy among southern cooks to never reveal this secret. If I disappear, I wish you to assume that I’ve been kidnapped by someone’s grandma and locked in a basement for my crimes. Happy baking!

Ciao for now,

Neen

A New York State of Mind: Bagels

23 Jan

A lot comes to mind when I think of New York City. Growing up it was this mysterious place that people talked about as the center of the universe. It wasn’t until my seventeenth birthday that my first trip there was even planned. My parents, knowing my grand lifelong obsession with Billy Joel, decided to take me to New York during the opening weekend of the musical based on his songs called “Movin’ Out.” I was star struck from the minute we arrived: Times Square was a mob scene, impossible for tour buses to navigate due to the crowd’s determination to catch a glimpse of Eminem waving out the window at Total Request Live. When I sat down in the theatre to see “Movin’ Out,” I realized that James Gandolfini was directly in front of me. Less than 24 hours after that I was taking a picture with Billy Zane (who, aside from Hugh Jackman was the most gracious, kind celebrity I have ever met).

Inevitably at some point in my blogging career I was going to use Billy Joel’s most famous song as a post title. One does not see him in concert 6 times in three different cities without having that song permanently embedded into a part of the brain. Trips to New York always remind me of going to his concerts because he sings so much about NYC and the surrounding areas.

There are a lot of iconic things about New York: The Empire State Building, The Statue of Liberty, vast amounts of museums, enormous flagship stores, the Yankees, Broadway, and probably the best people-watching around. And the food scene? Pretty much everything imaginable. The little neighborhoods throughout all seem to have little clumps of ethnic groups that have brought their dishes to the States throughout the country’s history. And if I learned one thing in New York it is that they are serious about bagels. Polish-Jew immigrants brought the bagel to America, and sadly by the 1960s their delicious, handmade creations had been industrialized by Harry Lender, who engineered the automatic production and…pre-slicing of them (face, meet desk). I mourn for these bagels.

But New York has a host of bakeries that still make them from scratch. Even if you feel most sure of it, do NOT insist to a New Yorker that you can buy a decent bagel anywhere but there. This is an argument that you will not win. The theory is that it’s all about the water (much like the lime content of Kentucky water giving bourbon its distinctive characteristics).

Oh, but I am defiant and stubborn. And skeptical of anyone who tells me that I can’t do something. Maybe I didn’t ask my brother to ship me some of his water, nor did I bring a bucket on Amtrak during my recent trip to NYC, but I did my research. I wanted to know what makes bagel baking different from other bread baking and how I could achieve the closest possible analog to the breakfast king of the Big Apple.

New Yorkers, I believe that I have done you proud. Perhaps they are not made with the “right” water, but I guarantee you that they are dense, slightly spongy, and chewy. They are not “doughnut bagels” or bread shaped like a bagel. They are truly, wholeheartedly bagels.

These ones are of the cinnamon-raisin variety, but they aren’t sweet. I really wanted to shy away from making these resemble pastry or sweet bread in any way. The process takes two days, so make sure you give yourself adequate time before beginning.

Cinnamon Raisin Bagels

adapted from Peter Reinhardt, recipes from Jewish friends, and the great city of New York.

Sponge

  • 4 cups bread flour (or high-gluten flour)
  • 2 1/2 cups room temperature water
  • 1 tsp. rapid-rise yeast

Dough

  • 3 ½ cups bread flour (or high-gluten flour)
  • 4 tbsp. sugar
  • 1 tbsp. cinnamon
  • 1 tbsp. malt syrup or honey
  • 1 tbsp. salt
  • 1 tsp. rapid-rise yeast
  • 2 cups raisins, rinsed under warm water and patted dry
  • 1 tbsp. baking soda for water bath
  • Cornmeal for baking pans

To make the sponge, mix the flour and yeast together and then stir in the water until you have a thick batter. Cover the bowl with plastic wrap and leave it in a non-drafty, warm place for 2-3 hours or until it has doubled in size and is very foamy on top. It should deflate slightly when the bowl is tapped on a hard surface.

1 - sponge

Add the second teaspoon of yeast and mix it thoroughly into the sponge. Mix in 3 cups of the flour, sugar, cinnamon, malt syrup, and salt. Add the remaining flour only as needed to form a stiff bread dough. Mix in the raisins.

2 - sponge with yeast and flour

3 - adding the dry ingredients

4 - mixing

5 - raisins addedTransfer the dough to a counter and knead for ten minutes or until it is smooth and pliable. The dough should not be tacky, but should be hydrated enough that it does not rip while being kneaded. At this point, check the temperature with an instant read thermometer. It should be somewhere in the mid 70s F.

6 - kneaded dough

Immediately divide the dough into 24 equal pieces and shape into rolls. These were 3 oz. each. Cover loosely with plastic wrap and allow them to rest for a half hour.

7 - formed rolls

Line two sheet pans with parchment paper and form the bagels. The easiest way to do this by hand is to poke the hole in the center using your thumb and then rotate the bagel around it until the hole is about one inch in diameter. Make them as even as possible to avoid timing problems during the baking process. Place the bagels on the prepared sheet pans and cover loosely with plastic wrap and let them rest at room temperature for 20 minutes. This room temperature rest is crucial before moving them to the refrigerator for final retarding as it provides some time for the gasses to build up that will make the bagels float during the pre-bake boil.

8 - shaped bagels

After the 20 minute rest do a test by dropping a bagel into a bowl of room temperature water. If it floats within 10 seconds, the bagels are ready for final retarding. Pat the test bagel dry and return it to the sheet pan. If the tester doesn’t float, leave the pans at room temperature and re-test every 10 minutes until it floats. Once this is achieved, move the bagels to the refrigerator and allow them to retard for 12 hours. They can stay like this for up to 2 days.

9 - float test

The following day, preheat the oven to 500 degrees F.

Bring a large pot of water to boil on the stove and then add the baking soda.

Line two sheet pans with parchment paper, lightly oil the paper, and sprinkle a layer of cornmeal on it.

Remove the bagels from the refrigerator and gently drop them into the boiling water a few at a time. They should float within 10 seconds. Boil for 1 minute, flip them over, and then boil for 1 more minute.

10 - boil bagels

Place the boiled bagels on the prepared sheet pan about 2 inches apart. Once you’ve finished boiling all of them, move the pans to the oven and bake for 5 minutes. Lower the oven temperature to 450 degrees, rotate the pans, and bake for 5 more minutes or until lightly golden brown. As with most bread, you can generally tell that they are cooked through once they reach an internal temperature of 190 degrees.

Cool the bagels on a wire rack for at least 20 minutes prior to cutting them. You wouldn’t want to smoosh all of the chewy goodness you worked to achieve, so be patient! I actually found that the texture improved greatly after several hours.

11 - boiled bagels12 - finished bagels 113 - finished bagels 2

But now you might be thinking “What do I do with two dozen bagels and only one stomach?” Well, I suppose you could share, but the good news is that these hold up well in the freezer as long as they’re tightly wrapped. Revive for a few minutes in a 350 degree oven or just toast them. Not as good as fresh, but infinitely better than store-bought.

Although I may never convince a New Yorker that these are the real deal, I have had many a bagel in my time and this is honestly the closest I’ve ever come to that distinct bagel-ness. Have fun, be patient, and enjoy. Other flavors? Omit the cinnamon and raisins and top your bagels with coarse salt, poppy seeds, or sesame seeds prior to baking. Purists might get mad at you, but dried blueberries are really tasty in place of the raisins. And besides, who cares what anyone thinks of you if you’re happy with them.

For now I think I’ll just enjoy my bagel and think about “taking a Greyhound on the Hudson River line…”

Ciao for now,

Neen

Warming up: Beer-Braised Short Ribs

21 Jan

Welcome to 2013! Neen’s Notes is grabbing the bull by the horns and ready for another year of kitchen experiments and fun:

20130118_184204

Our long national nightmare has ended and hockey is back! The Penguins had their opener against Philadelphia on Saturday and looked like they had things pretty well put together. I was impressed given that there was only a week of training camp due to the lockout.

It was conference championship week for the NFL, so a sports-filled weekend all around. What better way to enjoy the games than with something meaty and slow-cooked? That’s what was on my mind when I headed to the grocery store to get some things to make over the long weekend. You know it’s going to be a good day when you walk in and the butcher (with whom you have wisely made friends) gives you a big grin and says, “Check these out. These are what you want, trust me.”

Well who am I to argue? And let’s be honest…they were very pretty:

1 - short ribs

Short ribs have a lot of connective tissue to break down and cry out to be braised slowly in a very flavorful liquid. The key is to strike a balance between earthiness and acidity, and a mix of stock and something alcoholic is a good place to start. Wine braises are delicious, but for “tailgate” food I thought a good dark lager seemed more appropriate.

Beer Braised Short Ribs

  • 2 lbs. beef short ribs
  • 2 tsp. dried thyme
  • 3 tbsp. olive oil
  • 1 onion, diced
  • 3 cloves garlic, minced
  • 3-4 small carrots, diced
  • 2-3 sprigs flat leaf parsley
  • 4-5 sprigs thyme
  • 1 tbsp. fresh rosemary
  • 12 oz. dark lager
  • 2 1/2 cups veal stock
  • 2 tbsp. tomato paste
  • Salt and pepper

Remove the short ribs from the refrigerator one hour before cooking and season with the thyme, salt, and pepper.

2 - seasoned short ribs

Preheat the oven to 300 degrees F.

Heat a dutch oven over medium-high heat and add the olive oil. Once it is shimmering and fragrant, add the short ribs to the pan and brown on all sides. This will take about 10-15 minutes.

4 - browned ribs

Remove the ribs to a plate and set aside. Reduce the heat to medium-low and add the onions and garlic to the dutch oven. Cook for 2-3 minutes or until the onions are translucent.

5 - onions in pan

Add the carrots and tomato paste and stir thoroughly with a wooden spoon, scraping the bottom of the pan.

6 - vegetables and tomato paste

Add the ribs back to the dutch oven and tuck the herbs around them. Pour the beer over the meat and then add 1 ½ cups of the veal stock.

7 - herbs8 - add the beer

Cover the dutch oven and move it to the oven. Cook for 3 hours, adding small amounts of veal stock every hour until the remaining cup is used. Remove the lid during the last 20 minutes of cooking.

Move the ribs to a plate and remove sprigs of herbs from the dutch oven. Puree the remaining liquid and vegetables into a sauce with an immersion blender and reduce slightly until it coats the back of a spoon.

9 - cooked ribs10 - pureed sauce

Pour the sauce back over the whole ribs and serve as-is if you like. The meat is very tender though, so I shredded it and served it on whole wheat pasta with the sauce. The end result was a hearty, warm dish that fit perfectly into a lazy January weekend.

11 - short ribs over pasta

Hope you’re having a great start to 2013!

Ciao for now,

Neen