Ms. MLIS and the 114 Dozen Treats

6 Jan

Happy New Year from Neen’s Notes!

I took a hiatus from blogging in December for a multitude of reasons. The first was to focus on completing my final projects for graduate school. You may recall such posts where I defeated the Great Perl Dragon and other beasts along the way, but this was (to put it in super-nerd terms) the true Boss Battle. And yes, I won the game of graduate school. I’m now a bonafide library and information scientist.

And then came the baking and candy making. Once the final papers were off to my instructors, I suddenly had…time. It’s not as though I never had free time while I was in school, but I always had a lingering, “I really should be working on (blank)” feeling whenever I tried to take some down time. Last December, when I was only a little more than half-way through school I made 65 dozen cookies for friends and family. I did not anticipate ever coming close to breaking that record. After all, I only have two cookie sheets and two 9×13 in. pans.

Armed with my favorite recipes from last year and a brand new confectionery book, I warned my family not to bake and that I’d bring more than enough home for Christmas. I’m not sure they anticipated quite how excited I was to be back in the kitchen.

Here’s the final tally:

7 dozen peanut butter cups
3 dozen Nutella cups
6 dozen orange chocolate truffles
6 dozen gingersnaps
4 dozen thumbprints
6 dozen peanut butter blossoms
3 dozen chocolate almond coconut biscotti
4 dozen chocolate cherry walnut biscotti
4 dozen cranberry orange pecan biscotti
8 dozen Russian tea cakes
10 dozen coconut joys
17 dozen walnut caramels
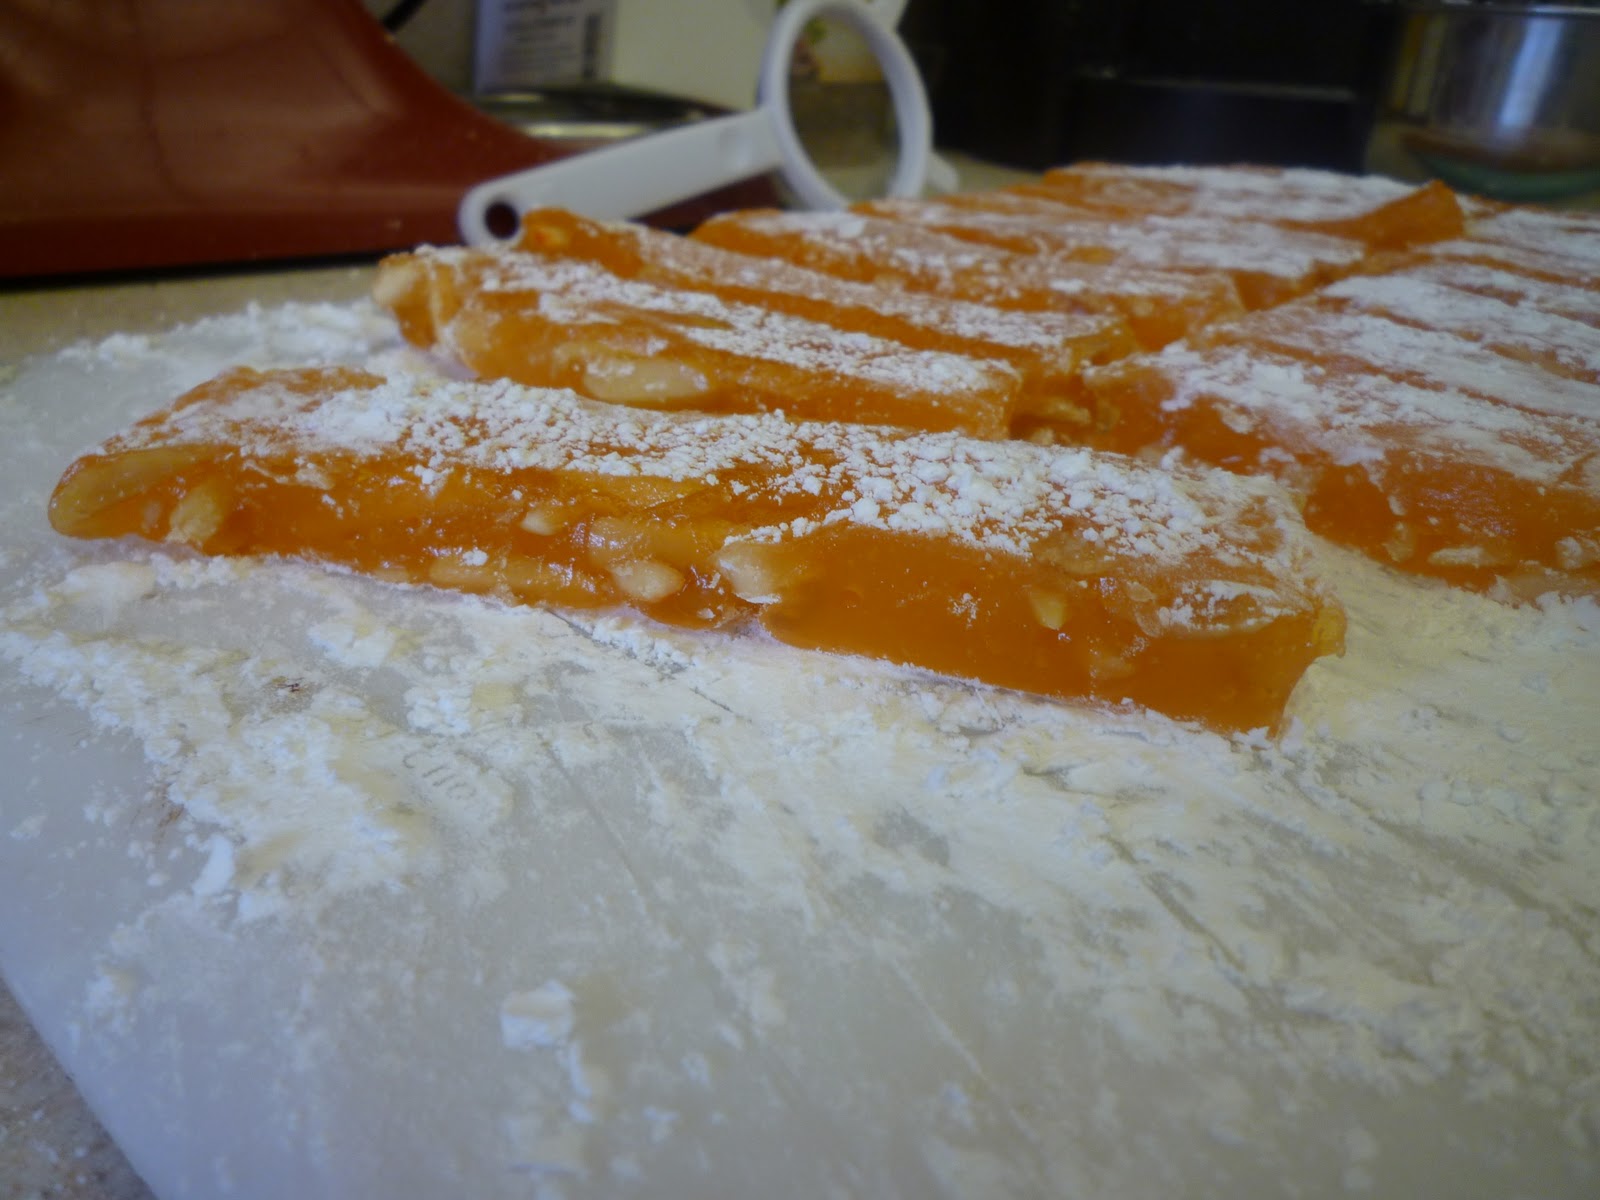
7 dozen torrone
10 dozen chocolate marshmallows (for Folger party)
12 dozen vanilla-almond spritz cookies
3 dozen walnut-coconut patties
4 cups sweet and spicy pecans
4 cups sweet and spicy peanuts

Total? Not counting the candied nuts, 114 dozen. I should go into business! If you have a request for any of the recipes above, let me know. There may be photo-tutorials for some of them in the coming weeks. Candy is so temperamental that it can be hard to get pictures of the process, but I’m getting better at setting the timer/one-handed photography.

My final reason for a blogging hiatus? Pittsburgh, of course! I can’t believe that I somehow didn’t write about the fact that (back in October) Joe got us tickets to the Steelers’ last home game of the season as an anniversary gift. The game was 2 days before Christmas and so we decided to spend the first week of our holiday up in PA.

Joe has taken me to a few Steelers games when they’ve played down here at Fedex Field, but I had never been to a home game at Heinz Field. In fact, the only home game I had ever gone to was a game at Three Rivers Stadium when I was…12ish? Needless to say, my anticipation was building for a very long time.

Thursday, December 23, 2010 I watched the Pittsburgh Steelers beat the Carolina Panthers 27-3 from Section 223, Row K, and it was incredible. My favorite part of the stadium was the Great Hall, where memorabilia (including all of the Lombardi trophies!) from Steelers and Pitt Panther stand-outs are on display for all fans to see. A live band, members dressed in black and gold and donning Polamalu wigs, blasted rock music to get the crowd milling around excited and ready to go. Fans wore jerseys from every era emblazoned with names like Lambert, Greene, Harris, Bettis, Stallworth, Bleier, and Swann. Of course, current players were heavily represented as well, and even some…interesting throwbacks like Kordell Stewart. I did not, however, witness any Neil O’Donnell jerseys and do not believe I ever will. 

And everyone, I mean everyone carried a Terrible Towel. Even before the announcer could start naming the players who ran onto the field, the crowd looked like a sea of Vegas-gold waves. The experience of being in a place where 60,000 people are excited and proud of the same thing was unbelievable. The players on the sidelines too, waved their Terrible Towels to liven up the crowd during crucial moments. (The glorious noise forced 2 Carolina time outs and contributed to 3 false starts. Hope we helped, boys!)

I don’t think I stopped smiling the entire evening. Thank you again, Joe, for making yet another one of my dreams come true!

Yet, that was only the very beginning of our vacation. You’d think it couldn’t get any better but it did. We spent the next 4 days celebrating with family we don’t see nearly enough. There are few things that make me happier than just having time to spend with my parents, brother and sister-in-law, and Joe. We had some wonderful meals together, wandered the Strip District, and just caught up on life over wine and board games. Cigars, too. Oh, and cookies…days and days of cookies. I feel like we should install a fire-extinguisher type case in each family member’s house that contains a tray of cookies: “Break glass in case of celebration.”

I hope your holiday held wonderful memories as well. My hope for this year is that I may continue learning how to have more compassion for both others and myself, to remove the ego and respect what my body and mind can do on each day that I am alive, and to live with a sense of respect for all that this amazing planet provides each day.

Happy 2011—Ciao for now!

-Neen

Truffle Shuffle

23 Nov

I recently gifted myself Chocolates and Confections at Home with the Culinary Institute of America written by Peter Greweling, an instructor at the CIA. I’ve been in the kitchen nearly every free moment since receiving it. Each chapter begins with a discussion of the theory and techniques (with photographs!) for the recipes found therein. Even if you’re not interested in making your own candy, it’s a really fascinating book for learning about what goes into some of the treats we love. Like most food, candies have cultural, social and regional ties that can bring a sense of nostalgia just from seeing them.  For instance, you C.S. Lewis and/or Charles Dickens fans may be interested to know that there is a recipe in Greweling’s book for irresistible Turkish Delight (I made mine orange and almond):

The main reason I went after this book was for the chocolate. There’s a whole chapter devoted to the treatment of chocolate and avoiding pitfalls like blooming or streaking in finished candies. Tempered chocolate and I have in the past, had a tenuous relationship. I chocolate-dip torrone or marshmallows, but they never look particularly pretty. How do I make molded chocolates with caramel or peanut butter inside? And candy bars? And cordial cherries? And..and…and…well the list goes on.

After reading the chocolate-chapter, I practiced tempering chocolate for some pecan and walnut turtles. While disastrously messy, it helped me learn how to arrange everything on my limited counter space and gave me a sense of the pace at which I needed to work. It reminded me so much of making marshmallows for the first time: Accept that you will make a mess, learn from it, and know that in the future you will know how to avoid it.

I was right. So before you all head off to dive head-first into your Thanksgiving cooking, here is a simple truffle recipe that makes an elegant addition to a holiday candy dish.

Marzipan-Walnut Truffles

Ingredients
Marzipan:
-3 oz. almond paste (I found it in the baking aisle at my local grocery store.)
-¾ cup powdered sugar
-2 oz. walnuts, chopped
-1-2 tbsp. brandy or other liquor (can use corn syrup for alcohol-free)

Coating:
-8 oz. dark chocolate, chopped
-2oz. walnuts, finely chopped

Method
-Cut the almond paste into small pieces and place in a mixing bowl.
-Sift the powdered sugar over the almond paste and knead into a cohesive ball, adding liquor or corn syrup as needed.
-Knead the chopped walnuts into the marzipan.
-Scoop teaspoon-size portions of the walnut marzipan and roll into balls to create the truffle centers.
-Prepare the coating by melting 6 oz. of the chocolate in a heat-safe bowl that fits snugly over a pot of barely simmering water (the bottom of the bowl should not touch the simmering water), stirring frequently until it reaches 120 degrees F. Remove from the heat, add the remaining 2 oz. chocolate and stir frequently until the chocolate is melted and reaches 85 degrees F.
-To maintain the temperature, place the bowl of melted chocolate on a heating pad set to medium. Alternatively, leave the small pot of water at a bare simmer on the stove and stir your chocolate over it if the temperature starts to drop.
-Use a fork to gently press each center in the melted chocolate and then turn once to coat evenly, -Scoop the truffle back onto the fork and tap the bottom of the fork on top of the melted chocolate a few times.
-Tap the fork on the edge of the bowl to remove the rest of the excess chocolate before gently setting the truffle on a baking sheet lined with parchment paper. Tapping the fork on top of the melted chocolate and then on the side of the bowl helps to keep a little chocolate puddle or “foot” from forming on the bottom of the truffle.
-Sprinkle the remaining chopped nuts over the truffles before the chocolate sets and then leave at room temperature until dry.

Makes about 20 truffles. Stored in an airtight container, they will keep at room temperature for several weeks.

Have a wonderful week. Happy Thanksgiving!

Ciao for now,

Neen

Flourless Chocolate Cake with Italian Meringue

15 Nov

Another birthday weekend! We celebrated Lynn’s (Joe’s mom) birthday this weekend with dinner on Friday night and brunch on Sunday. Who doesn’t love an multi-day birthday celebration?

Of course this meant more cake baking (Yay!). But this time, I had to take into consideration that Lynn is avoiding eating a lot of excess sugar these days. She was certainly not adverse to a little something extra-special and loves chocolate, so I thought that the occasion called for something dark, rich and only slightly sinful: The Flourless Chocolate Cake.

It has its sweetness, but the chocolate is the star. I played around with a few recipes, not wanting to tromp all over the chocolate flavor with a lot of butter and eggs. This version came out fudgy, dark, and rich. For the icing, I chose a light and fluffy Italian meringue. You don’t need very much (I used a little more than half of the recipe) for a one layer cake.

Flourless Chocolate Cake with Italian Meringue and Strawberries

Cake ingredients
-4 oz. dark chocolate
-1/2 cup butter
-3/4 cup sugar or sucanat (I used half and half—the latter has a lower glycemic impact)
-1/2 cup cocoa powder
-3 eggs, separated
-1 tsp. vanilla extract
-Pinch of salt

Method
-Grease and dust an 8 in. spring form pan with cocoa.
-Preheat the oven to 350 degrees F.
-In a saucepan over low heat, melt together the butter and chocolate and whisk until smooth.
-Remove the chocolate/butter mixture from the heat and whisk in the sugar, vanilla, salt and then the egg yolks (one at a time) until smooth.
-Sift the cocoa powder on top of the mixture and mix just until combined.
-Beat the egg whites to stiff peaks and then gently fold into the cake batter.
-Pour the batter into the spring form pan and bake for 25-30 minutes or until just set. Cool completely on a wire rack.

Italian meringue ingredients
-2/3 cup and 2 tbsp. sugar, divided.
-¼ cup water
-Pinch of salt
-3 egg whites
-1/4 tsp. cream of tartar

Method
-Combine the 2/3 cup of sugar, water, and pinch of salt in a saucepan over medium heat. Swirl the pan gently until the sugar dissolves and then cook without stirring until the mixture reaches 230 degrees F.
-While the sugar syrup is heating up, beat the egg whites and cream of tartar until foamy and then slowly add the 2 tbsp. sugar. Beat until medium peaks form.
-Once the sugar syrup has reached 230 degrees, remove it from the heat and allow the bubbles to dissipate. With the mixer on low speed, slowly add the sugar syrup to the egg whites and then increase the speed, add the vanilla, and beat until stiff peaks form.

Normally meringue does not store well, but the addition of the cream of tartar meant that I was able to keep this in a sealed container in the refrigerator for a day without it beginning to weep or shrink. Place a layer of wax paper directly on top of the meringue to avoid condensation from getting into it.

Spread an even layer of the meringue over the top and sides of the cake and then arrange sliced strawberries in overlapping circles. I wouldn’t recommend glazing them with anything as it will likely cause the icing to melt and spread.

Enjoy—and happy birthday again, Lynn!

Ciao for now,

Neen

Free Time for Croissants

8 Nov

I found out on Friday that I passed my graduate portfolio. I turned in the last several documents for it earlier in the week, and expected to receive revision recommendations from my advisor soon. I thought I’d likely spend this weekend tidying everything up. Instead, I opened my e-mail inbox to see the message subject line:  LIBR 289 CONGRATULATIONS CHRISTINA CERTO. I’d completed the requirements for the course.

I spent the next day in shock and then decided that a long set-aside culinary project was in order. I’d put off doing it due to time restraints–but this weekend presented the perfect conditions.

Anyway, time for Croissants!

Ingredients
3 1/2 cups flour
1 cup barely warm water
1 teaspoon active dry yeast
1/3 cup heavy cream
1 teaspoon salt
1 3/4 cups cold unsalted butter (3 1/2 sticks)

Method
-Mix 1 cup of the flour, the water, and the yeast together and then set aside to rest for one hour.
The mixture will become very foamy.

-Add the remaining flour, cream, and salt, then knead the mixture for one minute. Let the dough rest in a bowl covered in plastic wrap for 20 minutes.

-At this point you can either knead the dough by hand for about 10 minutes or in a mixer fitted with a dough hook attachment for 15 minutes on a low speed. Wrap the dough in plastic wrap and refrigerate for a half hour.

-Place the sticks of butter in between two sheets of plastic wrap and pound / roll them out into an 8 inch square.

-On a lightly-floured surface, roll out the dough to a 9 x 17 inch rectangle and place the square of butter on half of it:

-Fold the top of the rectangle over the square of dough and pinch the edges with your fingers to seal.

-Roll the dough into  9 x 18 inch rectangle…

and then letter-fold into thirds. Turn the dough so that the single-folded side is on the left:

-Roll the dough out to a 9 x 18 inch rectangle again and complete another letter-fold. Wrap in plastic wrap and chill for at least an hour. (I docked the top with two dots to note that I had completed two “roll-fold” cycles.

-Remove from the fridge, roll the dough out to a 9 x 18 inch square and letter-fold two more times. (A total of four). Cut the final letter-folded dough in half and wrap each in plastic wrap. Now the dough is ready for use, although aging it for a few hours or overnight will develop more flavor.

-Roll the dough out into two 6.5 inch by 20 inch rectangles. Place on two parchment-lined baking sheets and return to the refrigerator for 20 minutes.

-Dock the edges on each side of the rectangle to mark off triangles. Cut them out with a pizza cutter or small, sharp knife.

-Make a slit at the base of each triangle and roll slightly outward as you tightly roll up the croissants. Roll the triangle up so that the final tip is underneath and then bend the two ends toward one another to form the classic croissant shape.

-Arrange the rolled croissants on parchment-lined baking sheets, cover with plastic wrap and proof overnight in the refrigerator.
-When it is time to bake, remove the croissants from the refrigerator and leave them at room temperature for an hour.

Beat one egg and a splash of cream together and brush the mixture on top of the proofed croissants.

-Pre heat the oven to 375 degrees F and then bake croissants for 35 minutes or until puffed and deeply golden-brown. Cool on a wire rack and enjoy the buttery flaky goodness.

Ciao for now,

Neen

Hallow-Mallows

31 Oct

It’s really too bad that you can’t give out homemade candy to trick-or-treaters without parents being wary of your sanitation practices or fearing you might have mistaken arsenic for the vanilla extract. I love to make candy, especially marshmallows. They take very few ingredients, not a ton of time, and can be flavored hundreds of different ways just by switching out the extract or adding spices or crushed candy to the final dredge. This Halloween version has a sweet vanilla-bean middle with a crunchy chocolate topping, better than any bag of long-ago packaged candy. Mmm.

Chocolate-dipped Marshmallows

Ingredients
3 envelopes of unflavored gelatin
1/2 cup cold water

2 cups sugar
2/3 cup light corn syrup
1/4 cup water
1/4 teaspoon salt
1/2 of a vanilla bean, split and scraped or 1 tsp. vanilla extract
Orange food coloring

6 oz. semi-sweet chocolate chips

1/2 cup cornstarch mixed with 1 cup of powdered sugar.

Method
Grease a 9×13 in. pan and cover it with a layer of the cornstarch/powdered sugar mixture. (Reserve the rest for dredging the marshmallows later.)

In the bowl of an electric mixer fitted with a whisk attachment, combine the gelatin and 1/2 cup cold water. Let bloom for 10 minutes while preparing the sugar syrup.

In a large saucepan over medium-high heat, combine the sugar, corn syrup, 1/4 cup water, salt, and vanilla. Stir gently to dissolve the sugar and then let the mixture come to a boil. Boil for 1 minute and then remove from the stove. Allow the bubbles to dissipate.

Turn the mixer onto its lowest setting and slowly add the sugar syrup to the gelatin. When all of the syrup has been added, turn the mixer to the highest setting and whip for 12 minutes. When there are about 2 minutes left, begin adding food coloring until the desired shade of orange is reached.

After whipping for 12 minutes, you should have a fluffy, shiny, creamy marshmallow mixture. Using a greased spatula to get as much as you can (you will not get it all, trust me) pour the mixture into the 9×13 in. pan. Then, quickly grease your hands  and use them to spread the marshmallow into an even layer. Sprinkle another layer of the cornstarch/powdered sugar mixture on top. Let set for about an hour in the pan. When you can press a finger on top of the marshmallows and they spring back, they are ready to remove from the pan.

Flip the rectangle of marshmallow onto a cutting board and cut into squares using a pizza wheel. Toss the squares in the remaining cornstarch and powdered sugar to keep them from sticking together. Store in an airtight container.

Melt the semi-sweet chocolate chips over very low heat and mix the melted chocolate until it is smooth and shiny. Dip one side of the marshmallow into the chocolate, swirling gently to coat evenly and then place on a cooling rack to dry. Makes about 90 marshmallows.

Happy Halloween!
Ciao for now,

Neen

An Ice Cream Layer Cake for Roger

18 Oct

Celebration cakes are my favorite cakes to make. I’m not particularly apt at piping icing designs or writing messages, but I can usually come up with something creative to complement the flavors under the icing. The person the cake is to be for inspires me with their choice of flavors and then from there…a blank canvas. No rules, no rubrics to follow, no required homework, just good creative fun.

When Joe told me several weekends ago that his dad’s birthday was coming up, I offered to make the cake and asked what kind he thought Roger (his dad) would like.

“Can you make an ice cream cake?”

I had no idea. I didn’t even know if I had a powerful enough freezer, or for that matter, one with enough space to freeze multiple cake layers. I resolved to try, because (as they say) if you don’t try, you’ll never know.

One thing I did know was that Roger loves chocolate, so what better to include than my personal favorite perfect chocolate cake recipe. I made two 9in. layers of Ina Garten’s Beatty’s Chocolate Cake. After cooling completely on a rack, they were wrapped and placed in the freezer to firm up.

The next step was to create the ice cream layers. After lining two nine-inch rounds with plastic wrap (so I could lift the layers out later), I scooped and flattened softened ice cream into each–cookies and cream in one, and vanilla in the other. Using an offset spatula, I smoothed the surfaces even as best I could, then covered each with another layer of plastic wrap and then put them in the freezer to harden.

 After a day, I lined a springform pan with plastic wrap and stacked the layers together. First the cookies and cream ice cream, then a layer of chocolate cake, then the vanilla ice cream and finally the second chocolate cake layer. I wrapped the whole cake tightly in plastic wrap and returned it to the freezer.

Two days later, I turned the cake out of the springform pan and onto a turn table. By that time, the layers had frozen firmly together and I was able to do a quick crumb coat of icing. I used Cool Whip, by the way, as it will firm up in the freezer, but won’t get too hard. I let another 8 or so hours pass and then put on a final coating. I also moved the cake from the turn table to an aluminum foil covered piece of cardboard that I’d cut to fit inside of a cake box that the kind folks at the bakery near my office had graciously given to me.


As for decorating? Well, by the time I’d iced the cake I was so amazed that it had actually come together that I was hesitant to ruin it with a bad attempt at writing “happy birthday” on top. What I did instead gave me a lot of flexibility.
I melted a bag of semi sweet chocolate chips over low heat, mixing constantly until just smooth. I then poured the melted chocolate into a pastry bag fitted with a rounded point and piped lots of little shapes onto big sheets of wax paper. I made swirls, stars, zig-zags, curls and other odd little designs that I thought might look interesting. After they hardened, I topped the cake with them by gently pressing an edge of each into the icing until it stood. I wanted an explosion of chocolate stars and fireworks bursting forth from the icing. Because this cake, if it were to personify anything, I would want it to be joy.

With the freezer turned to its highest setting, I returned the cake to it once more to prepare for its final 10 minute trip to Joe’s parents’ house.

Fortunately, Joe had pre-warned his mom to make freezer space, and it was quickly tucked away to wait patiently for its unveiling after dinner.

At last I saw it opened, still decorated and stable, and was finally able to breath a sigh of relief.

And the inside looked really cool!

I was really proud of this, especially once I saw how well it held up after we took a few slices out. Aside from the icing starting to get soft, the layers of cake and ice cream remained remarkably firm and tasted oh-so-good. After Roger had two slices, I felt comfortable in assuming that it was in fact, delicious.

What I learned throughout this little endeavor is that ice cream cake doesn’t take a ton of time on any given day, just the patience to take small steps in between freezings. While it took me the course of a week to make, I worked on it for maybe 5 minutes each day either stacking, unmolding, icing, or decorating. An exercise in patience? Yes.

Worth it in every way when I saw the smiles on the faces of the folks around me eating it? You bet.

Ciao for now,
Neen